

![[Gallery] 3rd. Annual Father's Day Classic Car Show](https://www.racingjunk.com/news/wp-content/uploads/2026/07/Calistoga-2026-18-scaled-e1783026475349-376x206.jpg)

![[Gallery] Blackhawk Museum Stop Over](https://www.racingjunk.com/news/wp-content/uploads/2026/06/DSC_0918-e1782449621944-376x206.jpg)
Make Your GM G Body Hook Part 2
Click Here to Begin Slideshow
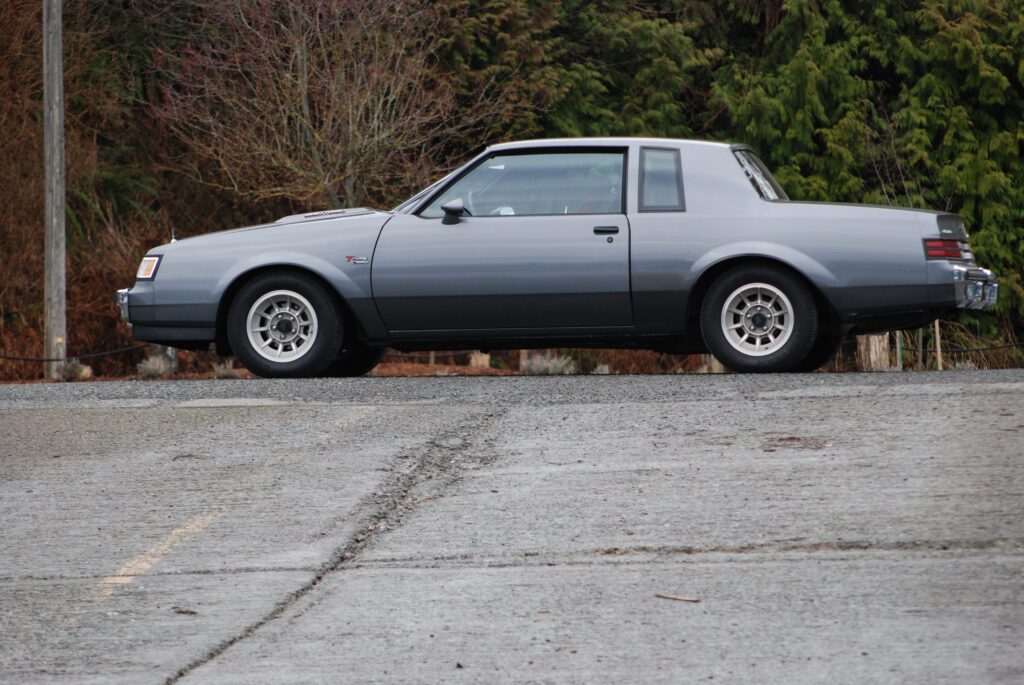
In our last issue, we started our look at triangulated four links for GM G Bodies (and much of this is the very same for earlier A-bodies too). We pointed out there were and still are a number of different rear suspension options for drag racing these cars, but the very best scenario is where the bars are adjustable, the shocks are double adjustable and a high quality Anti Roll Bar is used at the rear.
The stock G Body I/C location isn’t really that bad. Believe it or not, many of today’s very successful Pro Stock drag cars have instant center locations way ahead of the vehicle. In fact, many torque arm suspension combinations (for example, a 1982 to 2002 Camaro) that are known to hook pretty much on grass have a long I/C location. Crank in big power with your G-body and you’ll likely find that an I/C location near stock is actually close to optimum, provided you don’t jack the body way up in the air.
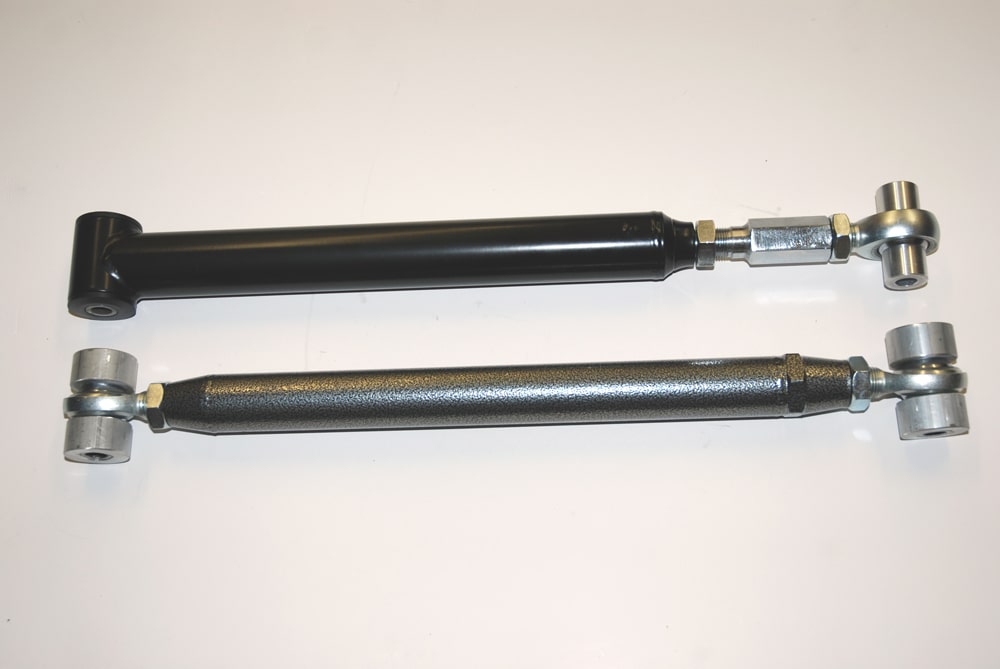
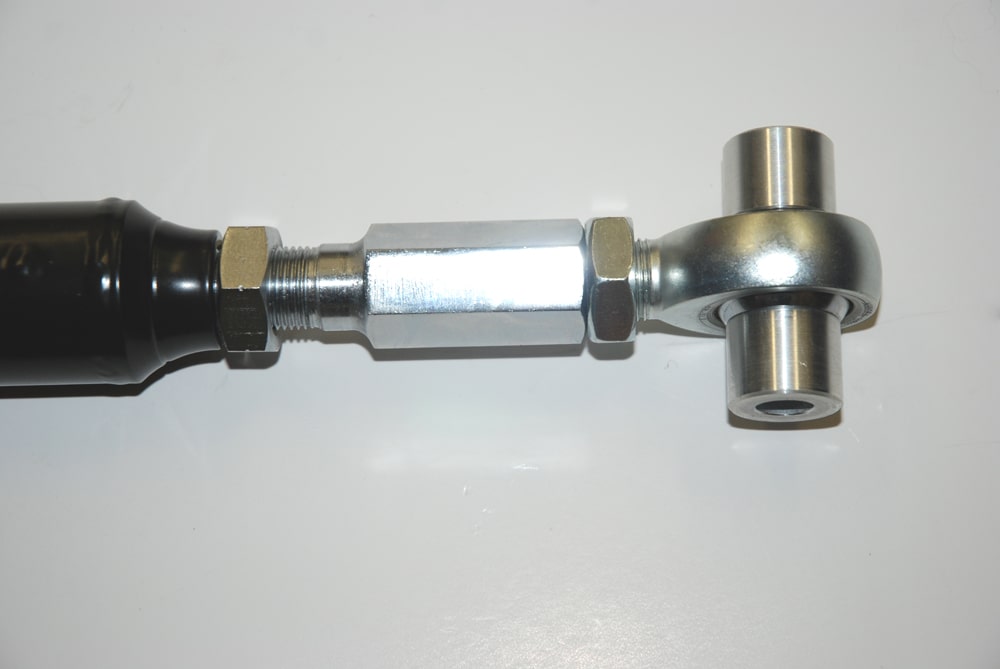
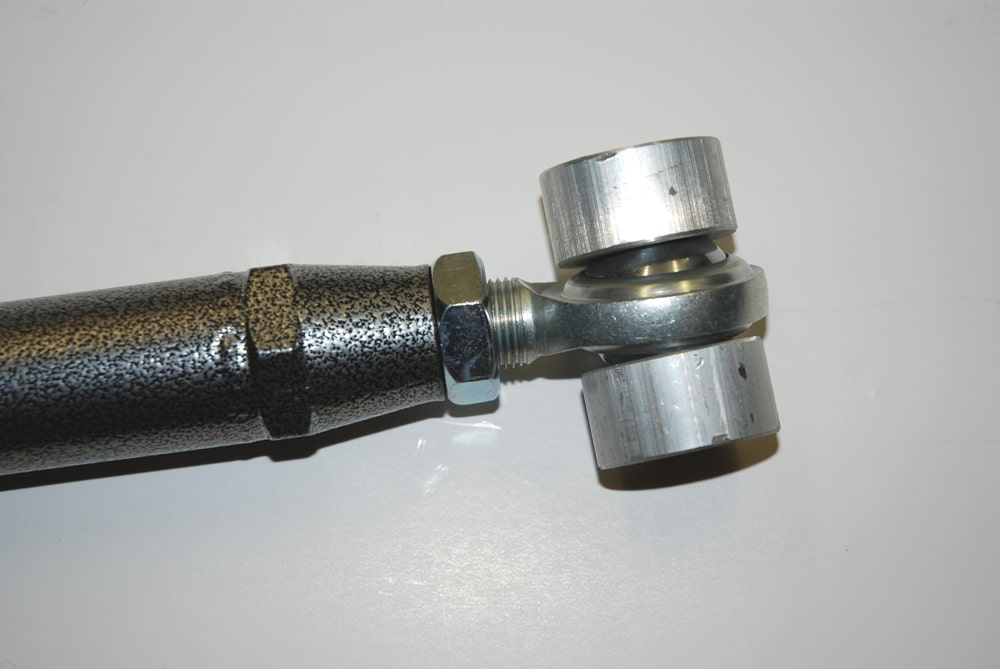
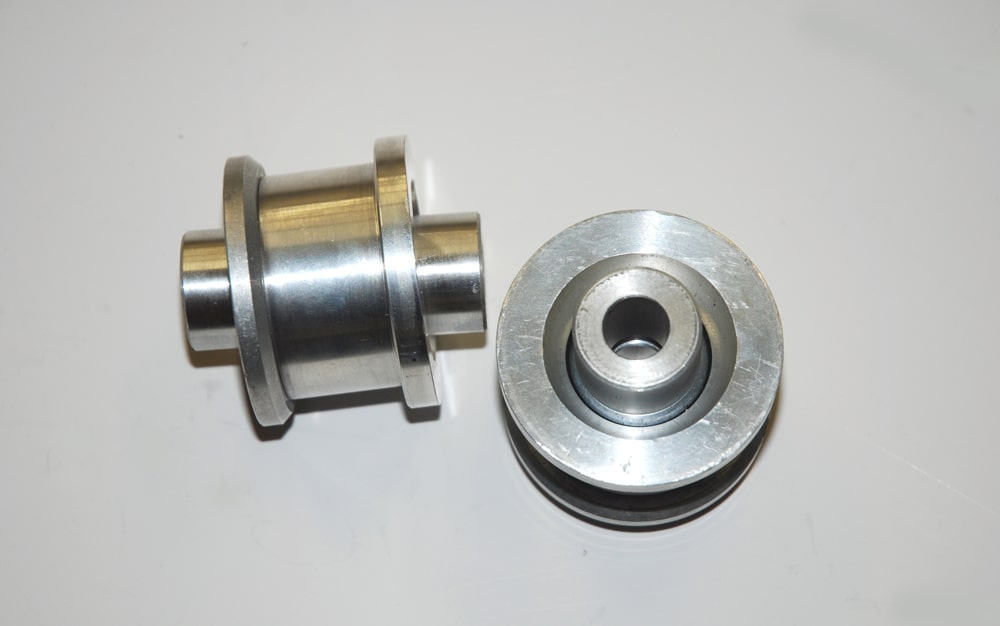
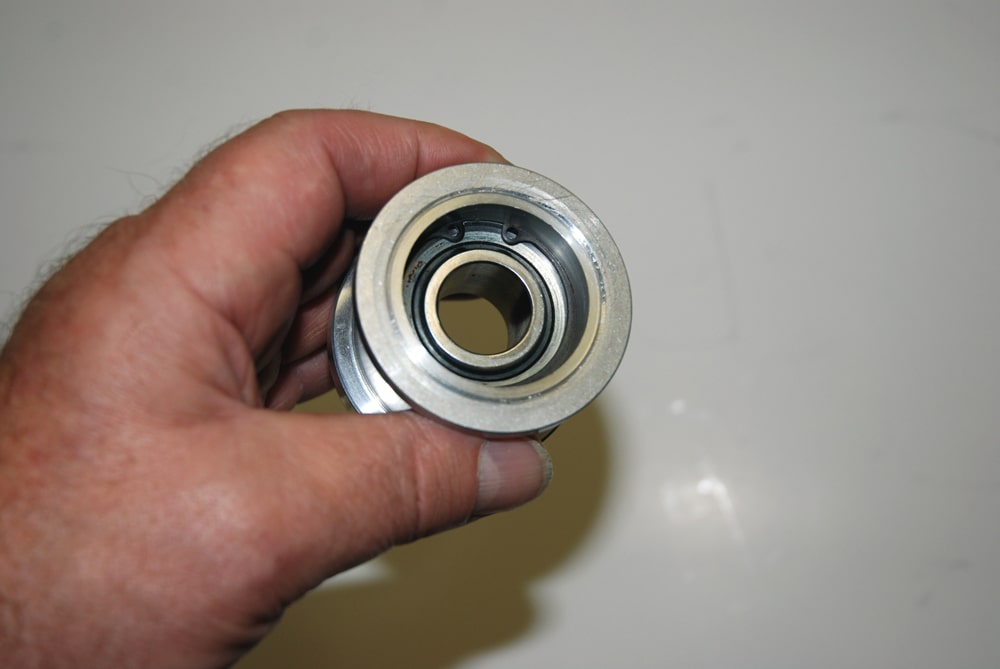
If you have some adjustment in the bars (for example, adjustable uppers and lowers), then you can fine tune the suspension and set the static pinion angle. What’s with big deal with pinion angle? It is a very big deal. In order to keep the driveshaft and u-joints operating in a (more or less) straight line, the pinion angle has to be correct. Typically, the pinion angle is measured between the pinion gear flange and the driveshaft. As the suspension in a car “wraps up”, then the pinion is driven upward (out of whack). To ensure that the pinion is in the correct location under power, it is typically set nose down static. For cars with spherical bearings (rod ends) or solid back suspension bushings, most people strive for a pinion angle of between -1 to -2 degrees (- is negative angle, or pointing “down”). If the car has OEM style rubber suspension bushings, a pinion angle of -3 to -4 degrees is likely more appropriate.
Preload is another major tuning tool, but in a triangulated four link, there is a big (as Big) caveat: In a high horsepower car, the engine torque tends to roll rotate the chassis. This means the car has more bite in the right rear. In turn, that bite tends to move the car toward the left. In a lower powered car, the forces that rotate the rear end (torque rotation) tend to provide more bite to the left rear tire. In either of these cases, you can counteract these forces with preload. In a conventional, non-triangulated four link (like a dedicated drag race car setup), you can shorten the upper right bar to increase the preload on the right rear tire. If you can lengthen the same bar, then more load is placed on the left rear tire. Sounds good, but here’s the rub:
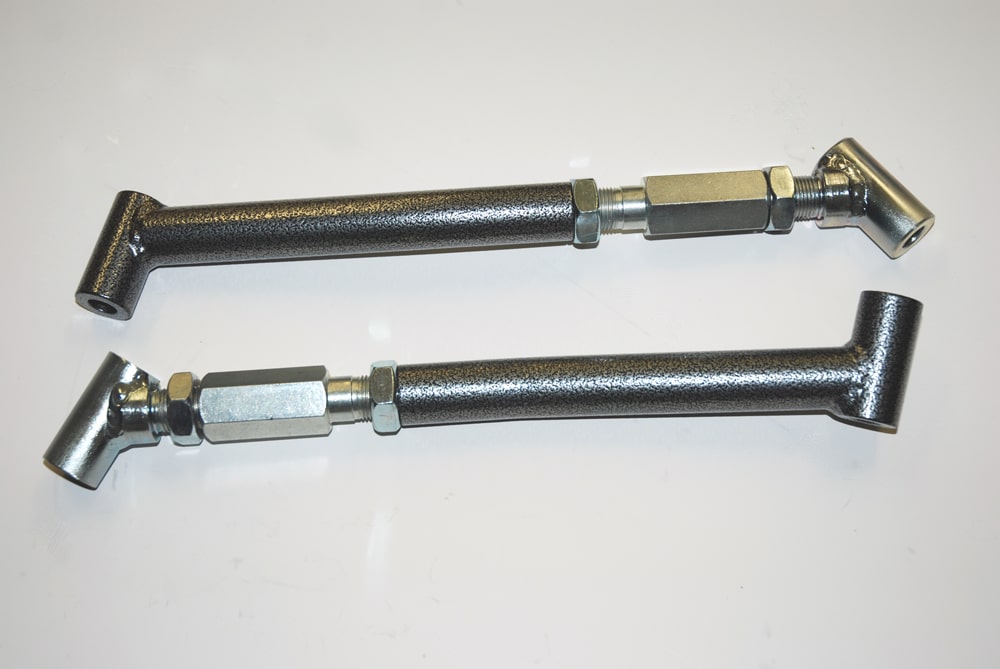
On cars that have the triangulated upper control arms (GM A and G Bodies) setting preload isn’t possible with the upper bars. When you adjust only one upper control arm then you actually shift the rear end housing left or right, depending upon which bar you try to adjust. The upper bars on a triangulated 4-link are used to center the rear end housing from side to side (by adjusting one upper). The upper bars also used to set the pinion angle (by adjusting both uppers the same direction and same amount). Adjustable lower bars are used to center the tires front to back in the wheel well and to make minute wheel base dimensional changes. To preload the suspension in a G Body (or A Body), a sway bar (anti-roll bar or “ARB”) is most often used. From here, you use adjustable shock absorbers (front and rear), front suspension limiters and to a lesser degree, specific spring rates to get the car to hook, but as you can see, the trailing arms are major traction players. For more on ARB’s, follow this link:
https://www.racingjunk.com/news/loose-as-a-goose-why-arbs-are-necessary-in-most-drag-cars-part-iv/
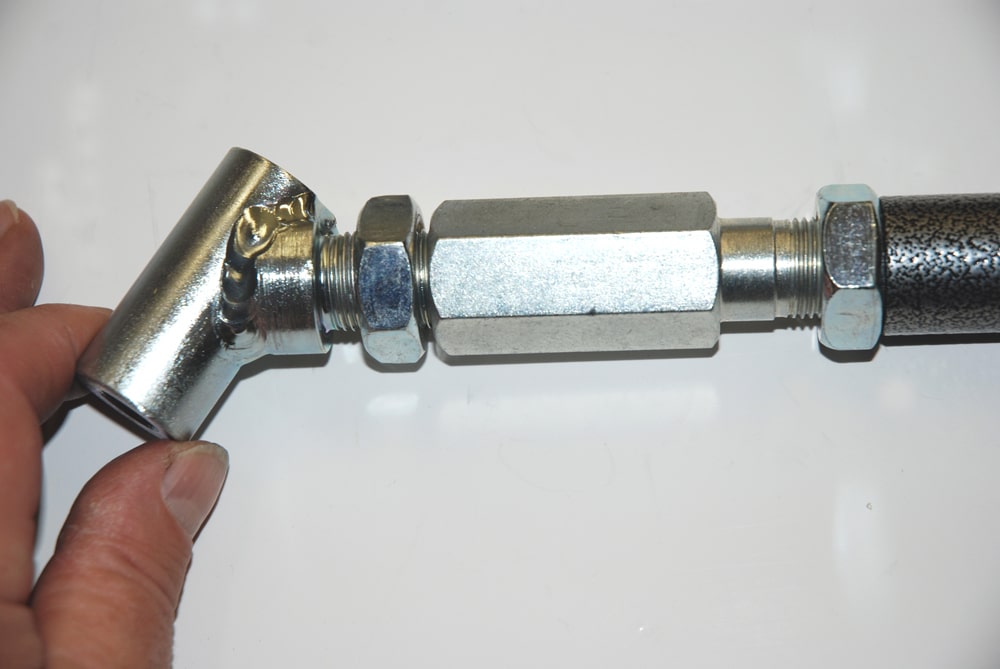
Finally, check out the accompanying photos. They’ll give you a good idea regarding what’s hot for high quality, bolt-in rear suspension hardware for your Malibu, Grand National, Cutlass, Monte Carlo or El Camino.
Autofab Race Cars
7443 Washington Blvd.
Elkridge, MD 2107
PH: 410-796-8777
TRZ Motorsports
1651 Kelley Ave
Kissimmee, FL 34744
PH: 407-933-7385
Click Here to Begin Slideshow
In our last issue, we started our look at triangulated four links for GM G Bodies (and much of this is the very same for earlier A-bodies too). We pointed out there were and still are a number of different rear suspension options for drag racing these cars, but the very best scenario is where the bars are adjustable, the shocks are double adjustable and a high quality Anti Roll Bar is used at the rear.
The stock G Body I/C location isn’t really that bad. Believe it or not, many of today’s very successful Pro Stock drag cars have instant center locations way ahead of the vehicle. In fact, many torque arm suspension combinations (for example, a 1982 to 2002 Camaro) that are known to hook pretty much on grass have a long I/C location. Crank in big power with your G-body and you’ll likely find that an I/C location near stock is actually close to optimum, provided you don’t jack the body way up in the air.
If you have some adjustment in the bars (for example, adjustable uppers and lowers), then you can fine tune the suspension and set the static pinion angle. What’s with big deal with pinion angle? It is a very big deal. In order to keep the driveshaft and u-joints operating in a (more or less) straight line, the pinion angle has to be correct. Typically, the pinion angle is measured between the pinion gear flange and the driveshaft. As the suspension in a car “wraps up”, then the pinion is driven upward (out of whack). To ensure that the pinion is in the correct location under power, it is typically set nose down static. For cars with spherical bearings (rod ends) or solid back suspension bushings, most people strive for a pinion angle of between -1 to -2 degrees (- is negative angle, or pointing “down”). If the car has OEM style rubber suspension bushings, a pinion angle of -3 to -4 degrees is likely more appropriate.
Preload is another major tuning tool, but in a triangulated four link, there is a big (as Big) caveat: In a high horsepower car, the engine torque tends to roll rotate the chassis. This means the car has more bite in the right rear. In turn, that bite tends to move the car toward the left. In a lower powered car, the forces that rotate the rear end (torque rotation) tend to provide more bite to the left rear tire. In either of these cases, you can counteract these forces with preload. In a conventional, non-triangulated four link (like a dedicated drag race car setup), you can shorten the upper right bar to increase the preload on the right rear tire. If you can lengthen the same bar, then more load is placed on the left rear tire. Sounds good, but here’s the rub:
On cars that have the triangulated upper control arms (GM A and G Bodies) setting preload isn’t possible with the upper bars. When you adjust only one upper control arm then you actually shift the rear end housing left or right, depending upon which bar you try to adjust. The upper bars on a triangulated 4-link are used to center the rear end housing from side to side (by adjusting one upper). The upper bars also used to set the pinion angle (by adjusting both uppers the same direction and same amount). Adjustable lower bars are used to center the tires front to back in the wheel well and to make minute wheel base dimensional changes. To preload the suspension in a G Body (or A Body), a sway bar (anti-roll bar or “ARB”) is most often used. From here, you use adjustable shock absorbers (front and rear), front suspension limiters and to a lesser degree, specific spring rates to get the car to hook, but as you can see, the trailing arms are major traction players. For more on ARB’s, follow this link:
https://www.racingjunk.com/news/loose-as-a-goose-why-arbs-are-necessary-in-most-drag-cars-part-iv/
Finally, check out the accompanying photos. They’ll give you a good idea regarding what’s hot for high quality, bolt-in rear suspension hardware for your Malibu, Grand National, Cutlass, Monte Carlo or El Camino.
Autofab Race Cars
7443 Washington Blvd.
Elkridge, MD 2107
PH: 410-796-8777
TRZ Motorsports
1651 Kelley Ave
Kissimmee, FL 34744
PH: 407-933-7385
Click Here to Begin Slideshow
Leave a Reply