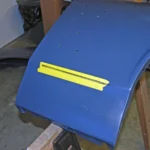
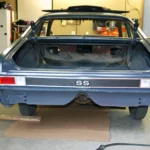
Here’s the finished product. The fit is excellent.
Click Here to Begin SlideshowIn our last segment on Body Piercing, we detailed how we began the process of fitting trim such as emblems to panels that never had them installed previously. If you spin your browser back, you’ll find that a good old fashioned mix of masking tape and a little bit of model car paint (or something similar) is your friend. Ditto with some cardboard of various thicknesses.
This time around we’ll show you how we matched components from side to side, duplicating their positions on the car. We’ll also show you how we fit a much larger and less manageable trim piece to the back of the car. All of this was accomplished while the car was in primer. That made it easier, but we still didn’t want to make any unnecessary errors.
Here’s how it was finished up:
Click Here to Begin Slideshow
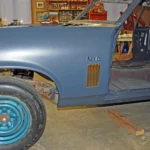
First mark off an easily referenced portion of the fender. Here, the lower crease in the fender was used for that purpose.
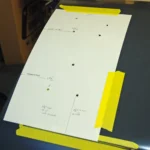
At this point, tape a piece of poster board paper on the fender.
Punch holes in the paper (through the previously drilled holes), note the distances from various points and then transfer to the opposite side of the car.
Eureka! Matching fenders. You’ll have the same component location from side to side. FYI, this process also works perfectly in cases where one fender might be drilled and you need to drill only the opposite side.
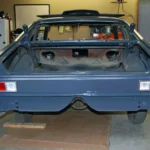
Back to the rear trim panel. The first step required here was to install a set of tail lamp assemblies, ensuring they actually fit the body.
This set of reproduction tail lamps happen to be almost perfect when it came to fit and construction.
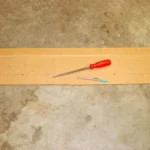
Cut a piece of heavy cardboard or firm box board to the same overall outside shape as the trim panel.
Mark all of the stud holes (the paint dabbing trick works here too).
Punch the holes and then enlarge them with a small round file. This keeps the holes clean in a piece of heavier box board such as this.
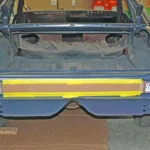
With both tail lamps installed (they provide the outer reference points for each side), tape the box board template in place. Double check to ensure the template is square. Then you can drill the mounting holes.
Here’s the finished product. The fit is excellent.


Leave a Reply