Wayne Scraba brings us a dozen tips for more easily fixing your front end in this first of a two part series.
Working on old cars can sometimes become downright taxing -- particularly if you’re forced to do something several times over just to get it right or if you have to eventually pay someone big dollars to get it right for you. And working on something involved like the front end of your car can present all sorts of challenges. With the front end of the car, you’re dealing with at least three totally different systems – suspension, steering and brakes (more if it’s FWD or AWD). When it comes to the front end, there might be several ways to fix something successfully but on other occasions, the task can be filled with plenty of trepidation. There are, however, some shortcuts to success. What follows is one dozen of those mechanical shortcuts. Check them out. There just might be something here for you (stay tuned for a second installment coming up in the next few weeks).
We will start with the first one:
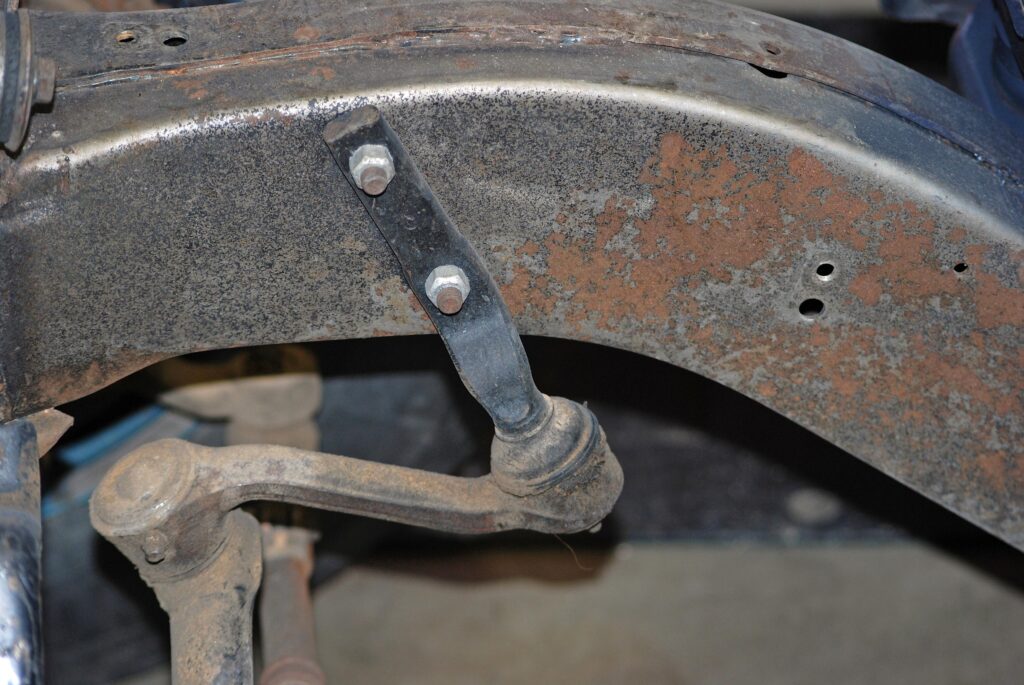
1. THE IDLER! Worn idler arms cause front end steering shimmy and can negate the responsive “feel” the steering demonstrates. So what the point? Never overlook the idler arm when it comes to steering maladies.
Click Here to see the rest of the tips!
Wayne Scraba brings us a dozen tips for more easily fixing your front end in this first of a two part series.
Working on old cars can sometimes become downright taxing -- particularly if you’re forced to do something several times over just to get it right or if you have to eventually pay someone big dollars to get it right for you. And working on something involved like the front end of your car can present all sorts of challenges. With the front end of the car, you’re dealing with at least three totally different systems – suspension, steering and brakes (more if it’s FWD or AWD). When it comes to the front end, there might be several ways to fix something successfully but on other occasions, the task can be filled with plenty of trepidation. There are, however, some shortcuts to success. What follows is one dozen of those mechanical shortcuts. Check them out. There just might be something here for you (stay tuned for a second installment coming up in the next few weeks).
We will start with the first one:
1. THE IDLER! Worn idler arms cause front end steering shimmy and can negate the responsive “feel” the steering demonstrates. So what the point? Never overlook the idler arm when it comes to steering maladies. Click Here to see the rest of the tips!
Front End Short Cuts Tip 2
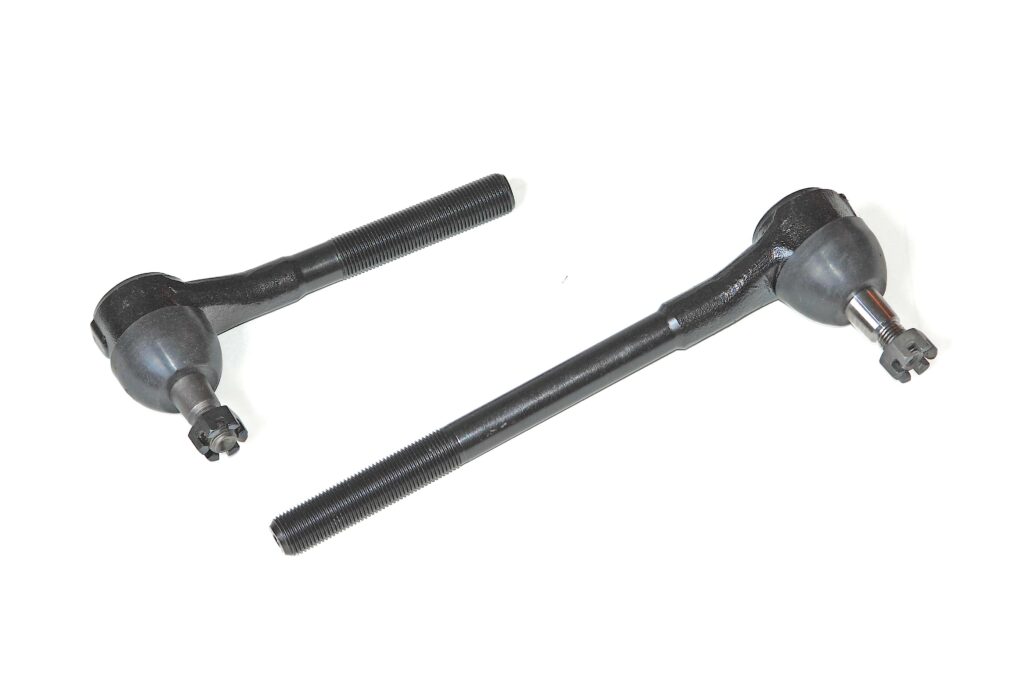
RATES A REPLACEMENT: Always replace inner and outer tie rod assemblies at the same time. Replacing one worn unit will accelerate the wear rate of the pieces not replaced.
Front End Short Cuts Tip 3
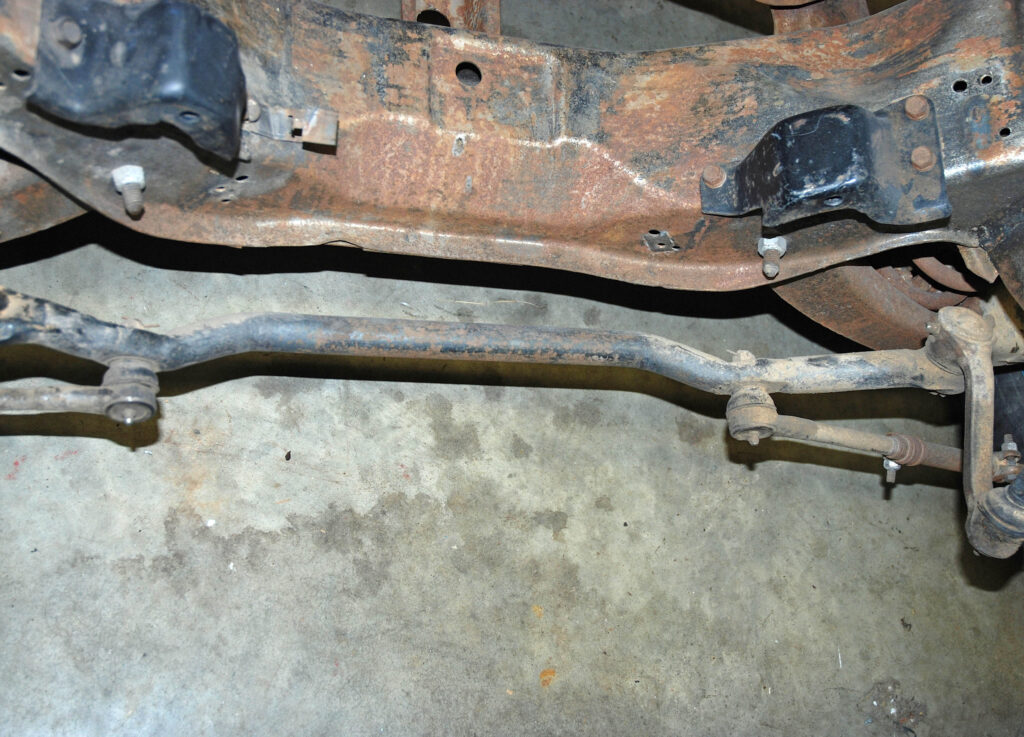
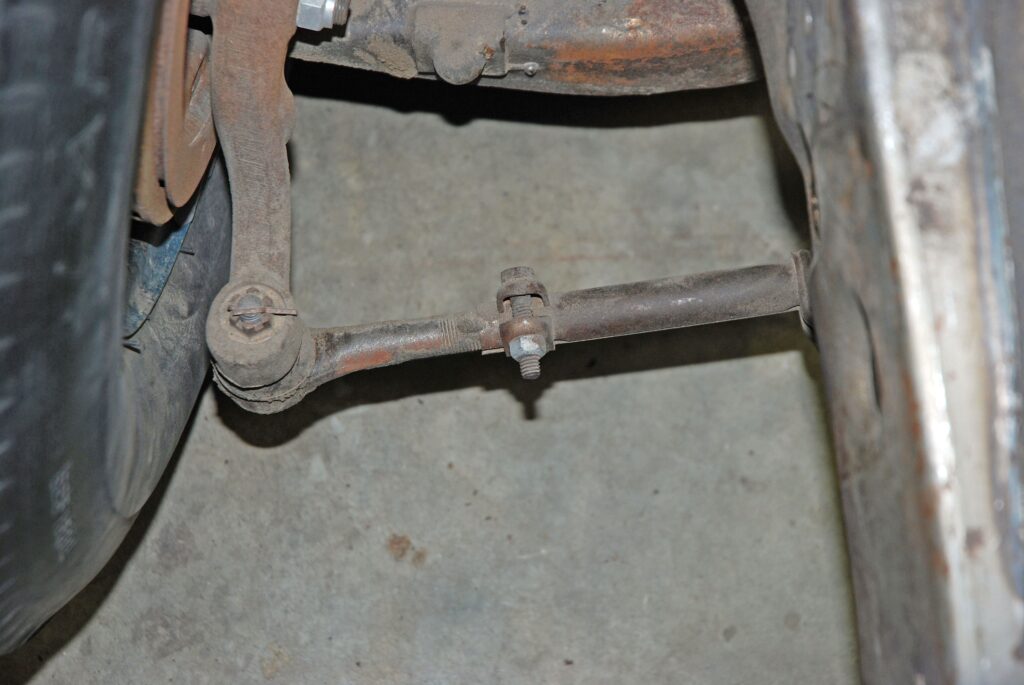
RELAY THIS: When reassembling the steering system, it’s rather important to square the various bits so that the center link (relay rod) is properly oriented. To accomplish this, measure from the center link end of the steering box to the front pivot of the idler arm and then from the center link end of the idler arm to the point where the pitman arm bolts on. Compare the measurements. Then adjust as necessary so that everything is centered.
Front End Short Cuts Tip 4
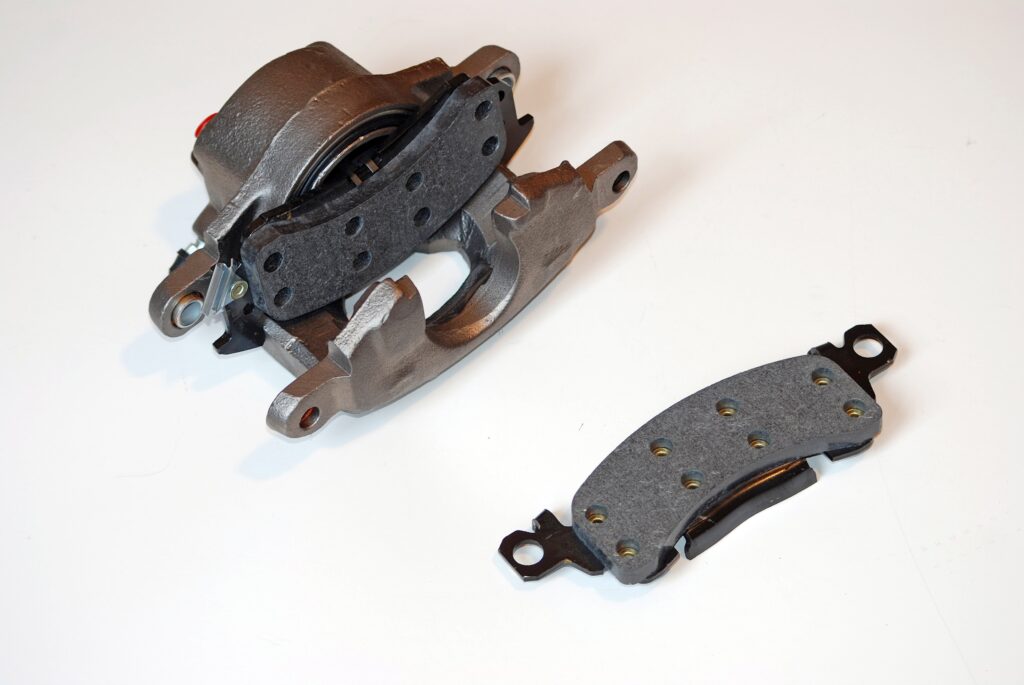
BREAK IN BRAKES: How do you break in new brake pads? To cure them, try this: Bring the car to speed, brake once normally (not hard – you don’t want to stand the car on it’s nose!) and then allow the pads to fully cool. The idea is to allow the pads to heat uniformly, and then cool uniformly.
Front End Short Cuts Tip 5
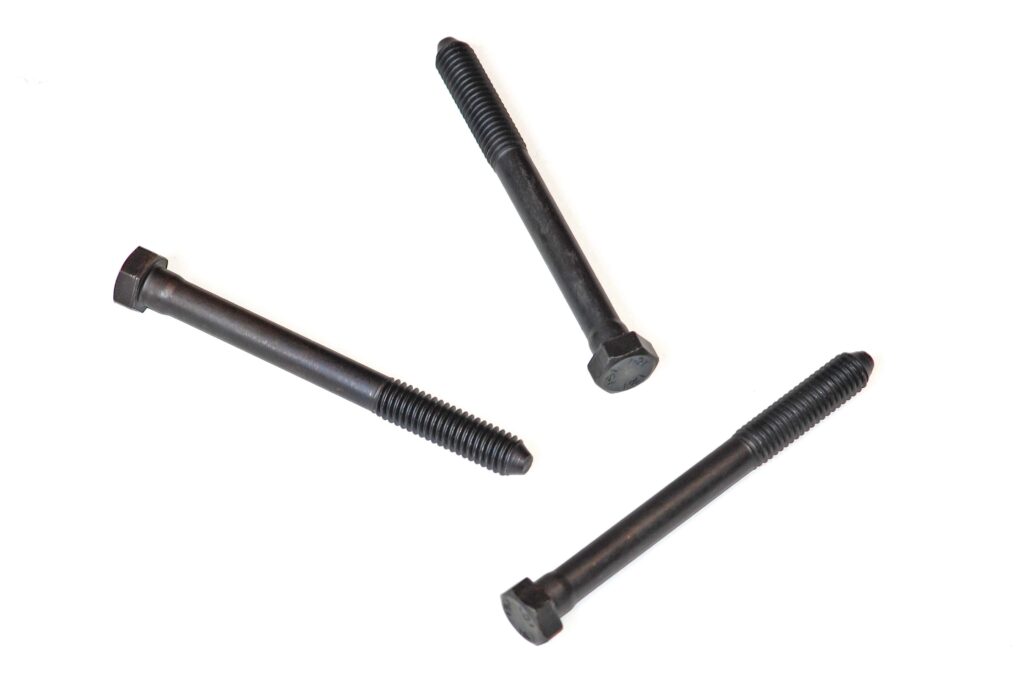
STEERING STRAIGHT: Inspect the bolts holding the steering box to the frame. They can actually stretch and become loose (they can also fatigue, which is why it’s not a bad idea to replace them during a rebuild). In addition, take the time to inspect welds near the steering box. If the bolts have ever become loose, it might have caused the weld to fail under the steering box at the seam of the frame.
Front End Short Cuts Tip 6
THREAD BY NUMBERS: When replacing tie rod ends, try this: Before you remove the old tie rod, count the number of exposed threads. When installing the new tie rod, be sure to leave the same number of threads exposed. This will by no means ensure a perfect wheel alignment, but it will prove close enough to get you to the local alignment rack.
Front End Short Cuts Tip 7
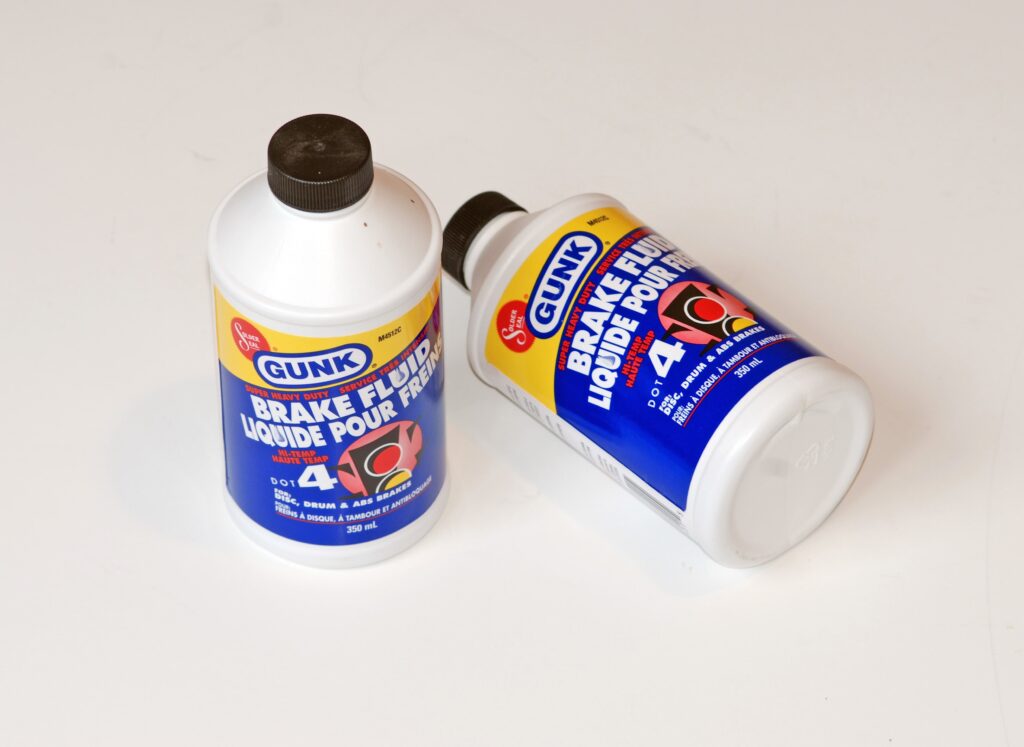
FLUSHING FLUID: If you have a vintage car or truck, think a bit about the brake fluid. How old is it? Yeas (decades?) of rust, scale and crud actually collect in the brake system. As you have probably guessed, this definitely has a way of interfering with the operation of the brake system. That’s why flushing brakes is important. The simplest way to flush brakes is open the bleeder screws, push the pedal a few times and let Mother Nature do the rest. Keep the master cylinder reservoir topped with fresh brake fluid. Repeat until the expelled fluid is clean. Expect to use a couple of small containers of brake fluid for the job.
Front End Short Cuts Tip 8
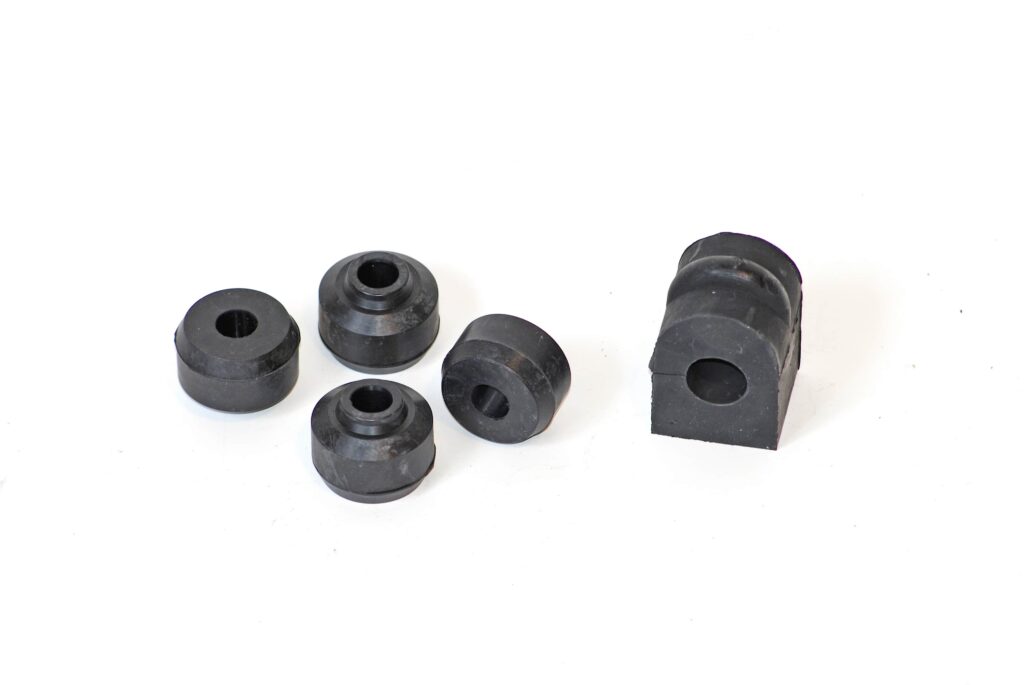
GREASY BUSINESS: When the time comes to lube urethane (or even conventional) sway bar bushings, there is no need to slop the grease all over the place. The idea here is to only lube the area where the bushing contacts the bar.
Front End Short Cuts Tip 9
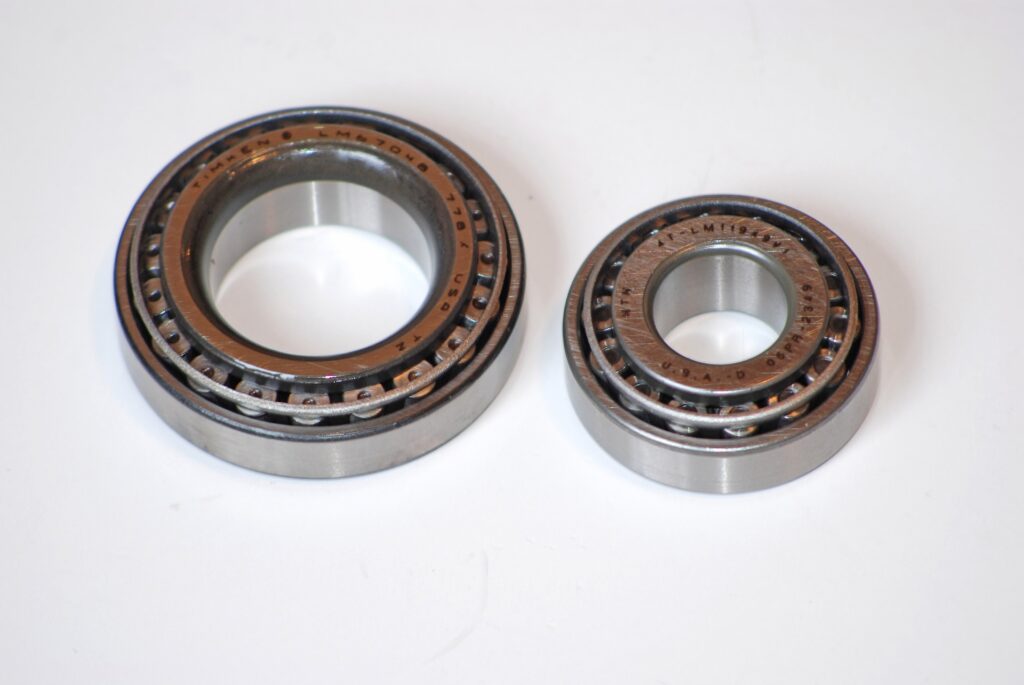
JAM PACKED: When packing wheel bearings, never jam the cap full of grease. If you do, it will just leak out and make a mess.
Front End Short Cuts Tip 10
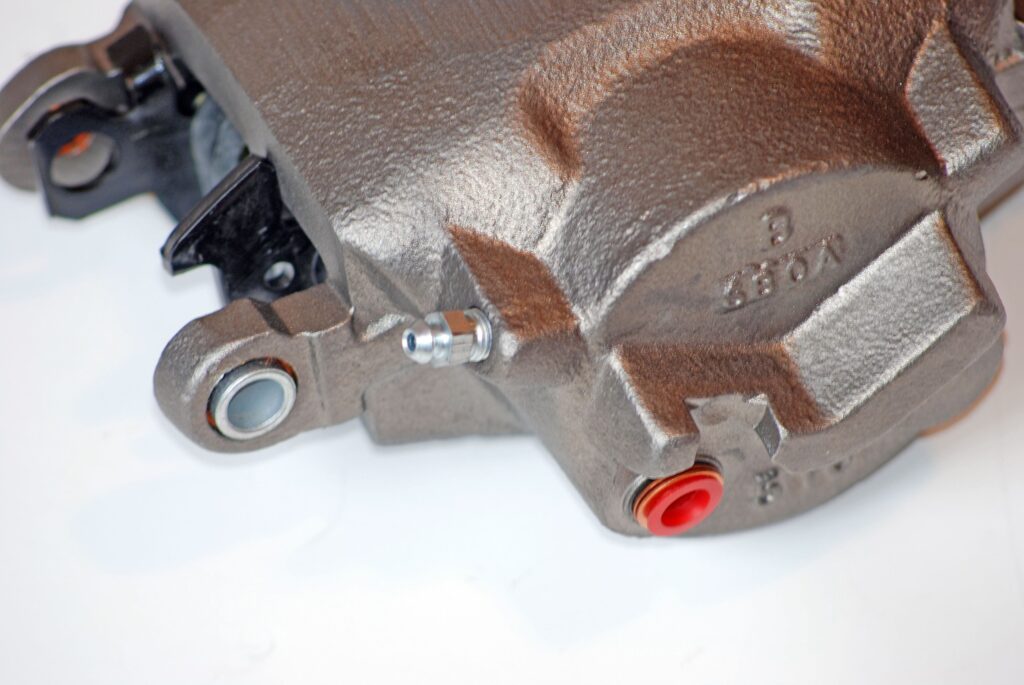
BUSTED BLEEDERS: Brake bleeders always rust. That’s a given. If you’re fortunate enough to get all four loose, spend a few bucks and replace them with new jobs. Some folks even use Teflon tape on the threads (with care – you really don’t want to contaminate the system). The idea behind this is to keep the threads from seizing until the next brake job.
Front End Short Cuts Tip 11
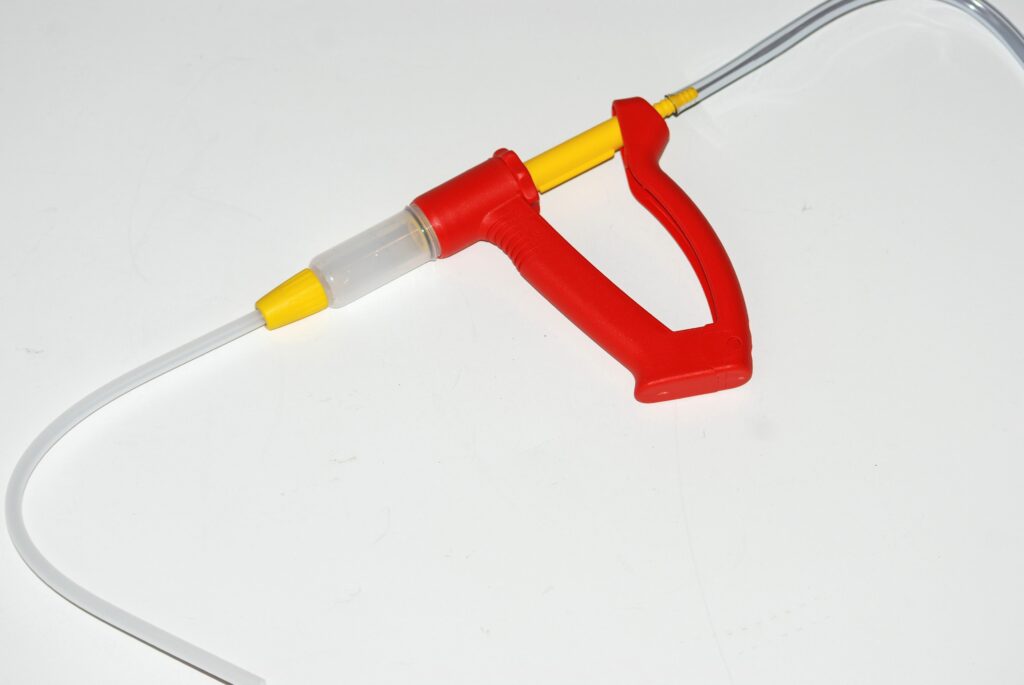
REVERSE TACTICS: Yet another method of bleeding brakes consists of using a hand operated vacuum pump attached to the bleed screw. With this setup, you actually pull he fluid through the system instead of pumping it. On some cars, this is the only way to get a proper bleed.
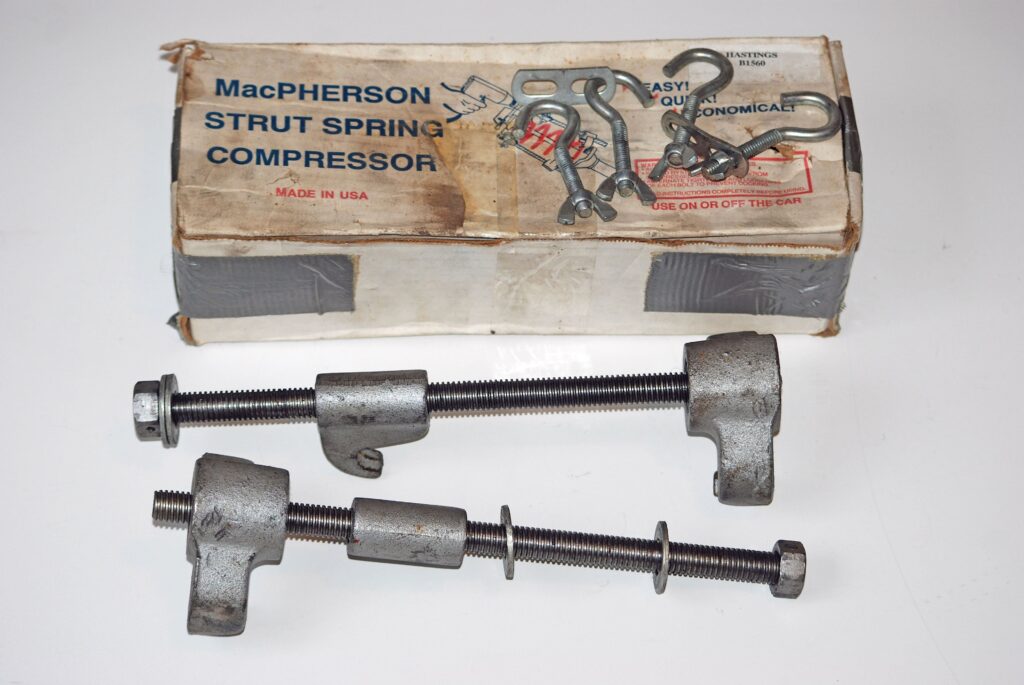
Front End Short Cuts Tip 12
DOUBLE LENGTH COILS: Coil springs found on some cars can prove to be almost twice as long as they look (for example Gen IV Camaros and Firebirds). You can’t use a conventional screw-style spring compressor either. Instead, special tooling is often required. A good alternative is a spring compressor designed for use on cars equipped with McPherson struts. By the way, when dealing with any compressed coil spring, it’s a good idea to chain it to the control arm so that it doesn’t make a quick departure in the wrong direction (if you’ve ever launched a coil spring across the garage floor, you’ll know what we’re talking about).


![[Gallery] 3rd. Annual Father's Day Classic Car Show](https://www.racingjunk.com/news/wp-content/uploads/2026/07/Calistoga-2026-18-scaled-e1783026475349-376x206.jpg)

![[Gallery] Blackhawk Museum Stop Over](https://www.racingjunk.com/news/wp-content/uploads/2026/06/DSC_0918-e1782449621944-376x206.jpg)
Leave a Reply