

![[Gallery] 3rd. Annual Father's Day Classic Car Show](https://www.racingjunk.com/news/wp-content/uploads/2026/07/Calistoga-2026-18-scaled-e1783026475349-376x206.jpg)


![[Gallery] Blackhawk Museum Stop Over](https://www.racingjunk.com/news/wp-content/uploads/2026/06/DSC_0918-e1782449621944-376x206.jpg)
Plumbing 101: Part 5
Click Here to Begin Slideshow
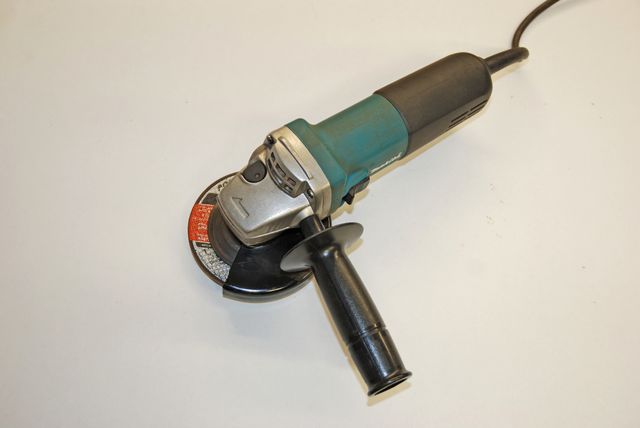
Over the past four issues, we examined AN hose, hose ends, various fuel components and so on. Once you have the key components determined and the mounting points figured out, you can turn your attention to assembling hose. In this segment (and the next one) we’ll take a step-by-step look at how to assemble Perform-O-Flex hose and Swivel Seal fittings.
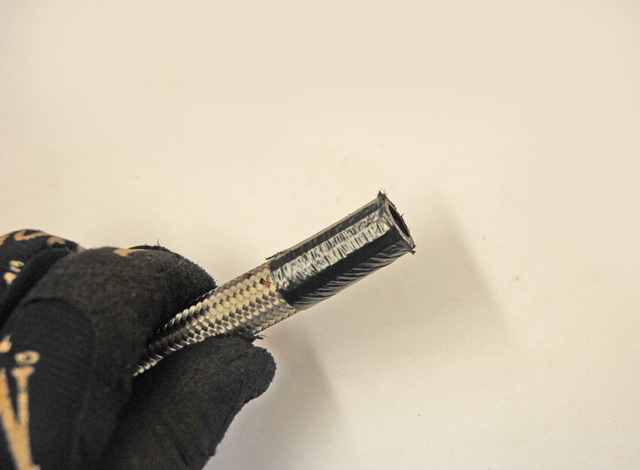
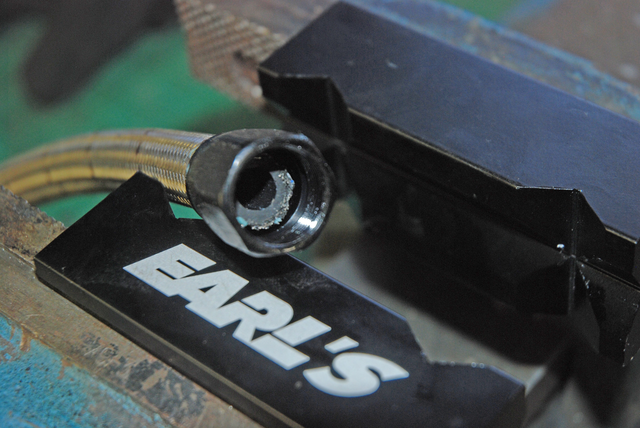
Assembling Earl’s Perform-O-Flex hose and Swivel Seal fittings is very straightforward. You just can’t take shortcuts – otherwise you can end up with a leaking fitting. During the assembly process, you have to be careful so that you don’t damage the fittings, leave unsightly (and potentially faulty) gaps and generally make a mess of the fittings and your fingers (cut braided hose is sharp)!
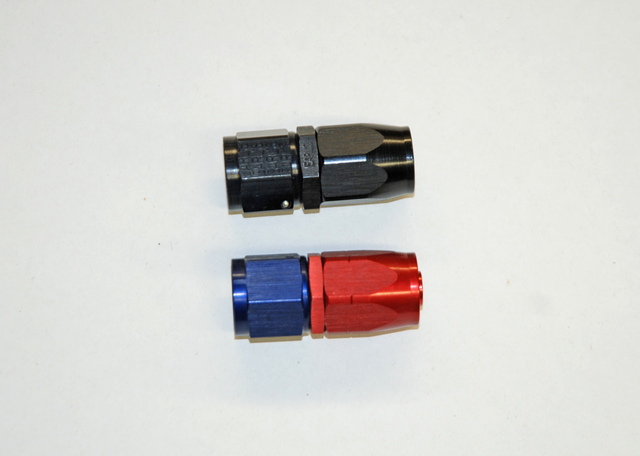
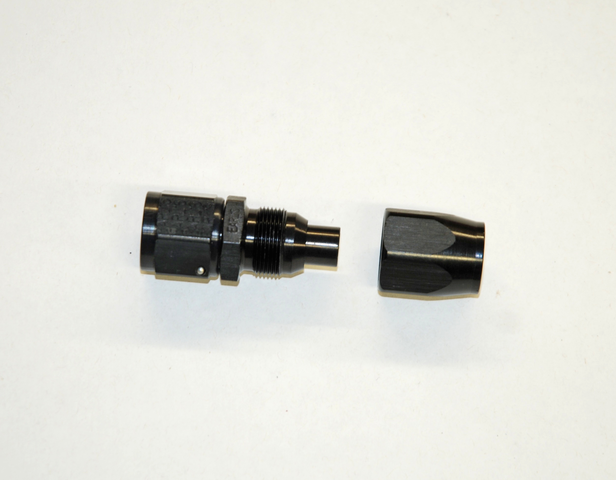
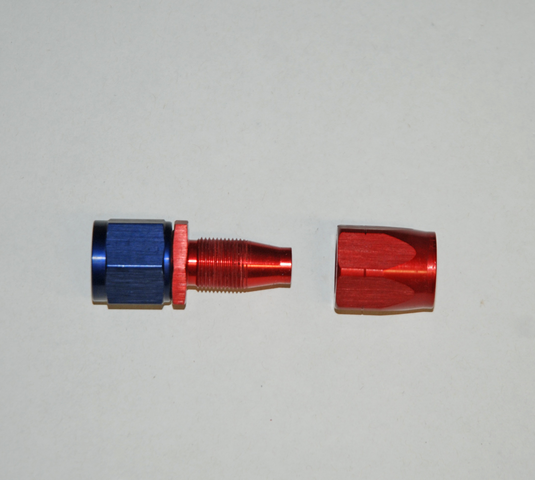
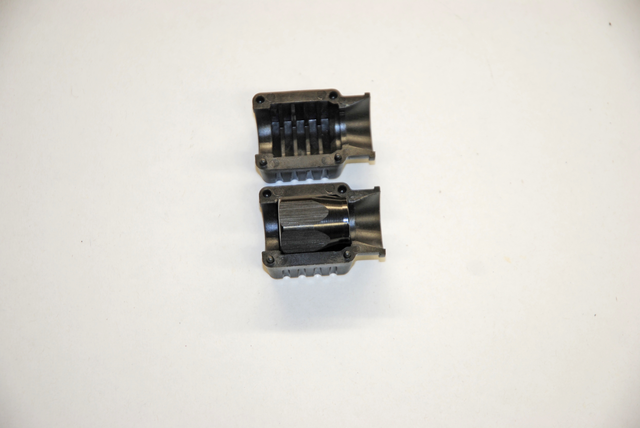
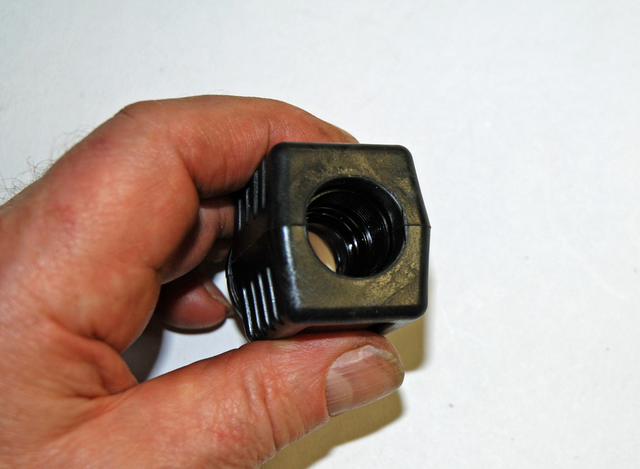
As we pointed out in the earlier segments of this series, there are several different types of hose ends available today. One is a tapered style while the other is a cutter style. The cutter style (such as the Earl’s Swivel Seal fitting shown in the accompanying photos) is assembled in a slightly different manner than tapered style hose ends. Most knowledgeable folks in the racing industry will tell you that the cutter style hose end is more secure than the tapered style. There are a few differences in assembling various types of hose ends; however, cutter hose ends are almost as easy to assemble as the tapered style. In case you’re wondering, the system shown in the accompanying photos works for both cutter and tapered style hose ends.
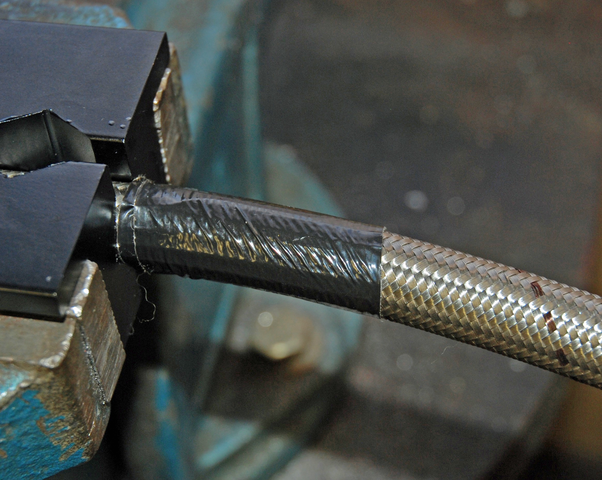
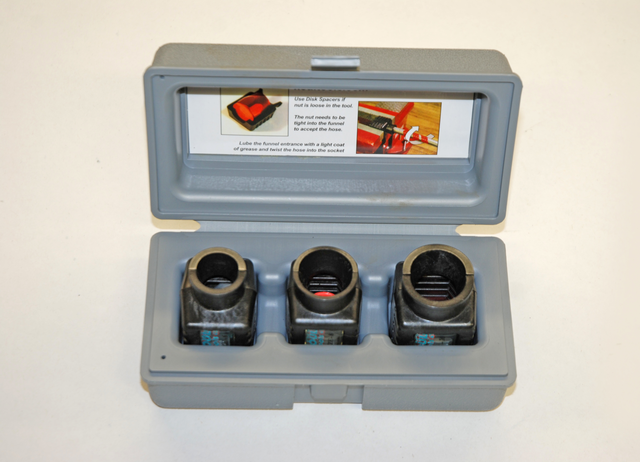
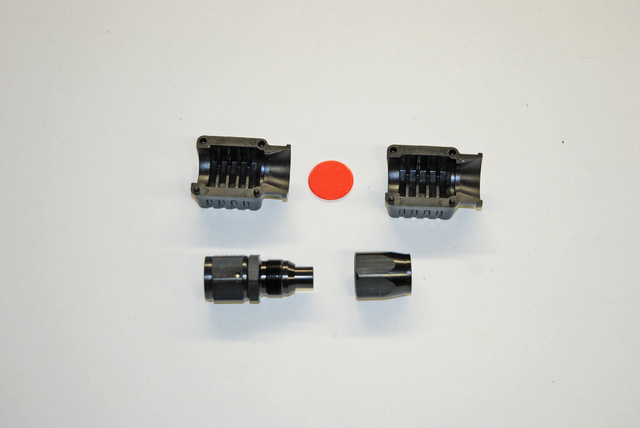
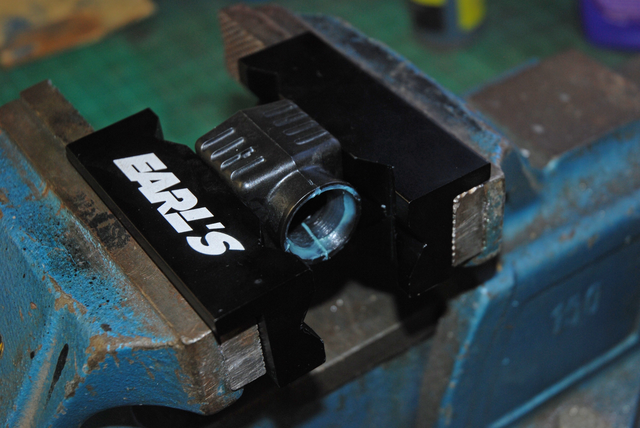
Proper tools and supplies are also important when assembling hose ends. You should use a proper set of AN fitting vice jaws (Earl’s Performance has a nice one, P/N 1004ERL). This tool locks the fitting in place without damage, allowing you to properly engage the fitting threads. Another tool you might consider is the Koul Tool. This is a unique tool that’s easy to use. It allows you to insert the hose end socket into the tool and twist in the hose, and socket assembly is complete in less than 10 seconds. It also saves your fingers from sharp cuts on the actual hose.
What follows is a step-by-step look at assembling hose and hose ends (we’ll start with this issue and finish it in the next one):
Over the past four issues, we examined AN hose, hose ends, various fuel components and so on. Once you have the key components determined and the mounting points figured out, you can turn your attention to assembling hose. In this segment (and the next one) we’ll take a step-by-step look at how to assemble Perform-O-Flex hose and Swivel Seal fittings.
Assembling Earl’s Perform-O-Flex hose and Swivel Seal fittings is very straightforward. You just can’t take shortcuts – otherwise you can end up with a leaking fitting. During the assembly process, you have to be careful so that you don’t damage the fittings, leave unsightly (and potentially faulty) gaps and generally make a mess of the fittings and your fingers (cut braided hose is sharp)!
As we pointed out in the earlier segments of this series, there are several different types of hose ends available today. One is a tapered style while the other is a cutter style. The cutter style (such as the Earl’s Swivel Seal fitting shown in the accompanying photos) is assembled in a slightly different manner than tapered style hose ends. Most knowledgeable folks in the racing industry will tell you that the cutter style hose end is more secure than the tapered style. There are a few differences in assembling various types of hose ends; however, cutter hose ends are almost as easy to assemble as the tapered style. In case you’re wondering, the system shown in the accompanying photos works for both cutter and tapered style hose ends.
Proper tools and supplies are also important when assembling hose ends. You should use a proper set of AN fitting vice jaws (Earl’s Performance has a nice one, P/N 1004ERL). This tool locks the fitting in place without damage, allowing you to properly engage the fitting threads. Another tool you might consider is the Koul Tool. This is a unique tool that’s easy to use. It allows you to insert the hose end socket into the tool and twist in the hose, and socket assembly is complete in less than 10 seconds. It also saves your fingers from sharp cuts on the actual hose.
What follows is a step-by-step look at assembling hose and hose ends (we’ll start with this issue and finish it in the next one):
Leave a Reply