

![[Gallery] 3rd. Annual Father's Day Classic Car Show](https://www.racingjunk.com/news/wp-content/uploads/2026/07/Calistoga-2026-18-scaled-e1783026475349-376x206.jpg)

![[Gallery] Blackhawk Museum Stop Over](https://www.racingjunk.com/news/wp-content/uploads/2026/06/DSC_0918-e1782449621944-376x206.jpg)
How To Notch GM G-Body Frame Rails
Click Here to Begin Slideshow
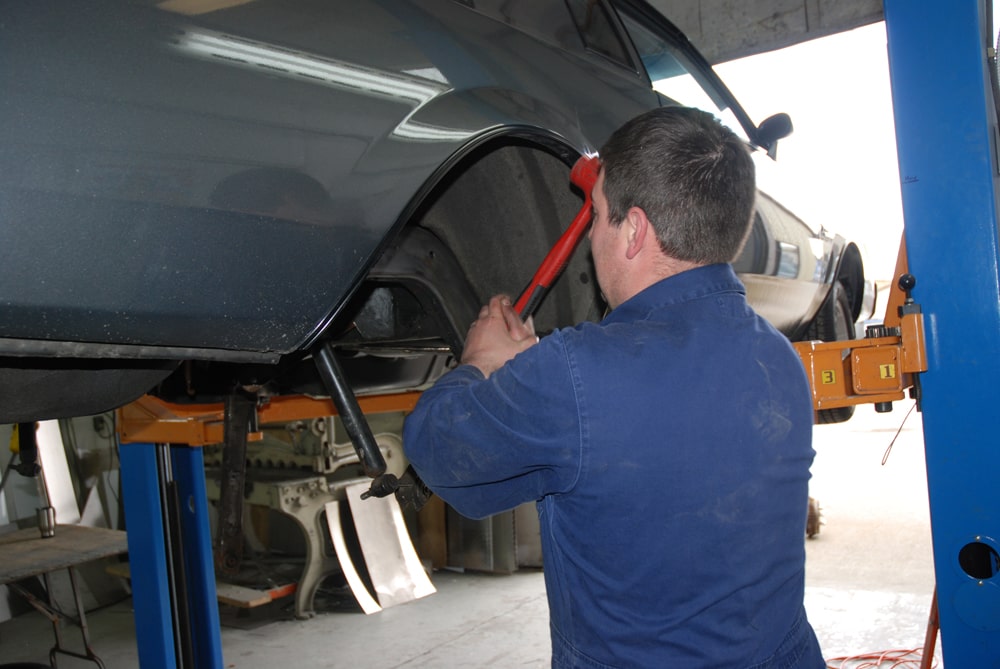
GM’s G-Bodies and more specifically, ’78 and later Malibu’s and Monte Carlo’s are popular cars, particularly if you want to burn rubber, either on main street or down the straight and narrow. There’s good reason for that. G-Bodies are the last of the mid size rear wheel drive platforms from General Motors, they have a full (albeit a wee bit flimsy) frame, they have relatively spacious engine compartments that swallow any number of different GM engines, there’s a ton of aftermarket support for them and they’re easy to work on.
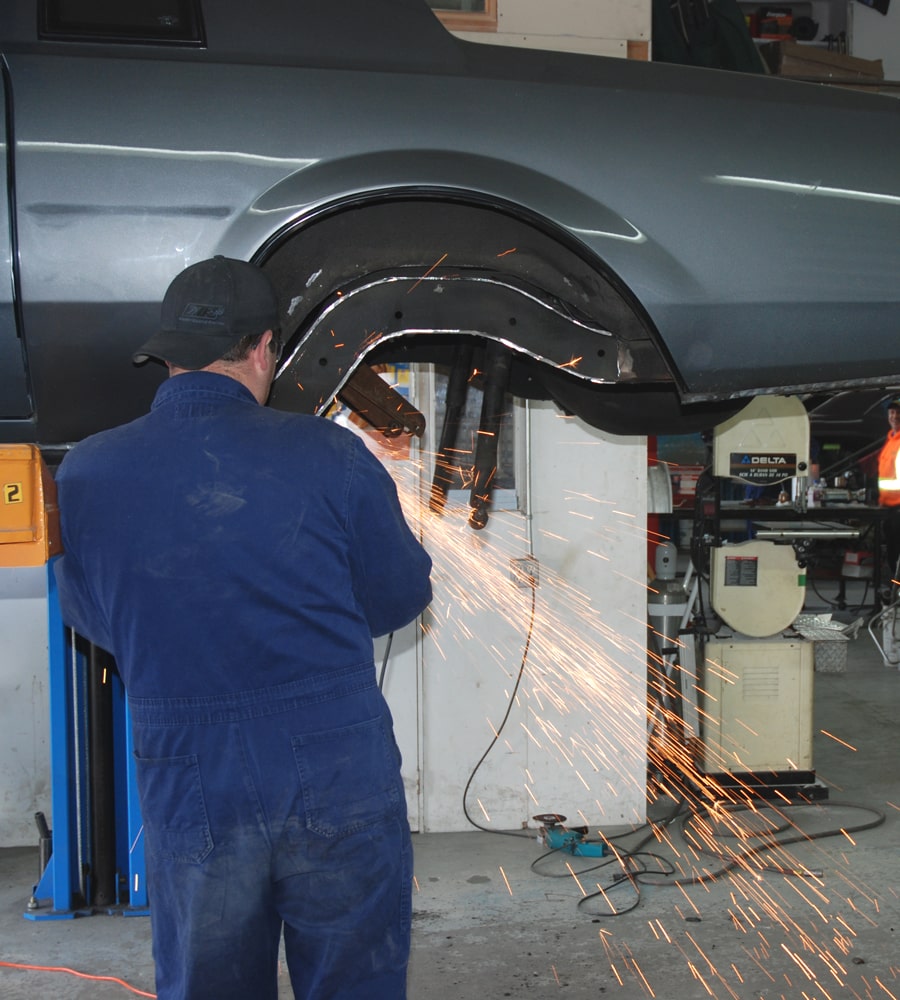
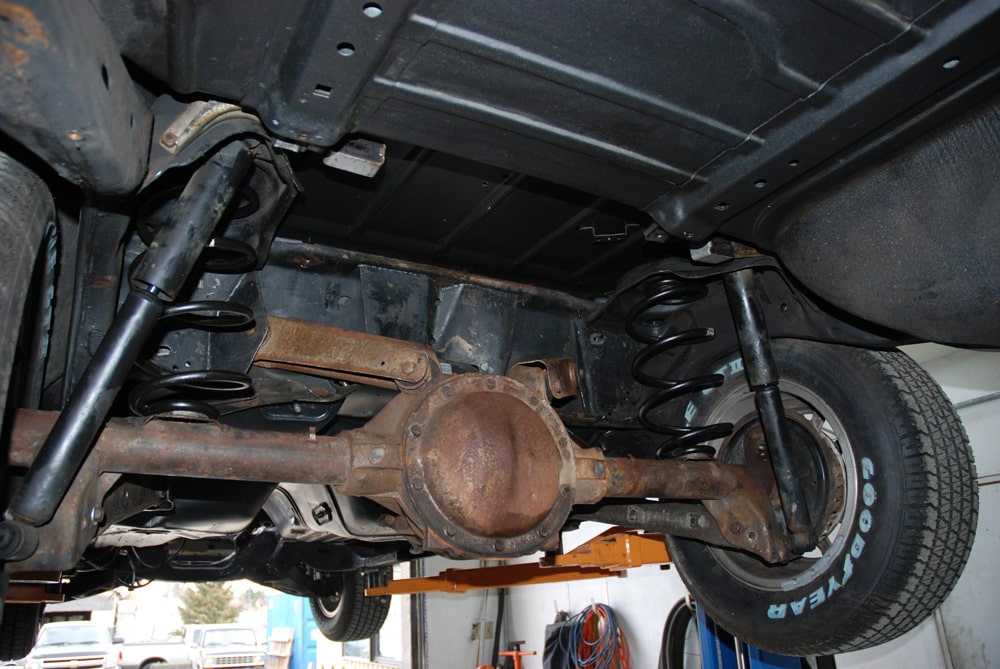
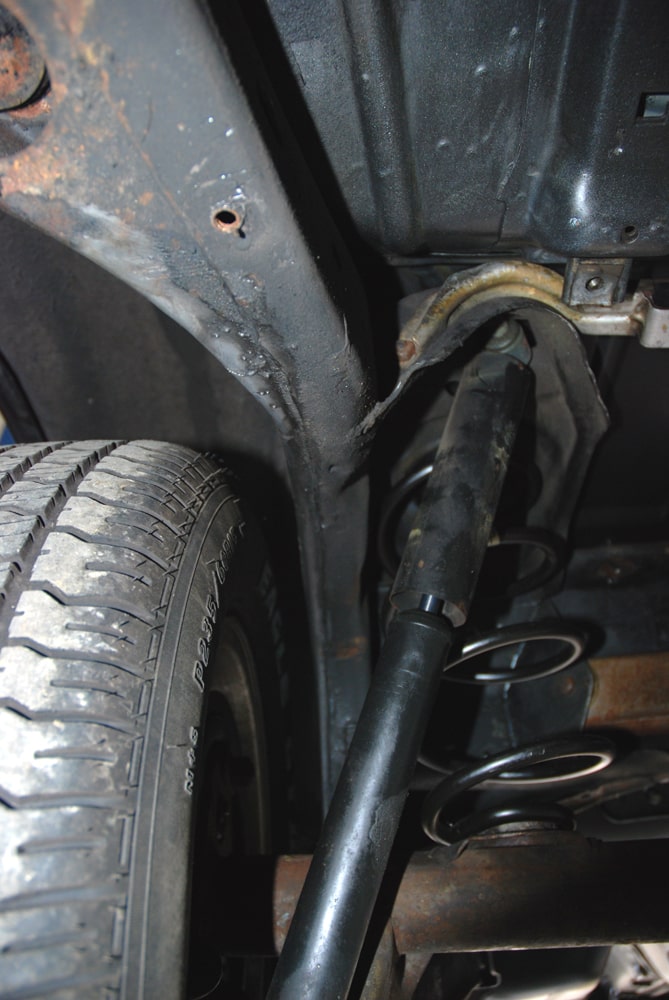
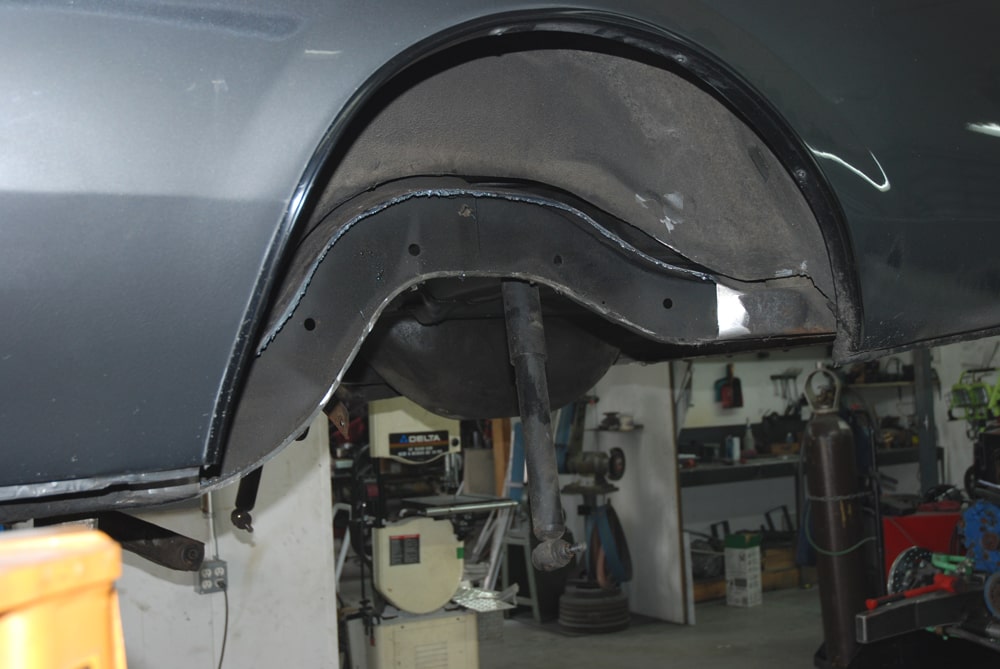
Bliss. Right? Maybe not. Unfortunately there’s limited room out back for big sticky tires. Typically, the most street tire these things can accommodate is in the range of a P275-60R15. And if you run slicks, a 9.00X28.00-inch example is the biggest you can get away with (and that might be a stretch for many cars). Even with those two examples, you’re almost always forced to jack the back end up to gain clearance. The reason is, the leading and trailing edges of the frame rail (closest to the back of the door jamb and closest to the bumper) are tight to the tire. The gentle production line frame “notch” simply limits the amount of tire you can fit, even though there’s plenty of room in the OEM wheel well. Then there’s the catch with jacking up the back of the car. If you raise it, you mess with the geometry of the back suspension. The factory 4-link instant center location is changed and typically, the car will be a handful to hook.
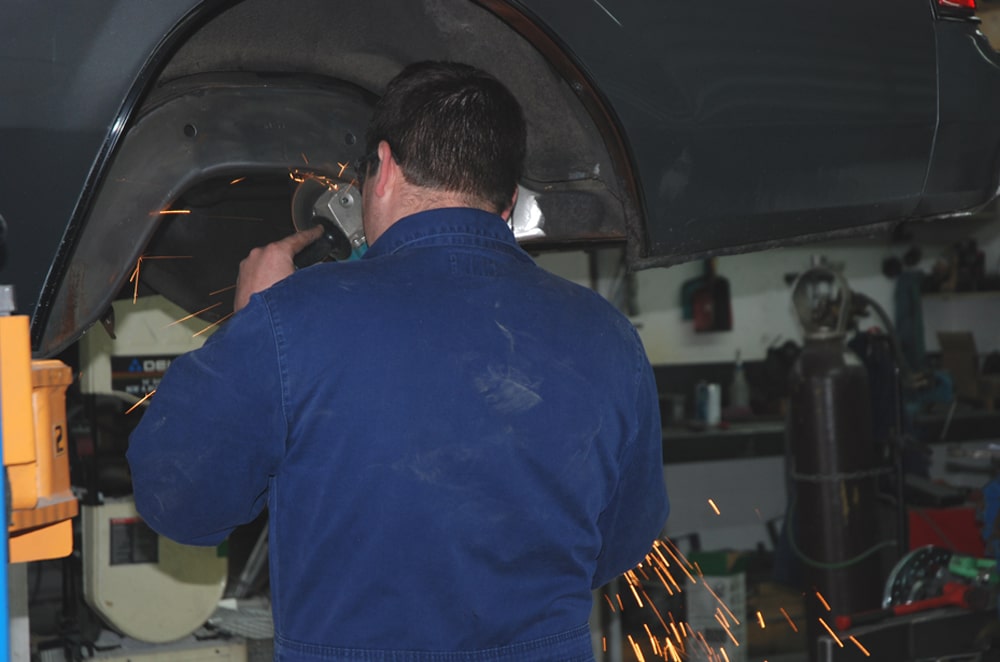
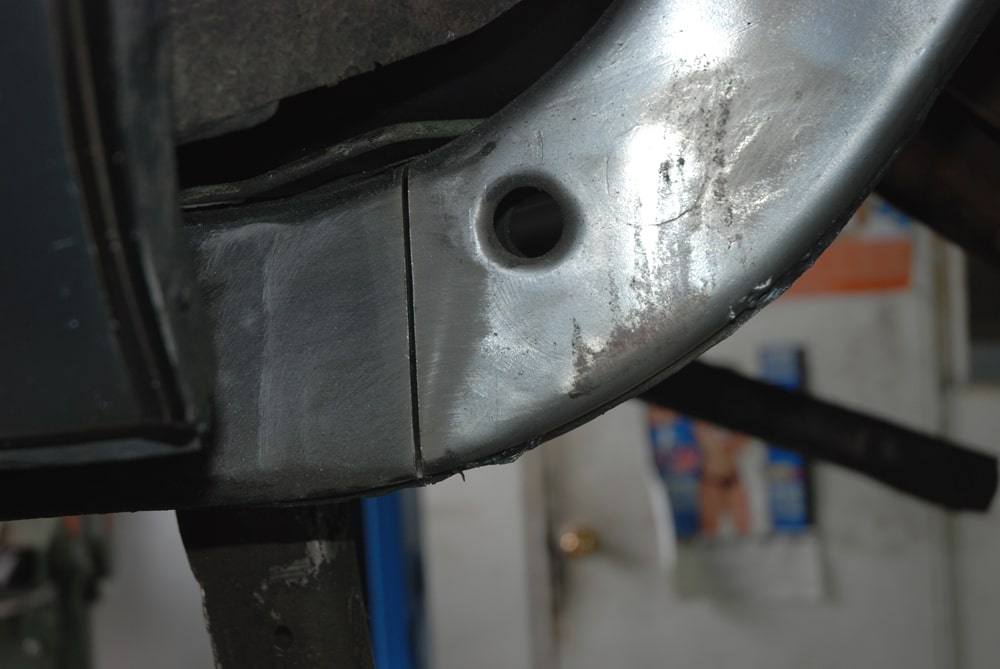
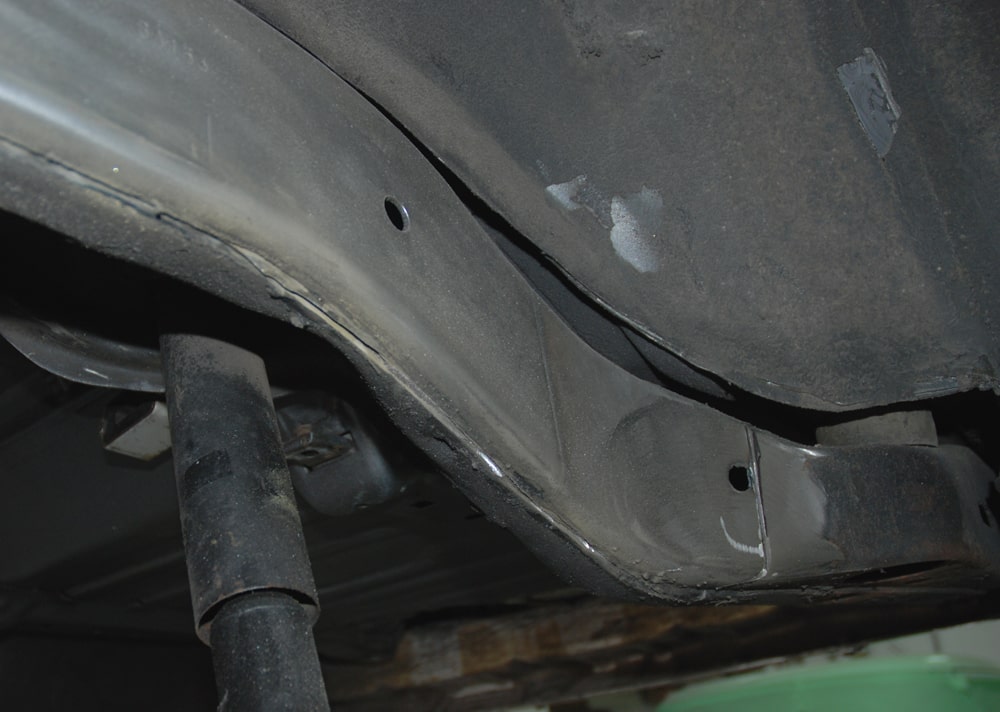
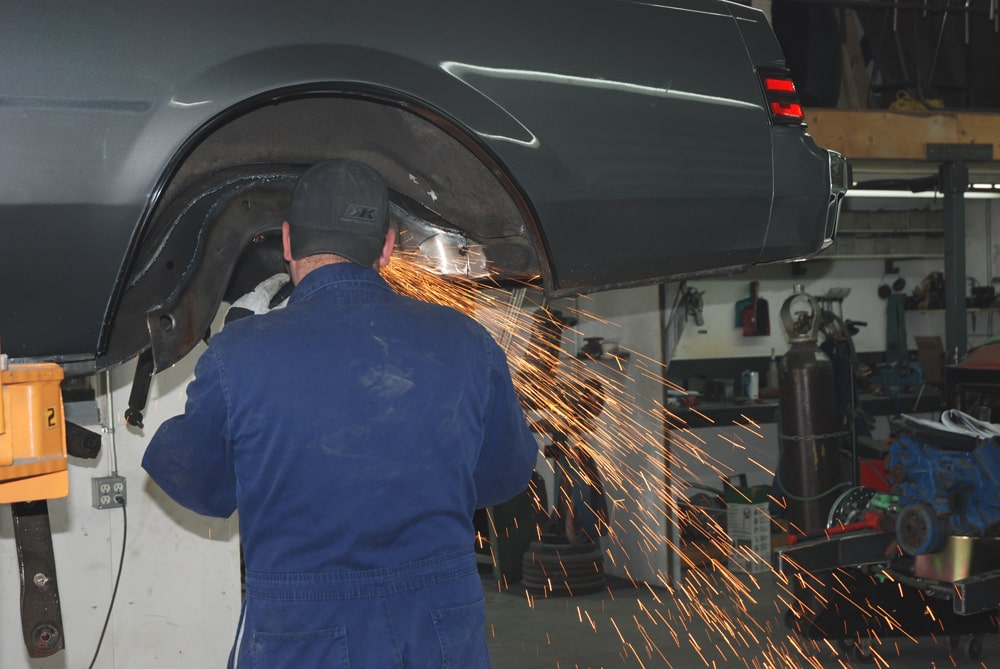
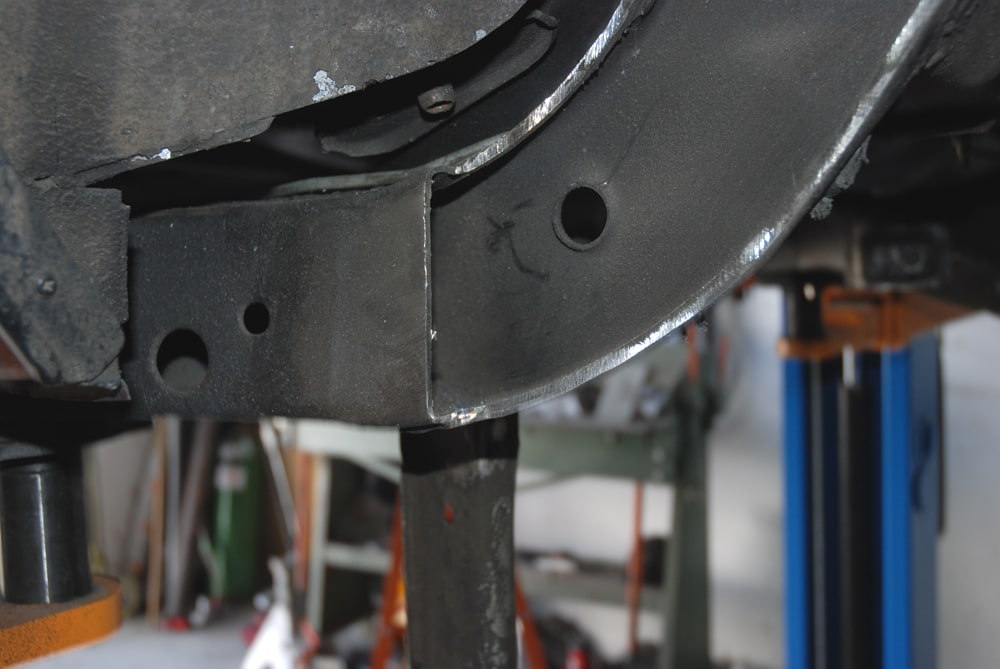
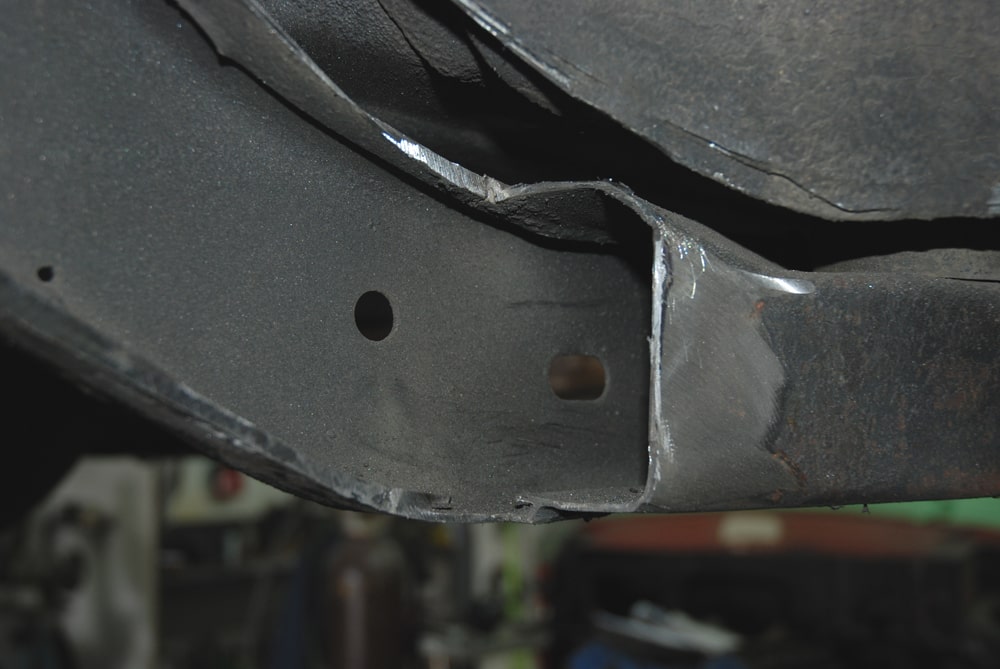
The solution is simple: Notch the frame. Sounds simple enough, but if it isn’t done correctly, it can turn ugly, simply because, as pointed out earlier, the factory frame isn’t the strongest piece in the world. The truth is, the frame has to be carefully notched, then reassembled (plated) with fresh material and reinforced (with a crossmember) so that it doesn’t droop or bend following the surgery. Once that’s complete, your G-Body can swallow tires right up to P325-50R15’s or 11.5X28.00-inch slicks, using the stock inner wheel well (tub). Best of all, it can be accomplished at stock (or close to stock) ride height which means the suspension geometry isn’t screwed up. Sound interesting? Read on. In the captioned photos (and the subsequent article) that follow, we’ll show you how the frame was notched in our old G-Body. FYI, what works on Buford will work equally well on your Malibu, Monte Carlo or Cutlass. And for this segment, we’ll show you how the frame was cut. Next issue, we’ll show you how it was completed.
Click Here to Begin Slideshow
Wayne Scraba investigates how to notch the frame of a GM G-Body to accomodate a big, sticky tire.
GM’s G-Bodies and more specifically, ’78 and later Malibu’s and Monte Carlo’s are popular cars, particularly if you want to burn rubber, either on main street or down the straight and narrow. There’s good reason for that. G-Bodies are the last of the mid size rear wheel drive platforms from General Motors, they have a full (albeit a wee bit flimsy) frame, they have relatively spacious engine compartments that swallow any number of different GM engines, there’s a ton of aftermarket support for them and they’re easy to work on.
Bliss. Right? Maybe not. Unfortunately there’s limited room out back for big sticky tires. Typically, the most street tire these things can accommodate is in the range of a P275-60R15. And if you run slicks, a 9.00X28.00-inch example is the biggest you can get away with (and that might be a stretch for many cars). Even with those two examples, you’re almost always forced to jack the back end up to gain clearance. The reason is, the leading and trailing edges of the frame rail (closest to the back of the door jamb and closest to the bumper) are tight to the tire. The gentle production line frame “notch” simply limits the amount of tire you can fit, even though there’s plenty of room in the OEM wheel well. Then there’s the catch with jacking up the back of the car. If you raise it, you mess with the geometry of the back suspension. The factory 4-link instant center location is changed and typically, the car will be a handful to hook.
The solution is simple: Notch the frame. Sounds simple enough, but if it isn’t done correctly, it can turn ugly, simply because, as pointed out earlier, the factory frame isn’t the strongest piece in the world. The truth is, the frame has to be carefully notched, then reassembled (plated) with fresh material and reinforced (with a crossmember) so that it doesn’t droop or bend following the surgery. Once that’s complete, your G-Body can swallow tires right up to P325-50R15’s or 11.5X28.00-inch slicks, using the stock inner wheel well (tub). Best of all, it can be accomplished at stock (or close to stock) ride height which means the suspension geometry isn’t screwed up. Sound interesting? Read on. In the captioned photos (and the subsequent article) that follow, we’ll show you how the frame was notched in our old G-Body. FYI, what works on Buford will work equally well on your Malibu, Monte Carlo or Cutlass. And for this segment, we’ll show you how the frame was cut. Next issue, we’ll show you how it was completed.
Click Here to Begin Slideshow
Love it, I cant wait to see the completed job !
I have a ’83 Olds with a ’91 454 and 4L80e trans. The stock size tire won’t work. So I’m going to try this………… Any feed back would be appreciated…….. Jack & Oleta