


![[Gallery] Sacramento Autorama](https://www.racingjunk.com/news/wp-content/uploads/2026/05/916_2154-e1778809267634-376x206.jpg)


![[Gallery] Ancient City Auto Club 41st Annual Car Show](https://www.racingjunk.com/news/wp-content/uploads/2025/12/DSC_9441-1-e1766520816593-376x206.jpg)
Encouraging Aftermarket Parts to Get Along - Part 1
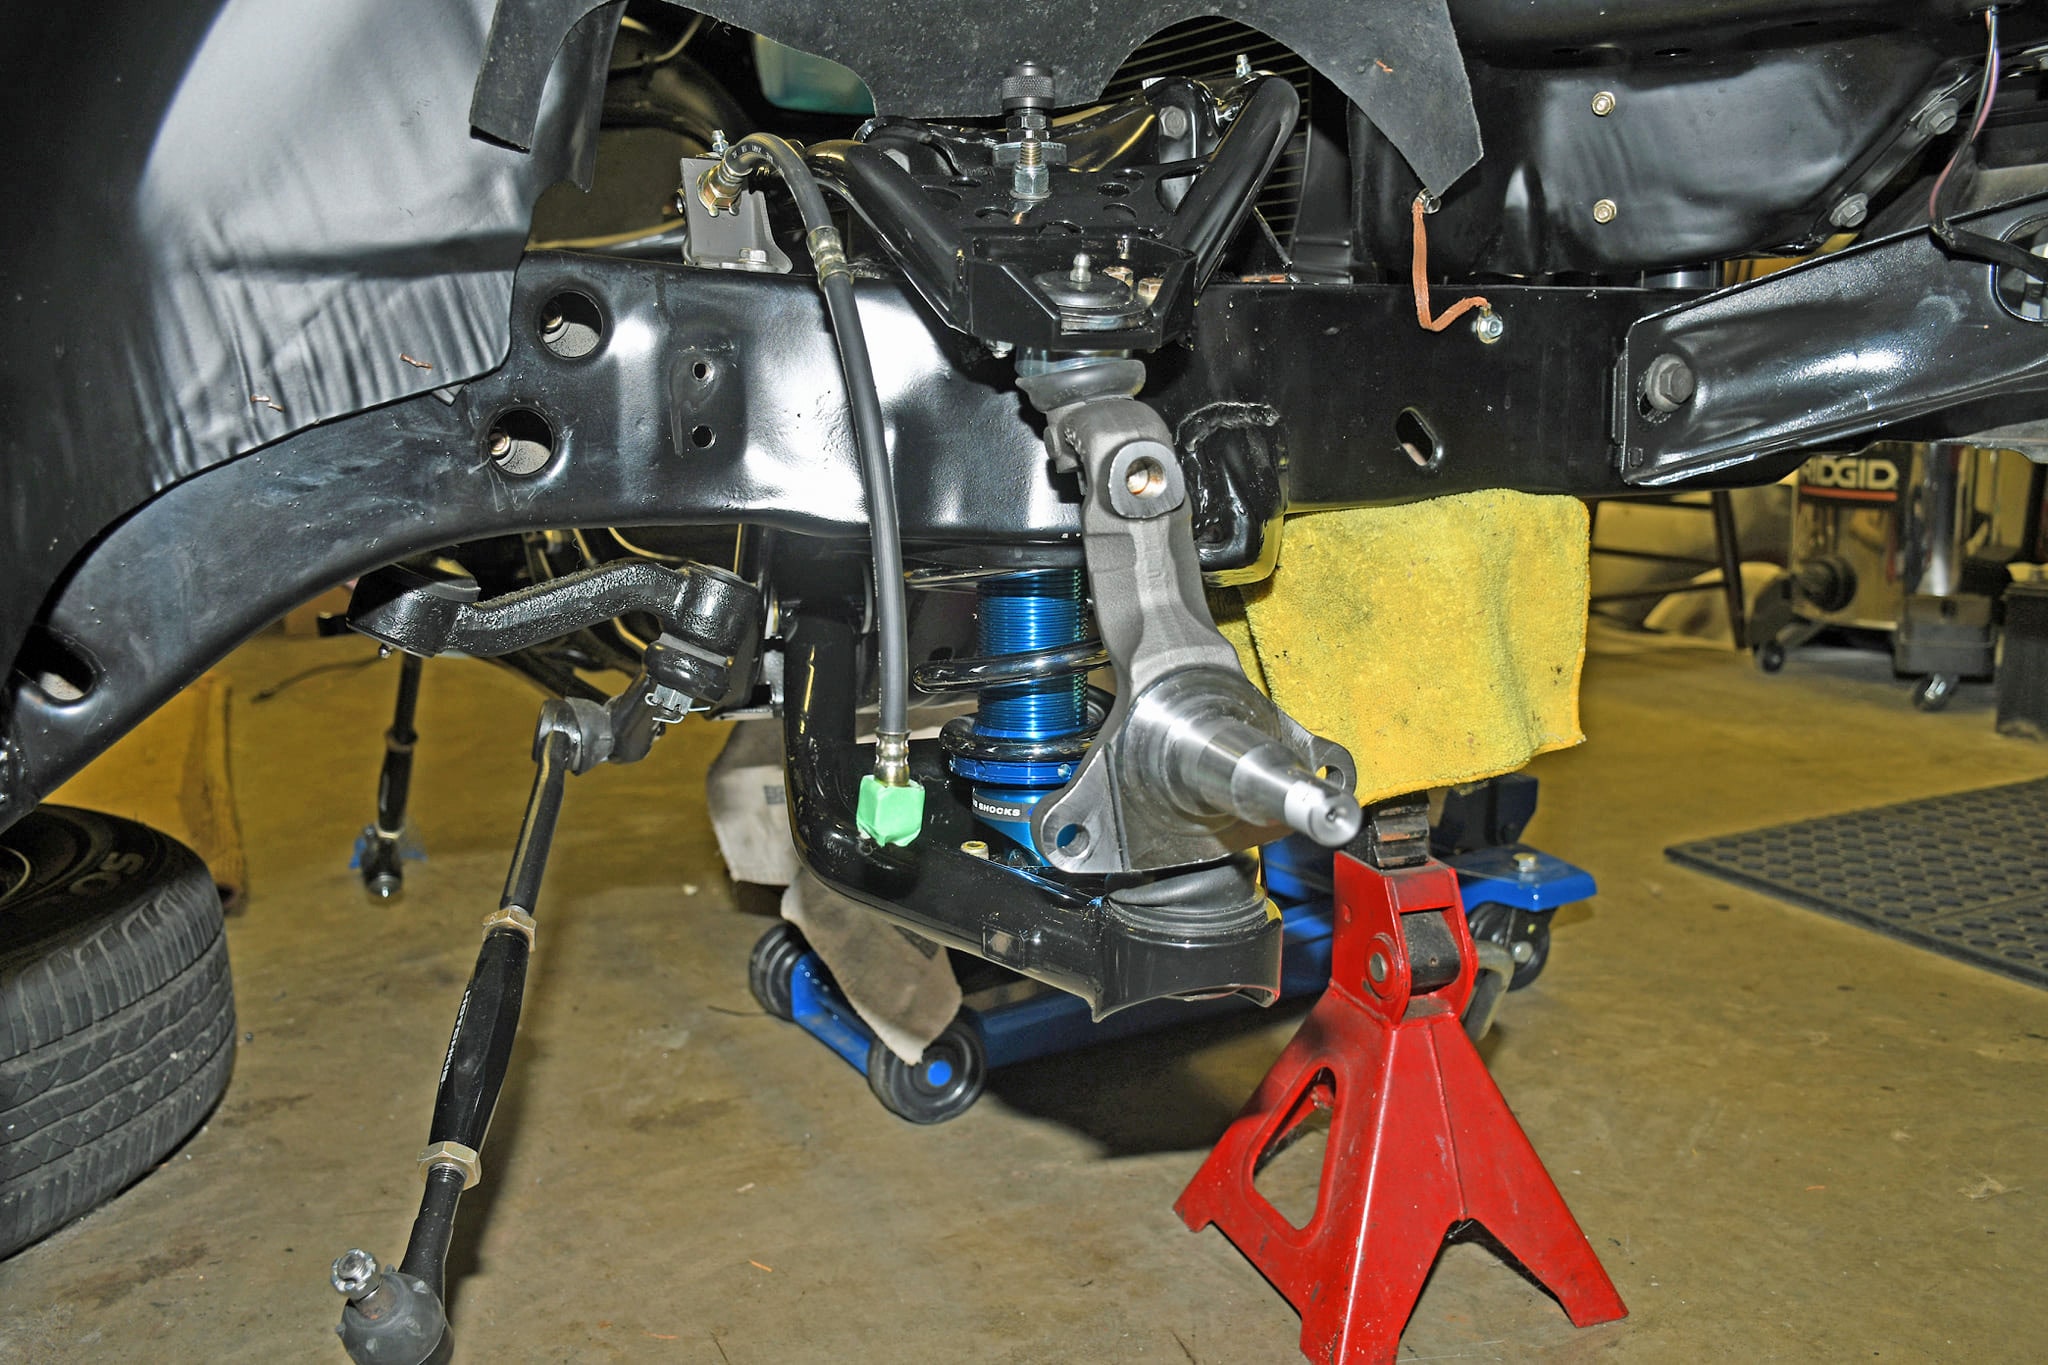
Sometimes a mix of aftermarket parts just doesn’t work, or at least work in conjunction with one another – even if your intentions were initially the most admirable on the planet. It can happen to anyone, including yours truly. The situation I found myself in was this: My car is a street-strip application (1970 Nova). I wanted to use an aftermarket a-arm setup in order to gain a bunch of caster in the car (amongst other things). Previously I've used thin wall chrome moly a-arms. They work great, but they always made me nervous in an application that sees street use, complete with curbs, potholes, rumble strips and all sorts of other road irregularities. As a result, I went with Detroit Speed components on this Nova. They’re built for street use and they’re beefy. They also provide an easy means to adjust caster (and there’s a lot of it available with these a-arms). Caster is important. Early cars such as my Nova were typically built with little caster so that Aunt Matilda could maneuver it around and park it easily without power steering. For the uninitiated, a lot of positive caster in a fast car means it tends to have a lot of straight line stability. But the trade-off is they’re a more difficult to parallel park and maneuver around at low speed (not a concern for me). Bottom line here is, the Detroit Speed a-arms are very nice, high quality pieces.
So far so good. The next piece in my personal puzzle was the front shock absorber setup. I really wanted to use a set of double adjustable shocks (and something with a drag race valving slant). I selected a set of AFCO Racing Eliminator series shocks with BNC (“Big Nose Compression”) valving. They can be used with or without coil over springs. They too are very nice, high quality pieces. You can see a previous Racing Junk series on the Eliminator shocks here:
https://www.racingjunk.com/news/simply-shocking-part-1/
https://www.racingjunk.com/news/simply-shocking-part-2/
https://www.racingjunk.com/news/simply-shocking-part-3/
https://www.racingjunk.com/news/simply-shocking-part-4/
In part 4 of the series, I outlined the conical coil over conversion AFCO racing offers. I opted for that setup, simply because it meant there was no need to cut up a set of lower a-arms to fit the big body shock. How it went together was like this: Position the conical spring on the coil over seat mounted on the shock and then stuff it up in the car. Next, fasten the top of the shock and allow the shock/spring combination to dangle in the spring pocket. Then I was supposed to position the lower a-arm under the shock and fasten it from the bottom. In theory, it all sounded great, but in the end, it turned into a real Gong Show.
I figured it would be easy enough to adjust the ride height by way of a conventional coil over spanner wrench. Not so. If I removed the shock/spring combination (and as a consequence, the lower a-arm) to adjust the ride height, then there was no way to compress the spring (because the shock was in place, inside the spring). And with no easy means of compressing the spring, there was no way to change the ride height.
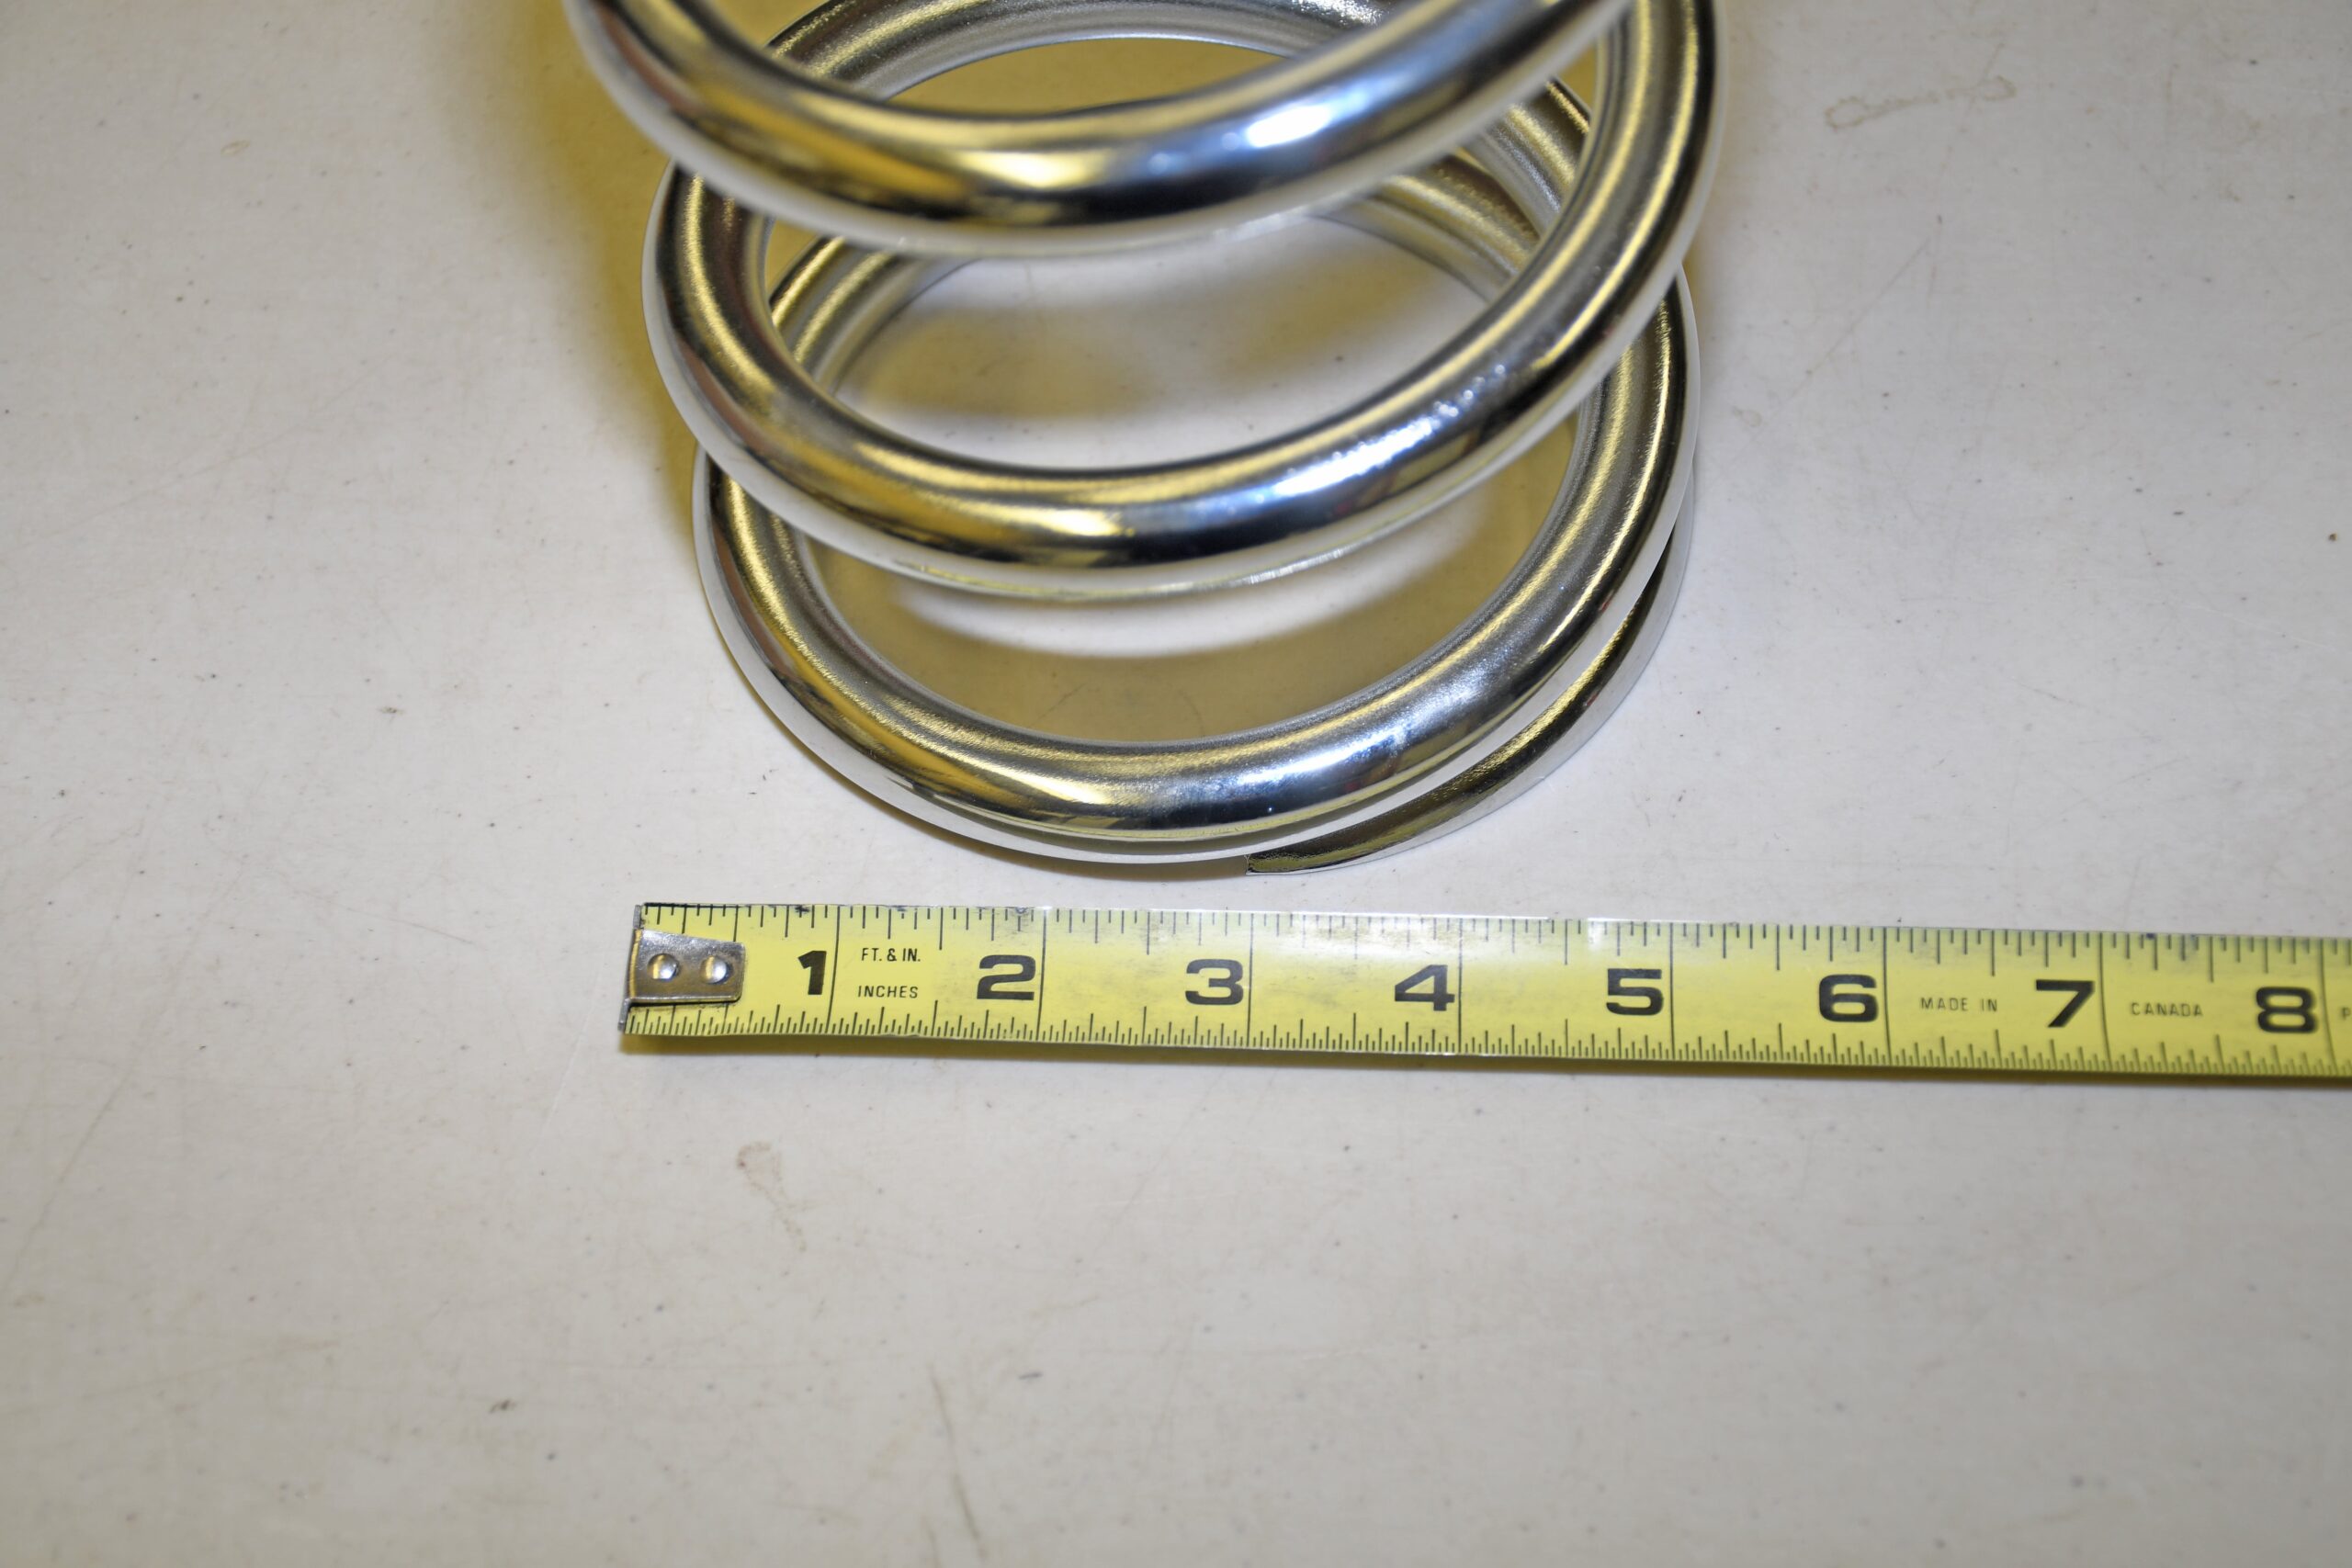
Compounding my dilemma was the fact the conical coil over springs are rather short. In order to make them work, the spring rate must increase. While that could be A-OK on a pro touring application (and most likely is), it’s definitely not the right setup for a drag car or a street-strip application. What you need for a car like that is a tall spring with a slightly smaller wire diameter. This allows the spring to store energy. It also provides for quite a bit more front end travel. You need front end travel on a small tire car so that you can compensate for lack of tire footprint. Big power, big tire cars don’t need as much travel. As a result (in select application) they can make use of coil over springs on the front. The truth is, I was very well-versed in all of this going in, but I thought, somehow, I could make it all work.
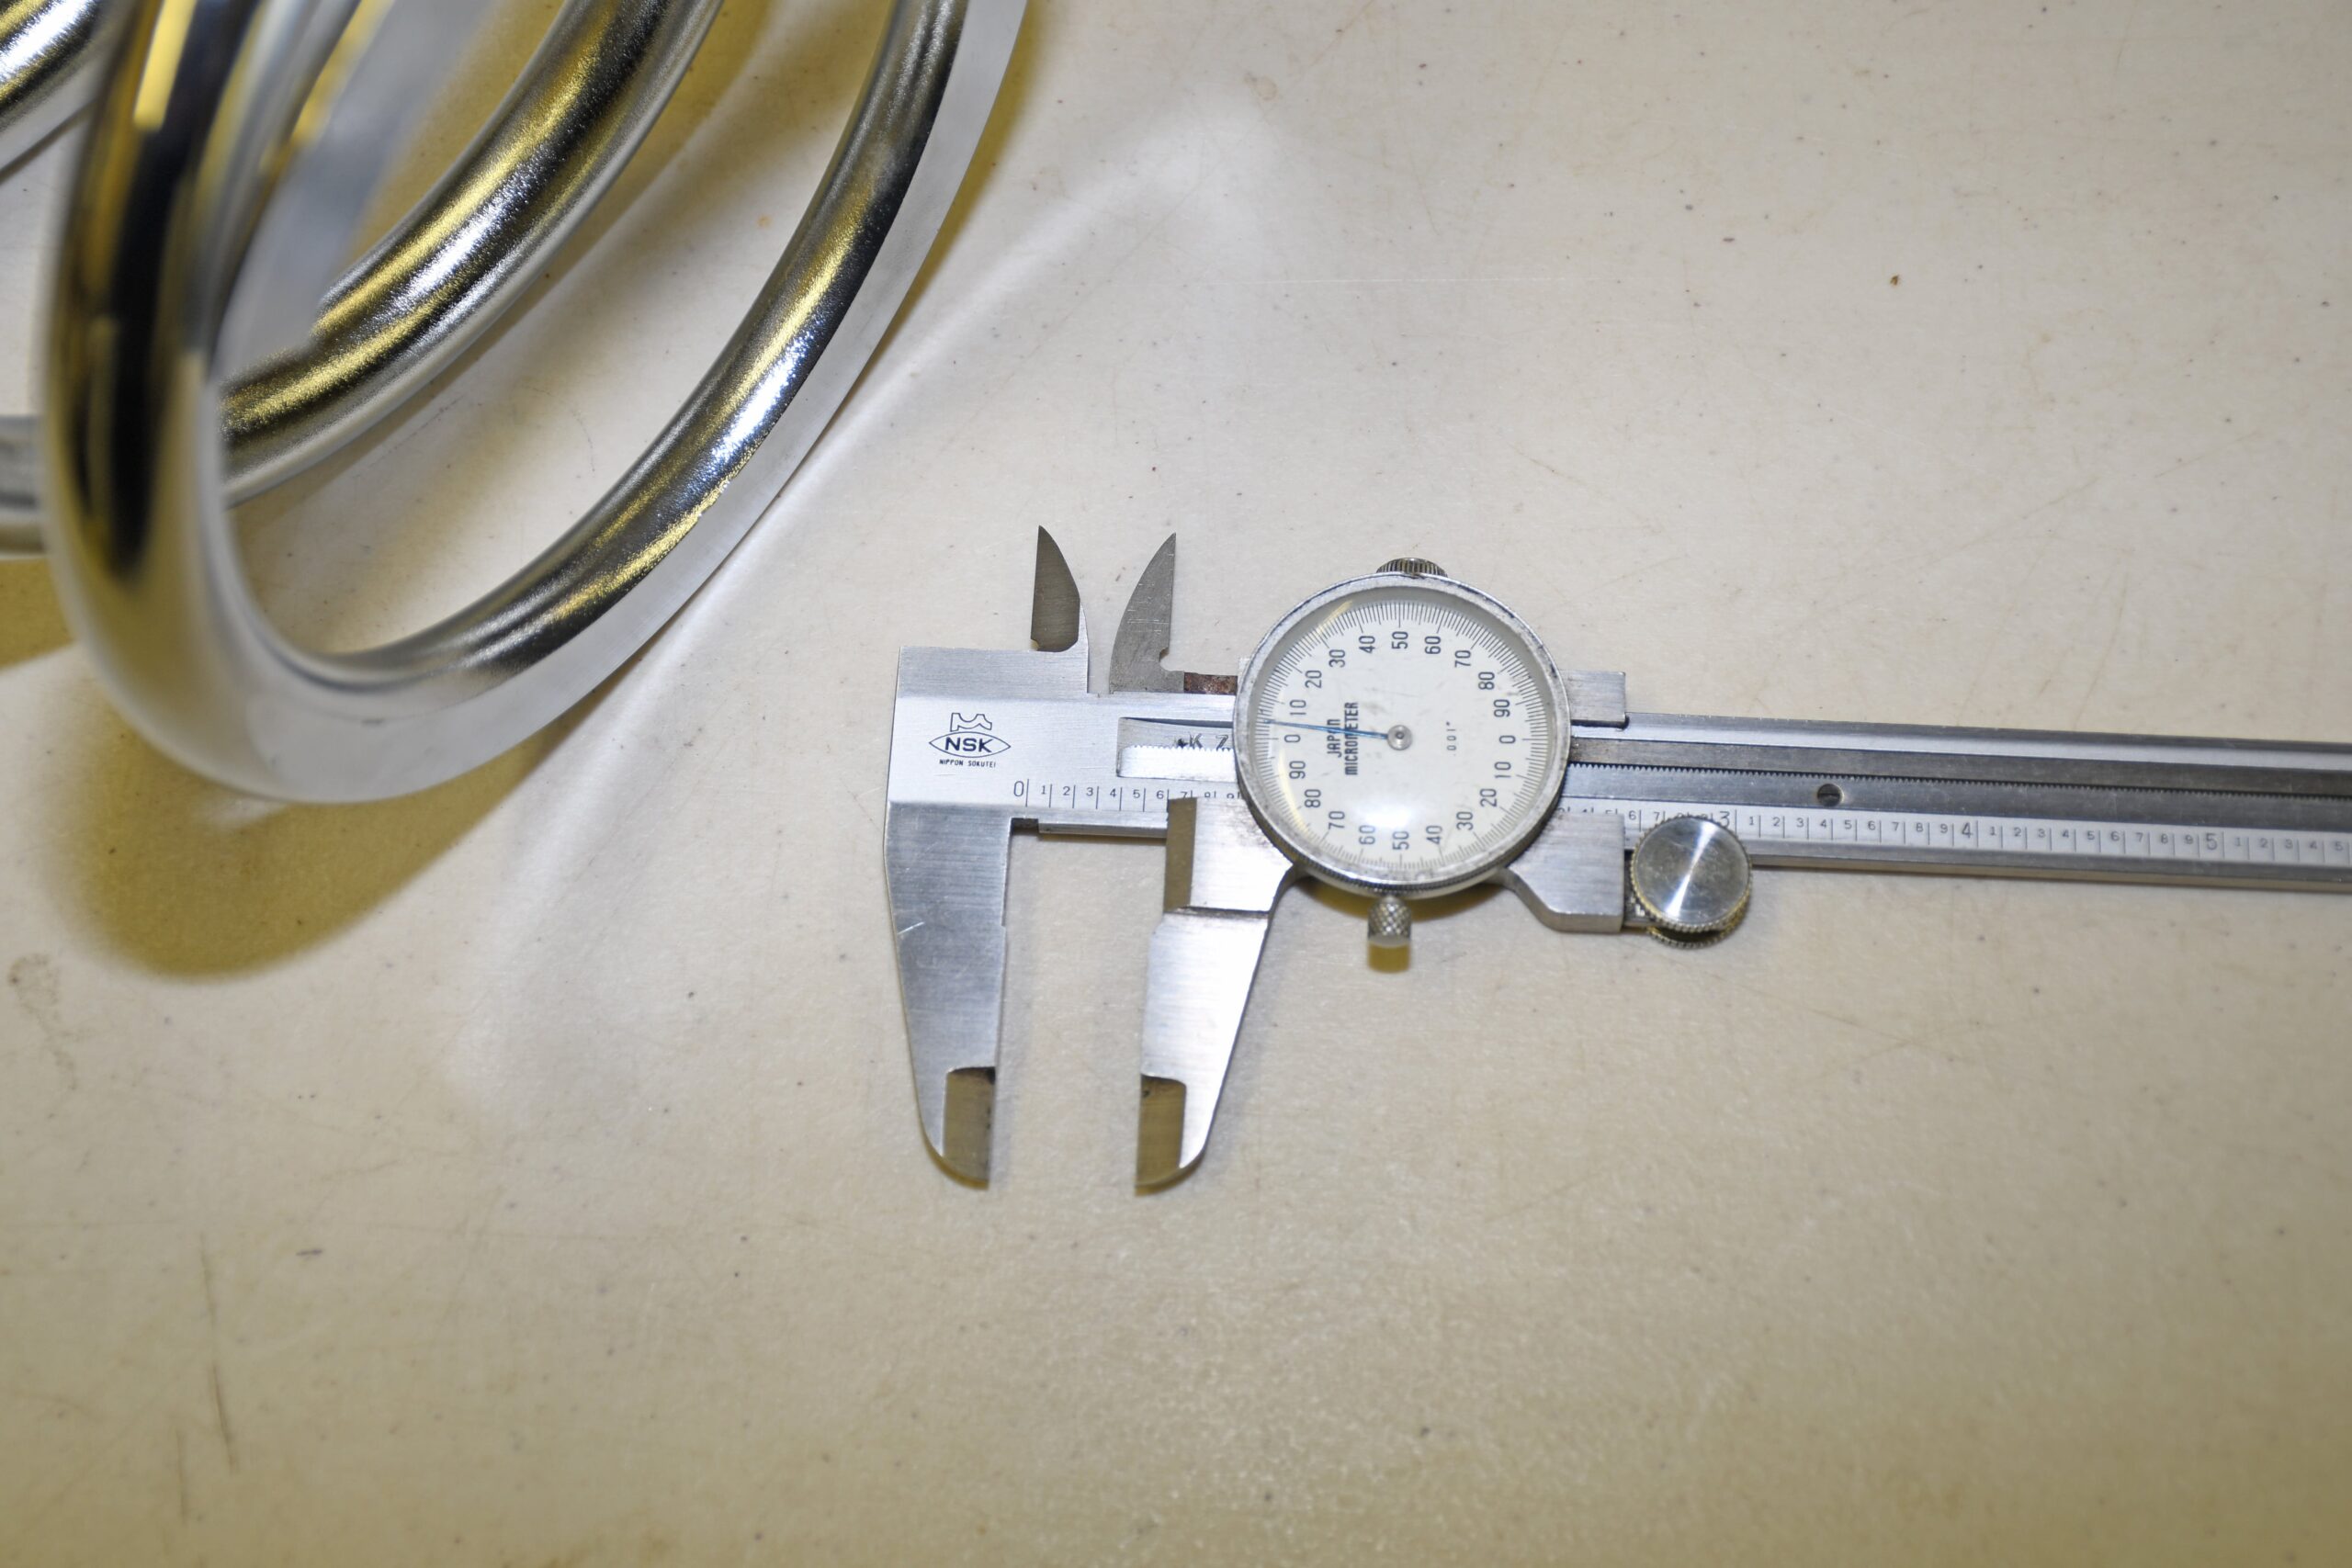
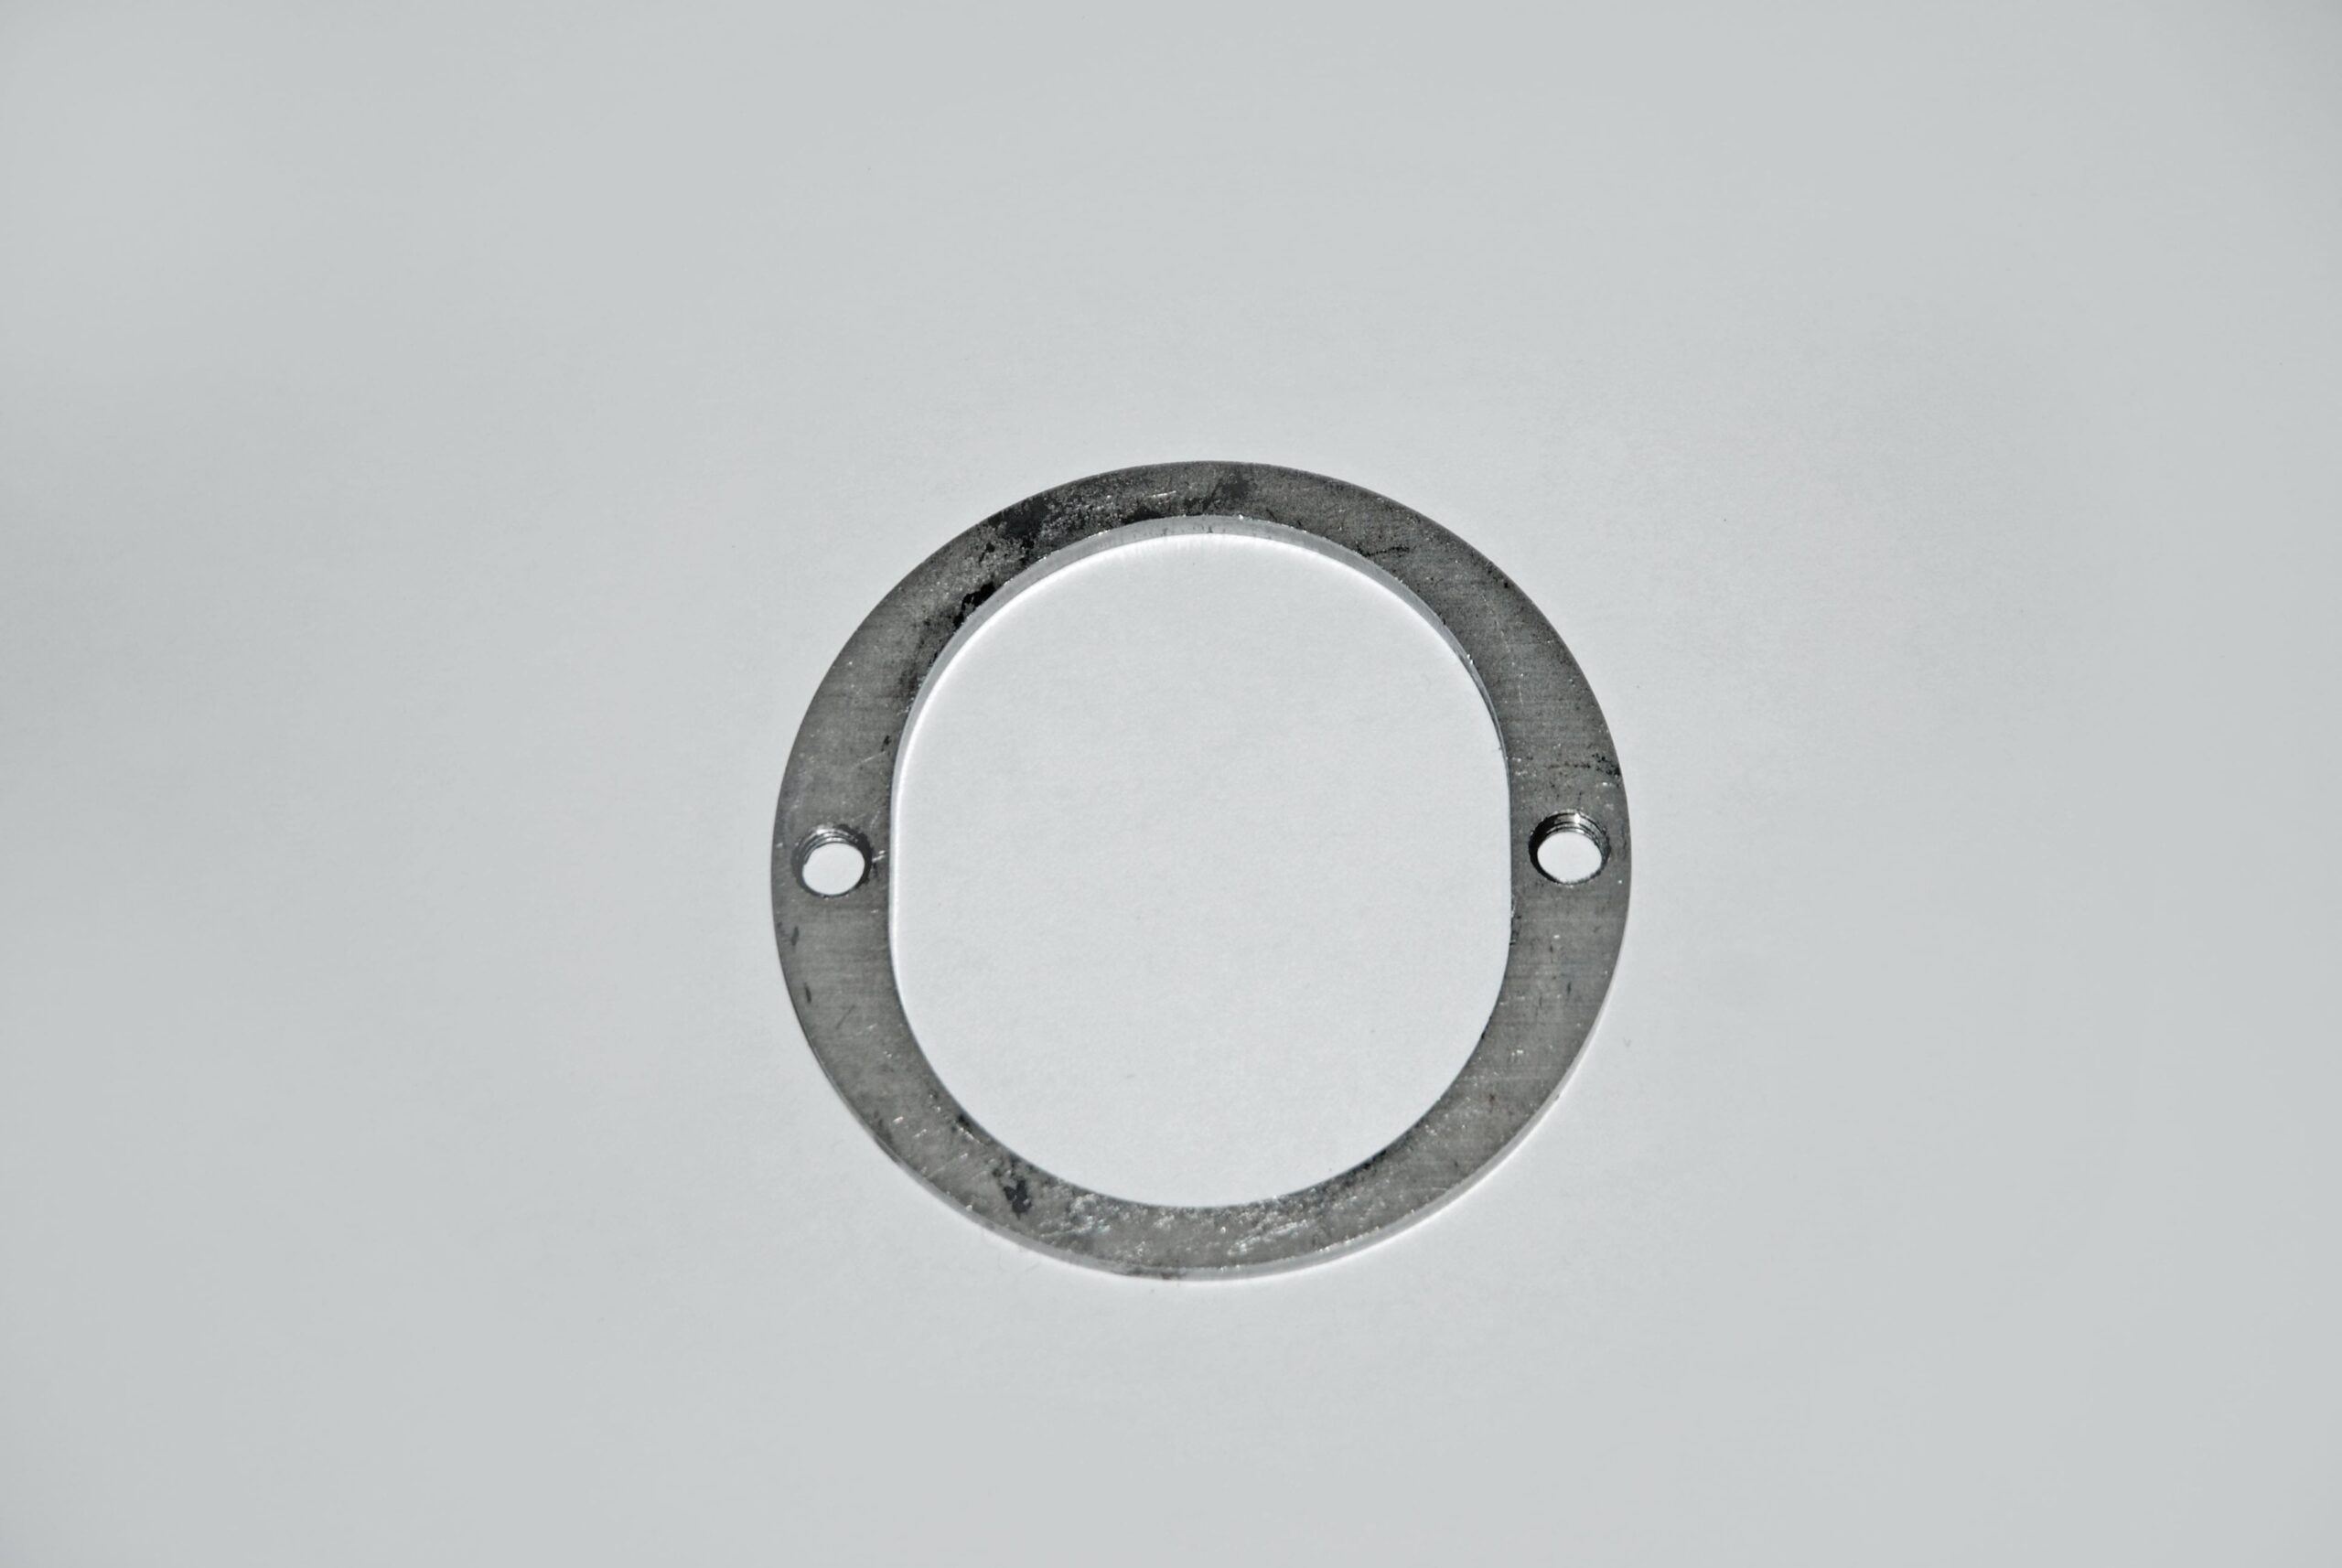
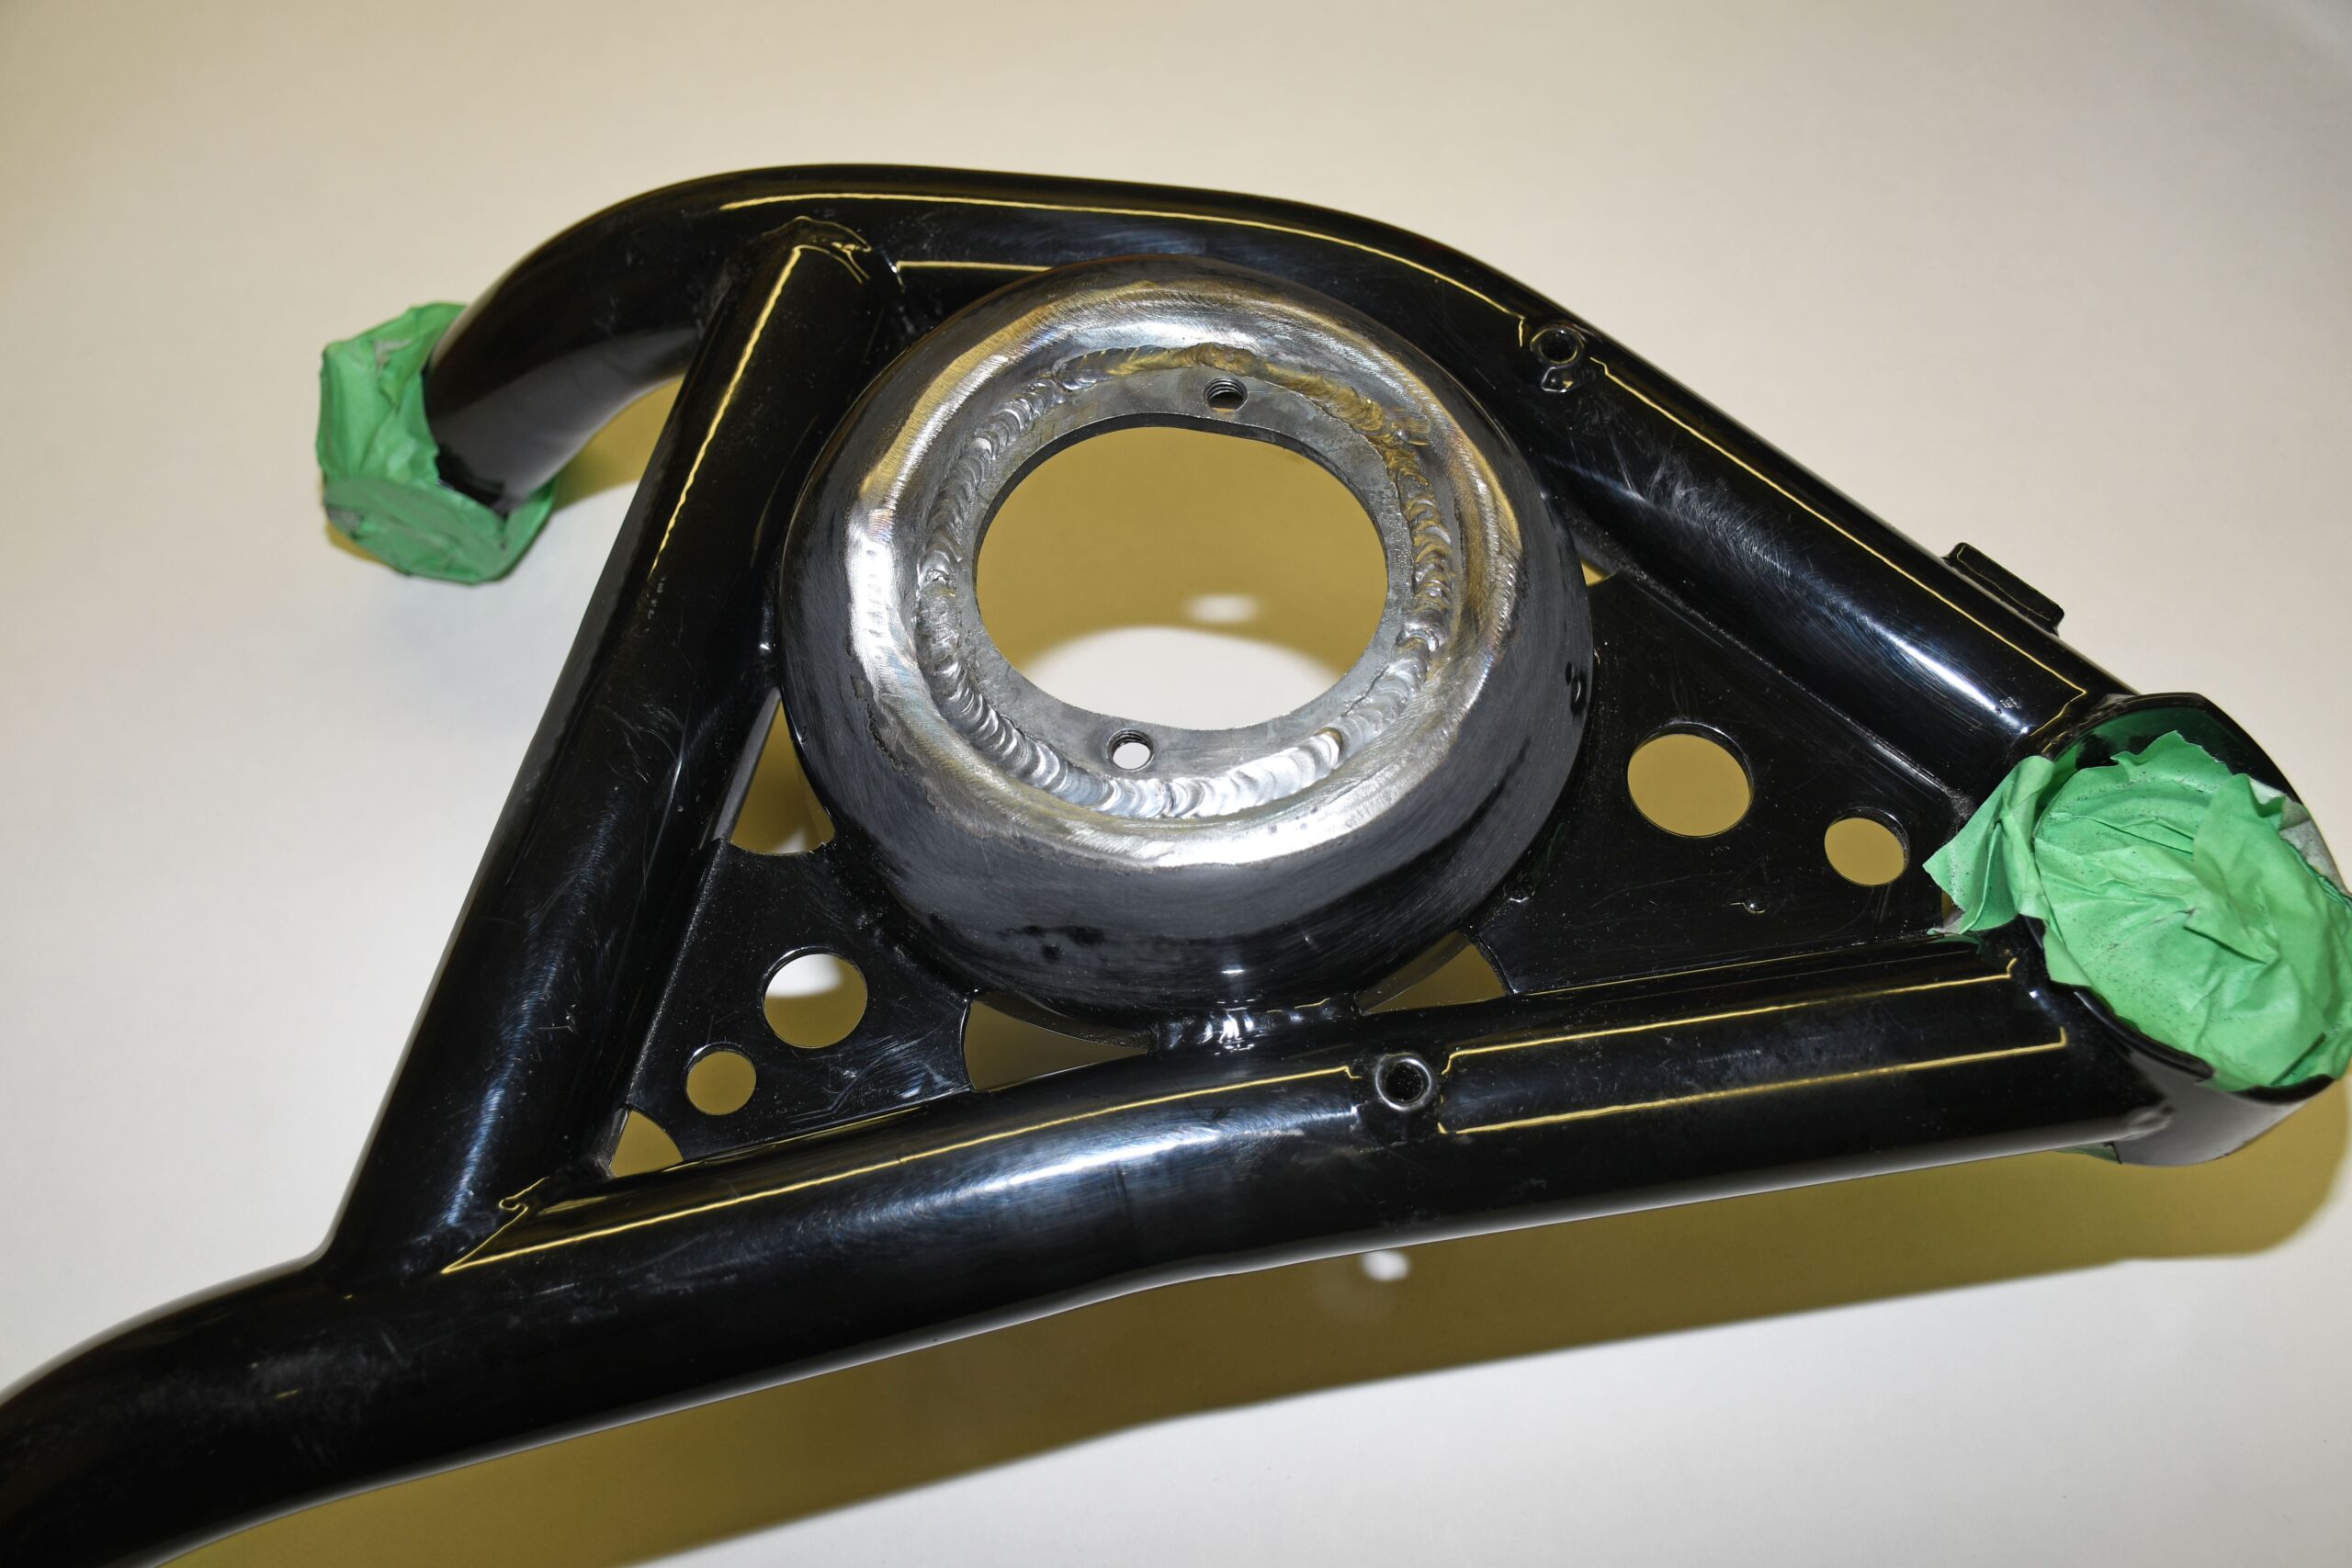
Why not swap out the coil overs for conventional springs? Sounds easy enough, but here’s the rub: The body size of the Eliminator shock is too large for the opening in a Detroit Speed lower a-arm. It’s also too large for the opening in a stock lower a-arm. And you can’t physically open it up enough without cutting into the lower shock mounting points. That means its impossible to install a regular coil spring and slide the big body shock in the from the bottom. Because of situations just like this, AFCO Racing includes a set of weld rings for their front shocks (part 4 of the “Shocking” series details it). To recap: “The hole size in the lower a-arm must be modified to allow for the adjuster to fit. Some aftermarket a-arms have large holes that will either work or will require minimum grinding to allow for shock clearance. OEM GM (and some aftermarket) a-arms might require the use of a weld-in AFCO shock ring (see the accompanying photos). The rings are included with the front shocks, and they’re also available separately. Basically, the lower a-arm is opened up and then the new shock ring is installed. It’s a large opening that provides full clearance for the compression adjuster.”
The Detroit Speed a-arms I chose to use do not have a bottom hole large sufficiently large to install the shock. And there’s clearly no room to massage the hole sufficiently to make it fit. That means a weld ring is necessary to install the AFCO shocks from the bottom. Fair enough, but there’s another wee fly in the ointment: The way the Detroit Speed lower a-arms are built, the spring pocket is formed to accept a spring pigtail. Detroit Speed also lowered the spring pocket 3/8-inch when compared to a stock Nova/Camaro a-arm. Basically, this all boils down to a spring pocket shape that is very irregular and far from flat. Because of this, I was really hesitant to cut them up.
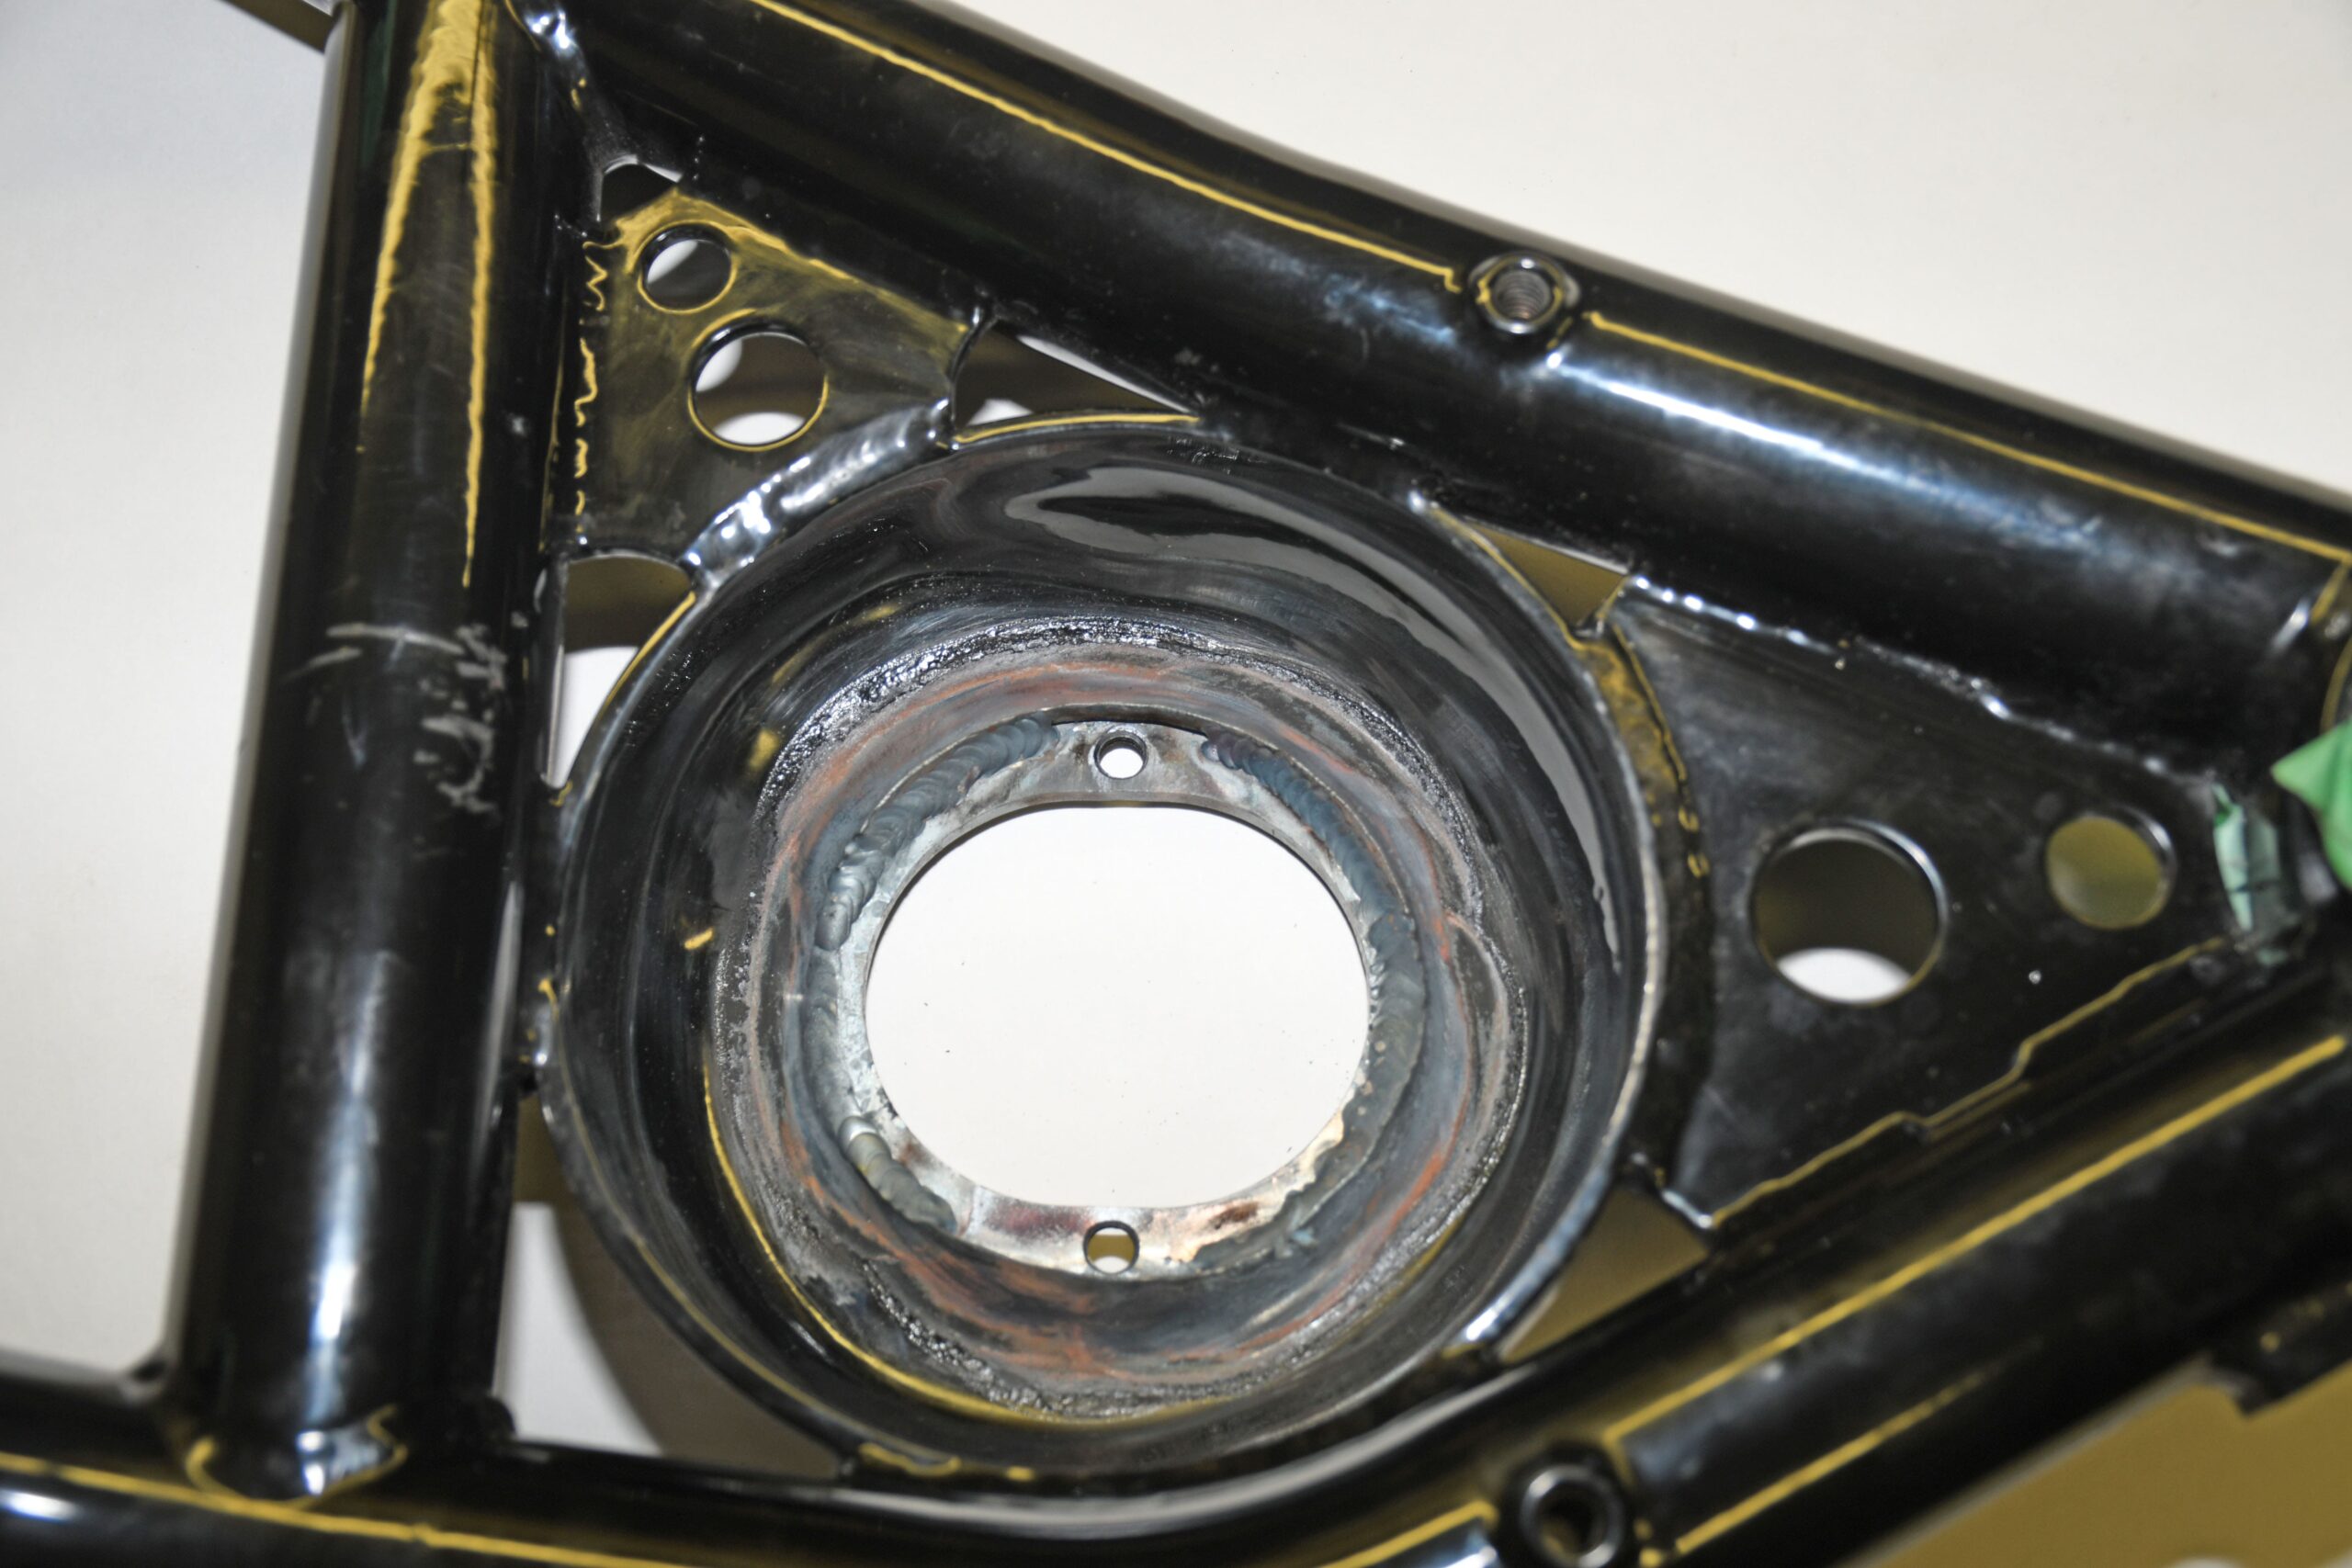
That was the dilemma. Now what? Other than going back to a stock lower a-arm and modifying it, the only other option was to attempt to fit the AFCO weld ring to the Detroit Speed lower. So....I ripped the car apart again (the story of modified car life..."no job is worth doing unless you do it twice!”). Out came the lower a-arms, shocks and conical springs. Using a die grinder, I carefully cut and ground out the centre of the lower a-arms and fit a set of the AFCO shock weld rings. It took two afternoons of cutting, grinding and painstaking fitting to get the AFCO weld rings into a spot where they’d would actually work. Once the pieces were fit, I had a local outfit, Fisher Fabrication TIG weld the rings in place. Kory Fisher partially welded the plates on the inside of the pocket and completely welded the plates on the outside of the pocket. Once done, this allowed me to fit the large body AFCO shock through the bottom of the lower a-arm. Fair enough. But what about springs?
We’ll save that for next issue, but suffice to say, there are some really good solutions available today. Watch for it!
So far so good. The next piece in my personal puzzle was the front shock absorber setup. I really wanted to use a set of double adjustable shocks (and something with a drag race valving slant). I selected a set of AFCO Racing Eliminator series shocks with BNC (“Big Nose Compression”) valving. They can be used with or without coil over springs. They too are very nice, high quality pieces. You can see a previous Racing Junk series on the Eliminator shocks here:
https://www.racingjunk.com/news/simply-shocking-part-1/
https://www.racingjunk.com/news/simply-shocking-part-2/
https://www.racingjunk.com/news/simply-shocking-part-3/
https://www.racingjunk.com/news/simply-shocking-part-4/
In part 4 of the series, I outlined the conical coil over conversion AFCO racing offers. I opted for that setup, simply because it meant there was no need to cut up a set of lower a-arms to fit the big body shock. How it went together was like this: Position the conical spring on the coil over seat mounted on the shock and then stuff it up in the car. Next, fasten the top of the shock and allow the shock/spring combination to dangle in the spring pocket. Then I was supposed to position the lower a-arm under the shock and fasten it from the bottom. In theory, it all sounded great, but in the end, it turned into a real Gong Show.
I figured it would be easy enough to adjust the ride height by way of a conventional coil over spanner wrench. Not so. If I removed the shock/spring combination (and as a consequence, the lower a-arm) to adjust the ride height, then there was no way to compress the spring (because the shock was in place, inside the spring). And with no easy means of compressing the spring, there was no way to change the ride height.
Compounding my dilemma was the fact the conical coil over springs are rather short. In order to make them work, the spring rate must increase. While that could be A-OK on a pro touring application (and most likely is), it’s definitely not the right setup for a drag car or a street-strip application. What you need for a car like that is a tall spring with a slightly smaller wire diameter. This allows the spring to store energy. It also provides for quite a bit more front end travel. You need front end travel on a small tire car so that you can compensate for lack of tire footprint. Big power, big tire cars don’t need as much travel. As a result (in select application) they can make use of coil over springs on the front. The truth is, I was very well-versed in all of this going in, but I thought, somehow, I could make it all work.
Why not swap out the coil overs for conventional springs? Sounds easy enough, but here’s the rub: The body size of the Eliminator shock is too large for the opening in a Detroit Speed lower a-arm. It’s also too large for the opening in a stock lower a-arm. And you can’t physically open it up enough without cutting into the lower shock mounting points. That means its impossible to install a regular coil spring and slide the big body shock in the from the bottom. Because of situations just like this, AFCO Racing includes a set of weld rings for their front shocks (part 4 of the “Shocking” series details it). To recap: “The hole size in the lower a-arm must be modified to allow for the adjuster to fit. Some aftermarket a-arms have large holes that will either work or will require minimum grinding to allow for shock clearance. OEM GM (and some aftermarket) a-arms might require the use of a weld-in AFCO shock ring (see the accompanying photos). The rings are included with the front shocks, and they’re also available separately. Basically, the lower a-arm is opened up and then the new shock ring is installed. It’s a large opening that provides full clearance for the compression adjuster.”
The Detroit Speed a-arms I chose to use do not have a bottom hole large sufficiently large to install the shock. And there’s clearly no room to massage the hole sufficiently to make it fit. That means a weld ring is necessary to install the AFCO shocks from the bottom. Fair enough, but there’s another wee fly in the ointment: The way the Detroit Speed lower a-arms are built, the spring pocket is formed to accept a spring pigtail. Detroit Speed also lowered the spring pocket 3/8-inch when compared to a stock Nova/Camaro a-arm. Basically, this all boils down to a spring pocket shape that is very irregular and far from flat. Because of this, I was really hesitant to cut them up.
That was the dilemma. Now what? Other than going back to a stock lower a-arm and modifying it, the only other option was to attempt to fit the AFCO weld ring to the Detroit Speed lower. So....I ripped the car apart again (the story of modified car life..."no job is worth doing unless you do it twice!”). Out came the lower a-arms, shocks and conical springs. Using a die grinder, I carefully cut and ground out the centre of the lower a-arms and fit a set of the AFCO shock weld rings. It took two afternoons of cutting, grinding and painstaking fitting to get the AFCO weld rings into a spot where they’d would actually work. Once the pieces were fit, I had a local outfit, Fisher Fabrication TIG weld the rings in place. Kory Fisher partially welded the plates on the inside of the pocket and completely welded the plates on the outside of the pocket. Once done, this allowed me to fit the large body AFCO shock through the bottom of the lower a-arm. Fair enough. But what about springs?
We’ll save that for next issue, but suffice to say, there are some really good solutions available today. Watch for it!
Leave a Reply