The pandemic hit everybody hard but with events and car shows being canceled left and right, it allowed us to work on those garage projects. Let's take a look back at the Top How-To Articles.
Click Here to Begin
The pandemic hit everybody hard but with events and car shows being canceled left and right, it allowed us to work on those garage projects. Let's take a look back at the Top How-To Articles.
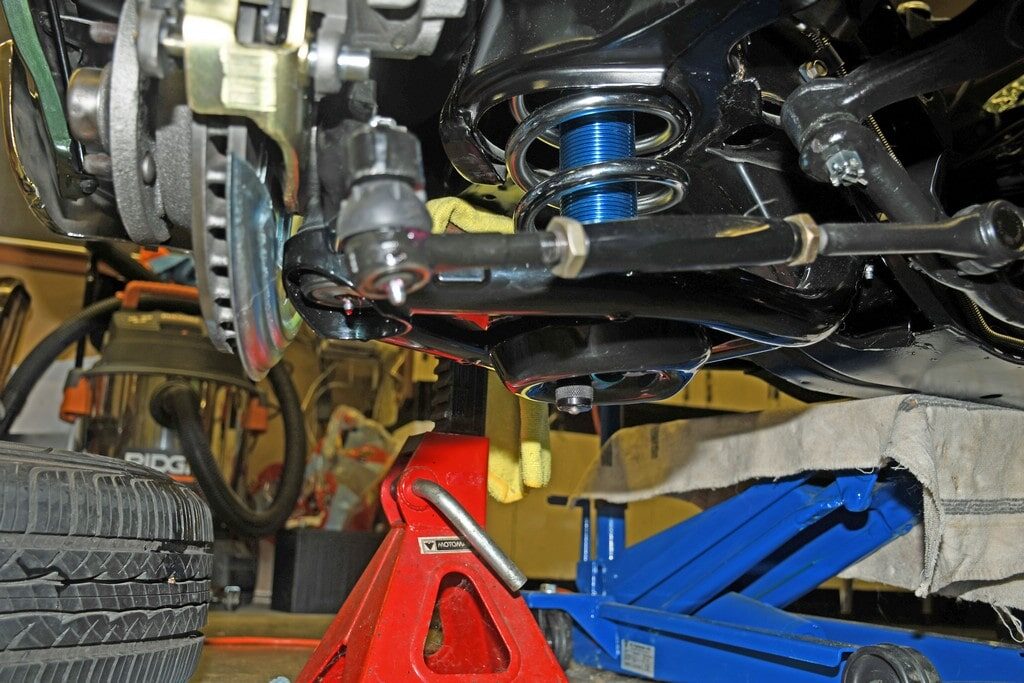
In the opening article of this series, we showed you the coil-over conversion shock setup from AFCO (out of the car). Here it is installed. Note the compression adjuster poking out of the lower a-arm. More in the next photo:
Simply Shocking Part 4 2
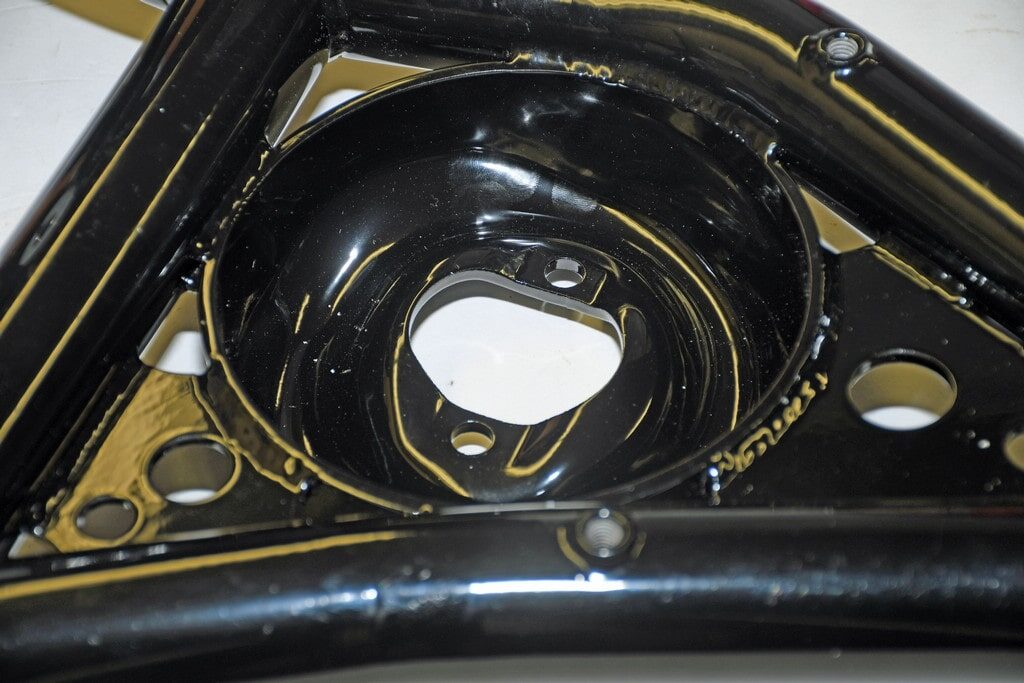
This lower a-arm is from Detroit Speed. In order to fit the shock adjuster in the a-arm, the opening has been enlarged. As noted in the text, we test fit the shock in the pocket without the spring and ran the suspension through its travel to ensure the shock adjuster does not make contact with the a-arm.
Simply Shocking Part 4 3
For a stock lower a-arm, AFCO supplies this weld ring. You simply enlarge the opening in the a-arm and weld in this large diameter ring. With this setup, there’s no danger of the adjuster coming in contact with the a-arm.
Simply Shocking Part 4 4
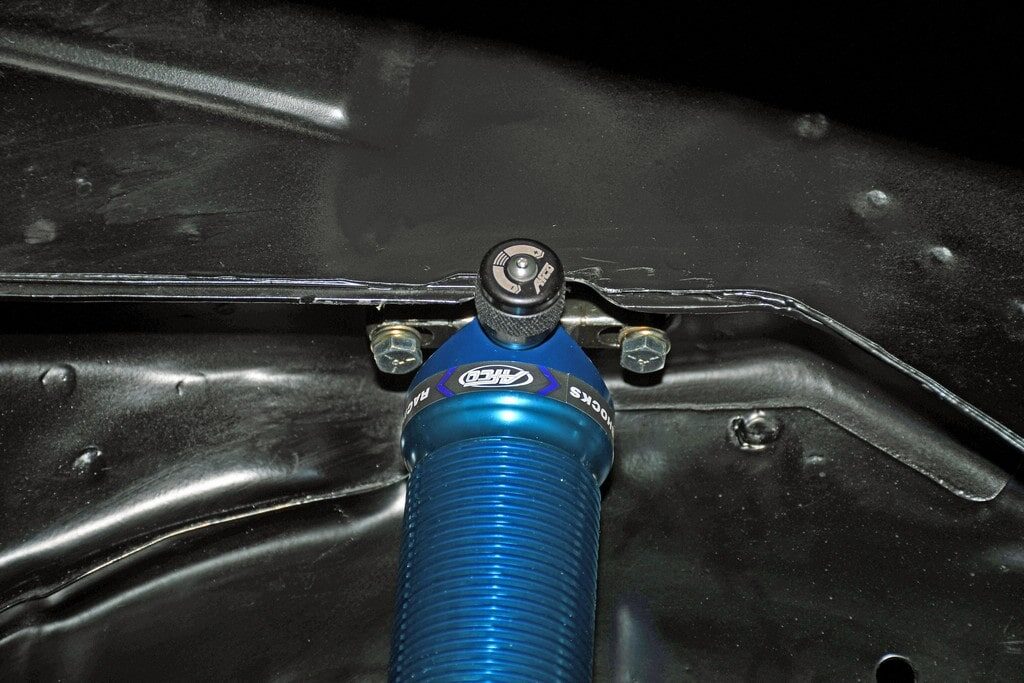
At the back, the double panel on the inner wheel house had to be notched very slightly in order to make room for the compression adjuster. Other than that, the shocks are a direct bolt-in.
Simply Shocking Part 4 5
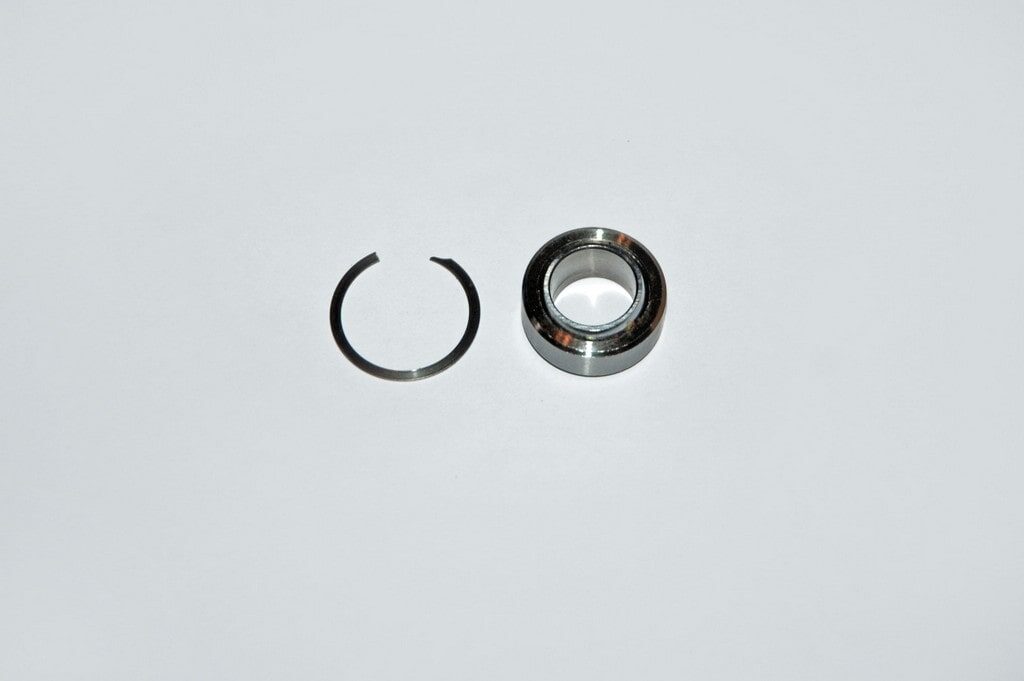
Some applications might require a slightly larger ID (5/8-inch versus ½-inch) on the rear lower shock stud mount. Because of this, AFCO supplies an extra spherical bearing and snap ring with the rear shocks.


![[Gallery] 3rd. Annual Father's Day Classic Car Show](https://www.racingjunk.com/news/wp-content/uploads/2026/07/Calistoga-2026-18-scaled-e1783026475349-376x206.jpg)


![[Gallery] Blackhawk Museum Stop Over](https://www.racingjunk.com/news/wp-content/uploads/2026/06/DSC_0918-e1782449621944-376x206.jpg)
Leave a Reply