

Years ago, my father’s main mechanic at the Chevron station, Billy Jeff – BJ – gave me a vacuum gauge as a birthday present. BJ was probably the best mechanic I’ve ever known. A full-blooded Native American Indian, he’d often climb up after me into an engine bay (he was only five feet tall) to do stuff and explain what he was doing and why he was doing it.
Dad and BJ, more so BJ, taught me early on that a vacuum gauge can tell you almost everything you need to know about your engine’s health as long as you know how to interpret what you’re seeing on the gauge, hearing and feeling. Put these three pieces of information together and you’ll know if you’re looking at an easy fix or a complete engine rebuild.
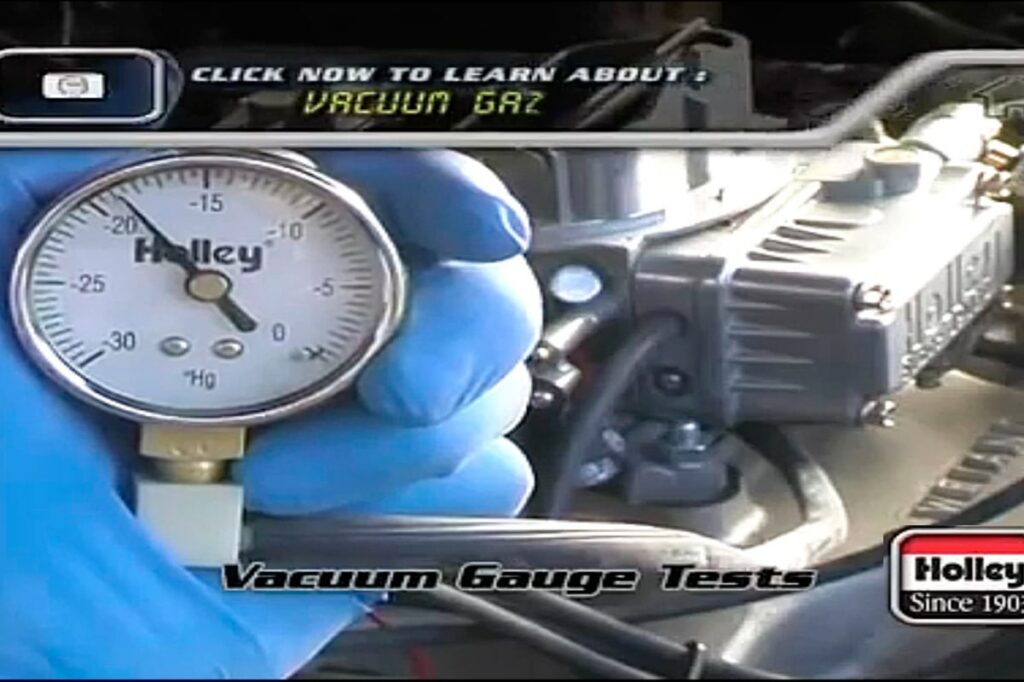
You should never scrimp on your vacuum gauge. It’s one of those tools for which you should pay more so you get the best quality you can afford. It needs to read up to 30 inches of mercury (In/Hg) of vacuum. Low quality gauges can leak internally and give unreliable readings. Since it’s hopefully a fine instrument, treat it properly. Keep it in the case it came in if possible. Keep it clean. Don’t bang or drop it.
Begin your engine check-up by making a thorough preliminary inspection. Pop the hood and look over the engine compartment with the proverbial fine-tooth comb. Check all vacuum lines and fittings for cracks or breaks. Test vacuum connections to make sure they’re tight. Make sure any ports or fittings that are supposed to be plugged are plugged properly. Fix anything you find here.
Start the engine and listen for leaks in several locations around the engine bay. Now perform the wiggle test. With the engine running, wiggle the vacuum connections and jiggle the lines while listening for the hiss or changes in the engine that vacuum leaks cause. I like to spray carb cleaner around the base of the carburetor and intake manifold as well as all the vacuum lines, check valves and connections. A vacuum leak will suck the carb cleaner into the engine and cause the RPM to fluctuate rapidly.
Next, go for a test drive. I like to push the hose on my vacuum gauge through the firewall/bulkhead (using an existing penetration) and connect it to a direct vacuum source like the manifold (more on this later) so I can watch my vacuum gauge as I’m test driving the vehicle. I put it on the dash above the speedo so I can see the fluctuations as I’m driving and link them to the driving conditions under which they occurred. So I can test the vehicle driving as my customer does, I get some neighborhood, city and highway driving during my 30 minute run.
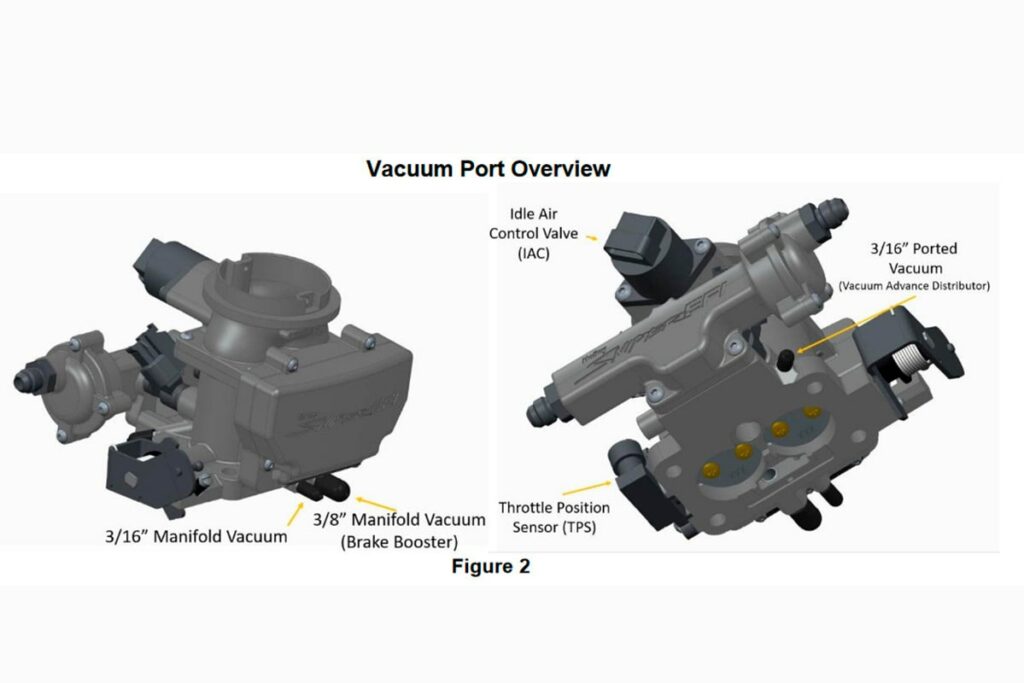
When diagnosing engine performance problems using vacuum, you must use a direct source of vacuum, such as the vacuum tap on most intake manifolds. A good source for many is the vacuum line going to the transmission. No matter where you get your vacuum source, make sure it’s not ported.

Most engines will run 17-21 In/Hg while idling at normal operating temperature. Obviously this isn’t true for huge lopy cams that can barely idle. Mild performance cam profiles should give vacuum readings of between 15-20 In/Hg, although their performance profiles may decrease average vacuum by approximately three In/Hg and cause mild “lopiness” with attendant vacuum fluctuations as overlap increases.
“Flooring it” should cause vacuum to drop quickly, maybe to zero. Releasing the accelerator quickly after a few seconds should cause vacuum to quickly bounce back up to above normal (usually around 25 in/Hg) then quickly return to normal (17-21 “/Hg) as engine RPM slowly returns to idle.
Vacuum decreases slowly when the pedal is put to the floor. It should drop almost to zero for an instant when you accelerate quickly. A restriction in either the intake or exhaust is indicated if the gauge shows vacuum decreasing slowly instead of quickly. Something like a plugged cat or muffler is usually the culprit here.
As stated, a “stock” engine should pull 17-21 In/Hg of vacuum at idle. The cool thing about using a vacuum gauge to diagnose engine problems is that different engine problems show themselves by vacuum readings in different ranges. For example, if you’re seeing vacuums readings at idle of:
- 15-18 “/Hg and holding steady the timing is retarded too much; advance ignition timing until vacuum returns to normal.
- holding steady at 10-15 “/Hg indicates valve mechanical timing issues, the timing chain or belt has slipped. Check the location of the rotor with #1 at TDC on compression.
- very low but steady readings of 5-10 In/Hg are indicative of a leaking intake manifold gasket or a leak in the manifold itself.
Fluctuations in vacuum with the engine idling at operating temperature are indicative of either an engine misfire or a problem with a valve. If the needle drops quickly and returns to a normal reading, a burnt or sticky valve is indicated. Engine RPM bouncing around with vacuum ranging between 10 and 20 are symptoms of weak valve guides.
A vacuum gauge is irreplaceable when tuning a carburetor. When I was a kid, my father and BJ taught me how to adjust a new or rebuilt carburetor by watching and listening to the engine. Turn the idle adjustment screw(s) out all the way and then turn it/them in until the engine begins to stumble and back off a quarter turn. Repeat on the other side if required. This is pretty much the accepted method of tuning a carburetor; however, it will only get you in the ballpark.
Using a vacuum gauge to help you tune a carburetor can get you within 1/16th of a turn of “perfect carburetor tuning.” Engine vacuum will respond much more quickly than waiting for the engine to stumble. Turn the idle mixture screw and watch the vacuum gauge. Turn very slowly and stop turning as soon as vacuum stop climbing or drops, then repeat the process on the other side if required. The improvements over using “feel” when tuning in throttle response, power and efficiency won’t be huge, but they will be noticeable.
Hello,
Very interesting to a Chevrolet fanatic that probably could assemble
a SBC, but only if all the parts were perfectly matched. I sure I couldn’t
tell you if the bearings were not the right size. Or the valve train being
out if kilter.
We recently went through a 383 stoker with only 8,000 miles on it We found a couple of cam lobs going flat. The aluminum “Trick Flow” 2.02 heads needed work and a couple springs that were weak. As I did some serious homework
on carbs, heads, manifolds, headers & exhaust. I learned alot.
So here is what I have:
383 CI 4-bolt mains
Mother thumper cam
Trick Flow 2.02 Heads
Holley 750DP
Edelbrock Air Gap manifold
1 3/4″ tube headers
HEI Distributor
Hot Plugs Extra-Long for aluminum heads
700R V auto built for up to 650 HP
2500-2700 stall converter
Problem: we 1st started with a brand new Holley 650 Double Pumper
never started. we change to the 750 DP that came on the engine.
Finally after hours of trial & error it started with the carb unplugged
with NO vacumn hooked to carb and the carb port was plugged. It barely
idles at 950-1050 rpm. It has horrible acceleration until 2nd gear @
4,000 rpm WOW, then nothing.
My mechanic tells me that during all our wasted hours hands on the vacumn
was 3-7 inches.
I plan on adding a Chevrolet Vacumn Canister and a vacumn pressure pump
and a vacumn gauge next to my tachometer. Please tell me if that’s the proper
next step. I hate to ponder pulling our fresh install to change out the
Comp Cams Mother “thumper” cam for something that WORKS…………..
Thanks in advance,
chris – Boise