Click Here to Begin Slideshow
Over the pastseveralweeks, we’ve presented the beginnings of our 88 restoration, maintenance and performance-tip series for GM musclecars. The tips all have one thing in common: They’re geared toward the little guy working in a home garage using common tools. As we pointed out previously, completing a task properly without any accompanying aggravation provides a feeling of fulfillment and satisfaction that’s pretty darned solid. These tips are meant to help get to that point without a lot of pain. Some of them are mechanical in nature while others point you in the right direction for parts you may not have known exist. Classic Industries (18460 Gothard Street, Huntington Beach, CA 92647; PH: 800-854-1280; Website: www.classicindustries.com) has helped immensely with the series, and they manufacture and/or sell many of the products shown in many of the tips. What follows are another dozen plus tips. Look them over. There’s something here for every GM musclecar fan.
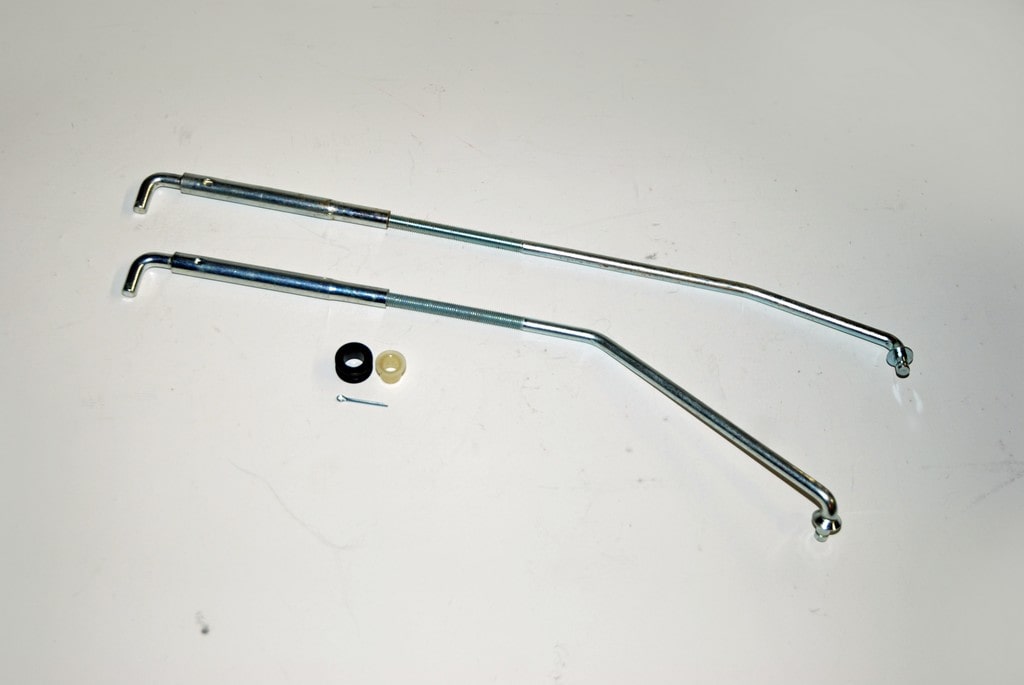
44. SPARE THE ROD: Cars like the first generation Camaro typically used a mechanical accelerator linkage setup. There was a throttle rod specifically built for small blocks and one specifically built for big blocks (they’re decidedly different). The linkage used a combination nylon and rubber bushing on each end. All of these pieces are readily available from Classic Industries.
After you've perused these tips, check out our next installments: 5 and 6.
Over the pastseveralweeks, we’ve presented the beginnings of our 88 restoration, maintenance and performance-tip series for GM musclecars. The tips all have one thing in common: They’re geared toward the little guy working in a home garage using common tools. As we pointed out previously, completing a task properly without any accompanying aggravation provides a feeling of fulfillment and satisfaction that’s pretty darned solid. These tips are meant to help get to that point without a lot of pain. Some of them are mechanical in nature while others point you in the right direction for parts you may not have known exist. Classic Industries (18460 Gothard Street, Huntington Beach, CA 92647; PH: 800-854-1280; Website: www.classicindustries.com) has helped immensely with the series, and they manufacture and/or sell many of the products shown in many of the tips. What follows are another dozen plus tips. Look them over. There’s something here for every GM musclecar fan.
44. SPARE THE ROD: Cars like the first generation Camaro typically used a mechanical accelerator linkage setup. There was a throttle rod specifically built for small blocks and one specifically built for big blocks (they’re decidedly different). The linkage used a combination nylon and rubber bushing on each end. All of these pieces are readily available from Classic Industries.
After you've perused these tips, check out our next installments: 5 and 6.
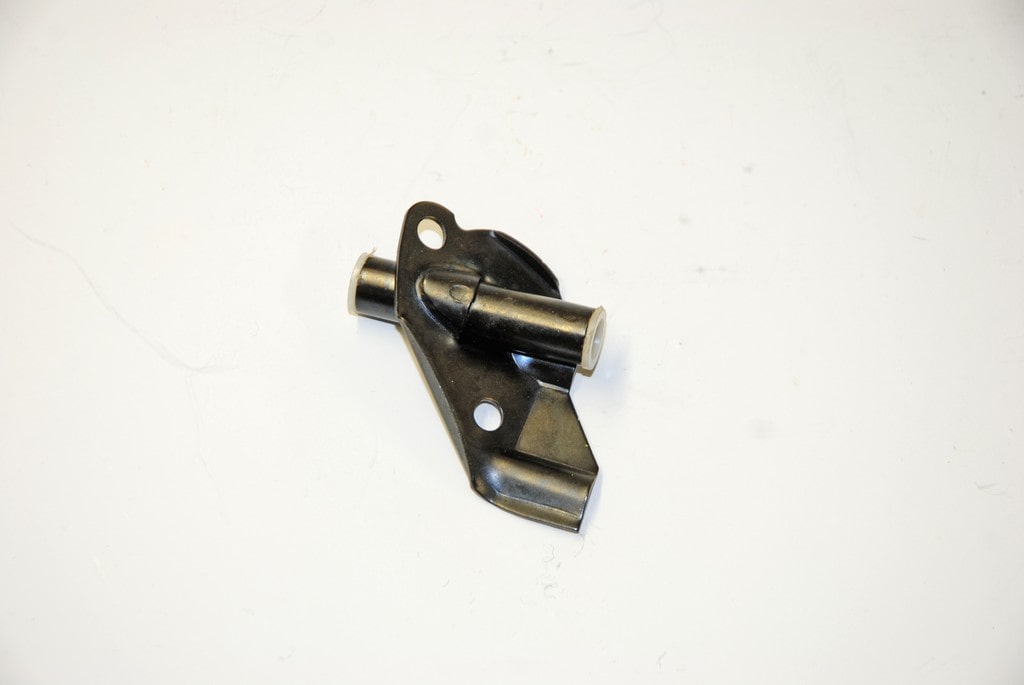
45. ACCELERATE THIS
First Gen Camaros and ’68 to ’70 Novas used an accelerator pedal rod support at the firewall. The design changed in 1968. The design was changed from a metal support to a plastic job. The stronger steel support (Classic Industries number 3924409) is a direct swap for the OEM plastic job.
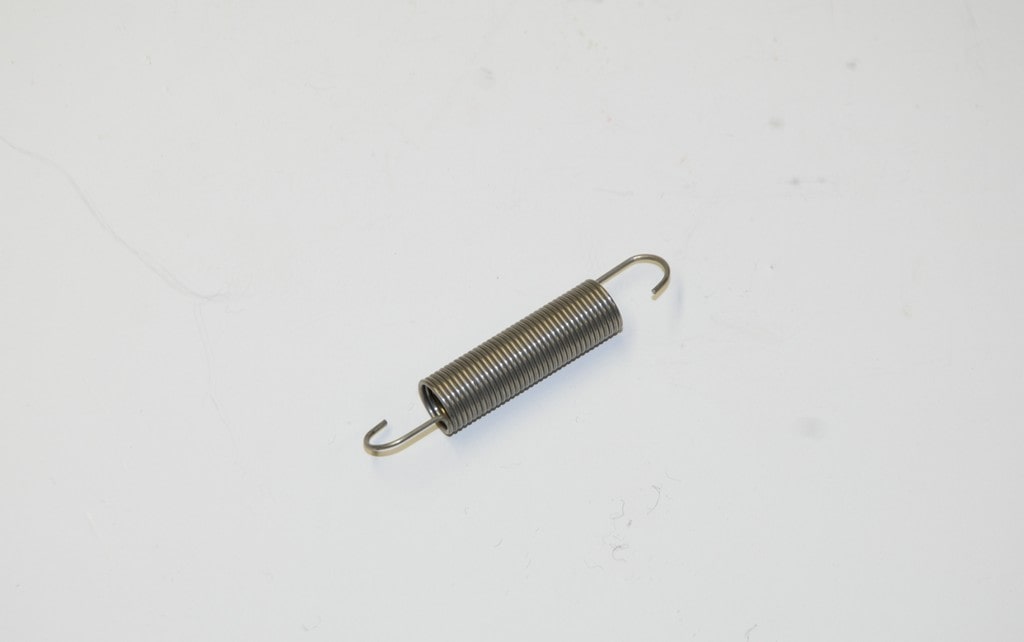
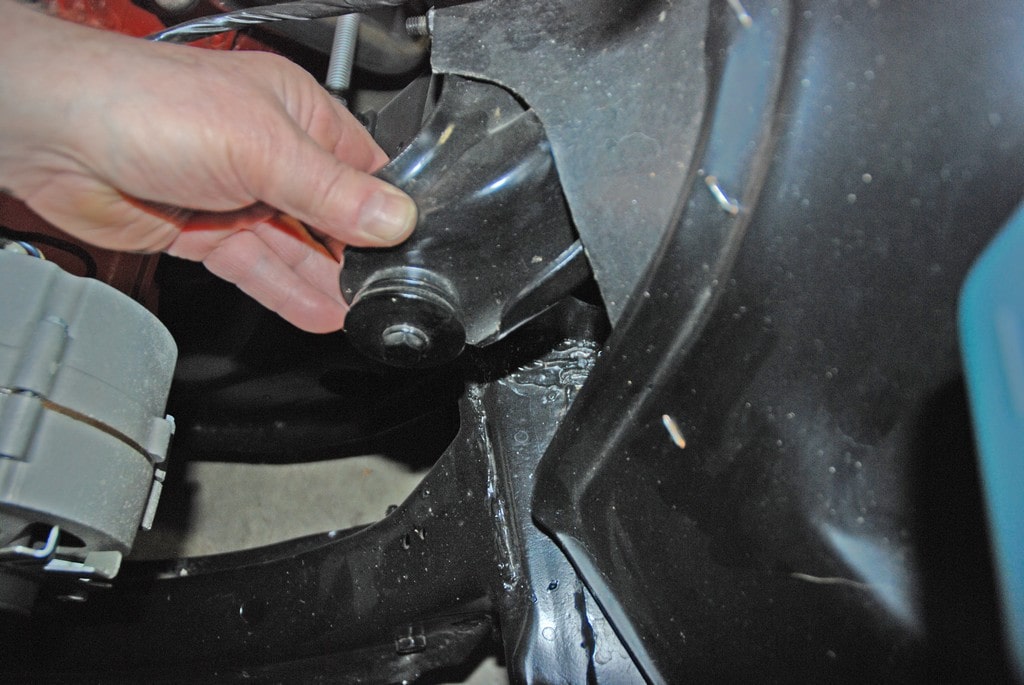
46. MORE THROTTLE
When you examine some cars, you have to scratch your head when it comes to the accelerator return spring. The reason is many are just cobbled up with non-original components. Some even use springs that would work well on a screen door (!). Certainly springs can go missing during a rebuild, but instead of using hardware store parts, consider the use of stock replacements such as these (in the accompanying photo). Mount them in the stock location and any concerns over a stuck throttle will be eliminated.
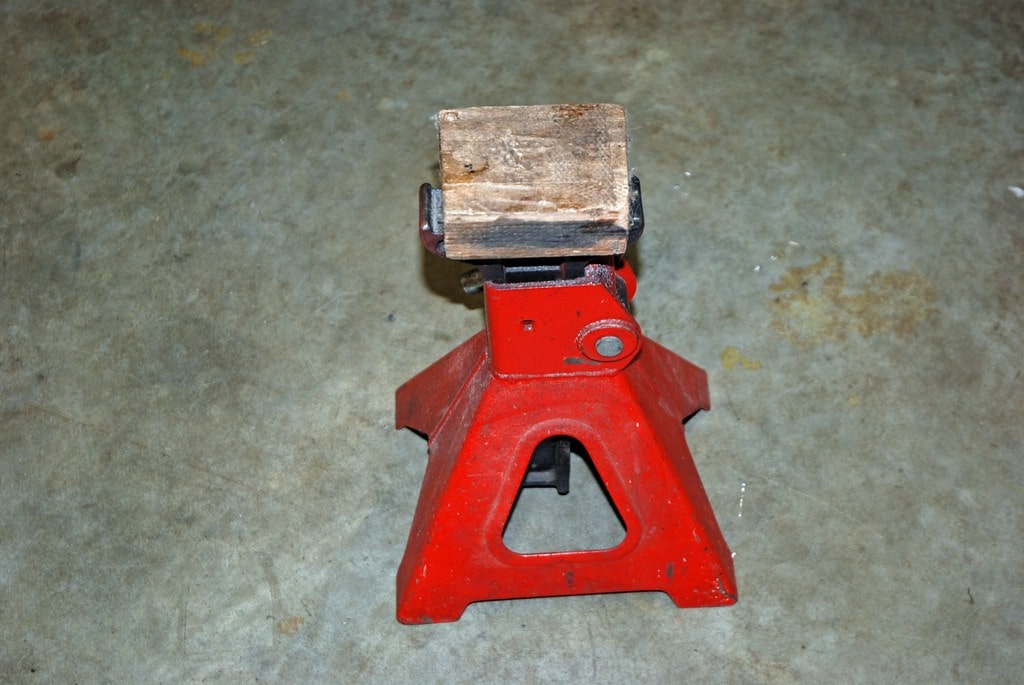
47. AXLE PADS
If you use axle stands under frame rails, you’ll quickly find they do a good job of marring the frame finish. A quick fix is to cut blocks from 2X4-inch wood so that they fit within the jaws of the axle stand. They’re cheap, they’re easy to slip into place and when you don’t need them, they’re easy to remove.
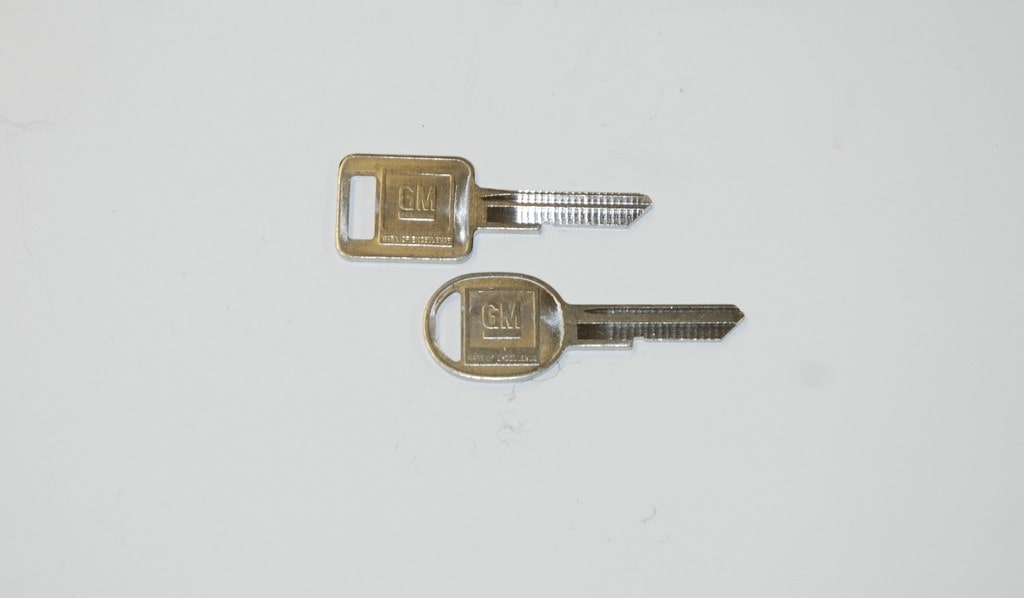
48. KEYED FOR SUCCESS
Do you ever think about the keys you use in your Chevy or other GM musclecar? It might be a pet peeve, but handling generic department store keys or using worn out originals seems so wrong when the rest of the car is completely restored. Fortunately, you can purchase replacement keys for early model musclecars and GM keys for later examples. They’re not cut, so you’ll obviously need to take them to a locksmith or any good key shop to match your existing examples. By the way, early Chevys (up to and including some 1968 models) had a Briggs and Stratton style key with a small hex for the ignition and a round key for the trunk, while later models used a large rectangular ignition key with a large oval trunk key.
49. FAN DANGLED
Typically there is a lot of interchange between first generation Camaros and ’68-72 Novas. One place where they differ is the cooling fan. The reason is that engine compartments are shorter in a Nova compared to a Camaro. Clutch fans were not used on 1969 and later big block Novas (these cars all had “long” water pumps). Instead, the Nova fan was spaced out very slightly. This is why air conditioning was not available on factory built big block Novas (there’s not enough clearance for a clutch fan).
50. PUMP IT UP
Once you’ve replaced a set of brake pads, be sure to pump the brake pedal a couple of times. This will extend the brake caliper pistons and firm up the pedal.
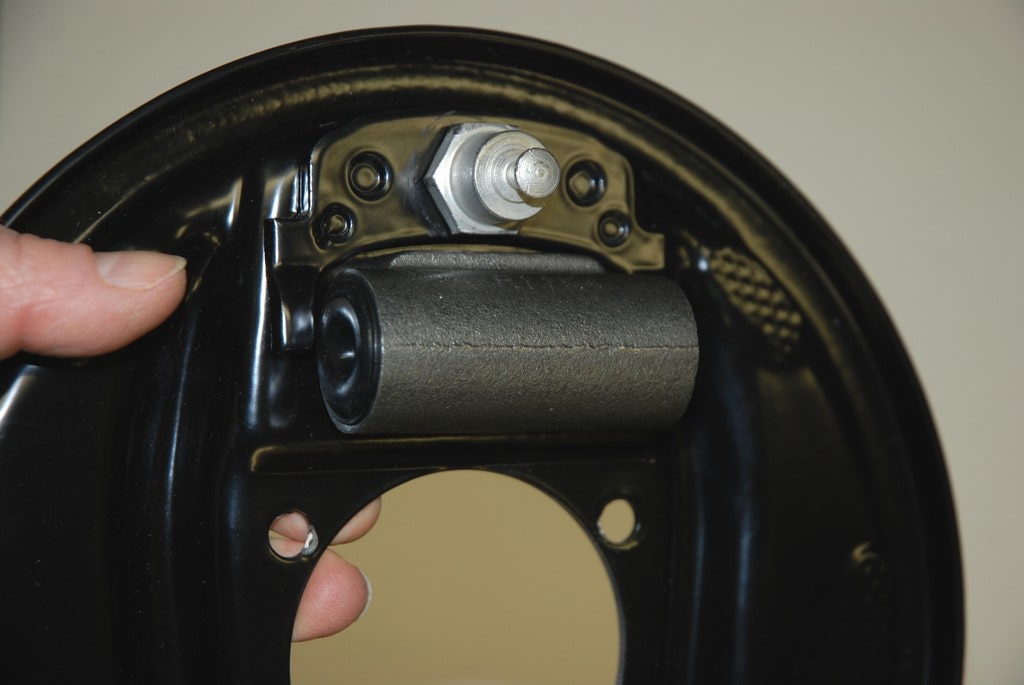
51. STORAGE PUMP
Speaking of pumping, if you have a car in long-term storage, it’s a good idea to pump the brake pedal occasionally. This keeps the wheel cylinders and the caliper pistons lubricated. It also ensures the rubber cups don’t become unsealed from the respective bore walls.
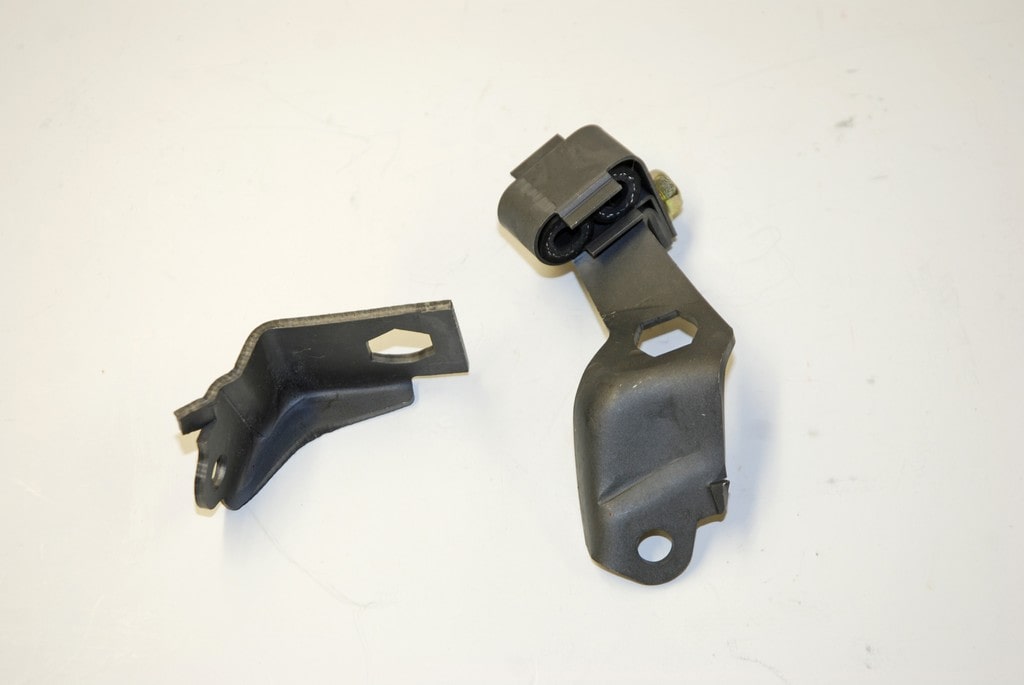
52. MISSING IN ACTION
Missing in many old cars are the correct brake hose brackets. These brackets bolt to the frame at the point where the brake hose and the brake line connect. Stock brackets keep the lines and hoses in the appropriate location, and that usually translates into “safe.” Fortunately, the restoration aftermarket has stepped up and high quality reproductions such as these are readily available.
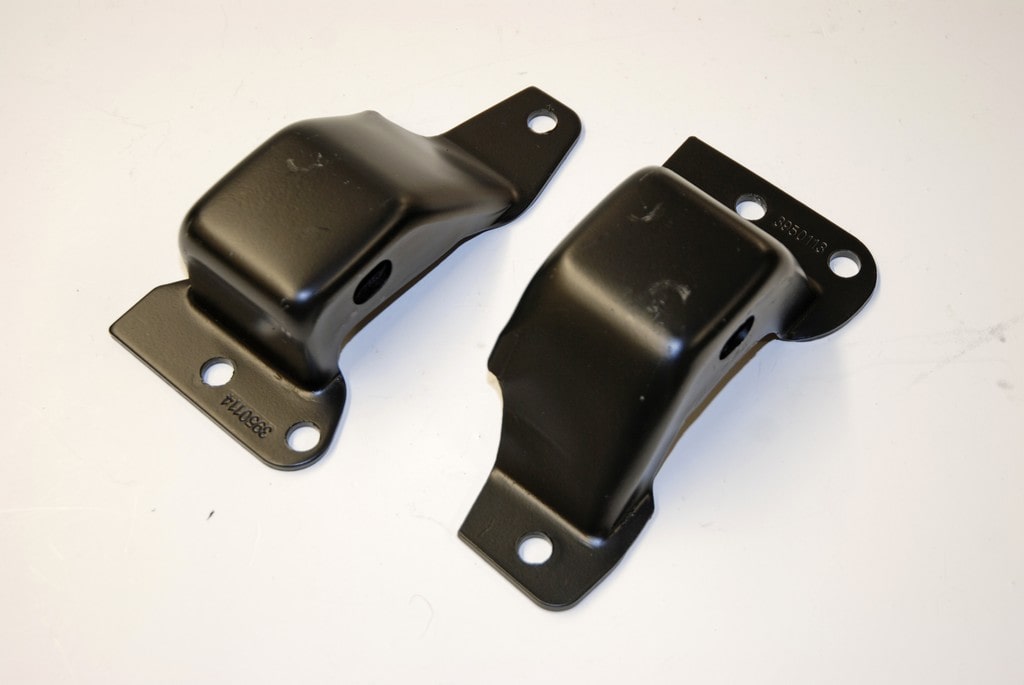
53. FRAME MOUNT CONFUSION
Chevy used three different engine frame mount combinations on first gen Camaros and ’68 to ’72 Novas. Those combinations had variations too. For example, there were six-cylinder mounts, small block mounts and big block mounts. Certain 1967 Camaro and 1968 Camaro/Nova mounts differ from 1969 mounts. Any of the engines physically fit any of the mounts, but the location and "angle" of the engine changes. Big block frame mounts have height differences between left and right sides. They also place the engine slightly further forward in the engine compartment and move it toward the passenger side.
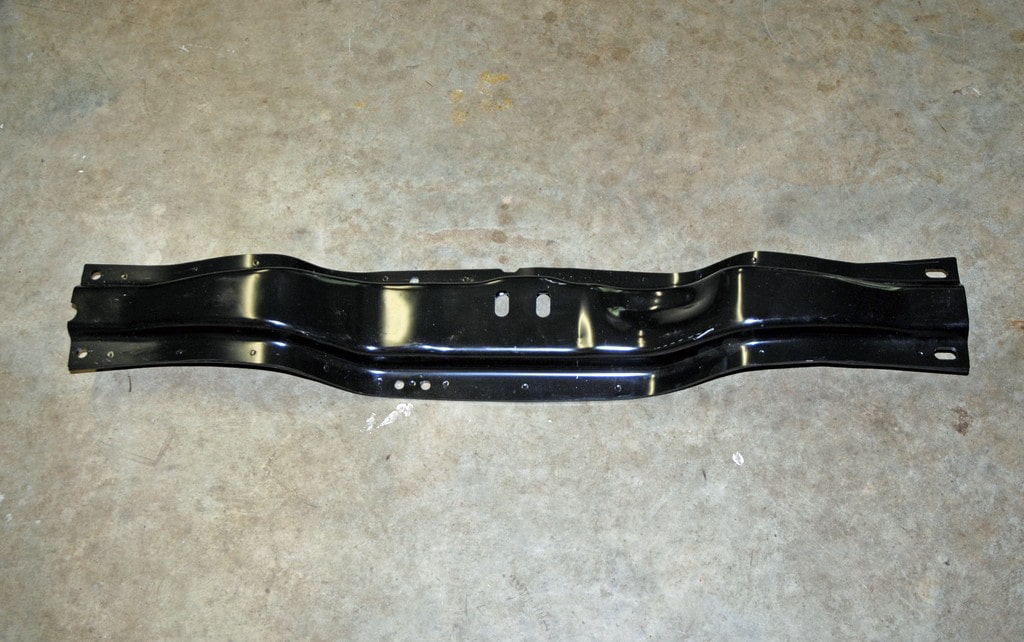
54. TRANSCENDENTAL MOVEMENT
Since OEM rat motor mounts offset the engine to the passenger side, the transmission must also be offset slightly. This 4-speed cross member for a big block is a good example. You can physically see the offset in the mounting location. By the way, this is a Classic Industries reproduction.
55. JUST IDLING
Worn idler arms cause front end steering shimmy and can negate the responsive “feel” the steering demonstrates. So what’s the point? Never overlook the idler arm when it comes to steering maladies.
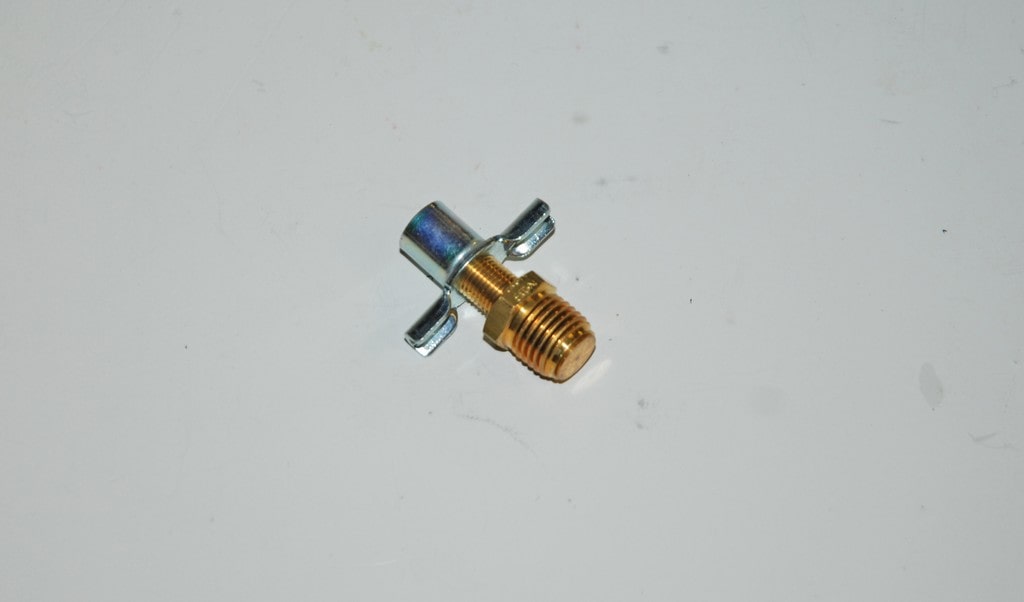
56. HOT BLOCKS
Draining a Chevy (or other engine with a similar arrangement) cylinder block for storage or before tear down can sometimes prove aggravating. The factory just sticks a common pipe plug in the water jacket core. More times than not, the pipe plug hex head will become rounded and you'll have to resort to a set of heavy duty vise grips to break the thing loose. To make matters worse, the plug is normally in a hard to reach (and often searing hot) location. To ease the water drain pain, swap the pipe plugs for a set of common rad drain petcocks. Draining the water is now a simple flick of the wrist task.
57. TALKING TORQUE
Once you’ve installed a new set of control arm bushings, don’t be tempted to torque the hardware in place while the car is suspended on axle stands. If you do, the bushings will be preloaded when the car is returned to the shop floor. The correct method is to drop the car to the ground first, then tighten the bushings to specs. The car will handle better and the life of the bushings will be extended.


![[Gallery] Street Rodders for Life Memorial Day Car Show](https://www.racingjunk.com/news/wp-content/uploads/2026/06/Memorial-day-show_0198-376x206.jpg)
![[Gallery] Townsman Car Show](https://www.racingjunk.com/news/wp-content/uploads/2026/05/916_2843-e1780072552171-376x206.jpg)

Leave a Reply