Other than putting the tires back on and adjusting the suspension, this is the last step of the process.
Set the Rear Ride Height
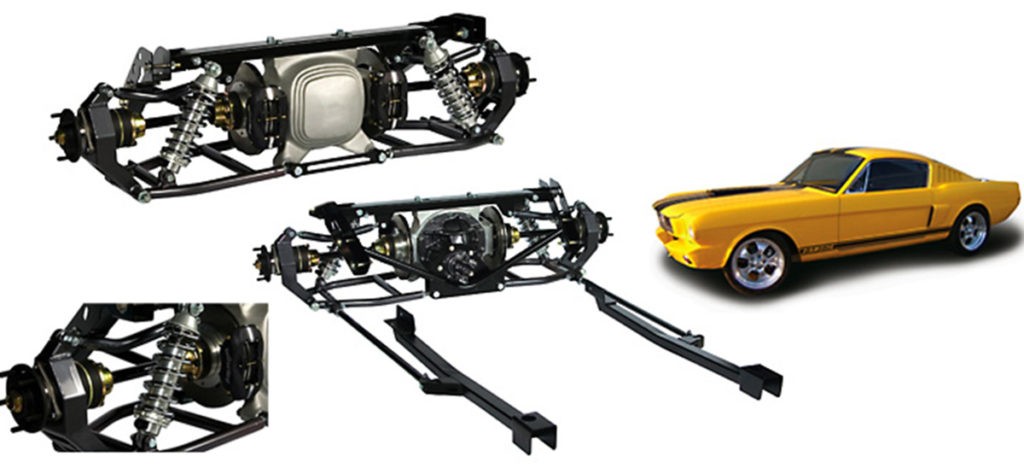
I like to either lower the wheels onto blocks or lower the control arms on jack stands for this step. If you’ve got a rack or, even better, an alignment rack to do your work on, you can simply lower the rear wheels onto the rack. Rear ride is set by making sure that the rear suspension is loaded exactly like it would be when driving and then adjusting the big spanner nuts on the bottom of the coilovers until the ride height is set to either what you measured in the first steps above, or to the new, lower ride height you’re looking for. Once the ride height is where you want it, lock the spanners with the lock nut and set screws.
Adjusting the Rear Alignment
Adjusting the rear alignment is easier with the wheels off than it is with the wheels on, unless you have an alignment rack with skid plates to allow the wheels to move. Caster should be set to zero. In other words, the two points on the upright where the control arms mount to the upright should be as perfectly lined up on the vertical as you can get them. Caster is adjusted by using the lower forward adjustable rods. Exposing more threads pushes the lower control arm back, and exposing fewer threads pulls it forward. Lock down the jam nut when finished.
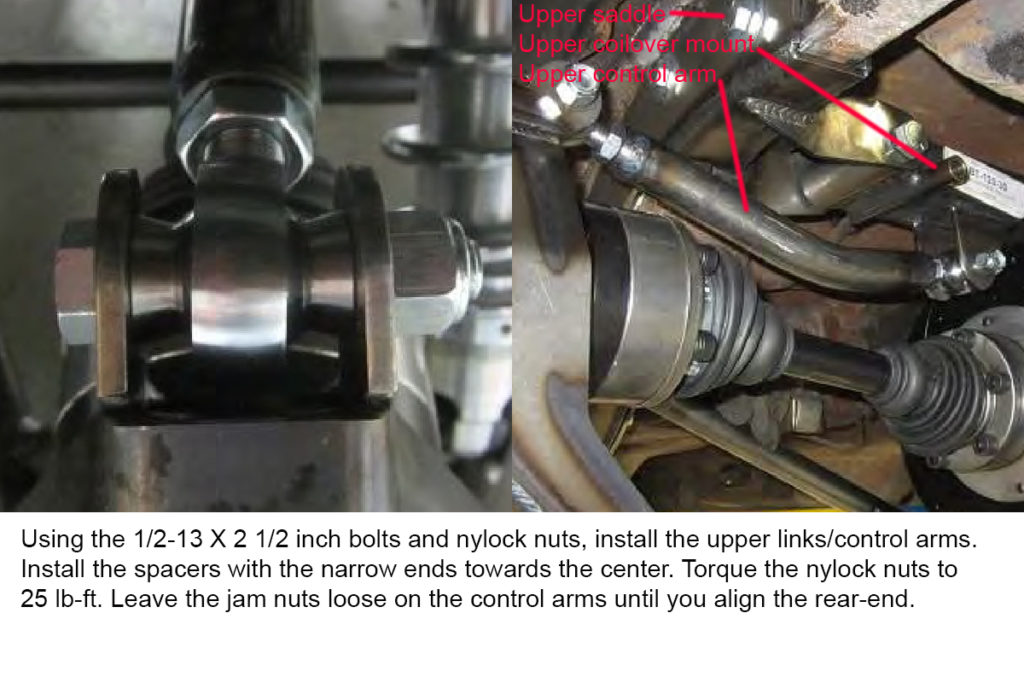
You want the camber, the angle off the vertical of the rear uprights, to be as close to zero degrees, vertical, as you can get it. This is adjusted using the adjusters on the upper and lower control arms. Rotating the adjuster sleeve on the upper arm so the arm collapses and fewer threads are visible will pull the upper part of the upright and make the camber angle go negative.
Camber and toe are adjusted using the adjusters on the lower control arms. Turning the front adjuster so more threads are exposed will give more toe-out, while turning the rear adjuster so more threads are exposed gives more toe-in. Toe should be set to zero to 1/16 inch toe-in. When adjusting toe, be sure to turn the two lower adjusters an equal amount in opposite directions. This will cause the effect their adjustment has on camber to be negligible. Once camber and toe are properly set, lock down the jam nuts.
Once you’ve got the car back on the ground, take it out for an increasingly hot test drive. Start slowly and safely so you can react if the suspension does anything funny or unexpected. After about 500 miles, go back and recheck the alignment and ride height and retighten everything.





![[Gallery] IOLA Car Show & Swap Meet](https://www.racingjunk.com/news/wp-content/uploads/2026/08/IMG_5599-e1787944233786-376x206.jpg)

For Pete’s sake RJ, Either FIX the problems with your site displaying pictures, or better yet, get rid of this aggravating slideshow format and just write a darned article with some embedded pics.
What’s the issue you’re having with images?
Thanks for the response.
It’s not just your articles, it’s all of these slideshow galleries on the RJ site.
It will display the first couple pics, then the next ones are blank.
I can usually get them to display by switching to full screen, but then when I advance a few more it does it again, until I switch back out of full screen.
I have the same problem with the galleries in RJ ads.
I run the latest version of Firefox, which works great on most other sites.
Ugh – just stick a Mark VIII/ Tbird or even a Jag IRS! Almost straight bolt- on and less headaches!
Looks like a Jag rear with inboard disk brakes. 9″ rear strength with Jag handling would be a huge improvement!