

![[Gallery] 3rd. Annual Father's Day Classic Car Show](https://www.racingjunk.com/news/wp-content/uploads/2026/07/Calistoga-2026-18-scaled-e1783026475349-376x206.jpg)

![[Gallery] Blackhawk Museum Stop Over](https://www.racingjunk.com/news/wp-content/uploads/2026/06/DSC_0918-e1782449621944-376x206.jpg)
Hurst Roll Control Set Up and Install Part 2
Click Here to Begin Slideshow
In our last issue, we took a look at how a Hurst Roll Control works and how to plumb it. The plumbing is obviously important, but you simply cannot ignore the fact that electricals are essential too. Hurst includes a very easy to follow electrical diagram with their kit. Here’s the basics:
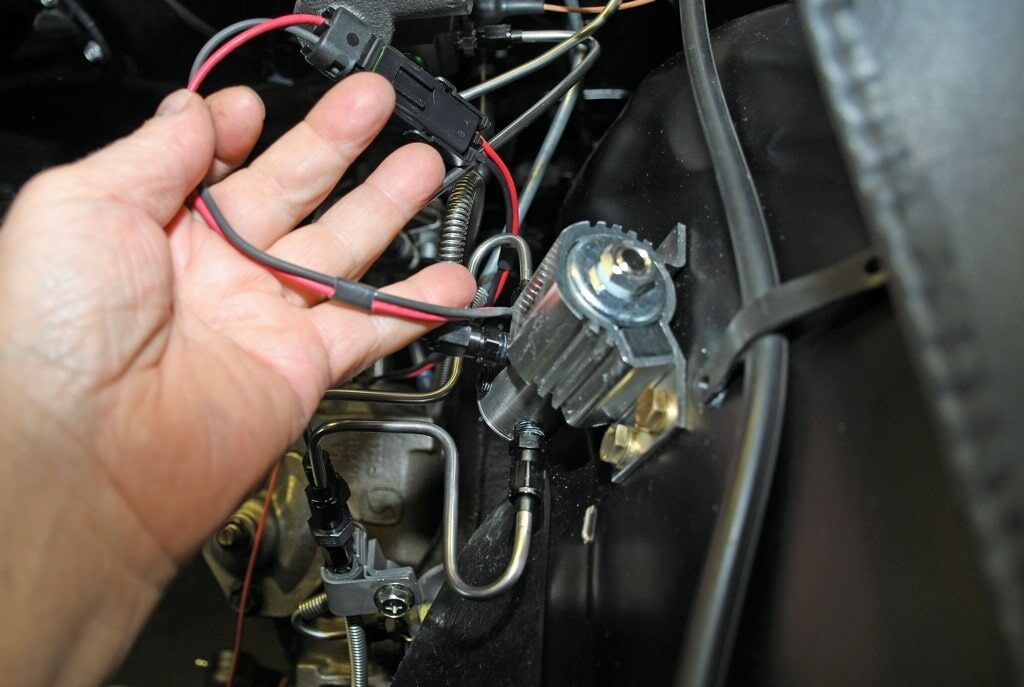
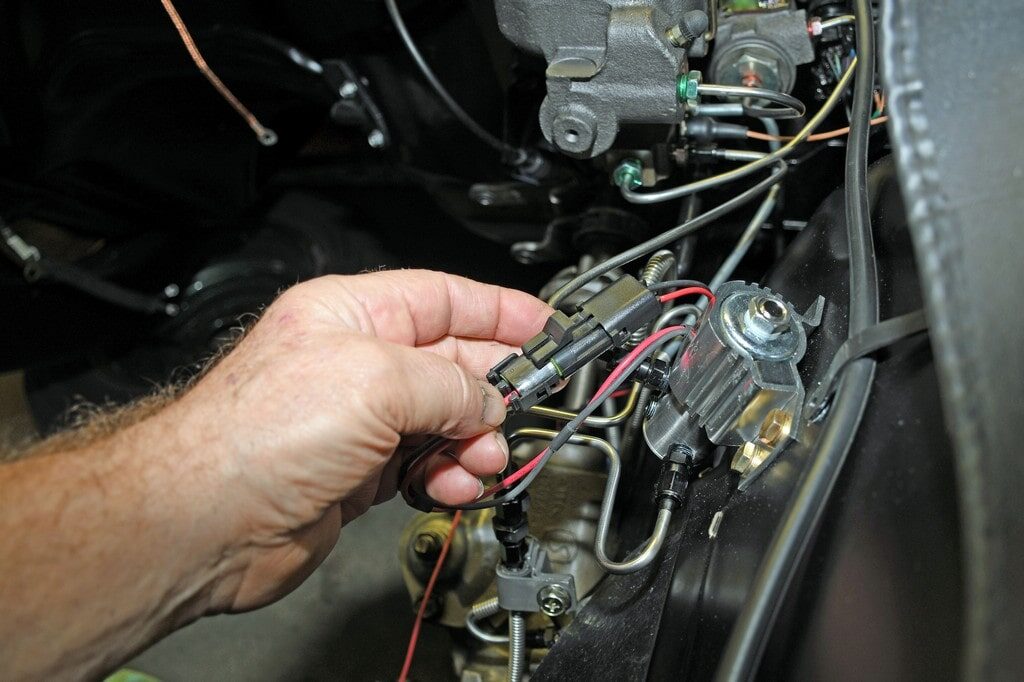
The electrical hookup on a Roll Control isn’t difficult, but it will take some time to route the wires. Electrical wiring obviously has to start and end somewhere. The place to begin is the solenoid. Hurst Roll Control assemblies have a pair of wires that originate from the solenoid. The red wire is "hot" and eventually goes to the switch. That wire branches off to the warning lamp, which in turn is grounded to the instrument panel. Once the wire goes to the switch, it returns back to the fuse panel.
Most automotive fuse panels already have provisions for such accessory installations. Virtually all sixties, seventies and later fuse panels will have a readily marked spare "LPS" terminal, a spare "BATT" terminal and a spare "ACC" terminal. Use the spare spade terminal on the ACC side. “ACC” stands for accessory. It’s hot when the ignition switch is clicked to "ACC" or "ON" when the vehicle is running.
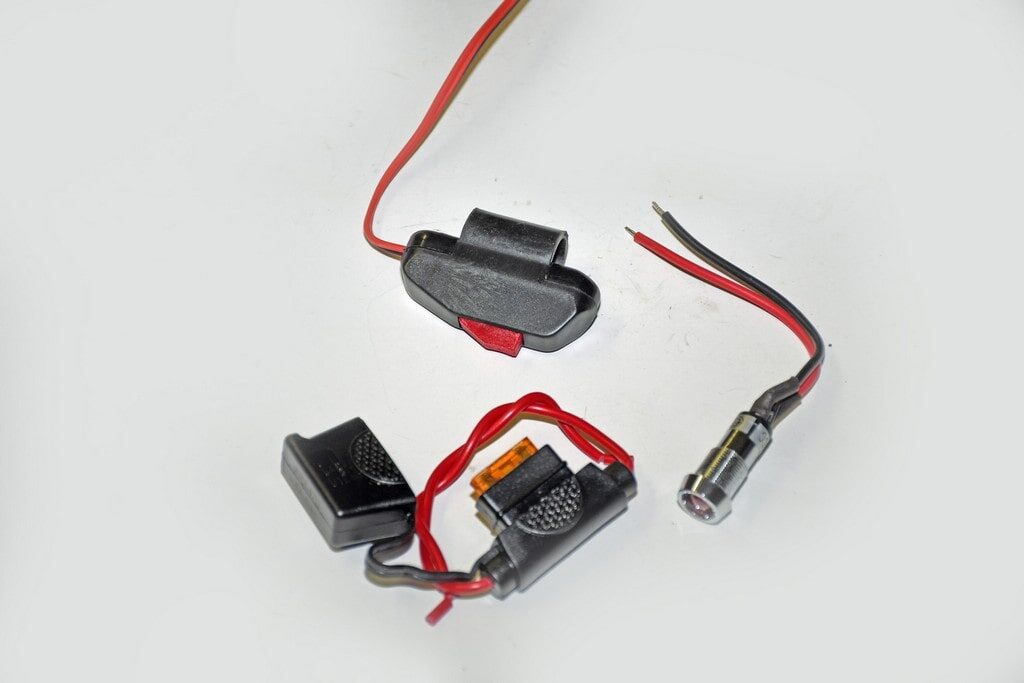
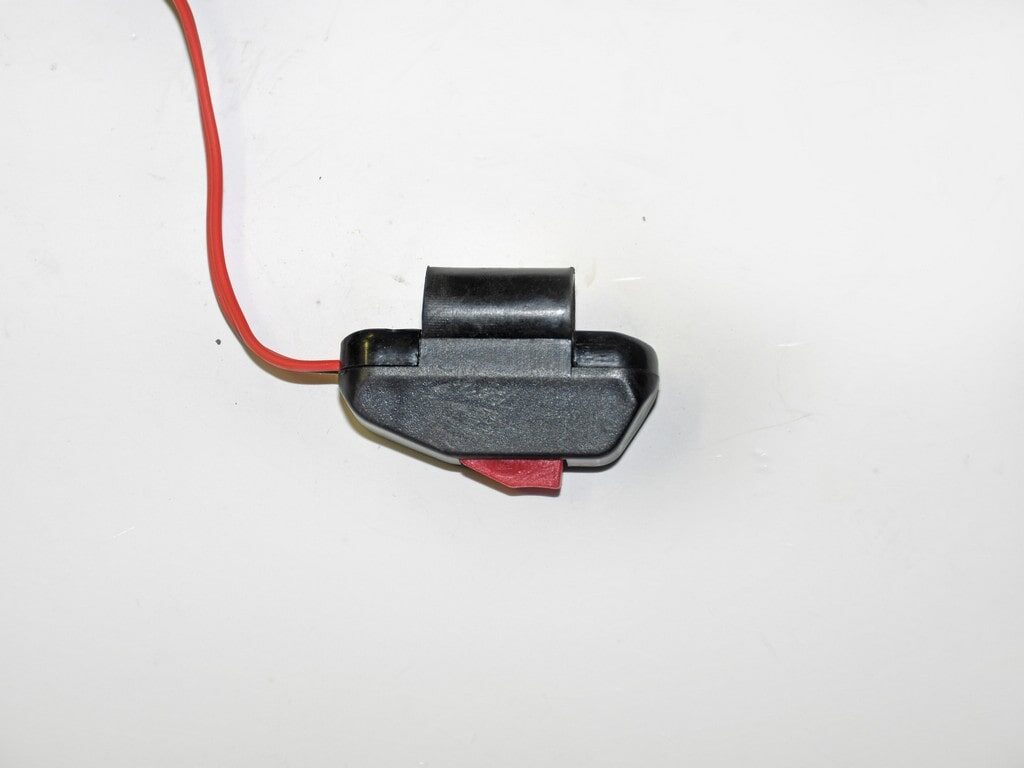
If you choose not to use the OEM fuse panel, Hurst supplies you with a cool fully enclosed inline fuse arrangement. You simply wire it inline between the solenoid and the switch.
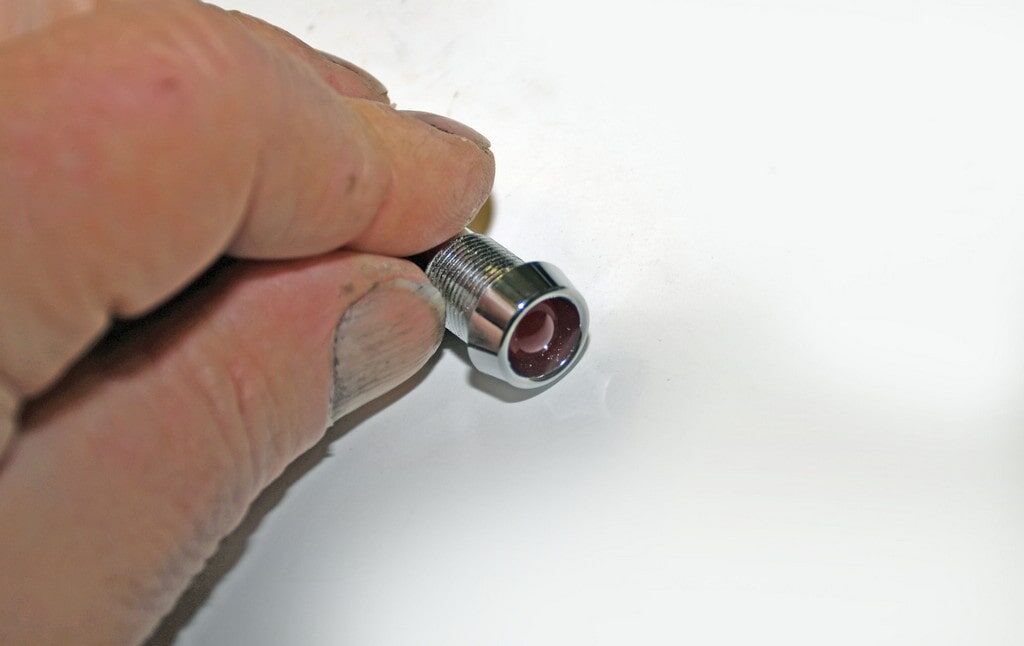
As mentioned above, Hurst includes a red “ON” indicator lamp with the system. This is important. Use it! A few cars ago, I was finishing the installation of a Roll Control. I inadvertently damaged the indicator lamp (don’t ask!) so I thought it would be pretty easy to get a replacement or, at least, a reasonable facsimile. So off I went to the local auto parts store/sort of speed shop. The young guy at the counter asked what I wanted the indicator lamp for (none of his biz, but that’s another story). I answered him and he broke out laughing: “No one installs those things.” Grrr (you have to remember I’m a grizzled old car guy). I painted a mental picture of him as naïve and promptly told him so. The reality is, the last thing you need is to accidentally engage the roll control when you’re on the brakes at the big end of the track (momentarily release the foot brake with your finger on the switch, and you know what happens next). The warning lamp is there for good reason!
The good news is, lamp wiring is basic – the lamp is spliced between the wire leading from the solenoid valve and the activation switch. Once wired, whenever the system is engaged, the roll control light comes on. Finally, you should be certain that the ground is adequate. In many applications, the roll control valve is mounted to a metal inner fender. If that's the case, it’s possible to simply ground it directly to the fender using one of the roll control mounting screws. One way or another be sure the ground connection is sound and clean. You’re done.
In our last issue, we took a look at how a Hurst Roll Control works and how to plumb it. The plumbing is obviously important, but you simply cannot ignore the fact that electricals are essential too. Hurst includes a very easy to follow electrical diagram with their kit. Here’s the basics:
The electrical hookup on a Roll Control isn’t difficult, but it will take some time to route the wires. Electrical wiring obviously has to start and end somewhere. The place to begin is the solenoid. Hurst Roll Control assemblies have a pair of wires that originate from the solenoid. The red wire is "hot" and eventually goes to the switch. That wire branches off to the warning lamp, which in turn is grounded to the instrument panel. Once the wire goes to the switch, it returns back to the fuse panel.
Most automotive fuse panels already have provisions for such accessory installations. Virtually all sixties, seventies and later fuse panels will have a readily marked spare "LPS" terminal, a spare "BATT" terminal and a spare "ACC" terminal. Use the spare spade terminal on the ACC side. “ACC” stands for accessory. It’s hot when the ignition switch is clicked to "ACC" or "ON" when the vehicle is running.
If you choose not to use the OEM fuse panel, Hurst supplies you with a cool fully enclosed inline fuse arrangement. You simply wire it inline between the solenoid and the switch.
As mentioned above, Hurst includes a red “ON” indicator lamp with the system. This is important. Use it! A few cars ago, I was finishing the installation of a Roll Control. I inadvertently damaged the indicator lamp (don’t ask!) so I thought it would be pretty easy to get a replacement or, at least, a reasonable facsimile. So off I went to the local auto parts store/sort of speed shop. The young guy at the counter asked what I wanted the indicator lamp for (none of his biz, but that’s another story). I answered him and he broke out laughing: “No one installs those things.” Grrr (you have to remember I’m a grizzled old car guy). I painted a mental picture of him as naïve and promptly told him so. The reality is, the last thing you need is to accidentally engage the roll control when you’re on the brakes at the big end of the track (momentarily release the foot brake with your finger on the switch, and you know what happens next). The warning lamp is there for good reason!
The good news is, lamp wiring is basic – the lamp is spliced between the wire leading from the solenoid valve and the activation switch. Once wired, whenever the system is engaged, the roll control light comes on. Finally, you should be certain that the ground is adequate. In many applications, the roll control valve is mounted to a metal inner fender. If that's the case, it’s possible to simply ground it directly to the fender using one of the roll control mounting screws. One way or another be sure the ground connection is sound and clean. You’re done.
Leave a Reply