

Photos by Wayne Scraba
We’ll pick up where we left last issue: Recall we mentioned that brakes are one of those things that are out of sight and out of mind? Honestly, that can turn into a worst-case scenario. Brakes are important. And it’s also important to keep them in tip-top shape. The tips we provided last issue and below go a long way toward alleviating brake system pain. Check out the following and please stay tuned. We’ll have more tips next time around. Watch for it.
Tip 13 – PEDAL PUSHERS: We’ve all seen other folks do it, and we’re probably just as guilty as the next guy. What are we talking about? Pumping the brake pedal in an attempt to increase brake-holding power. But does this actually increase the brake line pressure? According to the pros, this practice doesn’t really change the pressure. If you have to pump the pedal to increase the holding power of the brakes, something has pushed the pistons back in the caliper (run out in the rotor, a cocked caliper, bad mounts are all examples). Another common cause is air in the system. Bottom line? If you have to pump the brakes to hold a car still (or to stop it), something is wrong. Pumping the pedal does not build pressure, although it might eliminate pedal travel.
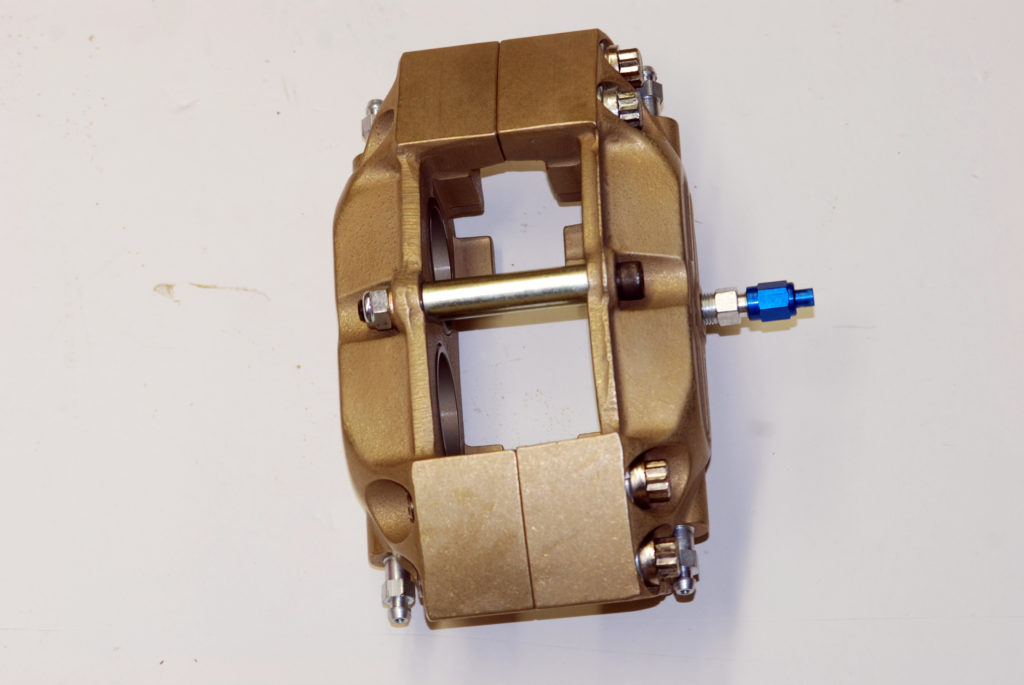
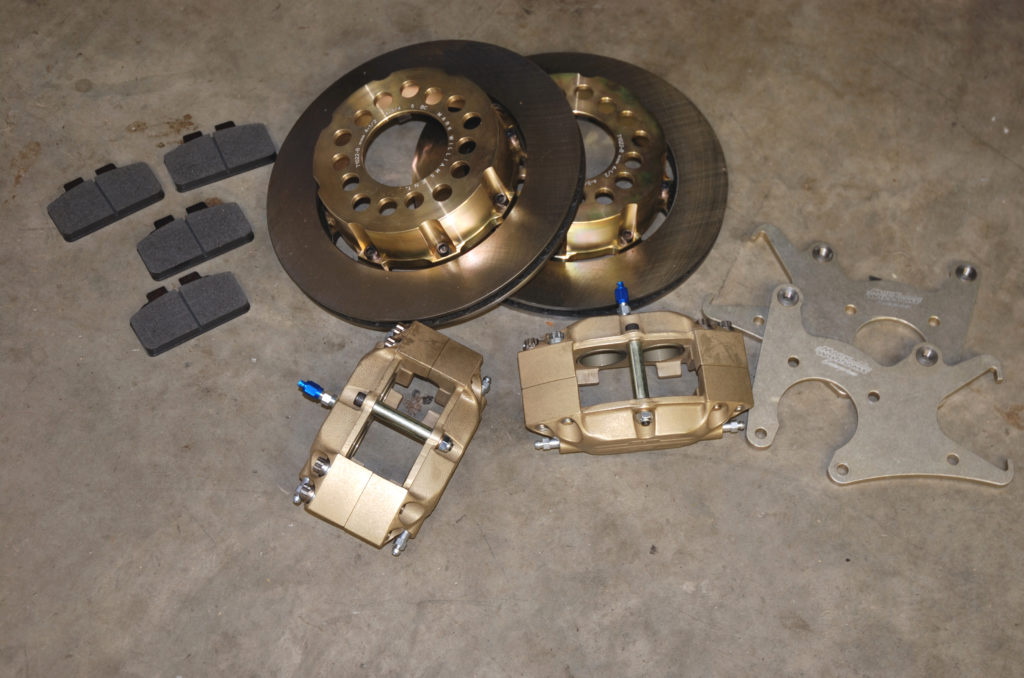
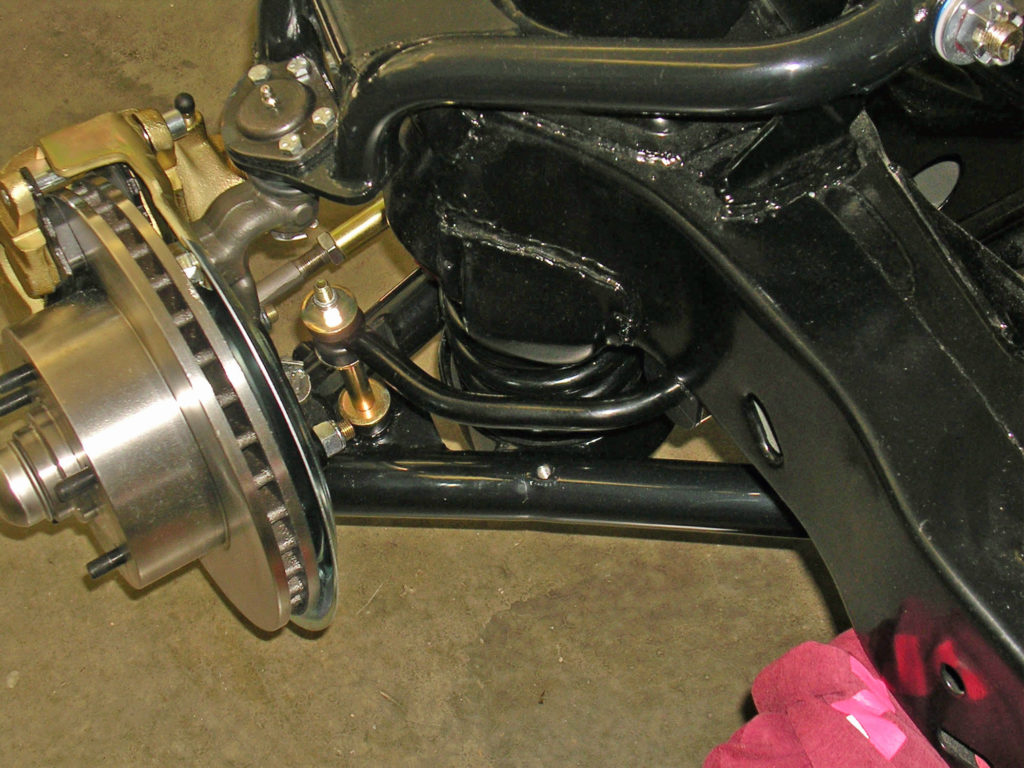
Tip 14 – ROCK SOLID: Caliper rigidity (and consequently, caliper flex) is critical in a brake system. If the body of the caliper flexes, then the “feel” in the pedal will be very soft. What’s happening is the caliper is cocking the pads. This leads to braking inconsistency (not good) and tapered pad wear (just as bad). According to brake manufacturer Mark Williams: “The most important characteristic for a caliper’s stopping ability is the bridge strength. The limiting strength factor for calipers of this type (fixed race-style calipers) is the fastener strength. All of the attention over material types (forged or billet) has little effect on the bridge strength. We use four 7/16″ diameter fasteners plus a support bushing to eliminate caliper flex”. Take a good look at this M-W caliper. It will never flex.
Tip 15 – HALF-BAKED E-BRAKE: Have you ever witnessed a car that rolled downhill, even when the emergency (park) brake was set? What was that all about? There are a few logical answers:
(a) The car has drum brakes on the rear.
(b) The car is not in gear.
(c) The car was parked with the nose pointing up a steep incline.
You can test your car by setting the e-brake than trying to back up. Most likely the car will back up with little more effort than usual, but if you try to go forward, it will not move. Here’s why: Park brakes are designed to keep most vehicles stationary while the vehicle is pointed down inclines or going forward. Park brake failure is usually not a big problem unless the car is parked on a steep incline (then it can definitely hurt). You can avoid this unpleasant situation by simply parking with the nose downhill and turning the wheels into the curb.
Tip 16 – BRAKE IN: Exactly how do you break in (or “bed in”) new brake pads? According to the manufacturers, this process “conditions” the pads and rotor surfaces. This bedding in procedure will result in greater performance, longer wear and less likelihood of rotor cracking due to thermal shock. There are plenty of theories out there, but for a street driven car, try this: In order to cure the pads, brake, then allow the pads to cool while driving at moderate speeds, avoiding use of the brakes. The idea behind this is to allow the pads to heat uniformly, and then cool uniformly. Braking hard without first curing the pads can prevent heat from dispersing consistently.
Tip 17 – FROZEN FACTS: Replacing a set of park brake cables in a car isn’t in most folk’s definition of fun. It’s certainly much more stimulating working on something like the engine. To avoid the drill of replacing rusted and/or frozen park brake cables, consider preventative maintenance. Every time you change the oil in the engine try squirting a wee bit of cable lube or even good old-fashioned penetrant into the park brake cable end. If a rubber boot covers the end of the cable assembly, pry the rubber back and inject the oil (or grease) into the cable. Typically, this small amount of maintenance will end frozen cable woes permanently.
Tip 18 – RIGHT SIDE UP: Some vented brake rotors are sided. Some aren’t. If they’re sided, this means they are only designed to fit the left- or the right-hand side of the vehicle. In these applications, the vents inside the rotor are curved so that they pick up and increase airflow through the rotor. In order to achieve maximum cooling performance, the vents must point rearward at the top of the rotor (contrary to what you might first think). There’s a reason for this: The rearward orientation allows centrifugal force to whirl air outward from the center of the rotor. This force creates superior airflow – producing even more airflow than a ram or scoop effect would if the rotors were reversed. If the rotors in your car are directional and they’re installed backwards, the brake pad lifespan can be shortened by half or more.

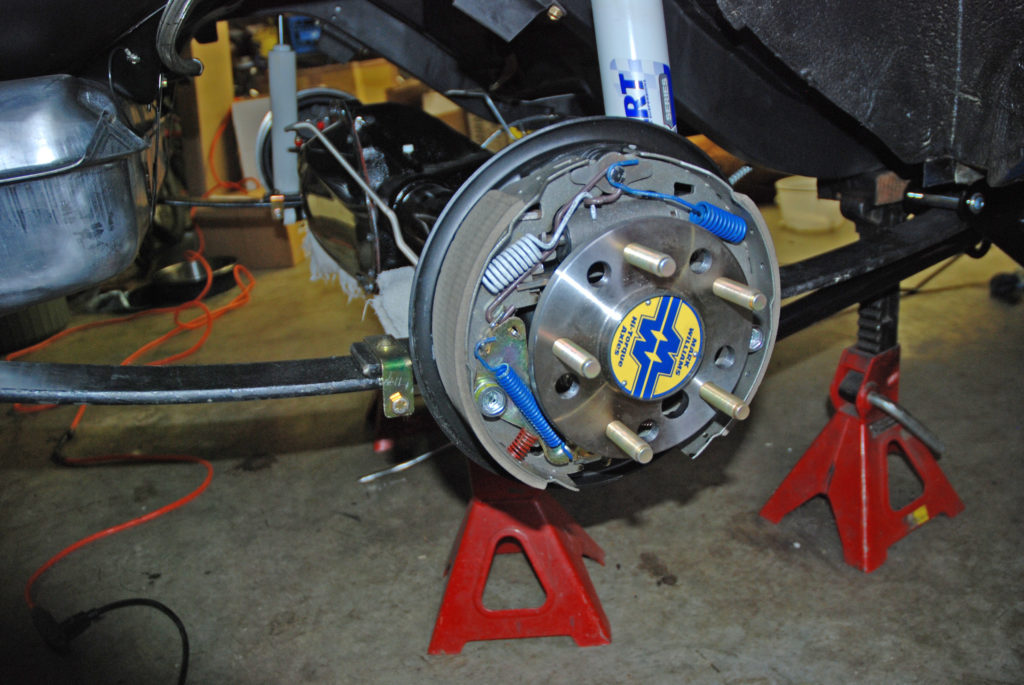
Tip 19 – SPECIAL OF THE WEEK: If you’re in the market for fresh backing plates for a vintage mid-size GM application and you just can’t scrounge up a set of backing plates, there’s no need to despair. Instead of searching for tough to find GTO, 4-4-2, Super Sport or Grand Sport backing plates, try looking under S10 pickups. They’re pretty much a direct replacement, right down to the same bolt pattern and the same bolt-in wheel cylinder setup. By the way, later model rear wheel drive GM G-Bodies (for example, Buick Grand Nationals) are equipped with similarly sized backing plates, but they incorporate a weaker, clip-in wheel cylinder.

Tip 20 – STREET SWEEPERS: Up close, you can see how grooves have been machined into this set of steel brake rotors. Why is this done? Simple. It provides an escape route for brake pad dust (which is inevitable whenever you apply the brakes). In an oval track or road race application, slots are often used to eliminate gas buildup between the rotor and the brake pad (which might cause brake fade), but this is seldom an issue in a street driven car application. The slots or grooves simply provide an escape route for the dust particles.
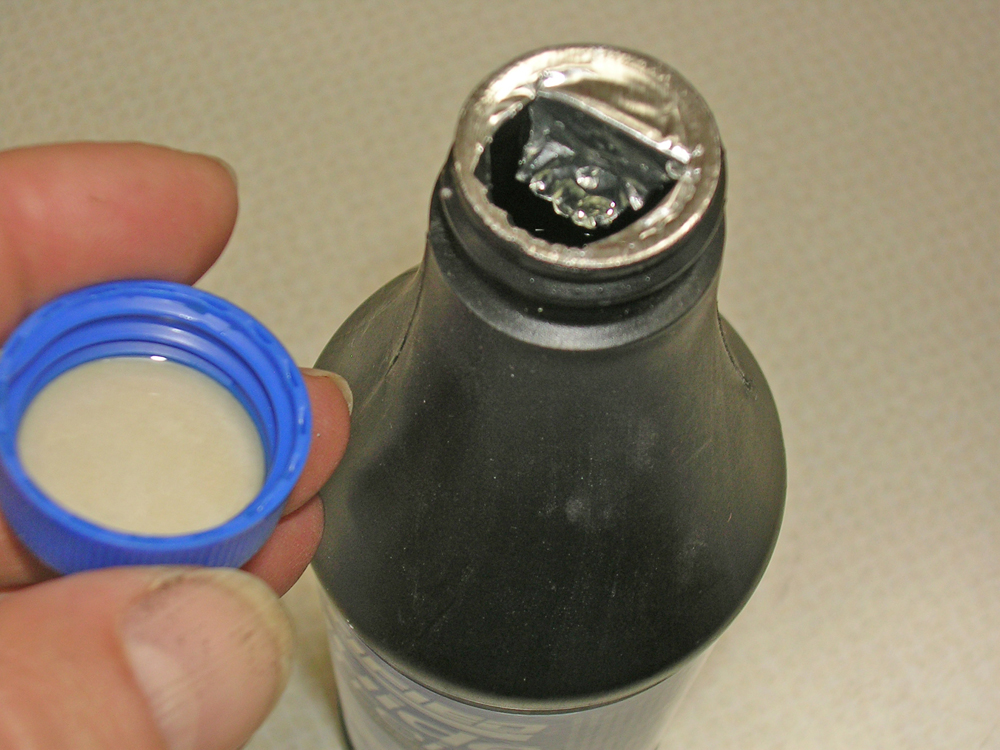
Tip 21 – FLUID FOLLIES: When it comes to brake fluid, there are plenty of considerations: Here’s some insight: Never mix brake fluid brands or types and make every effort possible to keep contaminants out of the brake fluid (as well as the brake system). Once the protective seal is broken on a can of brake fluid, use it immediately. Purchase brake fluid in small cans. Once the seal is broken in a larger container, moisture tends to collect which can lower the fluid boiling point and make it unsuitable for high performance applications. Reserve the use of silicone brake fluid for cars that are only driven periodically (such as collector cars or antiques). Finally, consider flushing out the old glycol fluid in your car’s braking system — replacing it with fresh racing brake fluid on a regular basis.

Tip 22 – BEHIND THE SHIELD: Something most of us take for granted is brake line shielding. Detroit made a practice of installing this stuff in any place where a metal (hard) line was vulnerable. In a modified car, it’s a good idea to use shielding for the same purpose. Is the stuff hard to find? Not at all. Plenty of restoration parts companies offer it in rolls. It’s not expensive. It fits 3/16-inch hard line. It looks pretty good and it’s easy to use (it slips on before you flare the ends). Try it. You won’t be sorry.
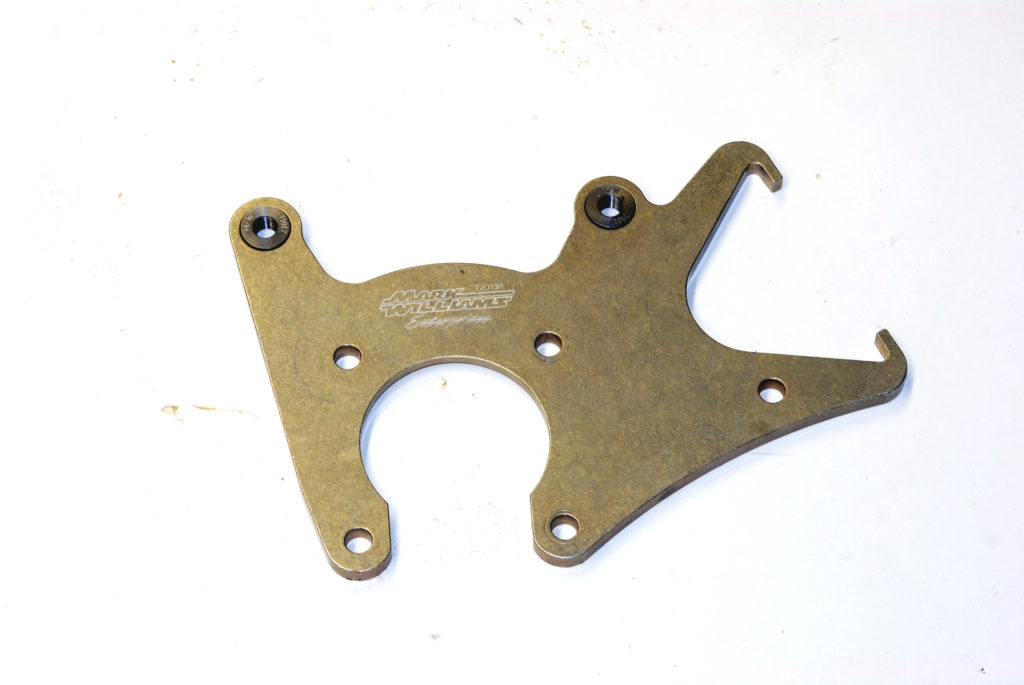
Tip 23 – MOUNT MALFUNCTIONS: Never take caliper mounting too lightly. If the caliper moves or flexes during operation (we’re talking about fixed calipers here, not floating configurations), then it can twist on the mount. If this occurs, the result is a spongy pedal, excessive pedal travel and uneven pad wear. A well-designed high performance caliper mount will be manufactured from high strength 7075-T6 aluminum material or equivalent. Keep that in mind if you’re building new custom mounts.
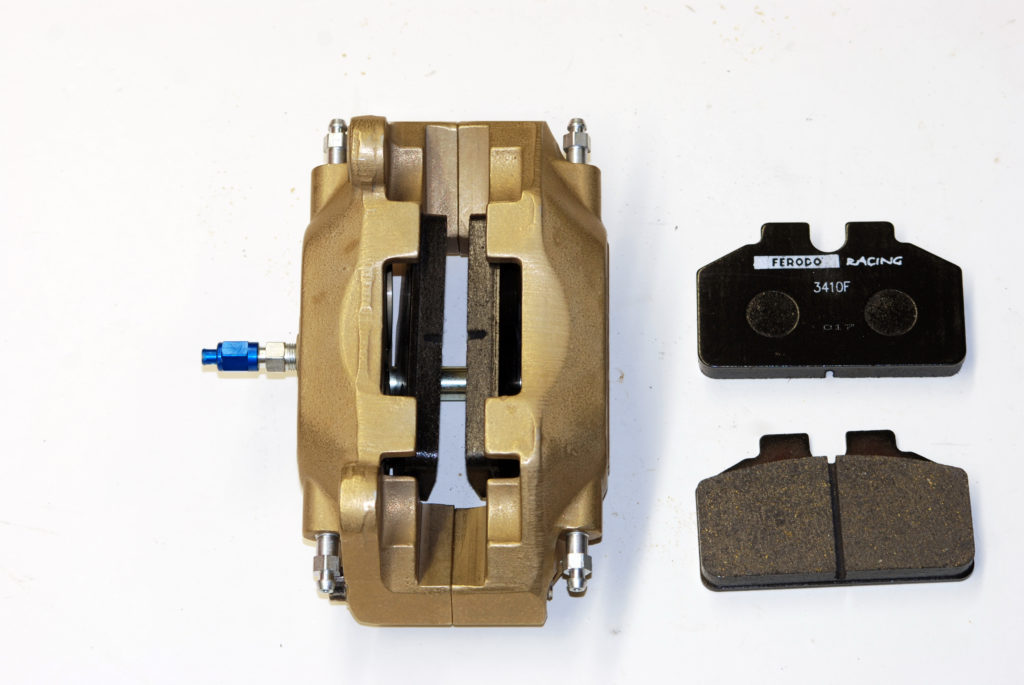
Tip 24 – PISTON PUSHER: If you’re in the middle of a pad change on a set of disc brakes, it’s often frustrating to find a piston that refuses to release (for example, the piston is stuck “out”). The result, of course, is a brake job that cannot be completed since there isn’t sufficient room to slip in the new pads. Most tool companies offer a dedicated caliper piston press, but they’re often expensive. Additionally, if you’re just a weekend rodder like most of us, then it’s an expensive tool that might be used once every couple of years. What’s the solution? Try a run-of-the-mill c-clamp. Affix it over the caliper body and tighten the clamp. If you need a spacer on the jaws of the c-clamp to allow it to reach the piston, a good old-fashioned socket works well. Once you tighten the c-clamp, the piston(s) will retract and you can easily slide in the new pads.
I have an extremely hard pedal. 98 camaro stock front brakes and willwood rear brakes. Not as good of brake stopping power as i would like. willwood 260-4894 1 1/16 MASTER CYLINDER. any suggestions???
Your car was originally a power brake car. If the power booster was removed and you converted it over to manual brakes, then the pedal ratio is wrong. While changing the overall length of the pedal is possible, it’s usually easier (and far more practical) to shorten the distance between the pivot point and the master cylinder pushrod mount location. That’s precisely how drag race chassis shops modify late model brake pedals for something like a Stock Eliminator car or SS car.