


![[Gallery] The Last Hot Rod Fall Out XX](https://www.racingjunk.com/news/wp-content/uploads/2026/04/DSC_8368-e1776446464704-376x206.jpg)

Shifting Accuracy With Precision Performance - Part 2
Click Here to Begin Slideshow
Last issue, we introduced you to the Precision Performance line of shifters. They’re a brilliant design and quality is fabulous. They offer a considerable number of options, they’re light, compact and at least by this writer’s book, they work and look great. Fair enough, but are they difficult to set up? The following will shed some light on the topic:
In the writer’s case, the engine and transmission were out of the car when the shifter was installed. This allowed for an easier shifter installation. Part of that is because I personally don’t like using big sheet metal screws to install a shifter. I much prefer using bolts, washers and nylock nuts to fasten a shifter. If you use screws, it won’t be as secure plus you always run the risk of slicing your skin if, for whatever reason, you need to get inside the tunnel. My car has a good size tunnel, and even with a big TH400, it’s still possible (but not really easy) to access the nylock nuts with the transmission in place.
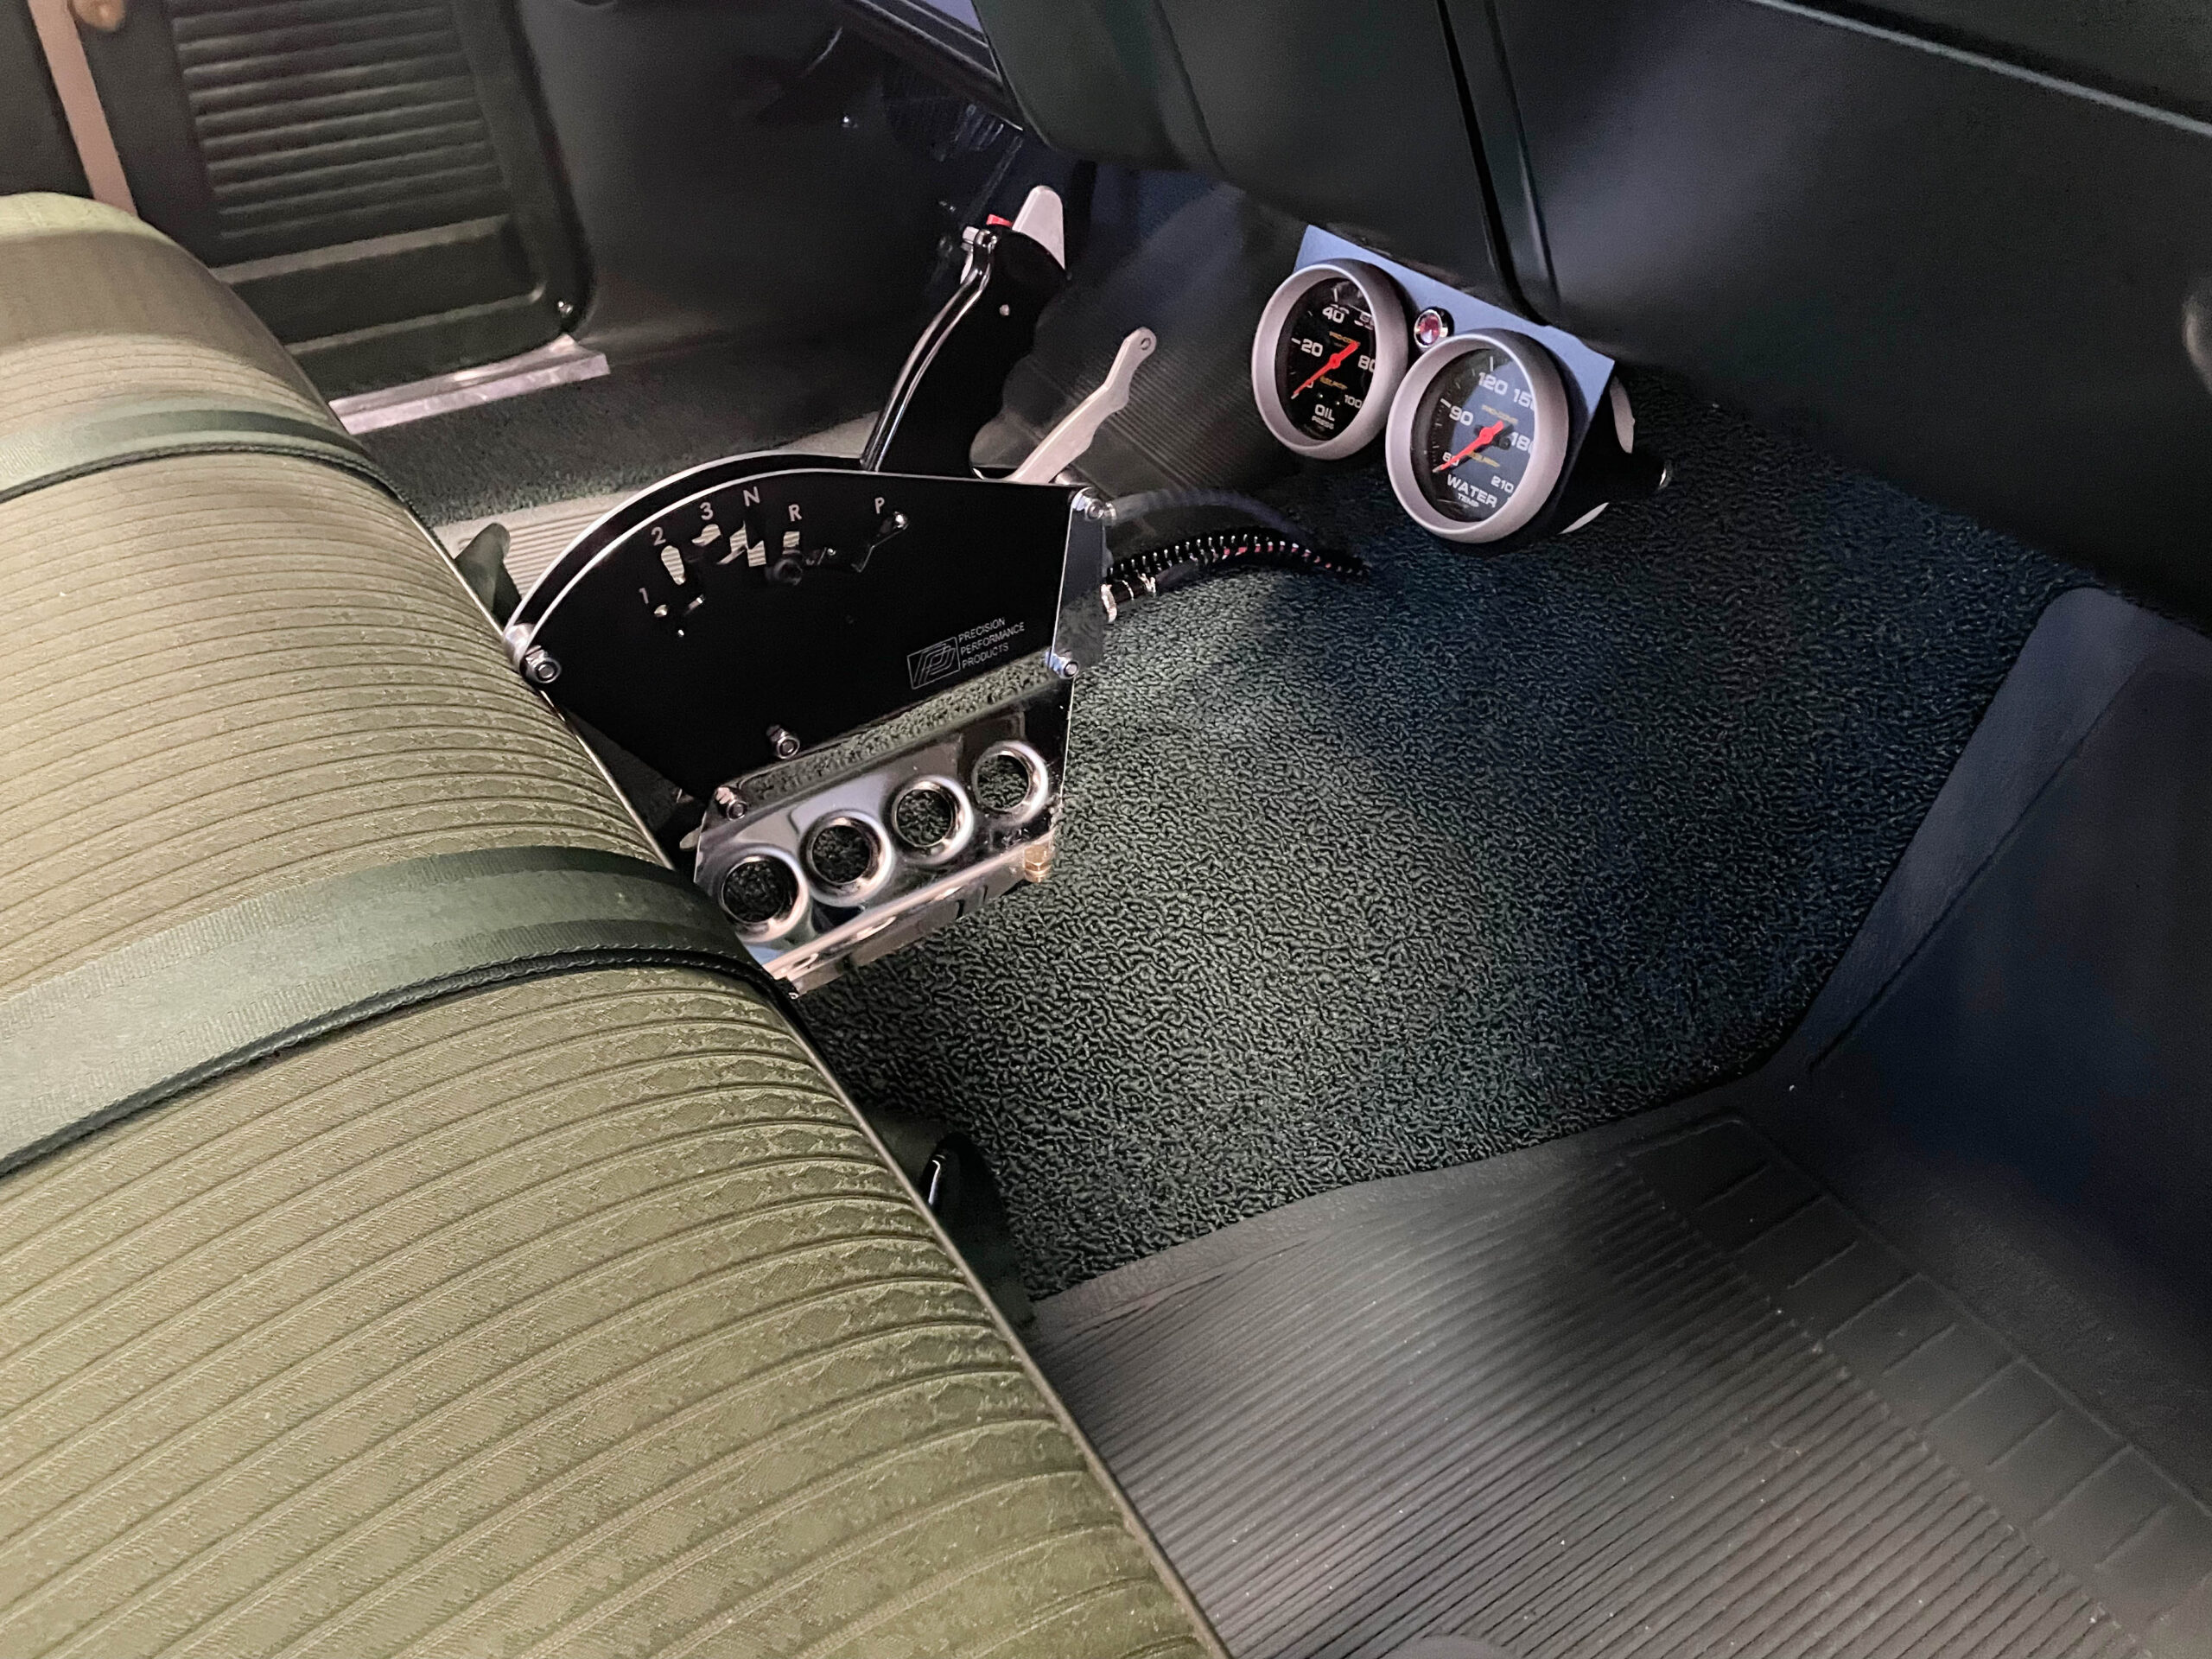
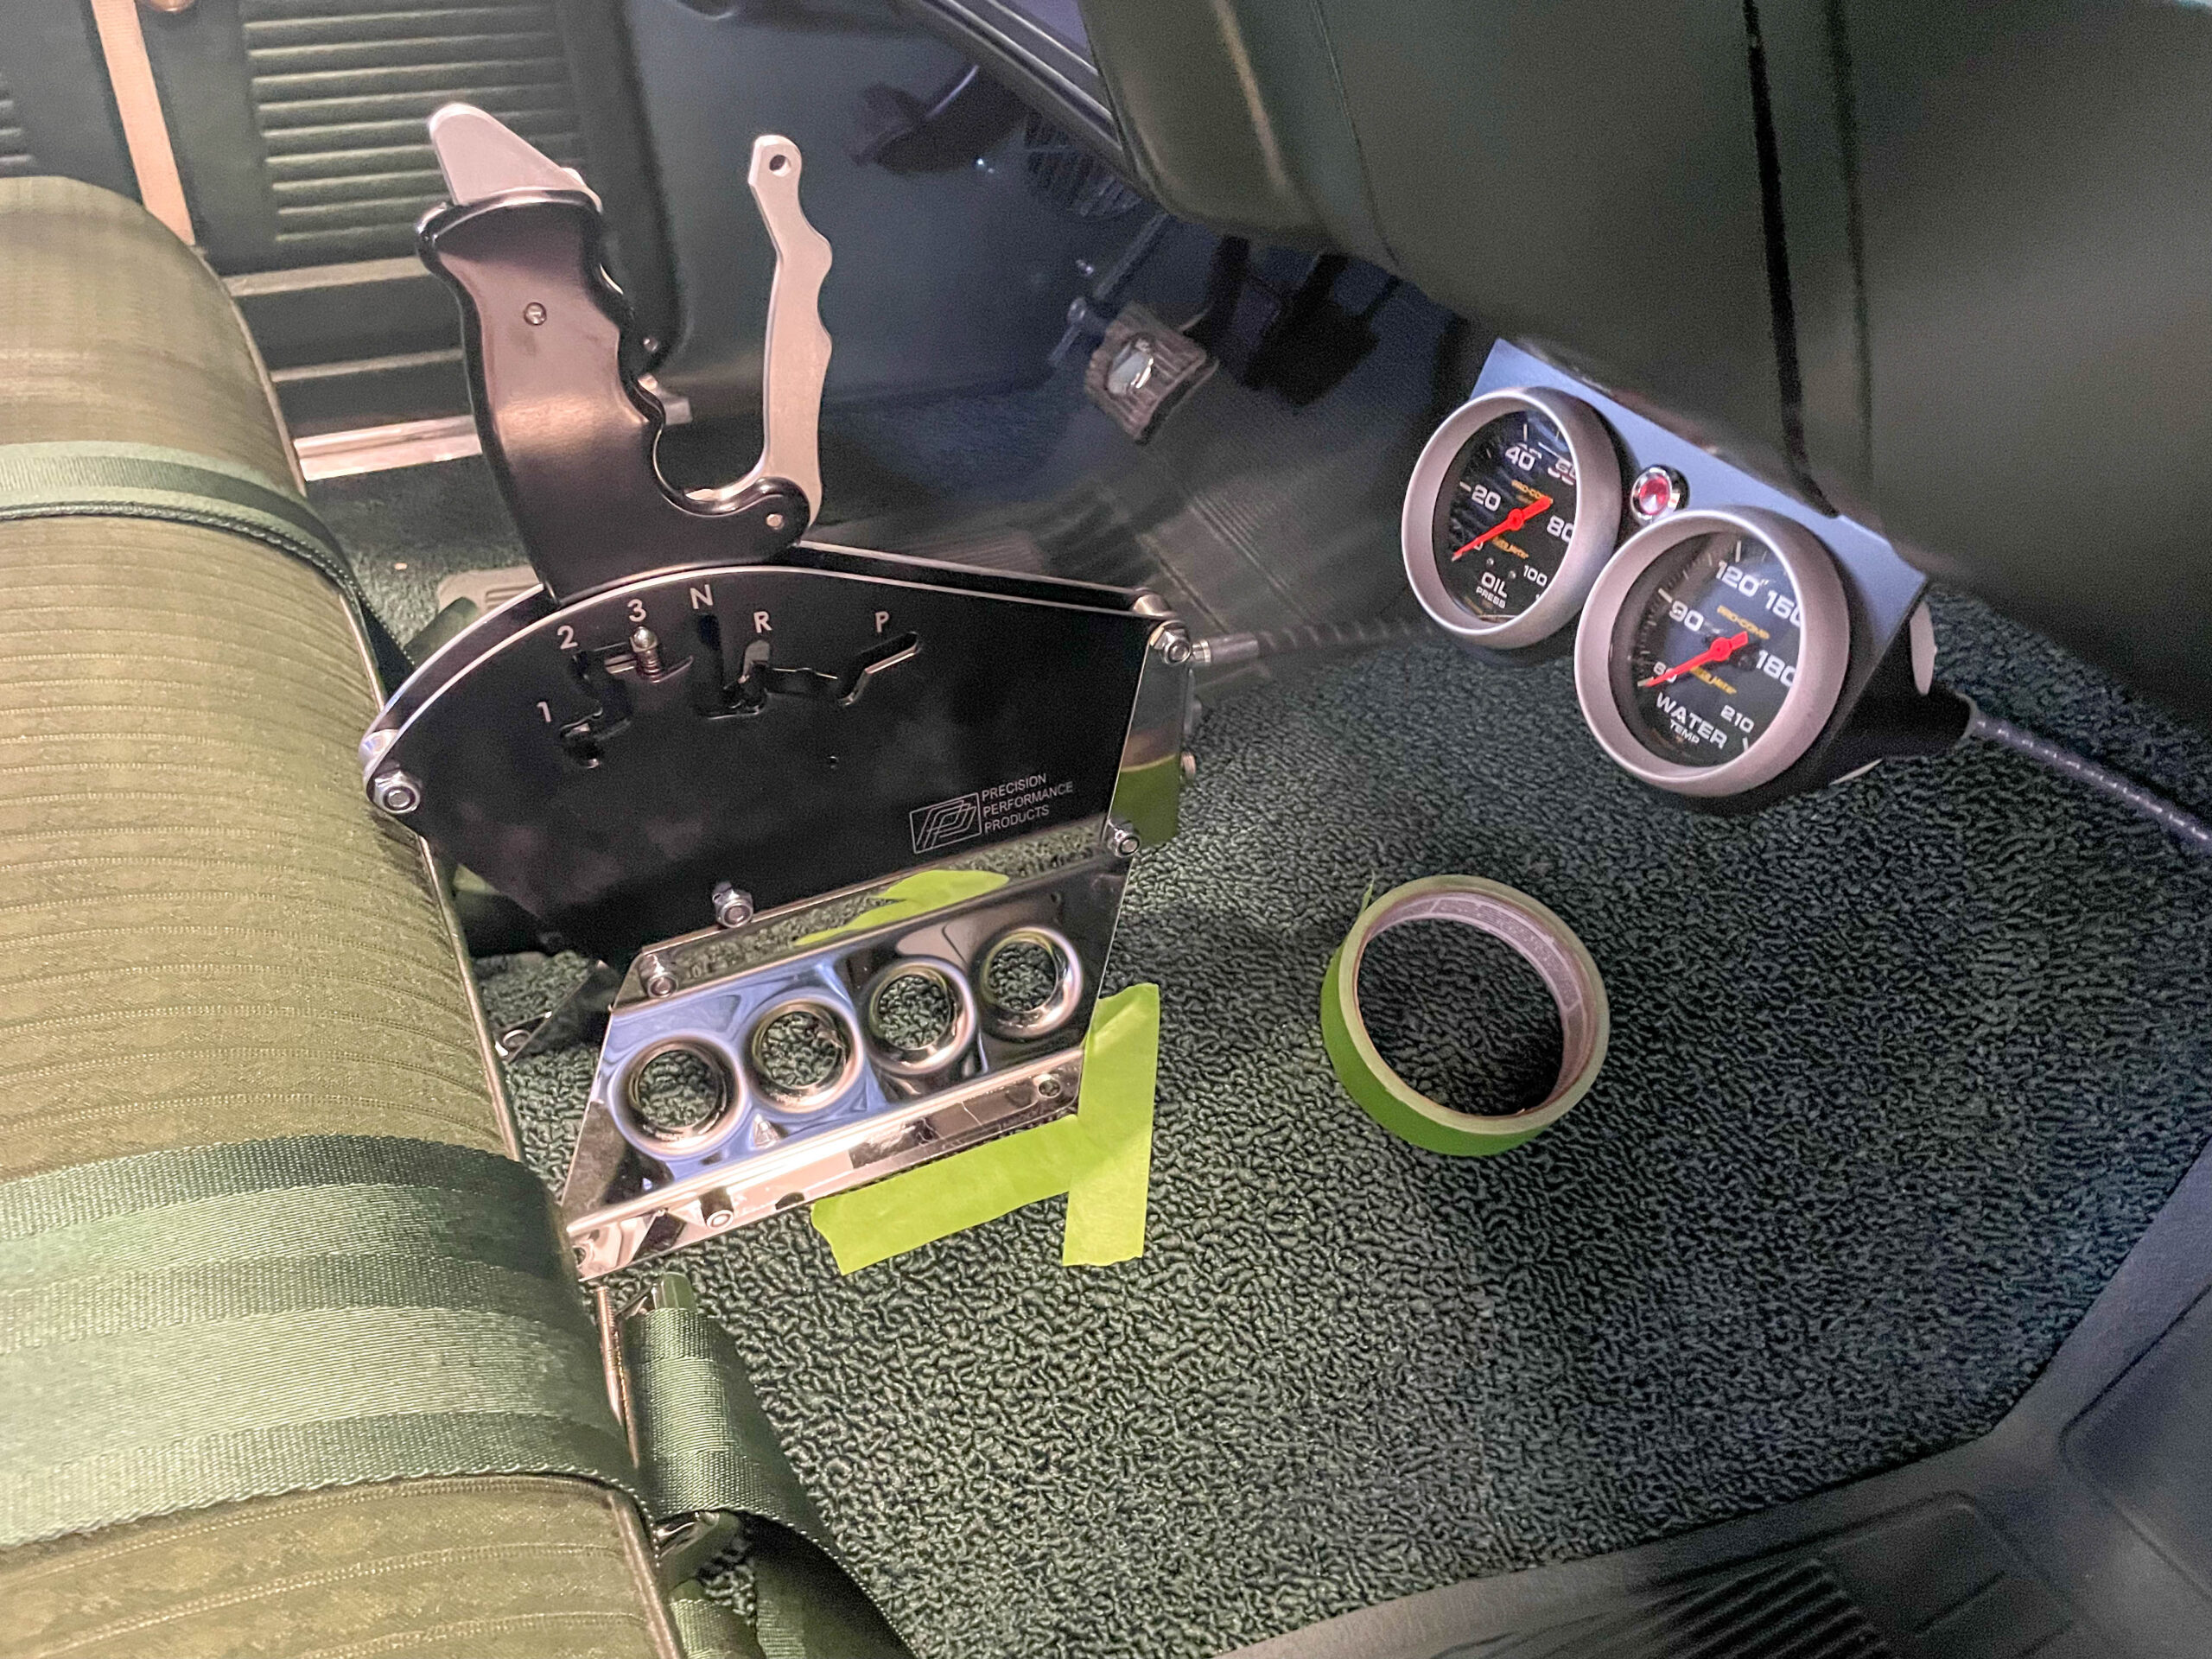
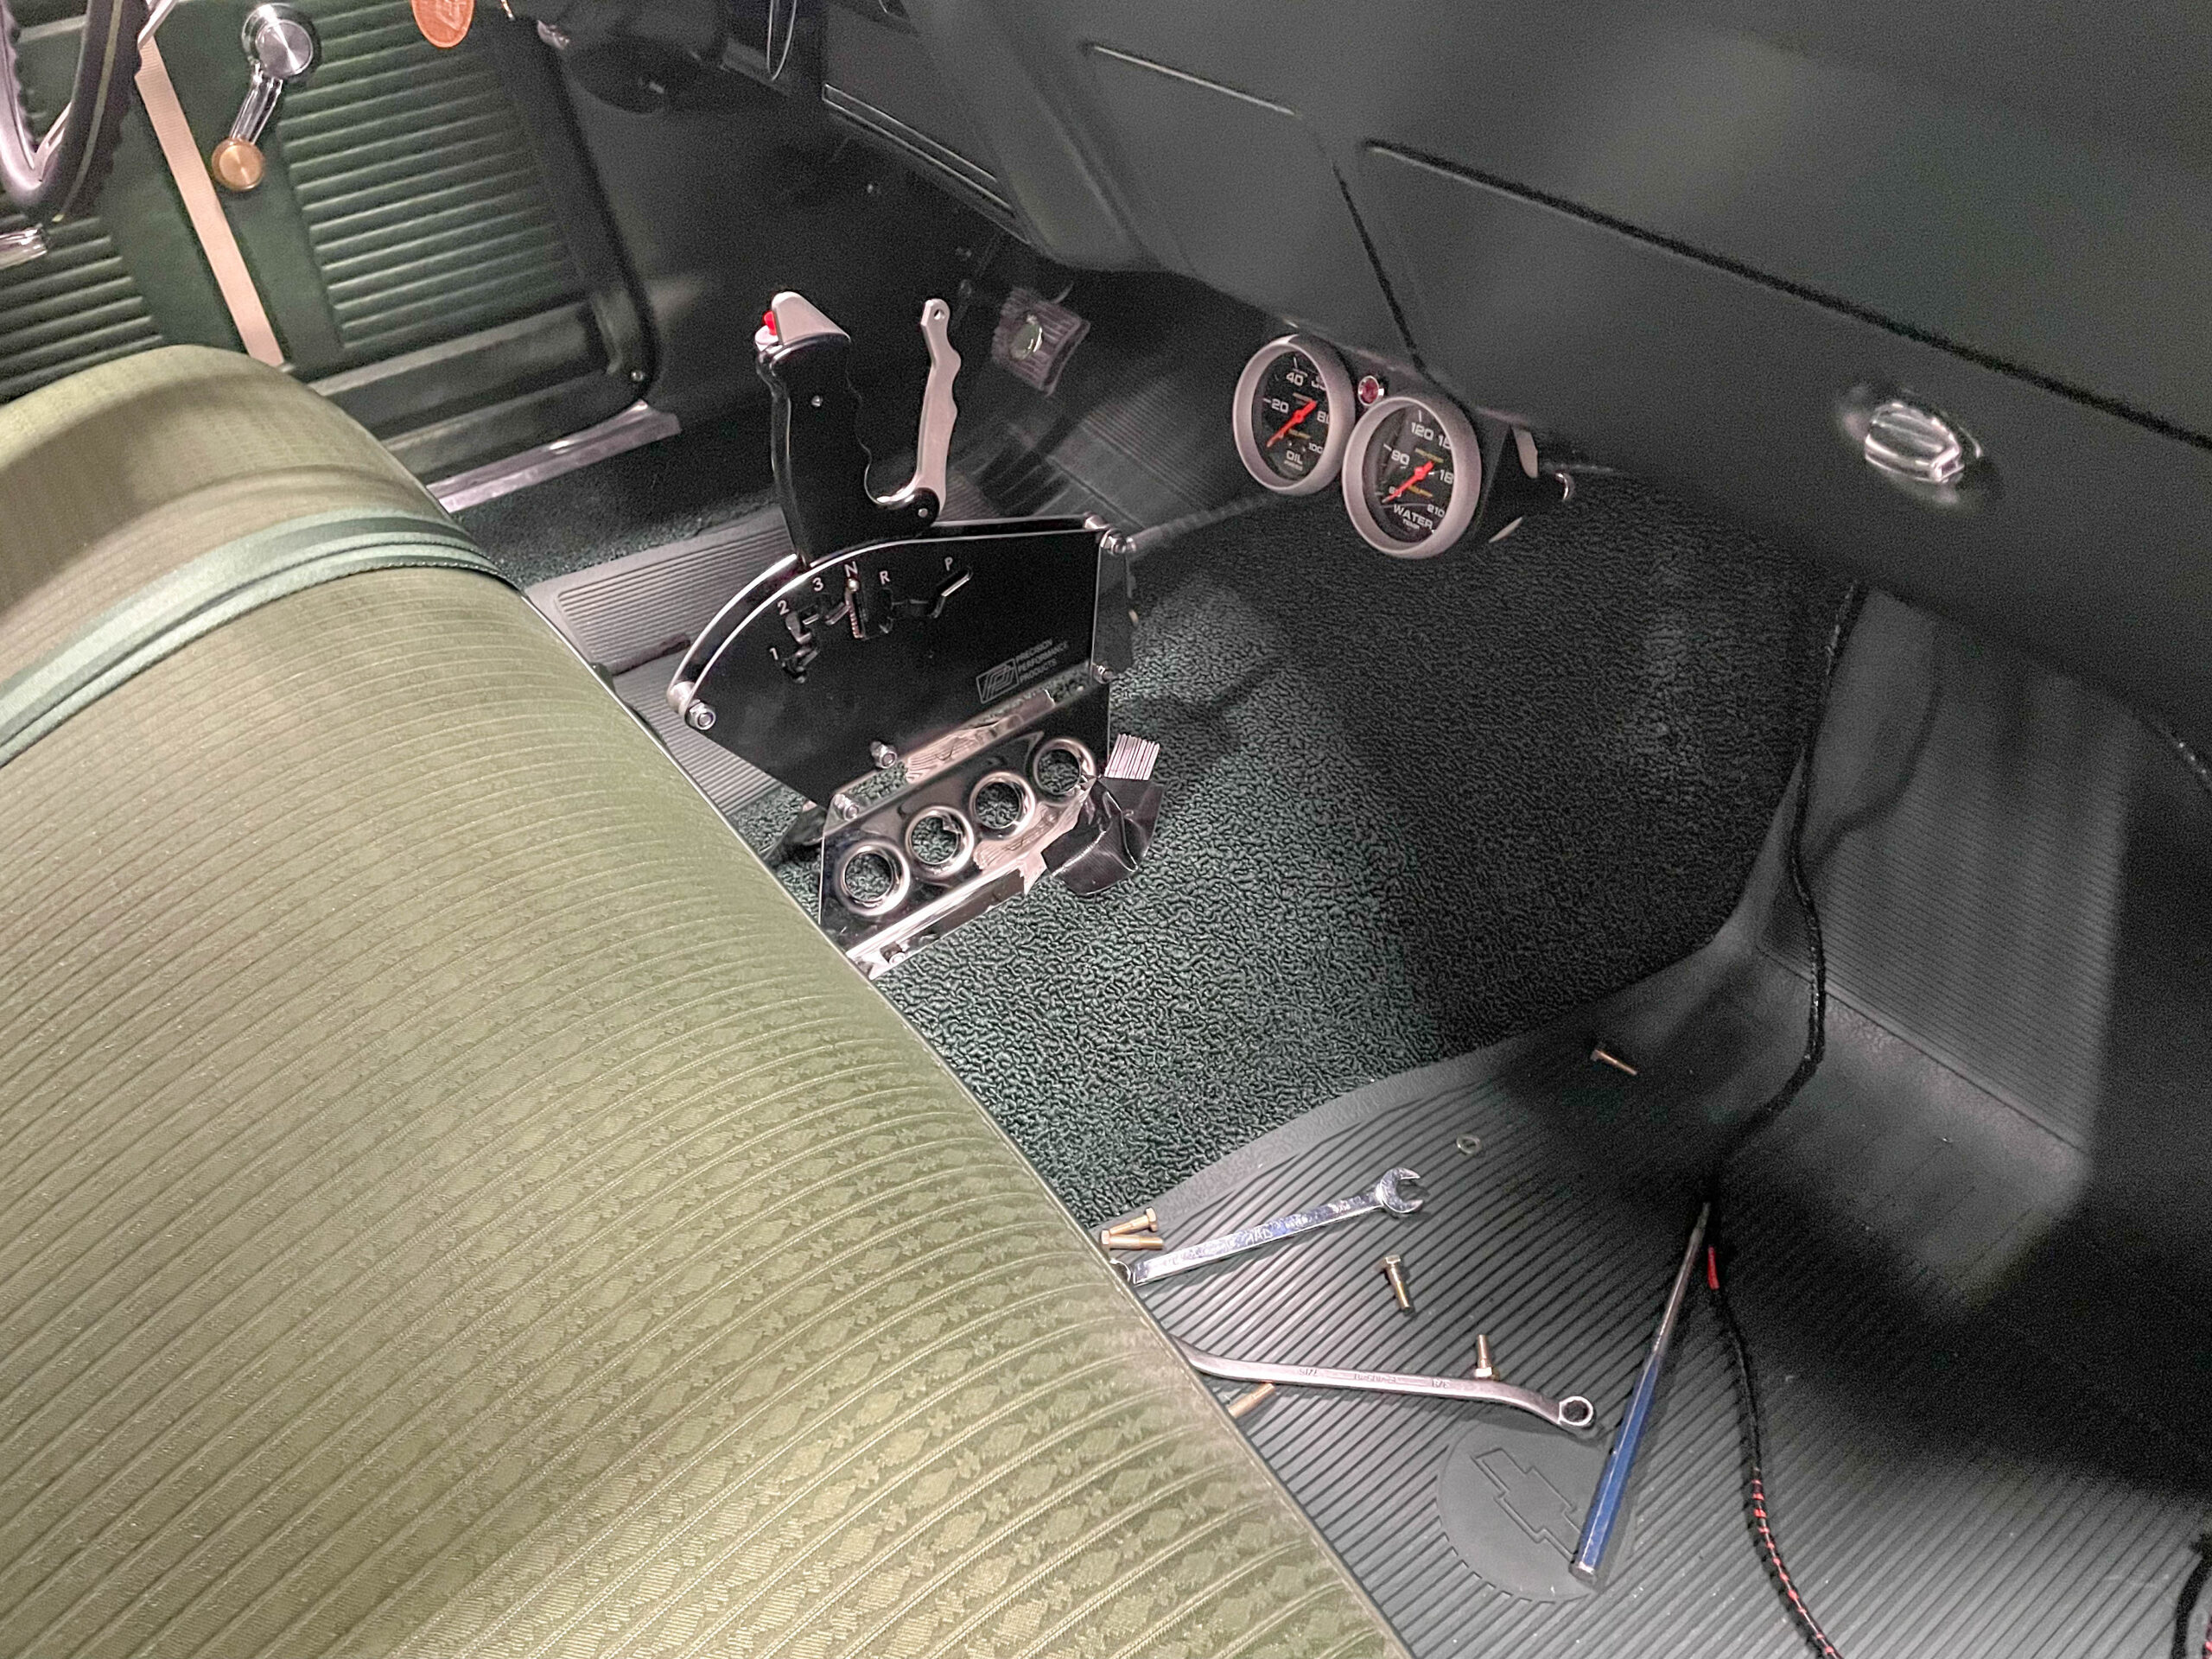
At this point, I placed the shifter (without the wiring harness and cable installed) on the transmission tunnel. I set the seat in my “comfort” position and fastened the seat belt and shoulder harness. From here, I could move the shifter around to a point where (a) I personally felt comfortable and (b) the shifter would fit without interfering with the seat or the dash. Keep in mind this is a bench seat car, so there are some limitations. As it turned out, I was able to set up the location so that I could personally use two seat positions and still operate the shifter comfortably without striking the seat. In order to mark the location, I used green painter masking tape to outline the mount bracket location (both sides of it). This way, I could remove the shifter and not have to fuss with nailing down the location again.
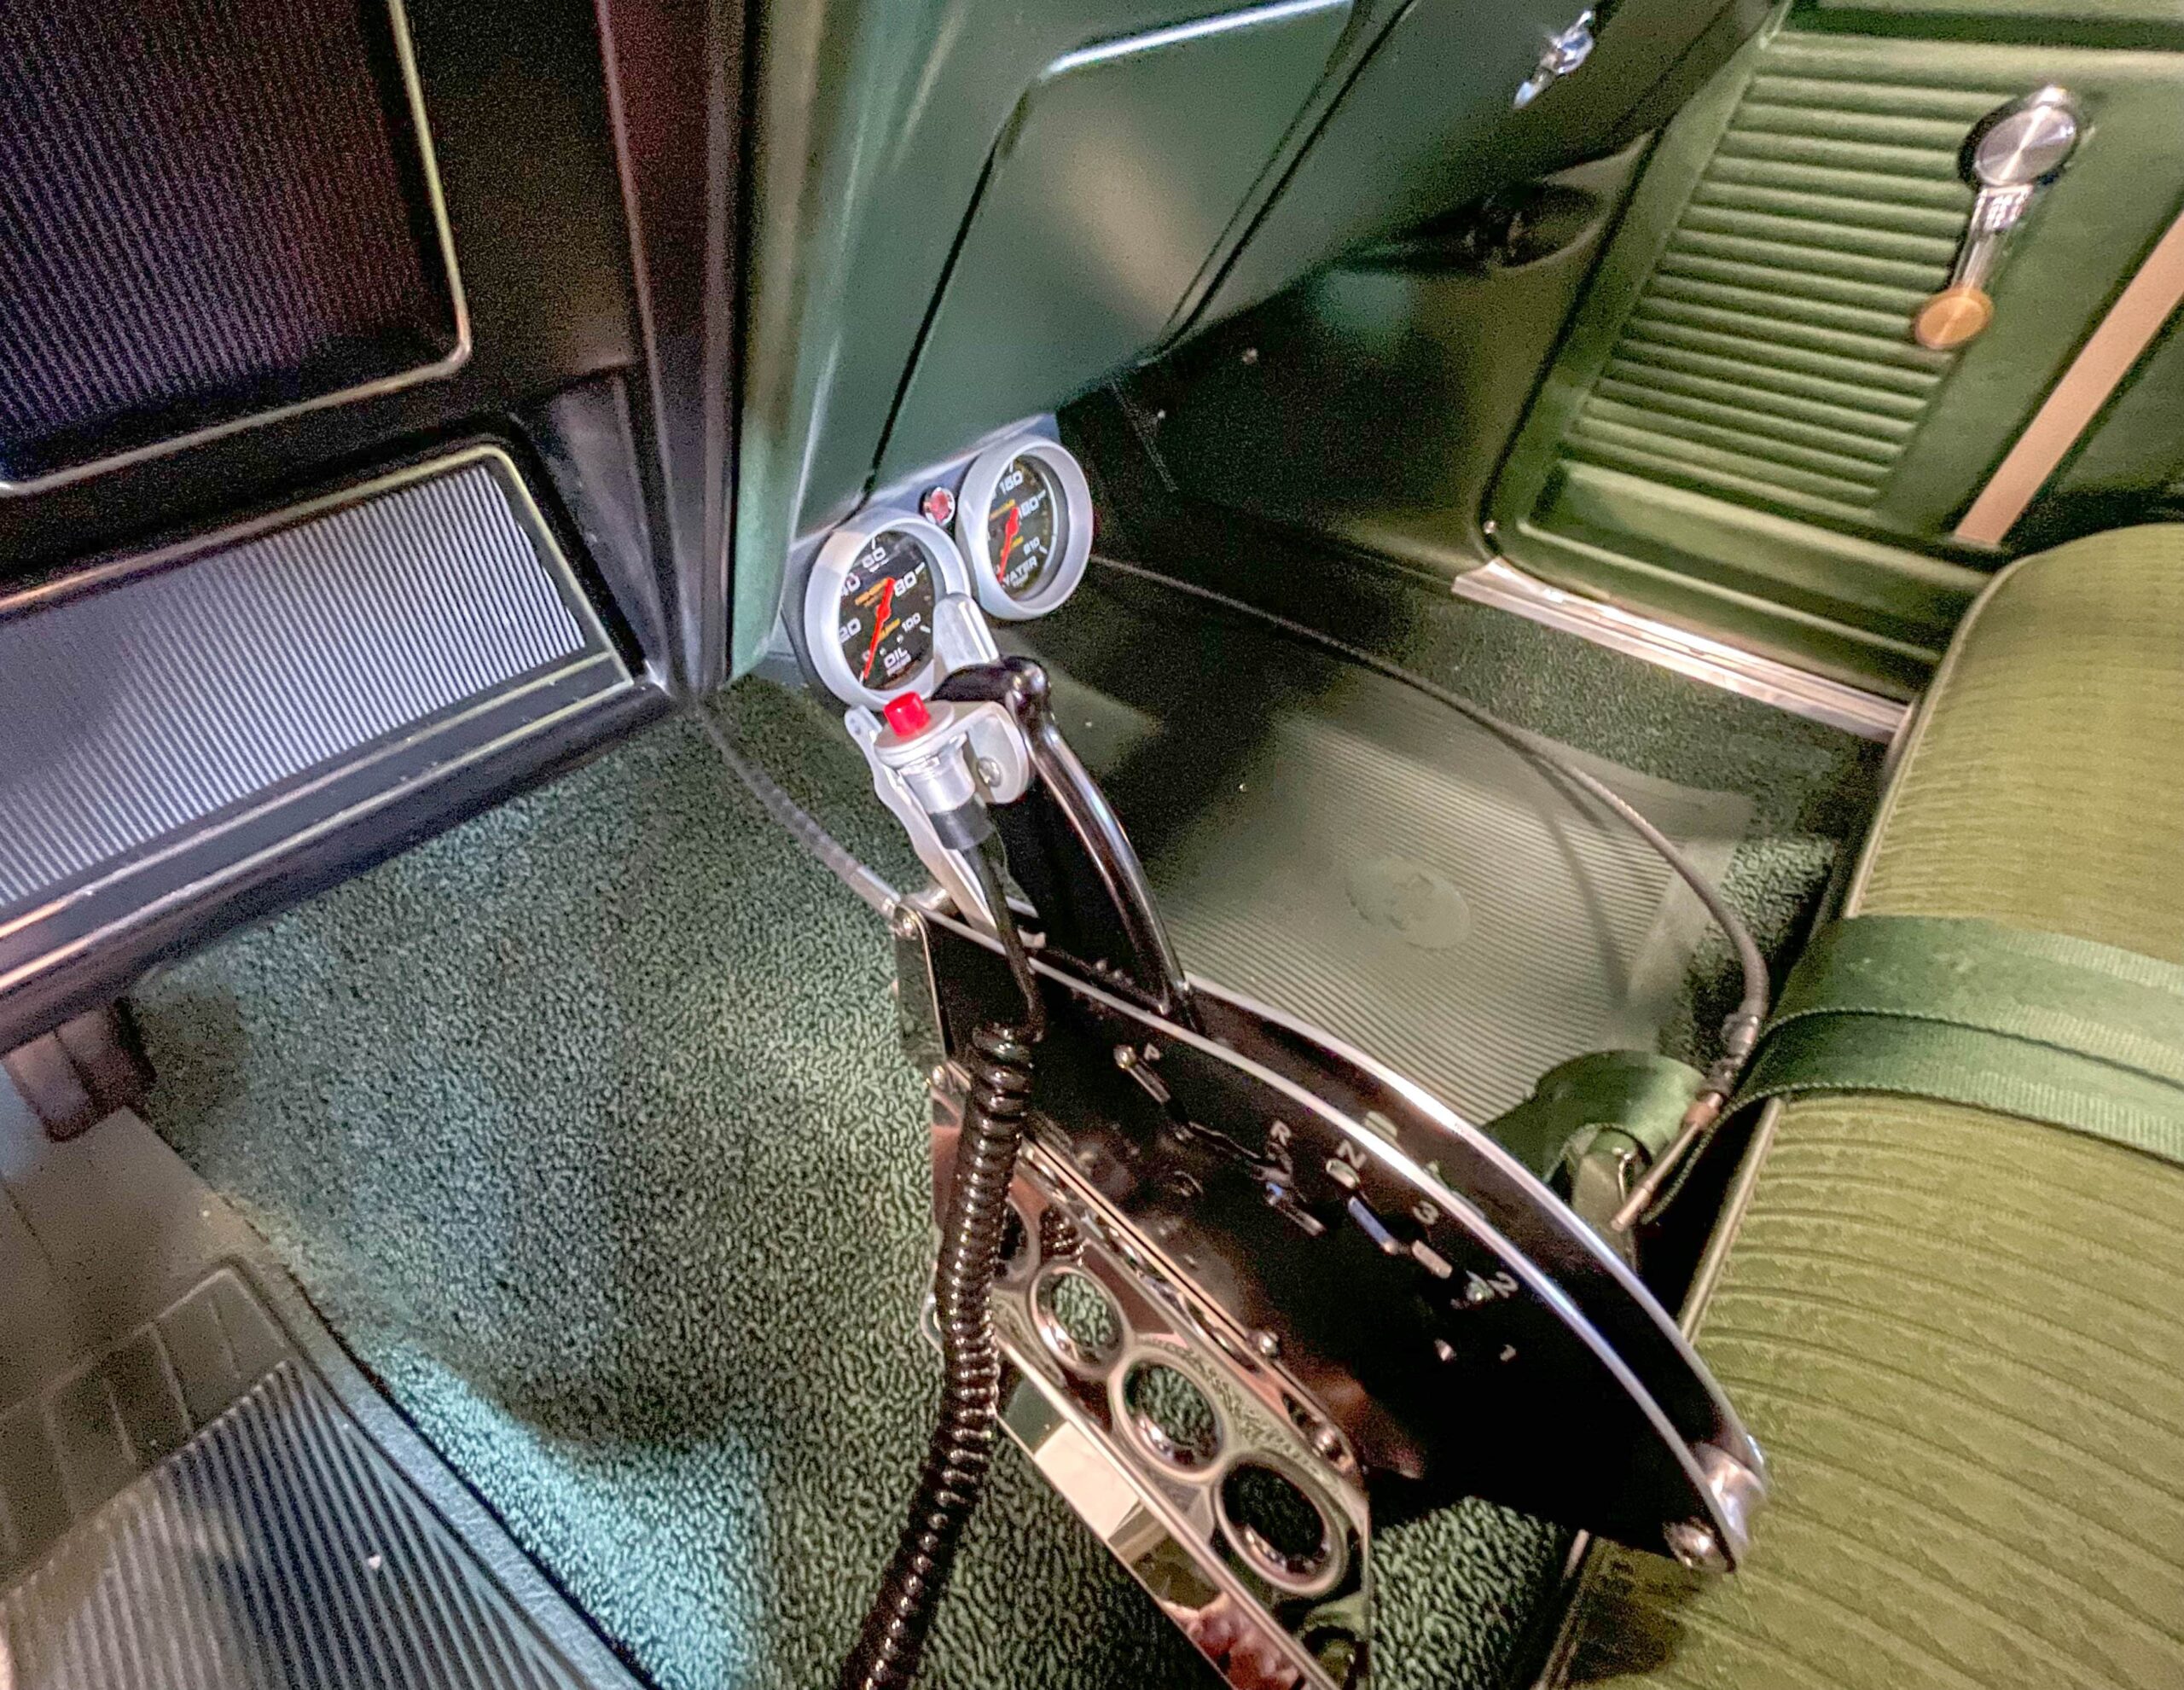
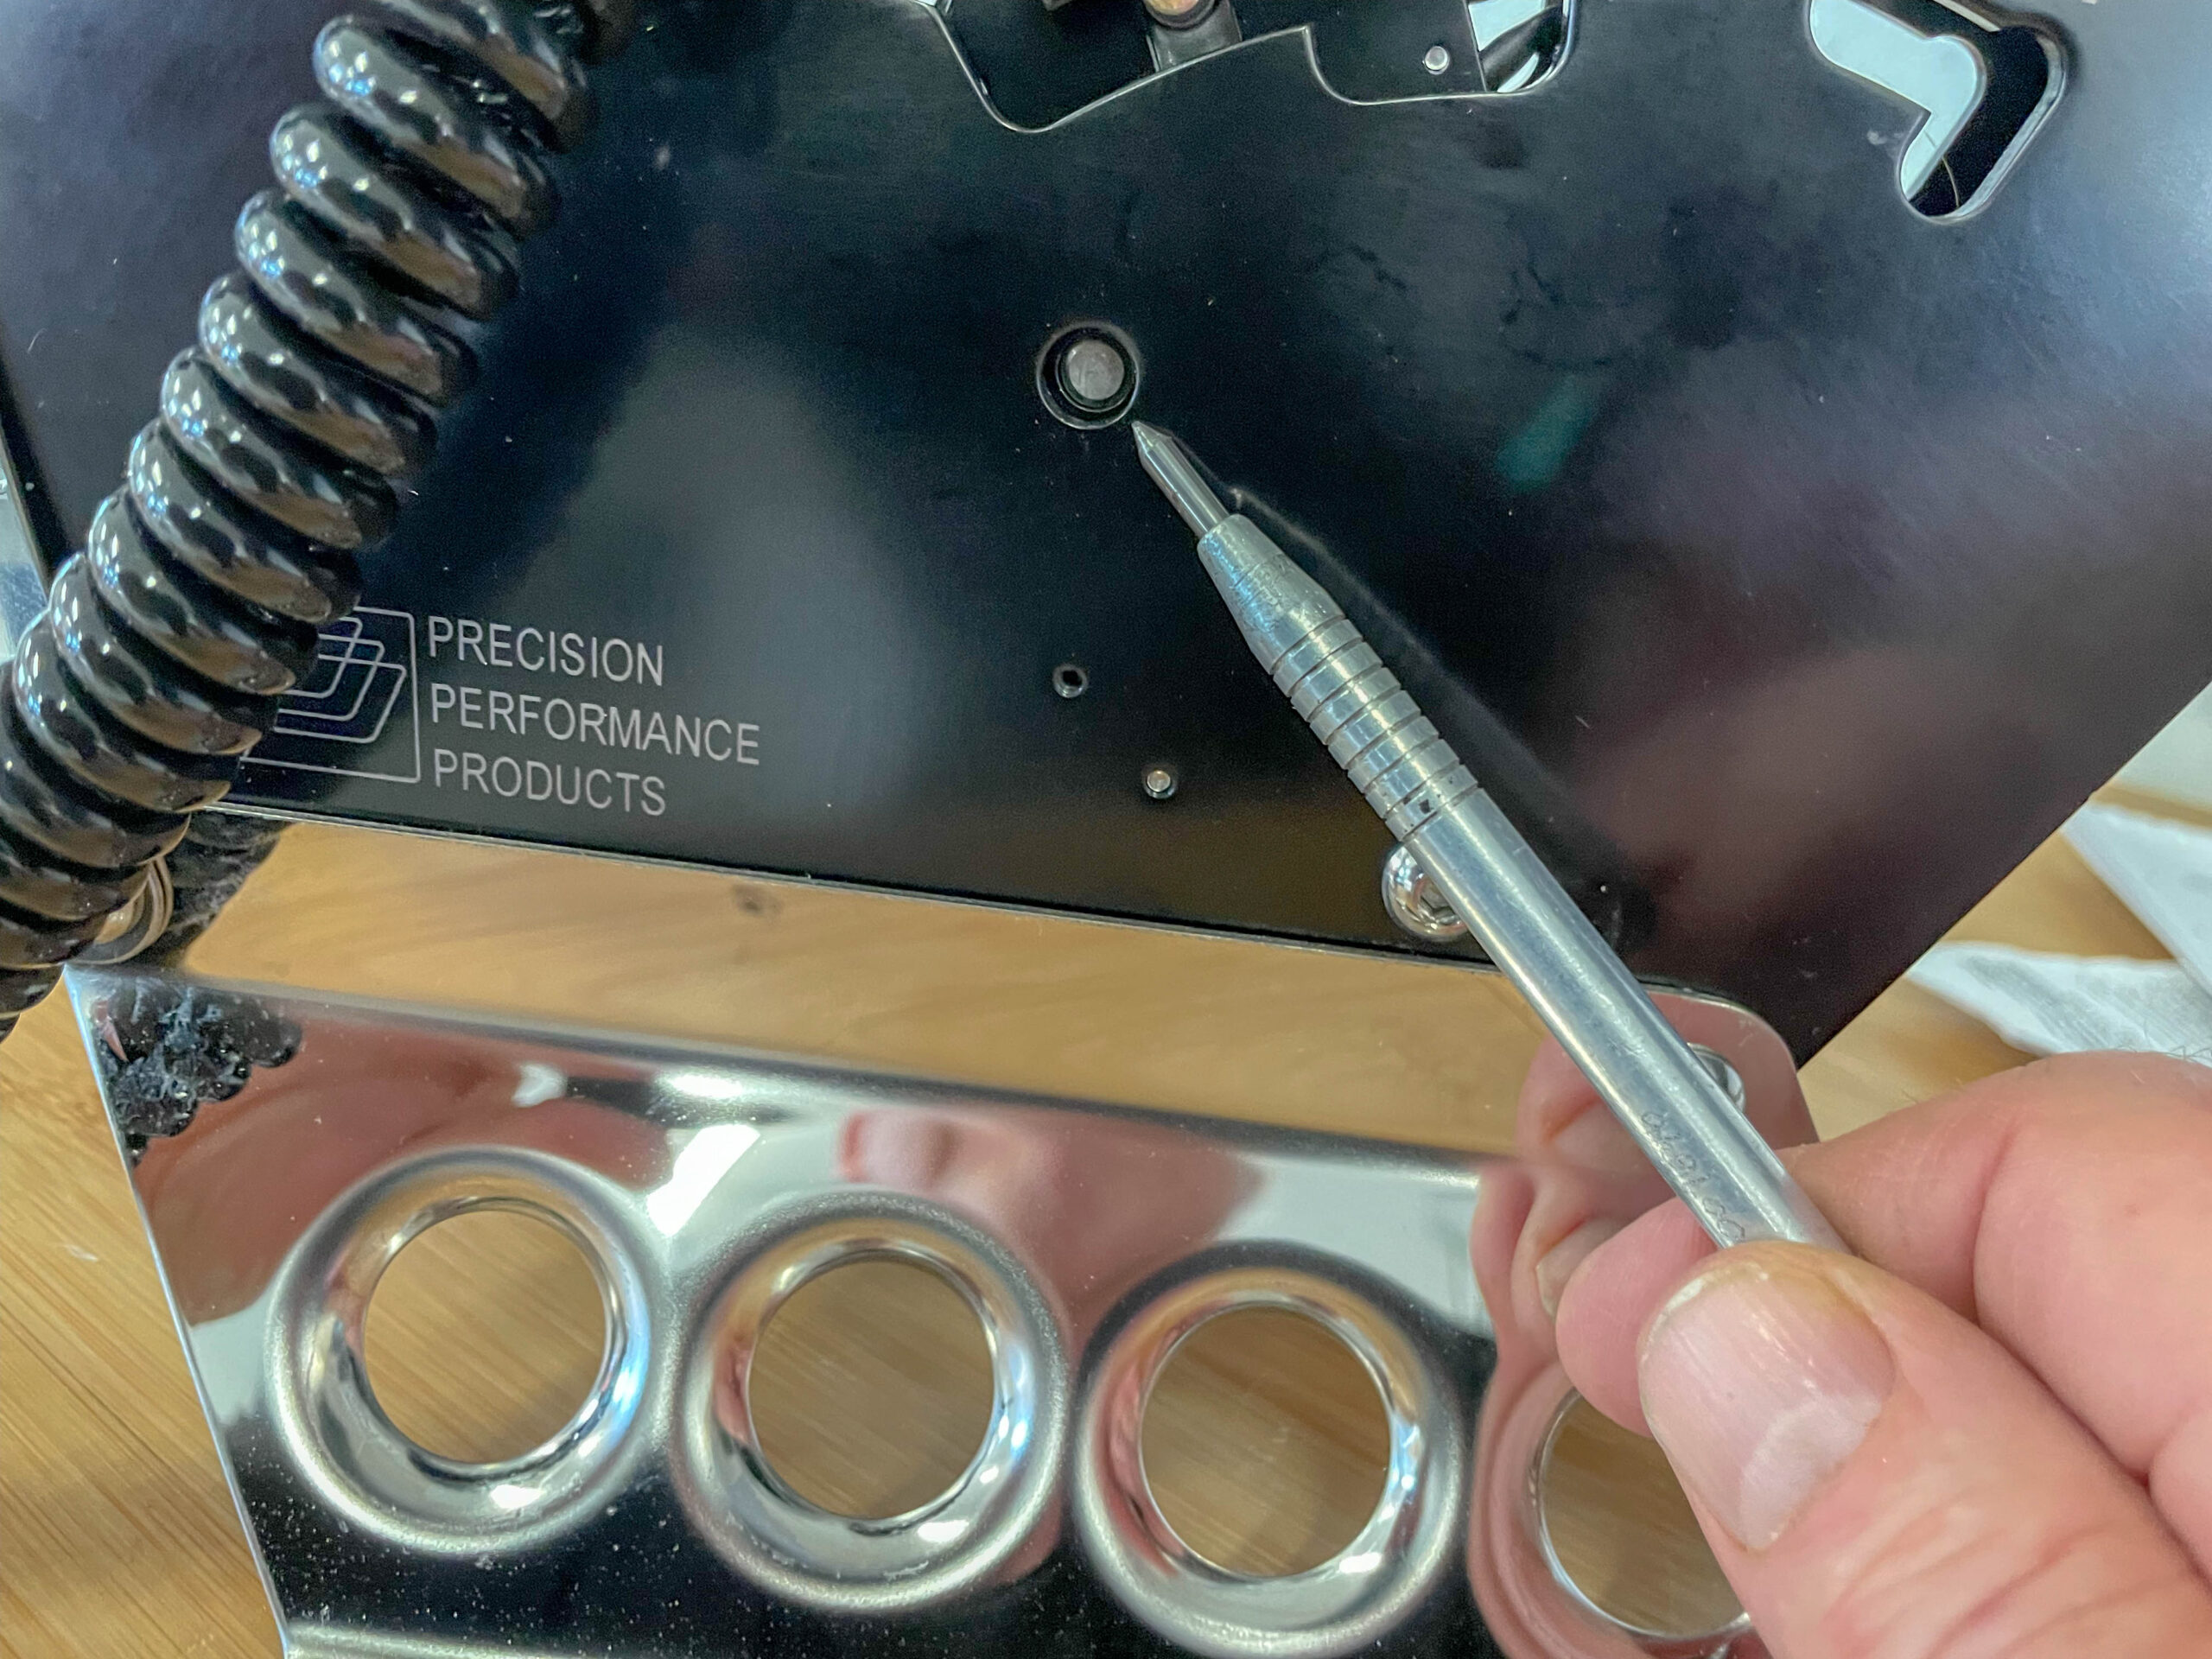
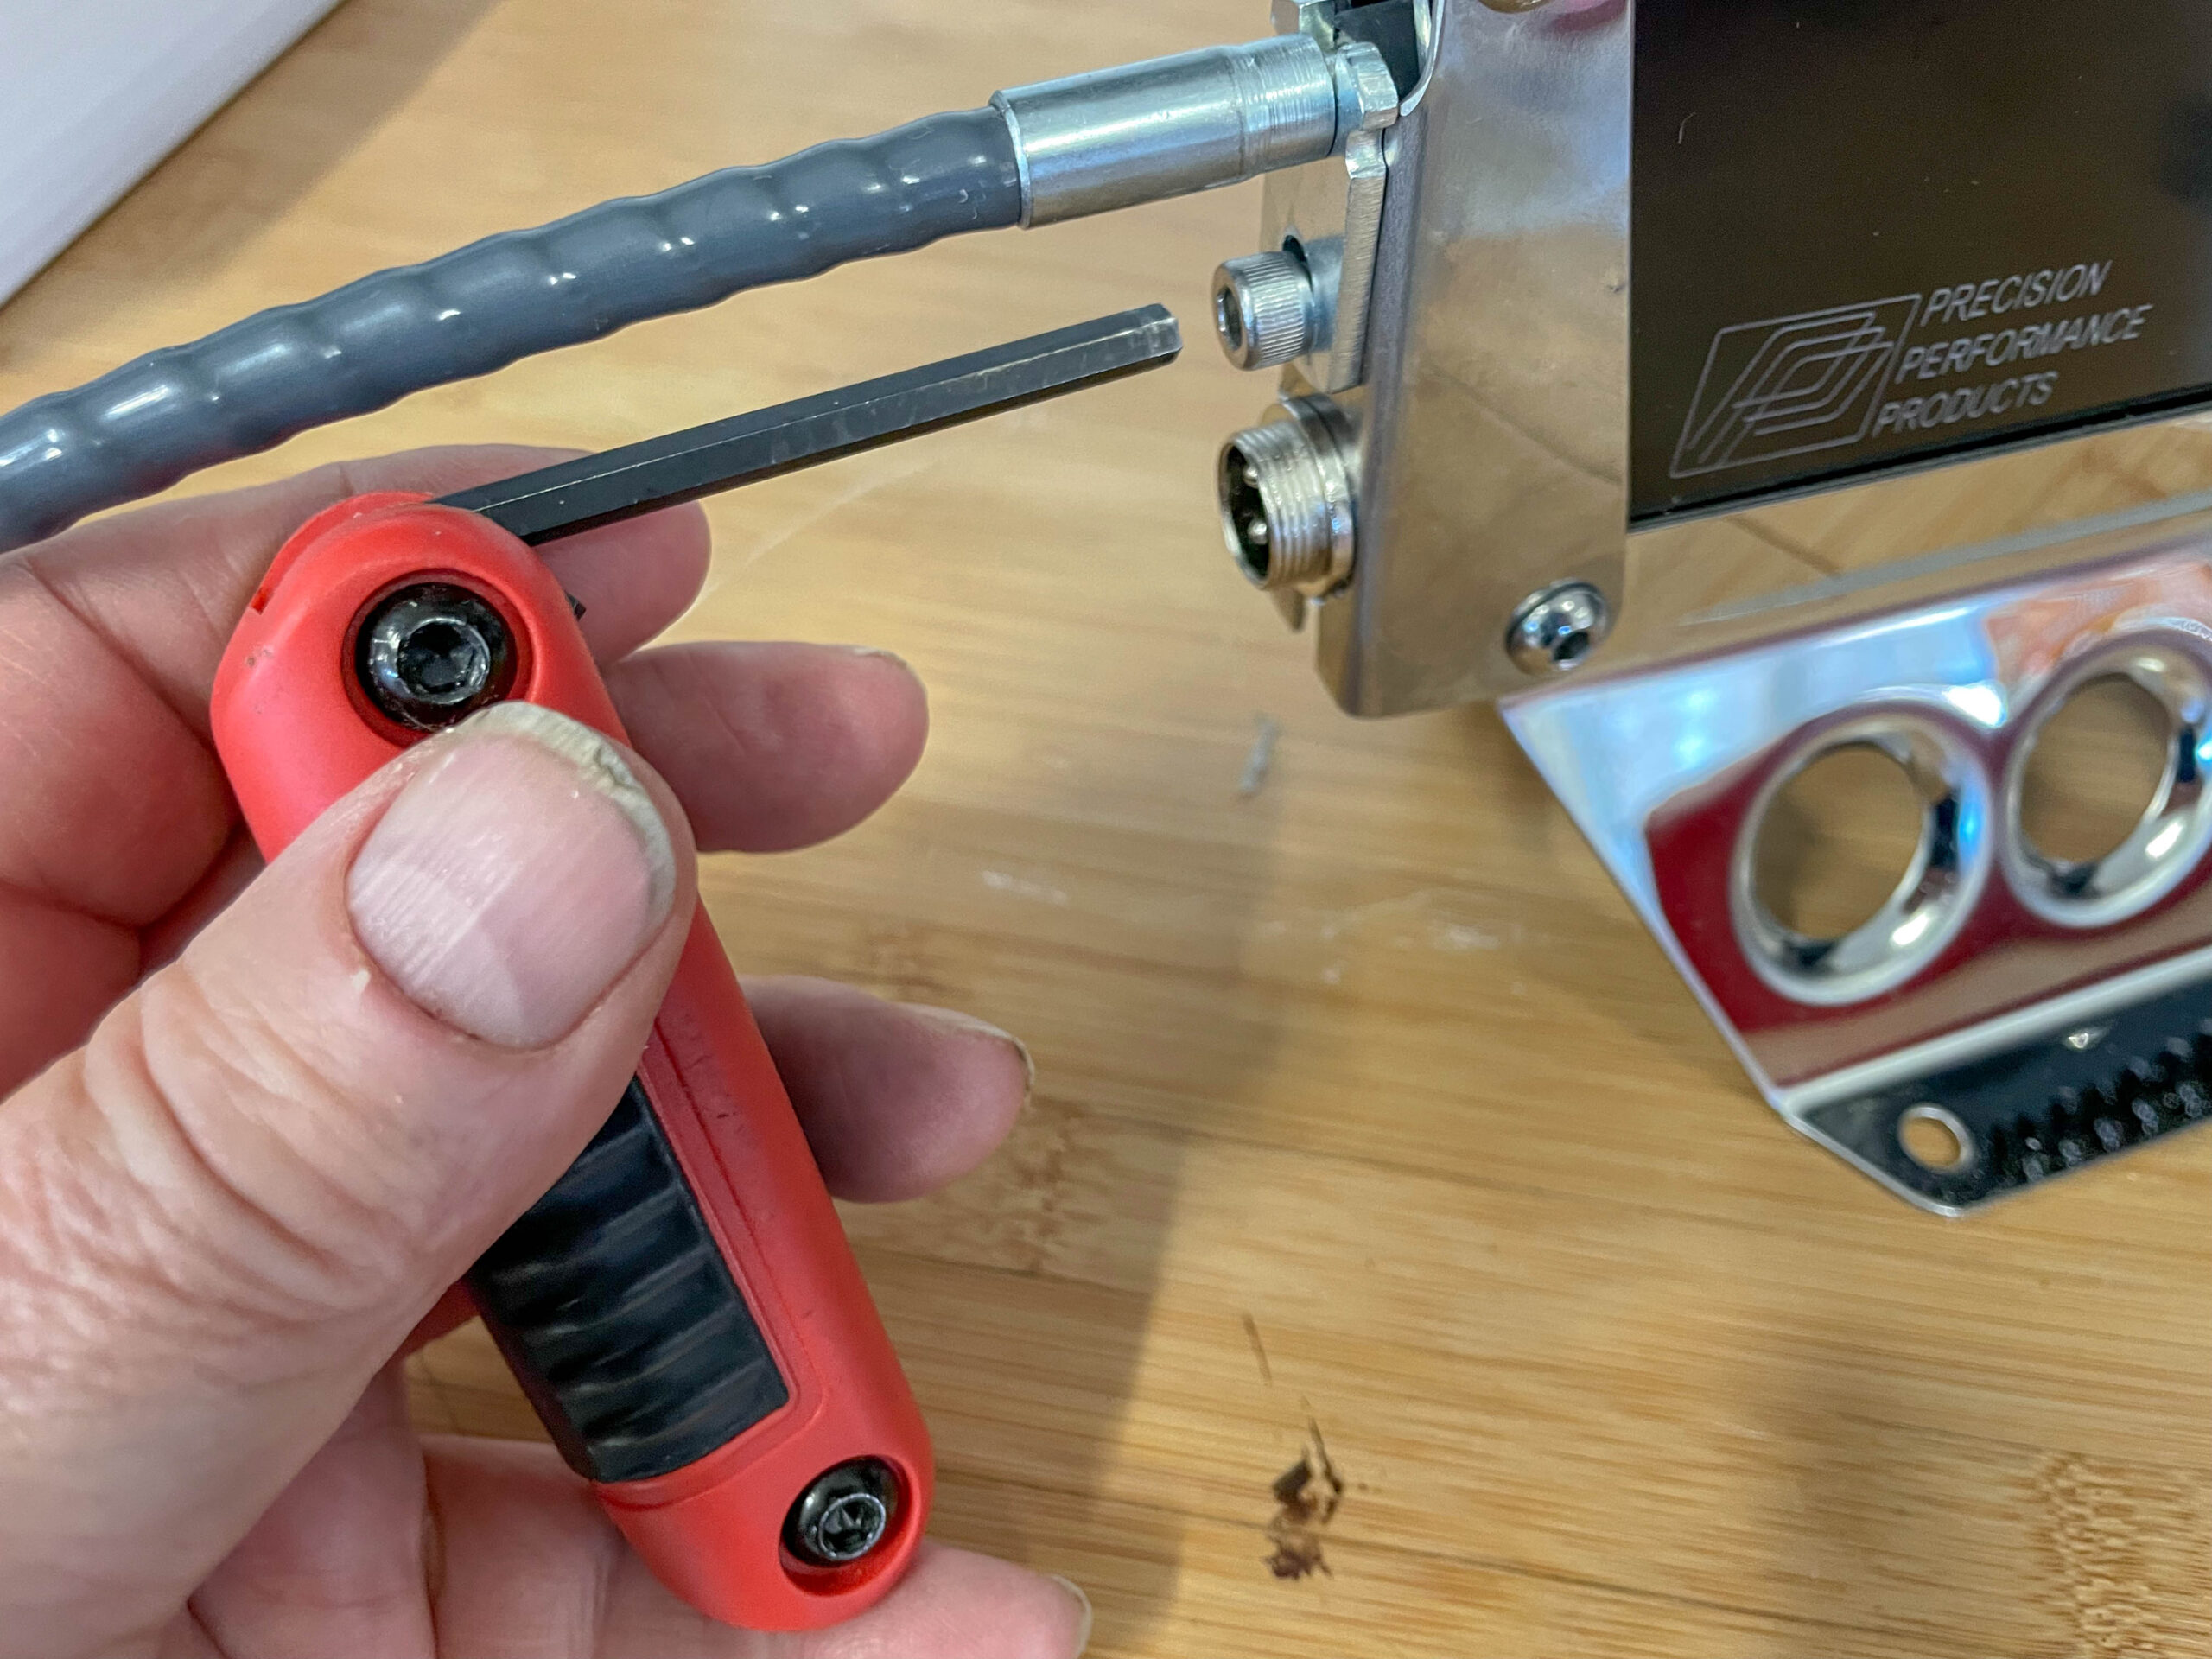
With the shifter out, the cable (on the shifter) was installed. The reason for doing this was to work out where the hole would be drilled in the tunnel. You have to be careful here because there are limits on how tight the cable bend can be. Precision Performance tells us the minimum bend radius for the cable is ten inches. To install the cable into the shifter body, move the shifter handle between park and reverse positions in the gate. You’ll note there is a small ½-notch in the gate. When in this position, a hole in the shifter side plate will be aligned with a hole in the handle. Align the shift cable eyelet with these holes and insert the supplied ¼-inch pin. Next, secure the cable housing to the shifter body. A (supplied) Allen-head ¼-inch bolt is used to attach the cable housing to the shifter body. From here, the shifter, with the cable attached was reinstalled in the car. This allows you to figure out where the hole for the cable should be drilled. Once I had the rough cable location figured out, I went under the car and checked the orientation. I had to work out a spot where the bend radius was right and where there wasn’t a double sheet metal panel to drill through. The location was marked but not drilled.
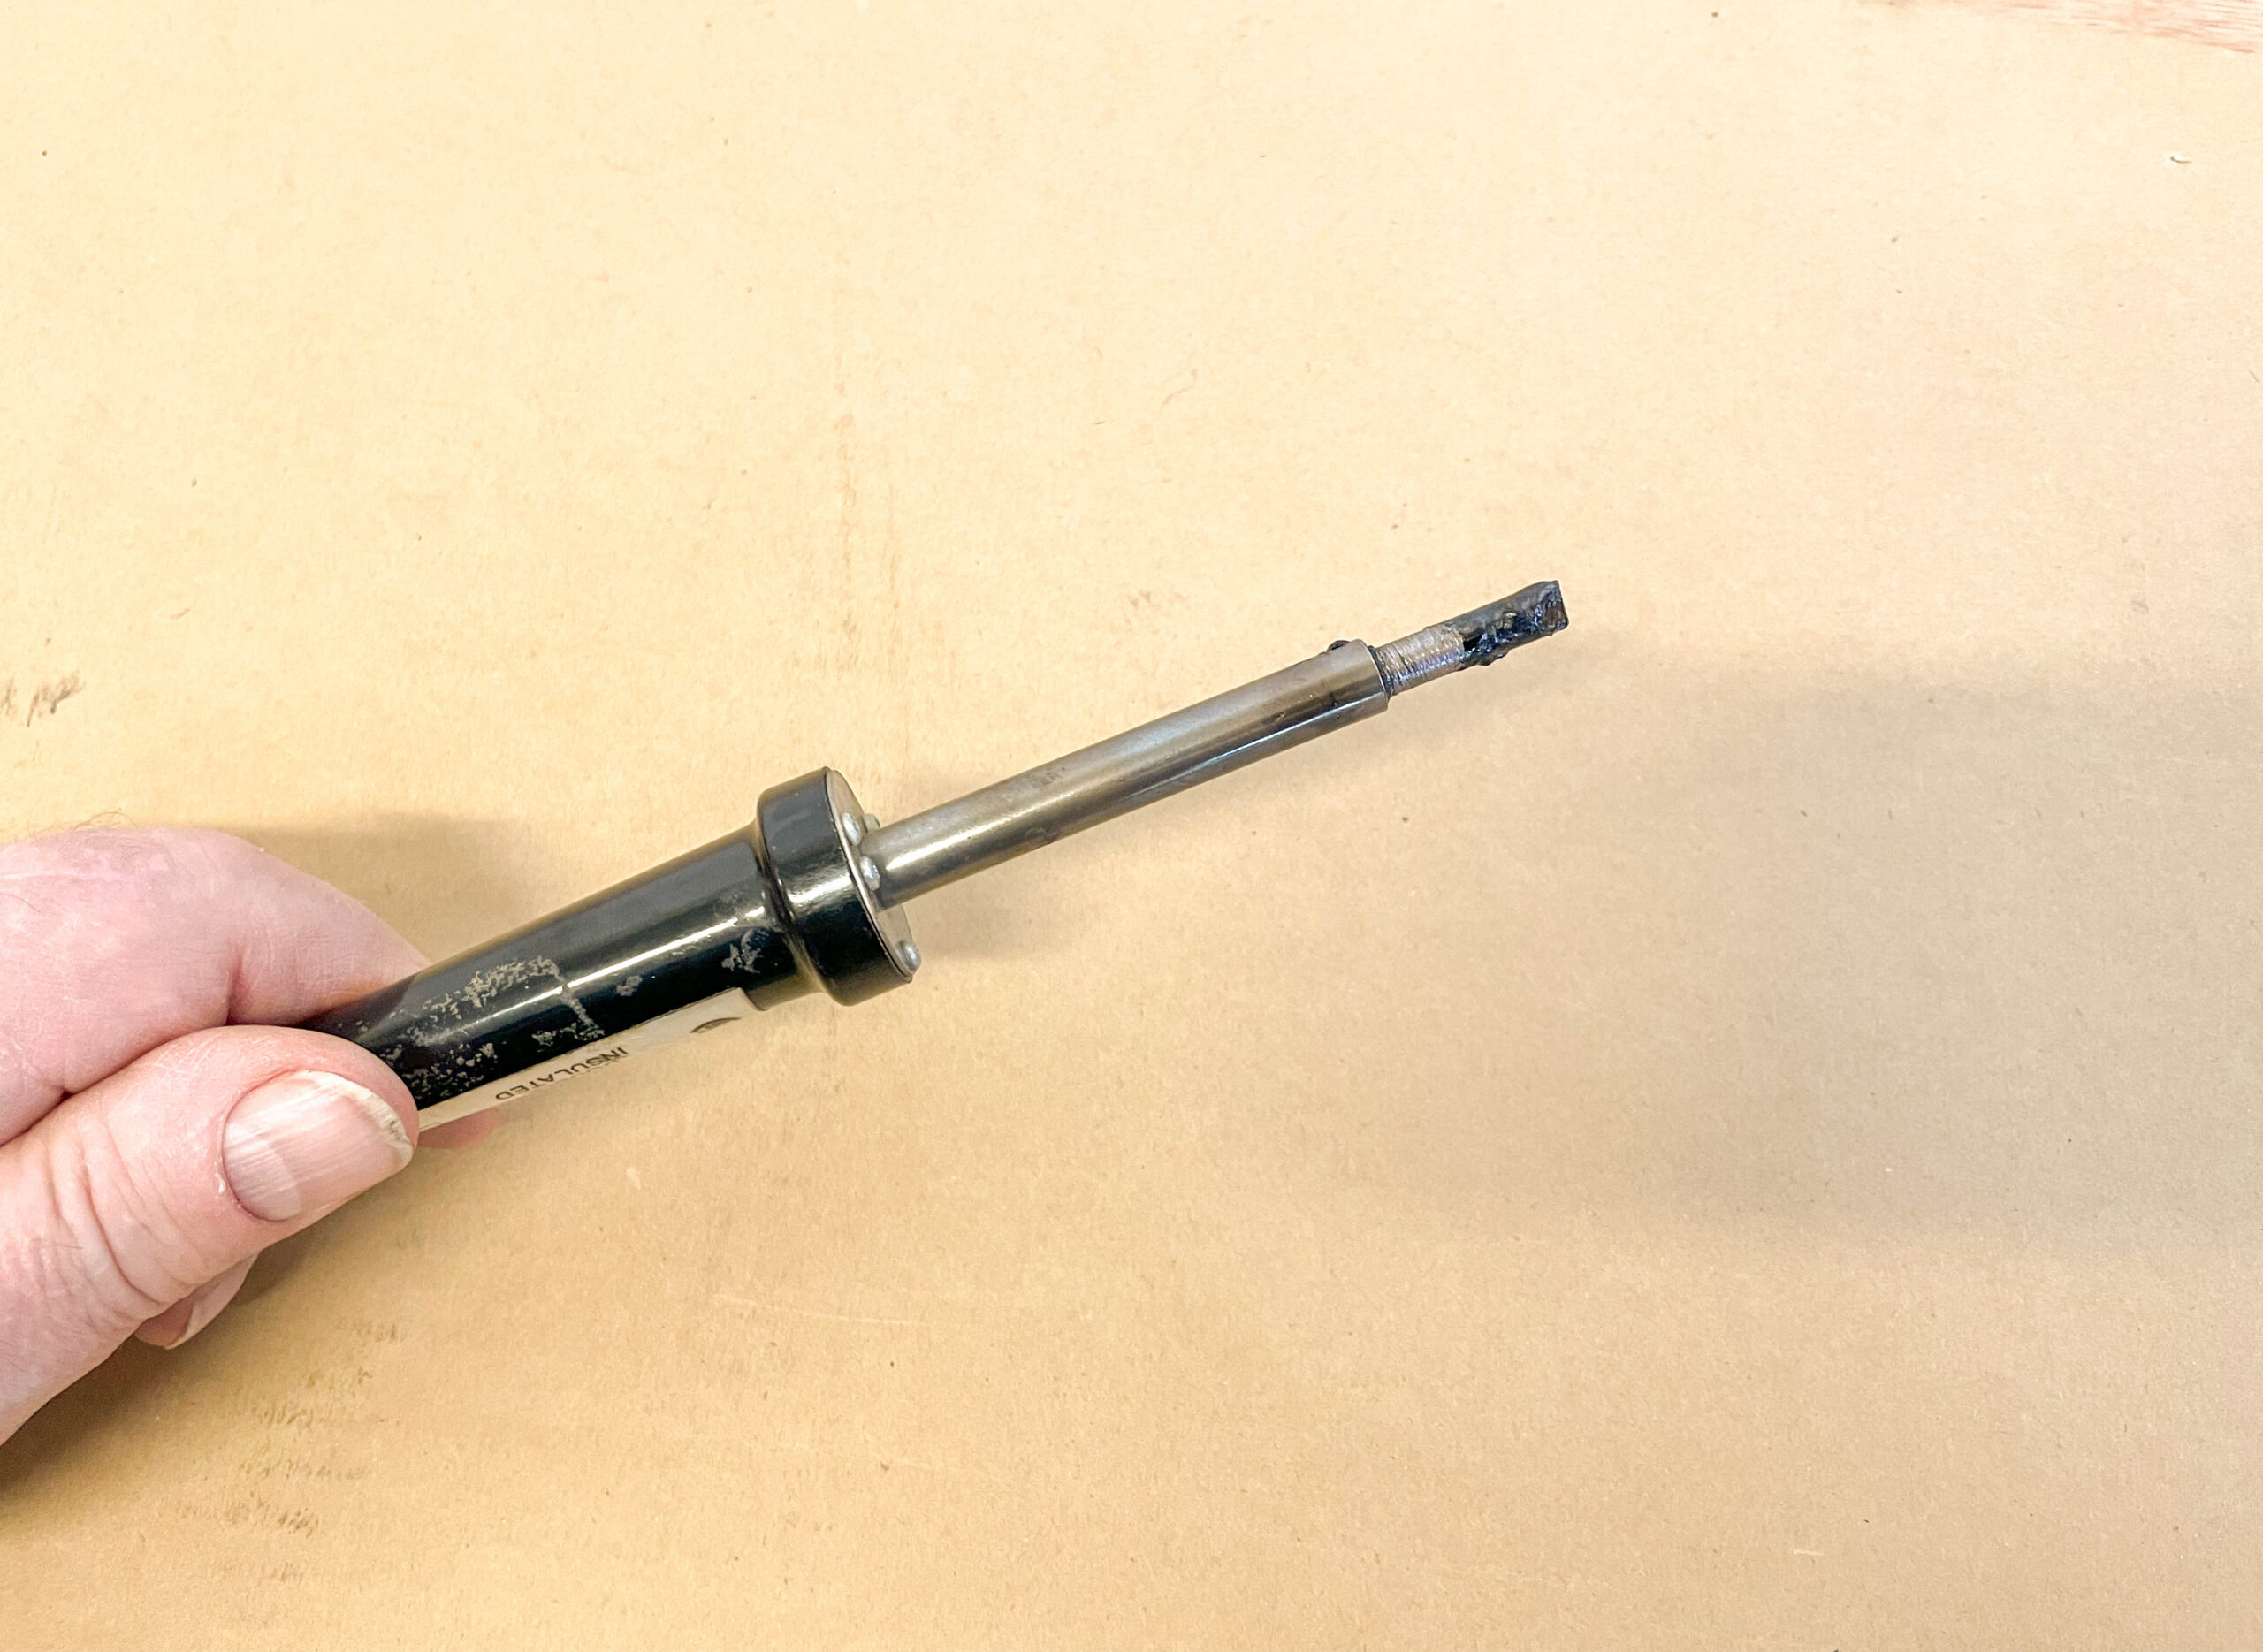
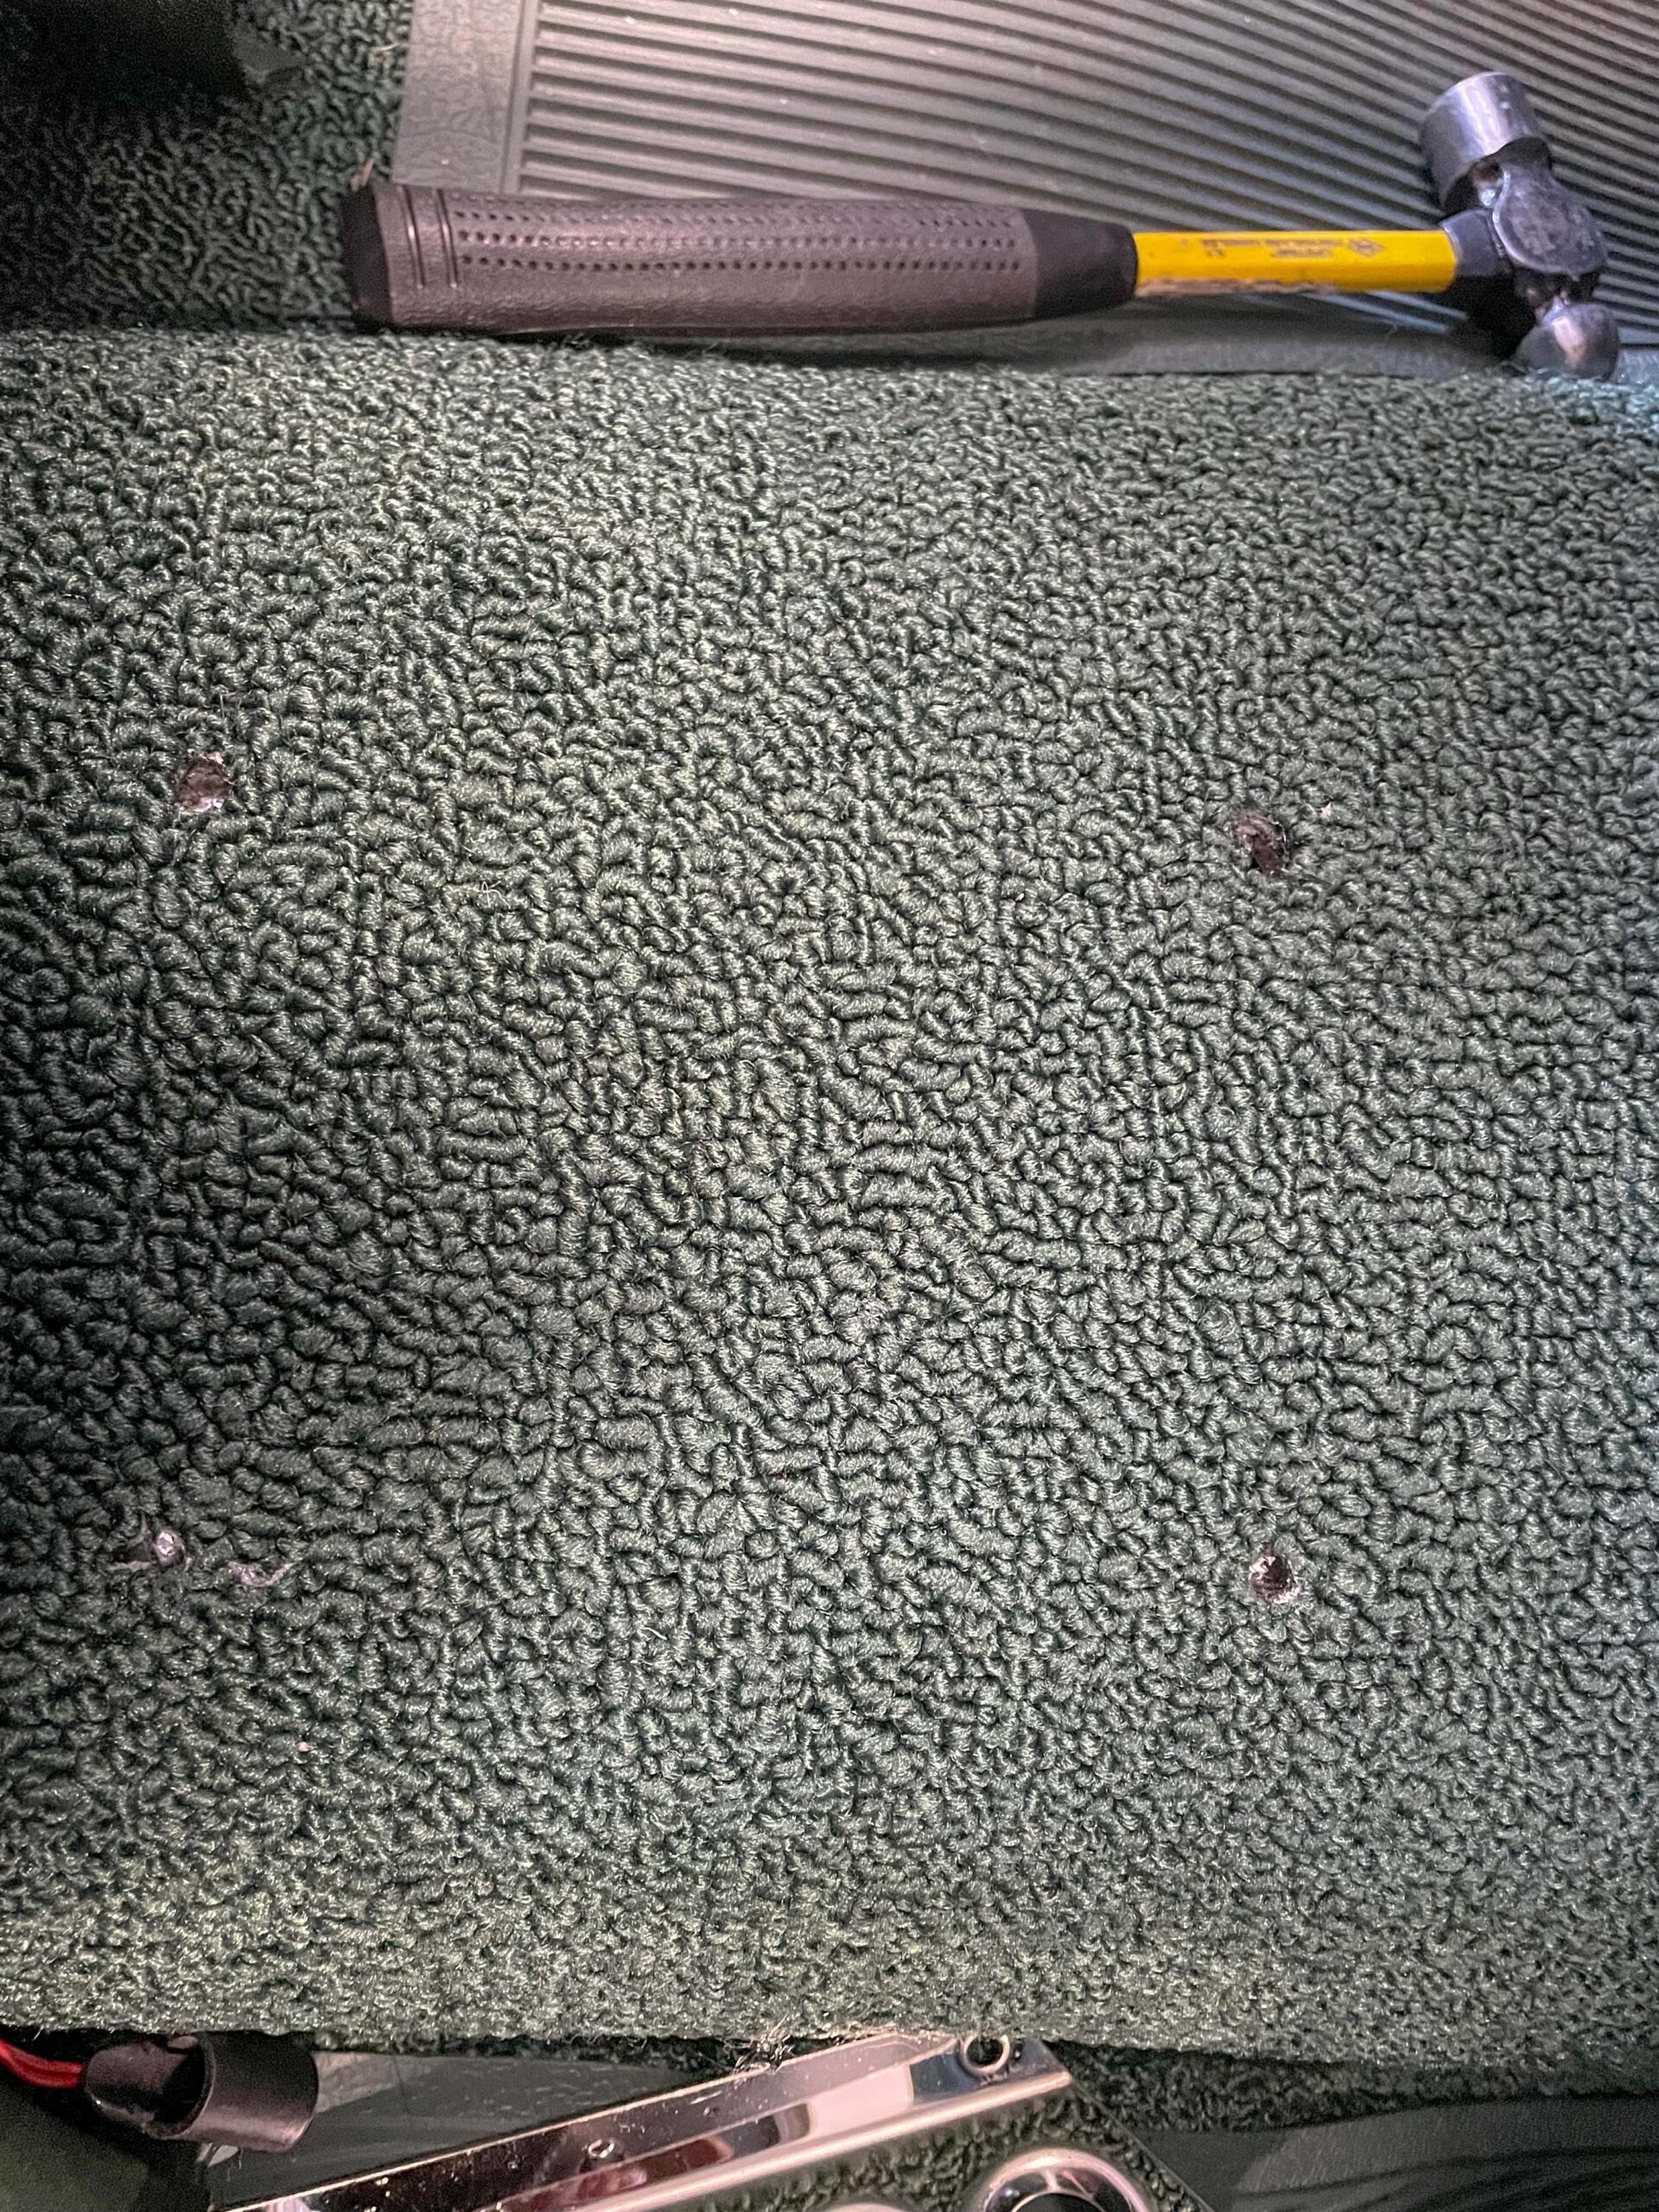
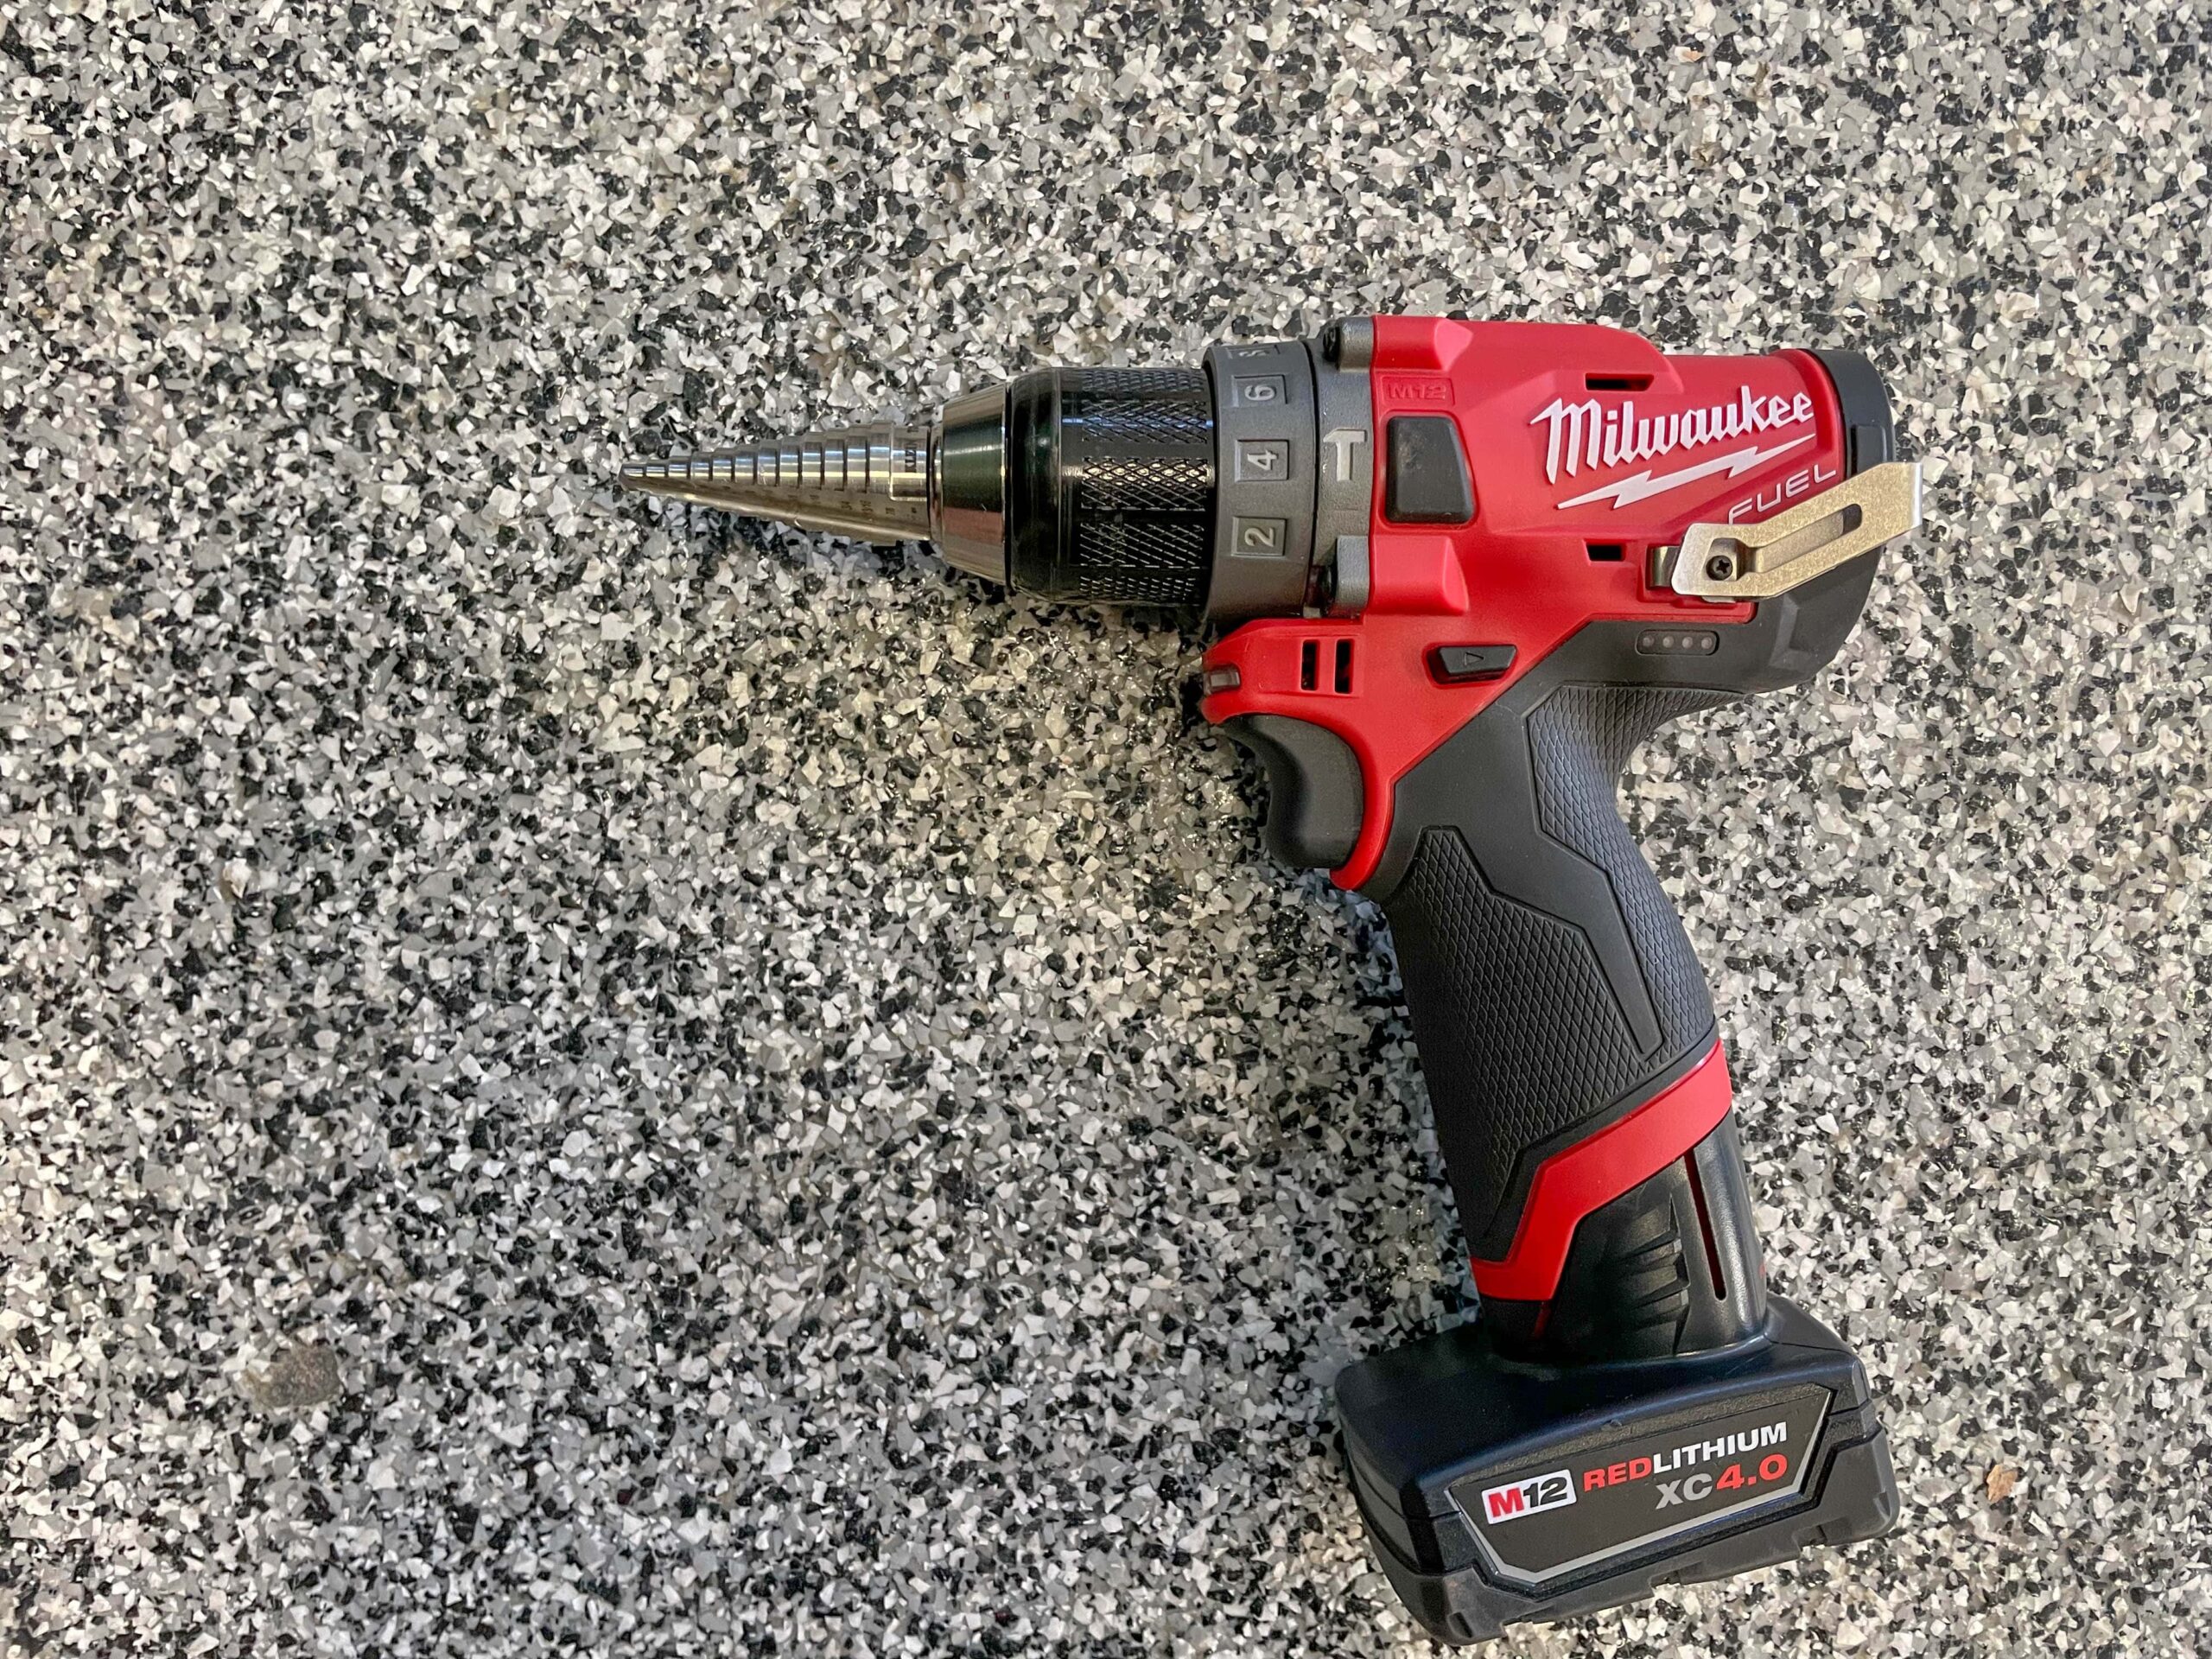
Back upstairs, it was now possible to drill holes for the shifter body. The shifter was placed within the taped location on the tunnel, and as mentioned previously, the plan was to use bolts, nuts and washers to secure the shifter. A word of caution: Drilling through carpet is a royal pain. The carpet strands tear and wrap around the drill bit and often wrap so tight, you can’t finish the job. The best solution is to melt a hole in the carpet prior to drilling a hole in the sheet metal. In order to accomplish this, I use a small round soldering iron to melt the holes. It makes for a super clean hole and it allows you to easily drill the respective holes into the sheet metal.
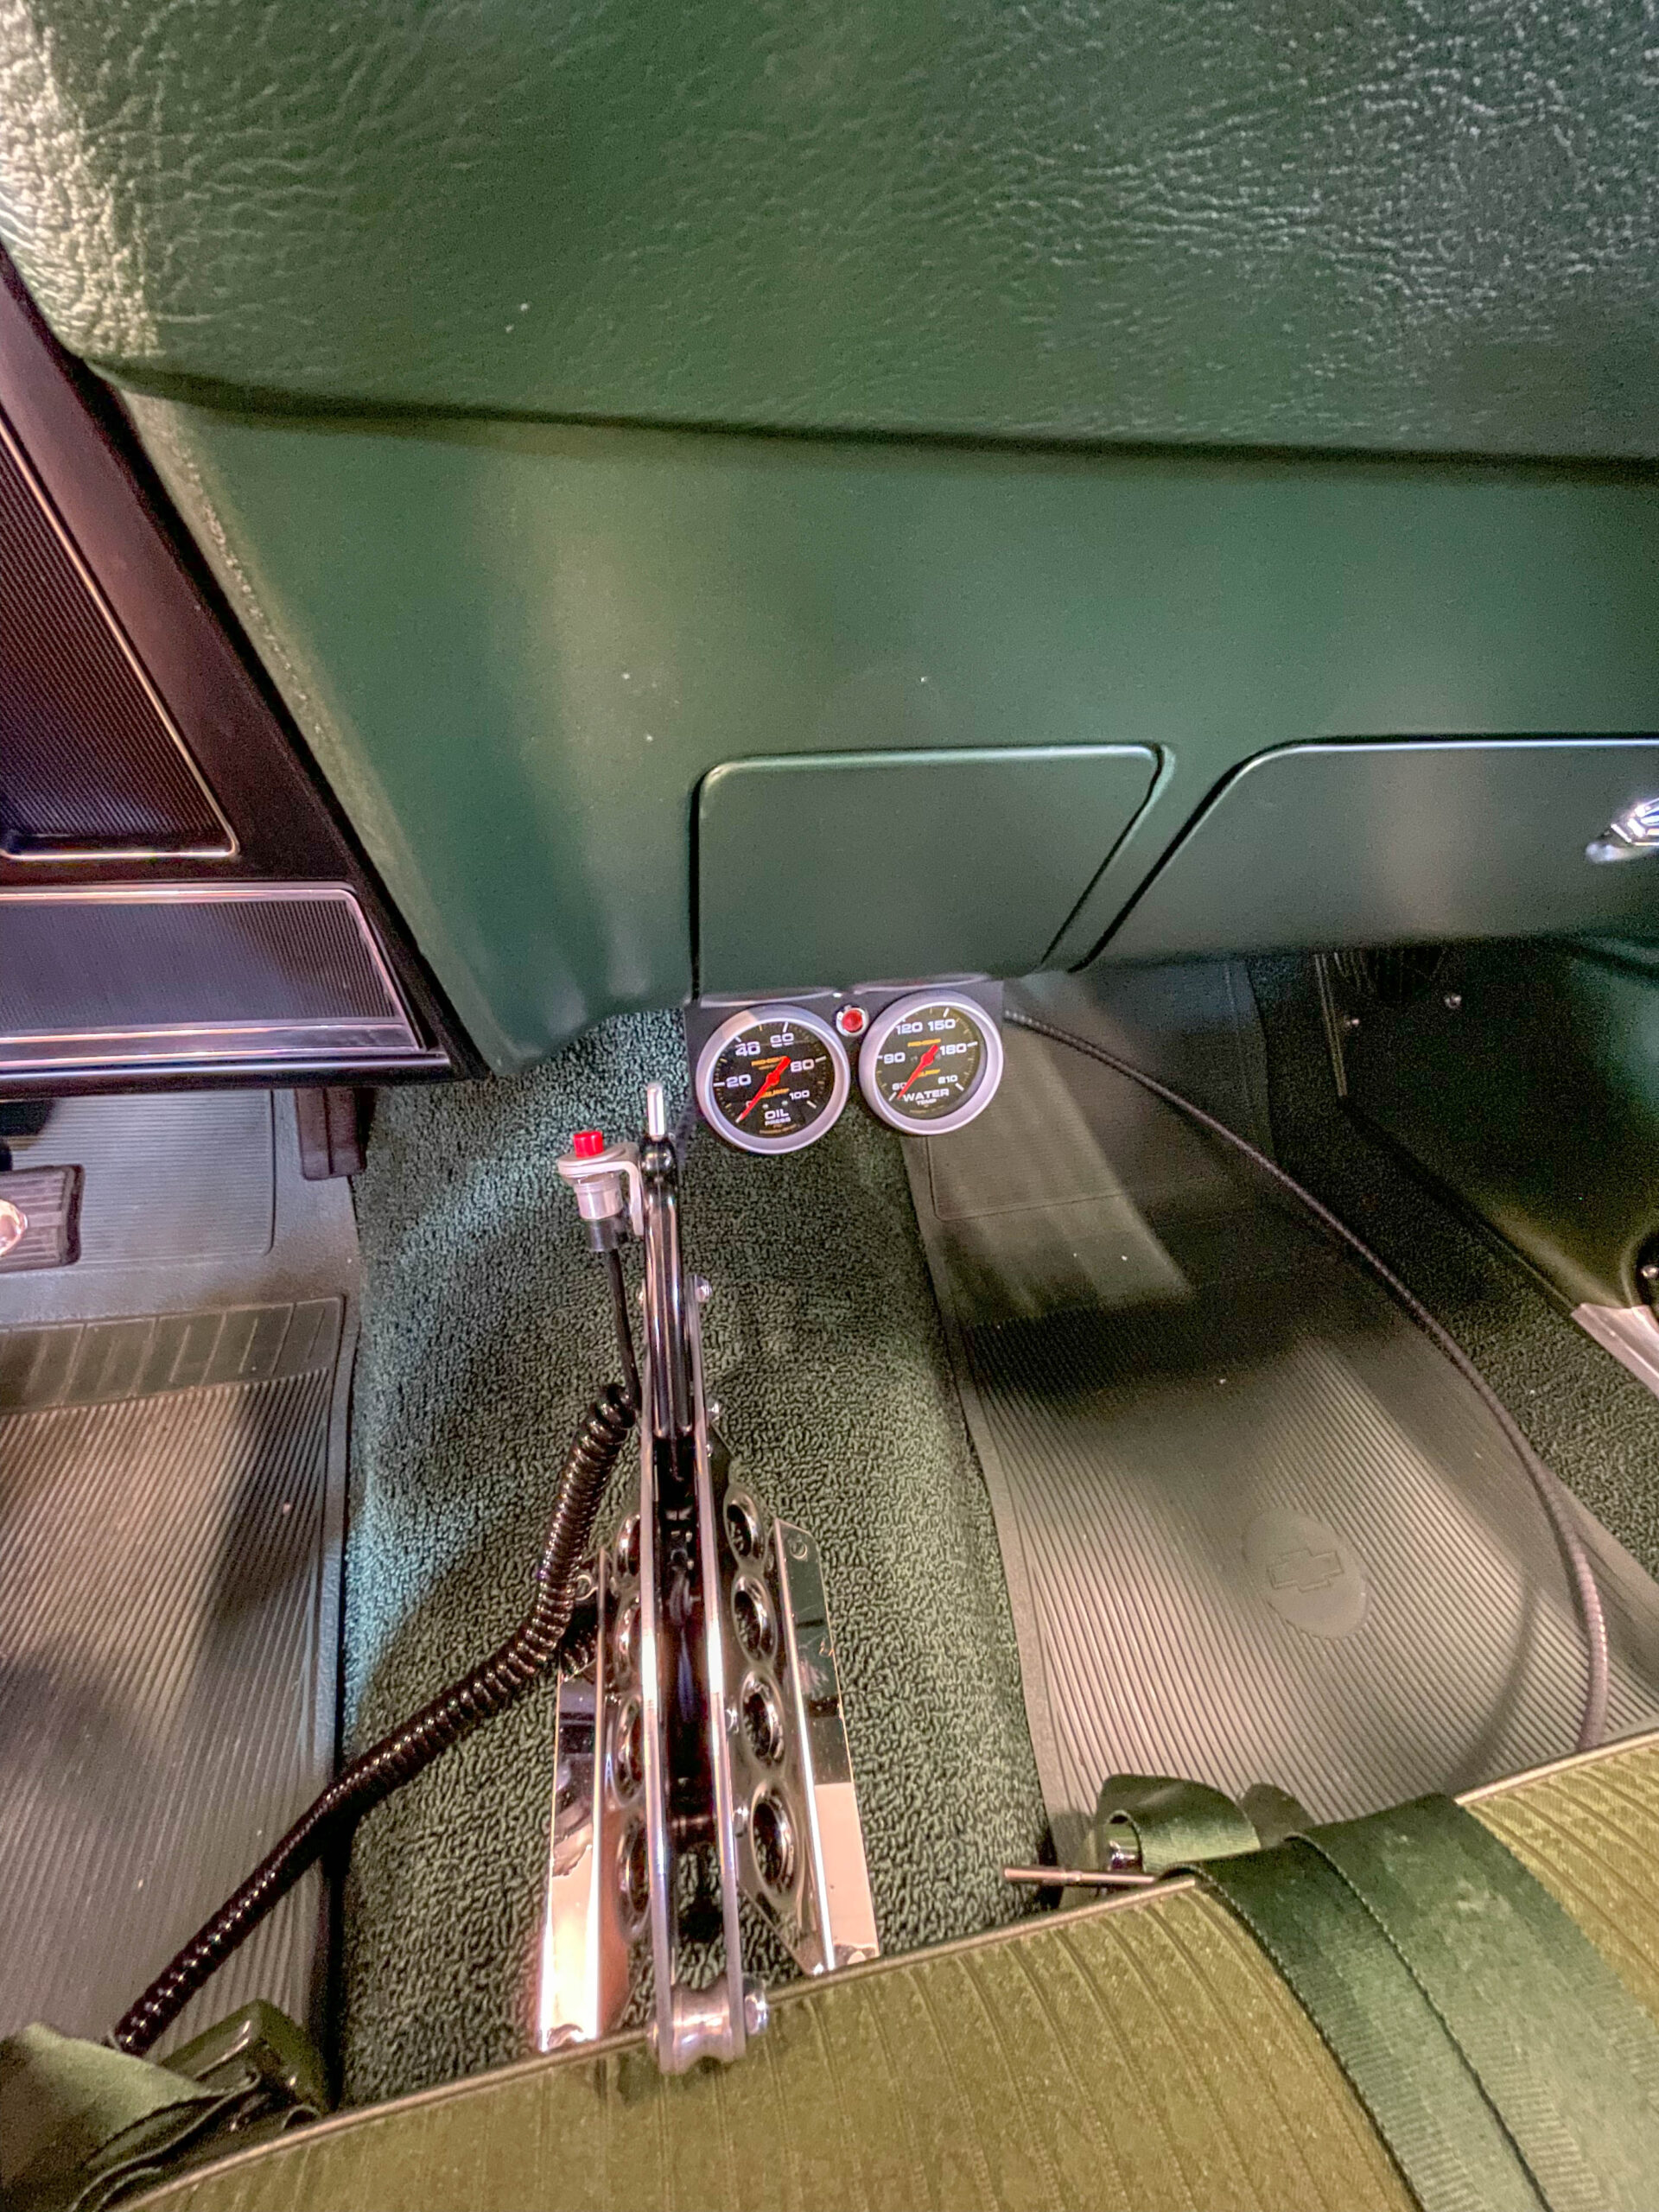
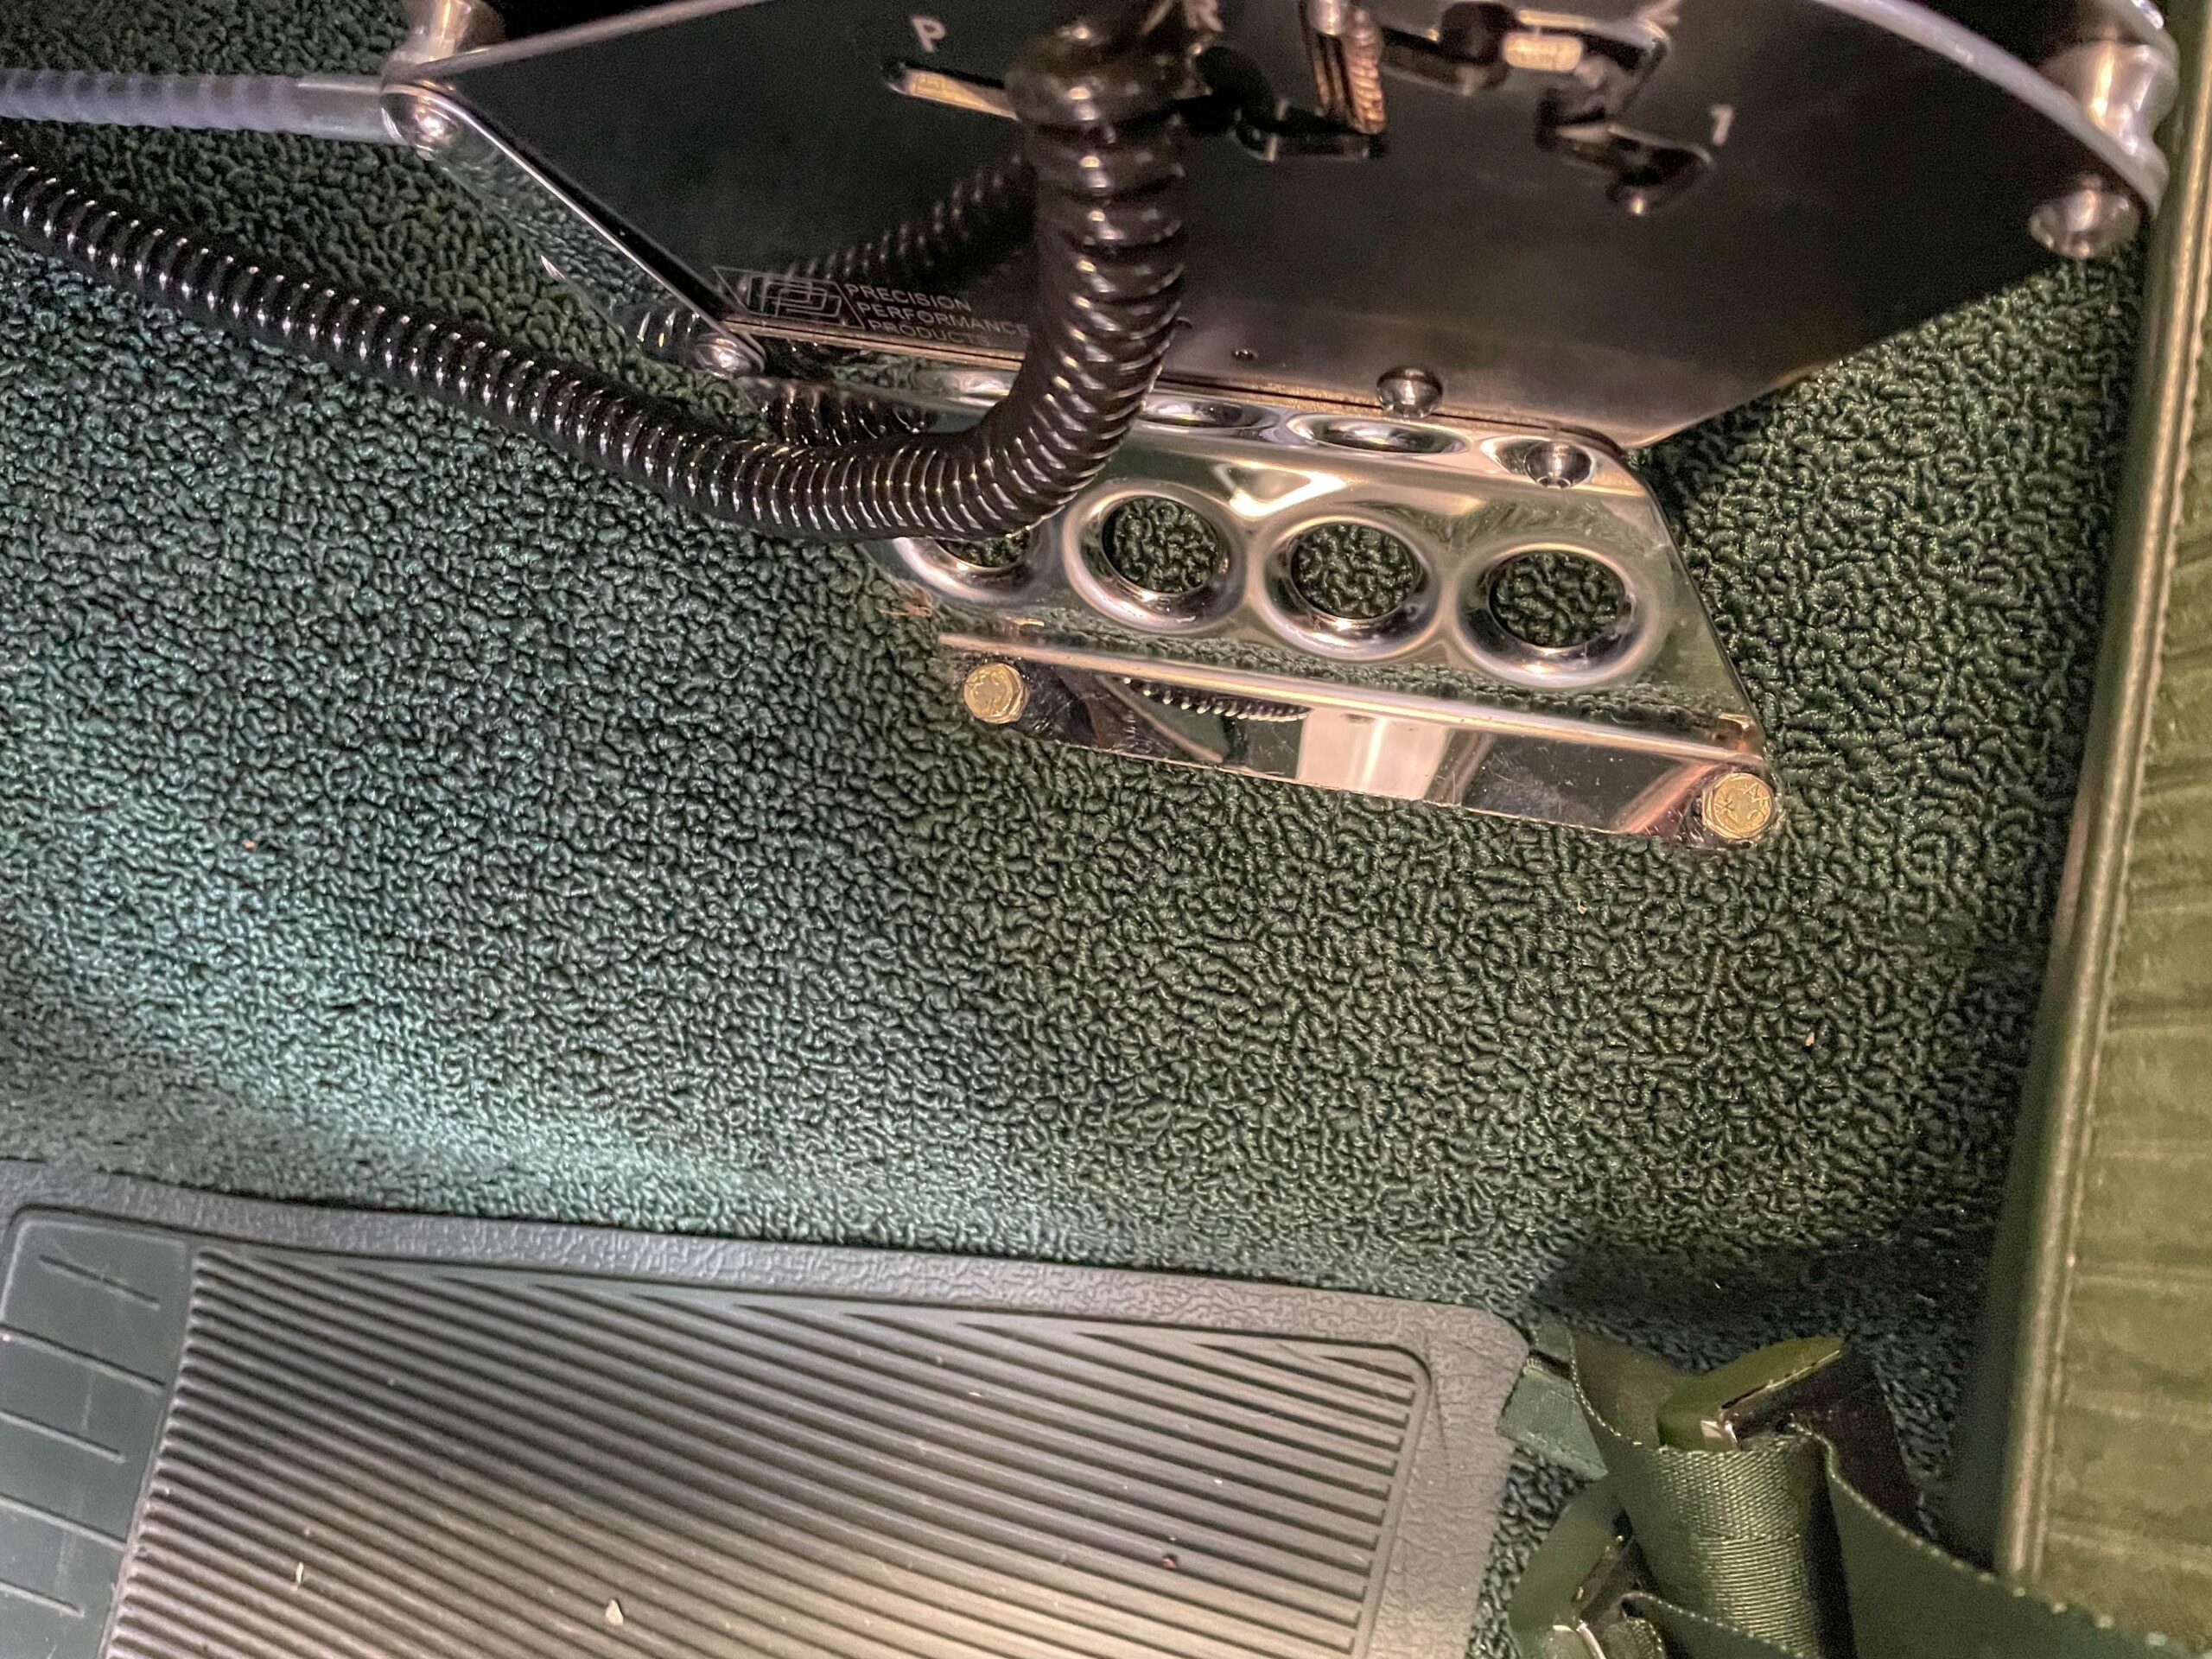
At this juncture, it’s a good time to double check the hole location for the shifter cable. In my case I went under the car again and measured forward from the pair of front mount holes to the potential cable hole. This was cross-checked against the original location previously marked under the car. Once the exact spot was determined, I drilled a pilot hole, drilling up from the underside of the transmission tunnel. Then a step drill was used to enlarge the hole. The step drill doesn’t tear up the carpet when using it from the bottom side. Once the hole was drilled, I simply used an awl to poke a hole through the carpet and then enlarged it with a razor blade for the cable to pass through. The shifter cable should be protected as passes through sheet metal. I had several different rubber grommet sizes in my collection, but while at a local auto parts store I found a generic Toyota (of all things) PCV grommet was perfectly proportioned for the hole in the tunnel as well as for the OD of the cable.
With the bolts inserted, how do you tighten down the shifter? Easy if you have a helper. Not so easy if you don’t. What I do is tape (quality duct tape works – sometimes strapping tape works) a box end wrench on the bolt head, climb under the car and install a regular (non-locking) nut on the bolt. This usually allows you to snug the fastener up. With all four fasteners tightened, it’s then possible to replace (one by one) each regular nut with a lock nut. Alternatively, you can just use a lock washer, however quality nylock nuts are more secure.
That completes the basic shifter install. In the next segment, we’ll finish the install, including the wiring for the line lock and neutral safety switch. We’ll also include info on how to setup the shifter linkage at the transmission. Adjustment is easy. Watch for it.
Click Here to Begin Slideshow
Setting up Precision Performance's shifters in Part 2 of Wayne Scraba's series.
Last issue, we introduced you to the Precision Performance line of shifters. They’re a brilliant design and quality is fabulous. They offer a considerable number of options, they’re light, compact and at least by this writer’s book, they work and look great. Fair enough, but are they difficult to set up? The following will shed some light on the topic:
In the writer’s case, the engine and transmission were out of the car when the shifter was installed. This allowed for an easier shifter installation. Part of that is because I personally don’t like using big sheet metal screws to install a shifter. I much prefer using bolts, washers and nylock nuts to fasten a shifter. If you use screws, it won’t be as secure plus you always run the risk of slicing your skin if, for whatever reason, you need to get inside the tunnel. My car has a good size tunnel, and even with a big TH400, it’s still possible (but not really easy) to access the nylock nuts with the transmission in place.
At this point, I placed the shifter (without the wiring harness and cable installed) on the transmission tunnel. I set the seat in my “comfort” position and fastened the seat belt and shoulder harness. From here, I could move the shifter around to a point where (a) I personally felt comfortable and (b) the shifter would fit without interfering with the seat or the dash. Keep in mind this is a bench seat car, so there are some limitations. As it turned out, I was able to set up the location so that I could personally use two seat positions and still operate the shifter comfortably without striking the seat. In order to mark the location, I used green painter masking tape to outline the mount bracket location (both sides of it). This way, I could remove the shifter and not have to fuss with nailing down the location again.
With the shifter out, the cable (on the shifter) was installed. The reason for doing this was to work out where the hole would be drilled in the tunnel. You have to be careful here because there are limits on how tight the cable bend can be. Precision Performance tells us the minimum bend radius for the cable is ten inches. To install the cable into the shifter body, move the shifter handle between park and reverse positions in the gate. You’ll note there is a small ½-notch in the gate. When in this position, a hole in the shifter side plate will be aligned with a hole in the handle. Align the shift cable eyelet with these holes and insert the supplied ¼-inch pin. Next, secure the cable housing to the shifter body. A (supplied) Allen-head ¼-inch bolt is used to attach the cable housing to the shifter body. From here, the shifter, with the cable attached was reinstalled in the car. This allows you to figure out where the hole for the cable should be drilled. Once I had the rough cable location figured out, I went under the car and checked the orientation. I had to work out a spot where the bend radius was right and where there wasn’t a double sheet metal panel to drill through. The location was marked but not drilled.
Back upstairs, it was now possible to drill holes for the shifter body. The shifter was placed within the taped location on the tunnel, and as mentioned previously, the plan was to use bolts, nuts and washers to secure the shifter. A word of caution: Drilling through carpet is a royal pain. The carpet strands tear and wrap around the drill bit and often wrap so tight, you can’t finish the job. The best solution is to melt a hole in the carpet prior to drilling a hole in the sheet metal. In order to accomplish this, I use a small round soldering iron to melt the holes. It makes for a super clean hole and it allows you to easily drill the respective holes into the sheet metal.
At this juncture, it’s a good time to double check the hole location for the shifter cable. In my case I went under the car again and measured forward from the pair of front mount holes to the potential cable hole. This was cross-checked against the original location previously marked under the car. Once the exact spot was determined, I drilled a pilot hole, drilling up from the underside of the transmission tunnel. Then a step drill was used to enlarge the hole. The step drill doesn’t tear up the carpet when using it from the bottom side. Once the hole was drilled, I simply used an awl to poke a hole through the carpet and then enlarged it with a razor blade for the cable to pass through. The shifter cable should be protected as passes through sheet metal. I had several different rubber grommet sizes in my collection, but while at a local auto parts store I found a generic Toyota (of all things) PCV grommet was perfectly proportioned for the hole in the tunnel as well as for the OD of the cable.
With the bolts inserted, how do you tighten down the shifter? Easy if you have a helper. Not so easy if you don’t. What I do is tape (quality duct tape works – sometimes strapping tape works) a box end wrench on the bolt head, climb under the car and install a regular (non-locking) nut on the bolt. This usually allows you to snug the fastener up. With all four fasteners tightened, it’s then possible to replace (one by one) each regular nut with a lock nut. Alternatively, you can just use a lock washer, however quality nylock nuts are more secure.
That completes the basic shifter install. In the next segment, we’ll finish the install, including the wiring for the line lock and neutral safety switch. We’ll also include info on how to setup the shifter linkage at the transmission. Adjustment is easy. Watch for it.
Click Here to Begin Slideshow
Leave a Reply