Making Your Body Mobile Part 2

Click Here to Begin Slideshow When it comes to mobility, once you separate the body from the frame on a project, that’s when the trouble really begins. In the real world, you can manhandle the frame with relative ease.  Once stripped to the bare essentials with no suspension or rolling stock, two average strength adults can usually lug the frame around.  The frame is a robust component too, but the body, on the other hand is a far different story. It’s a clumsy, sometimes fragile piece – something you just can’t easily jostle on a whim.  Or without considerable help. And that’s where the big questions arise.  How in the heck do you move the thing around your workshop or take it to the body shop without breaking it or risking personal injury?  The answer is a body cart.  Some time ago, in our sister publication, Hot Rod Hotline, I showed you how I built a dolly setup to take the place of a subframe (https://www.hotrodhotline.com/waynes-project-body-dolly-part-1). This time around, we’ll show you how to build a basic (cheap) cart for a complete car body.  Now there’s more than one type of body cart out there – some pretty slick and expensive (for example, a high end wheeled rotisserie) and some home built and downright stingy (for example, the cart shown in the accompanying photos).  Personally, I’ve done it both ways, but from the pure dollars and cents perspective, a home-brewed body cart like the one in the accompanying photos is definitely tough to beat.  Not only can you build it dirt cheap (even with today’s inflated costs), once you’re finished with it, you can disassemble it, and use the hardware for other projects. Before going any further, let me explain something:  I loathe anything to do with woodwork.  If you can’t bend it, heat it with a torch, weld it, grind on it or turn a wrench on it, it’s pretty much foreign to me.  The truth is, I probably can’t hammer a nail straight, so I assembled the cart in the accompanying photos with bolts and screws.  If you’re like me (all thumbs when it comes to wood), then this project is for you. First things first, a rudimentary sketch was created.  It was more or less a basic “blueprint” for the job (see the accompanying illustration).  That sketch is obviously no thing of beauty, but it works.  Note too, that I wanted a low cart, so that the entire body could be accessed.  Plus it would keep the center of gravity down low so that the cart and body could easily be hoisted on a ramp truck or roll-bed wrecker to get it to the body shop.  As a result, the overall height is 12-inches, plus the height of the caster wheels and caster mounting plates, for a total figure of 21-inches.  From here, I made a “want list” (see the accompanying sidebar) and headed out the door.  It was a simple matter of pointing my pickup truck toward my closest lumberyard, dragging out my credit card and signing on the dotted line. Once home, I unloaded the truck bed and dragged out a skill saw (I do have one of those, although it gets precious little use).  The accompanying photo captions show the entire construction process from start to finish.  And for your information (and much to my wife’s amazement), no digits were lost or mangled along the way.  Next issue we’ll wrap it up with a finished bare bones wooden body cart. Watch for it. Click Here to Begin Slideshow

1-min

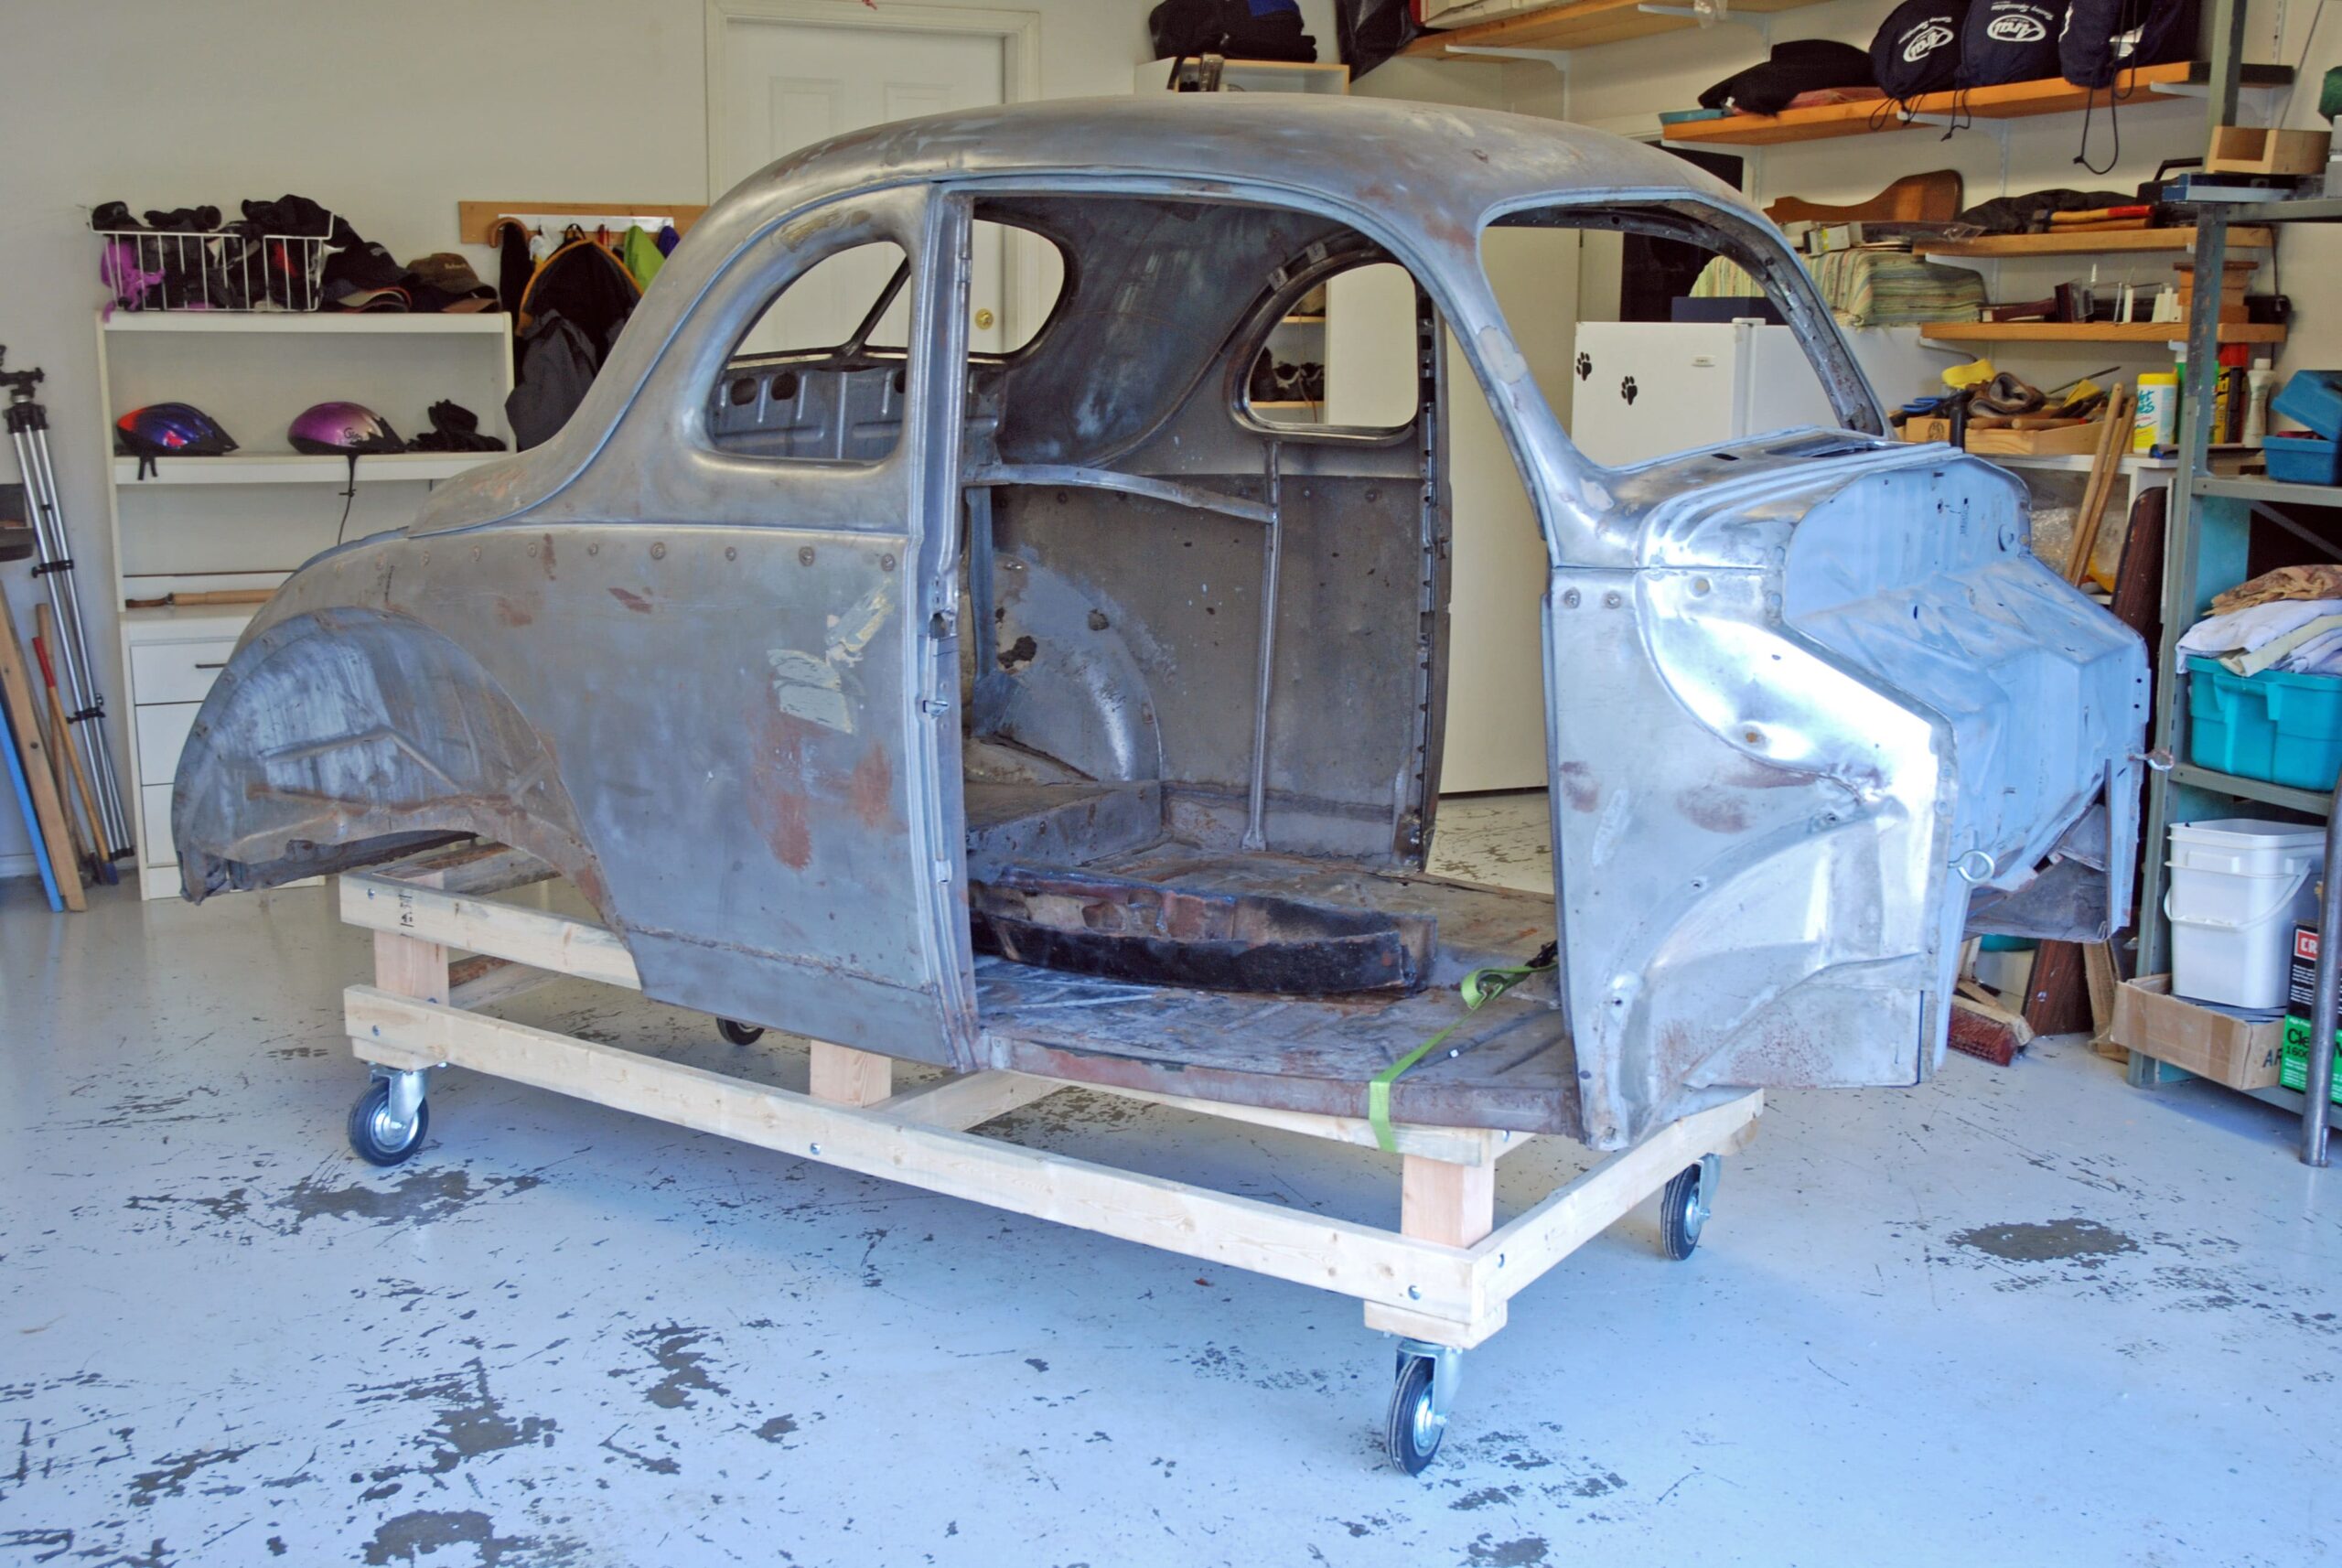
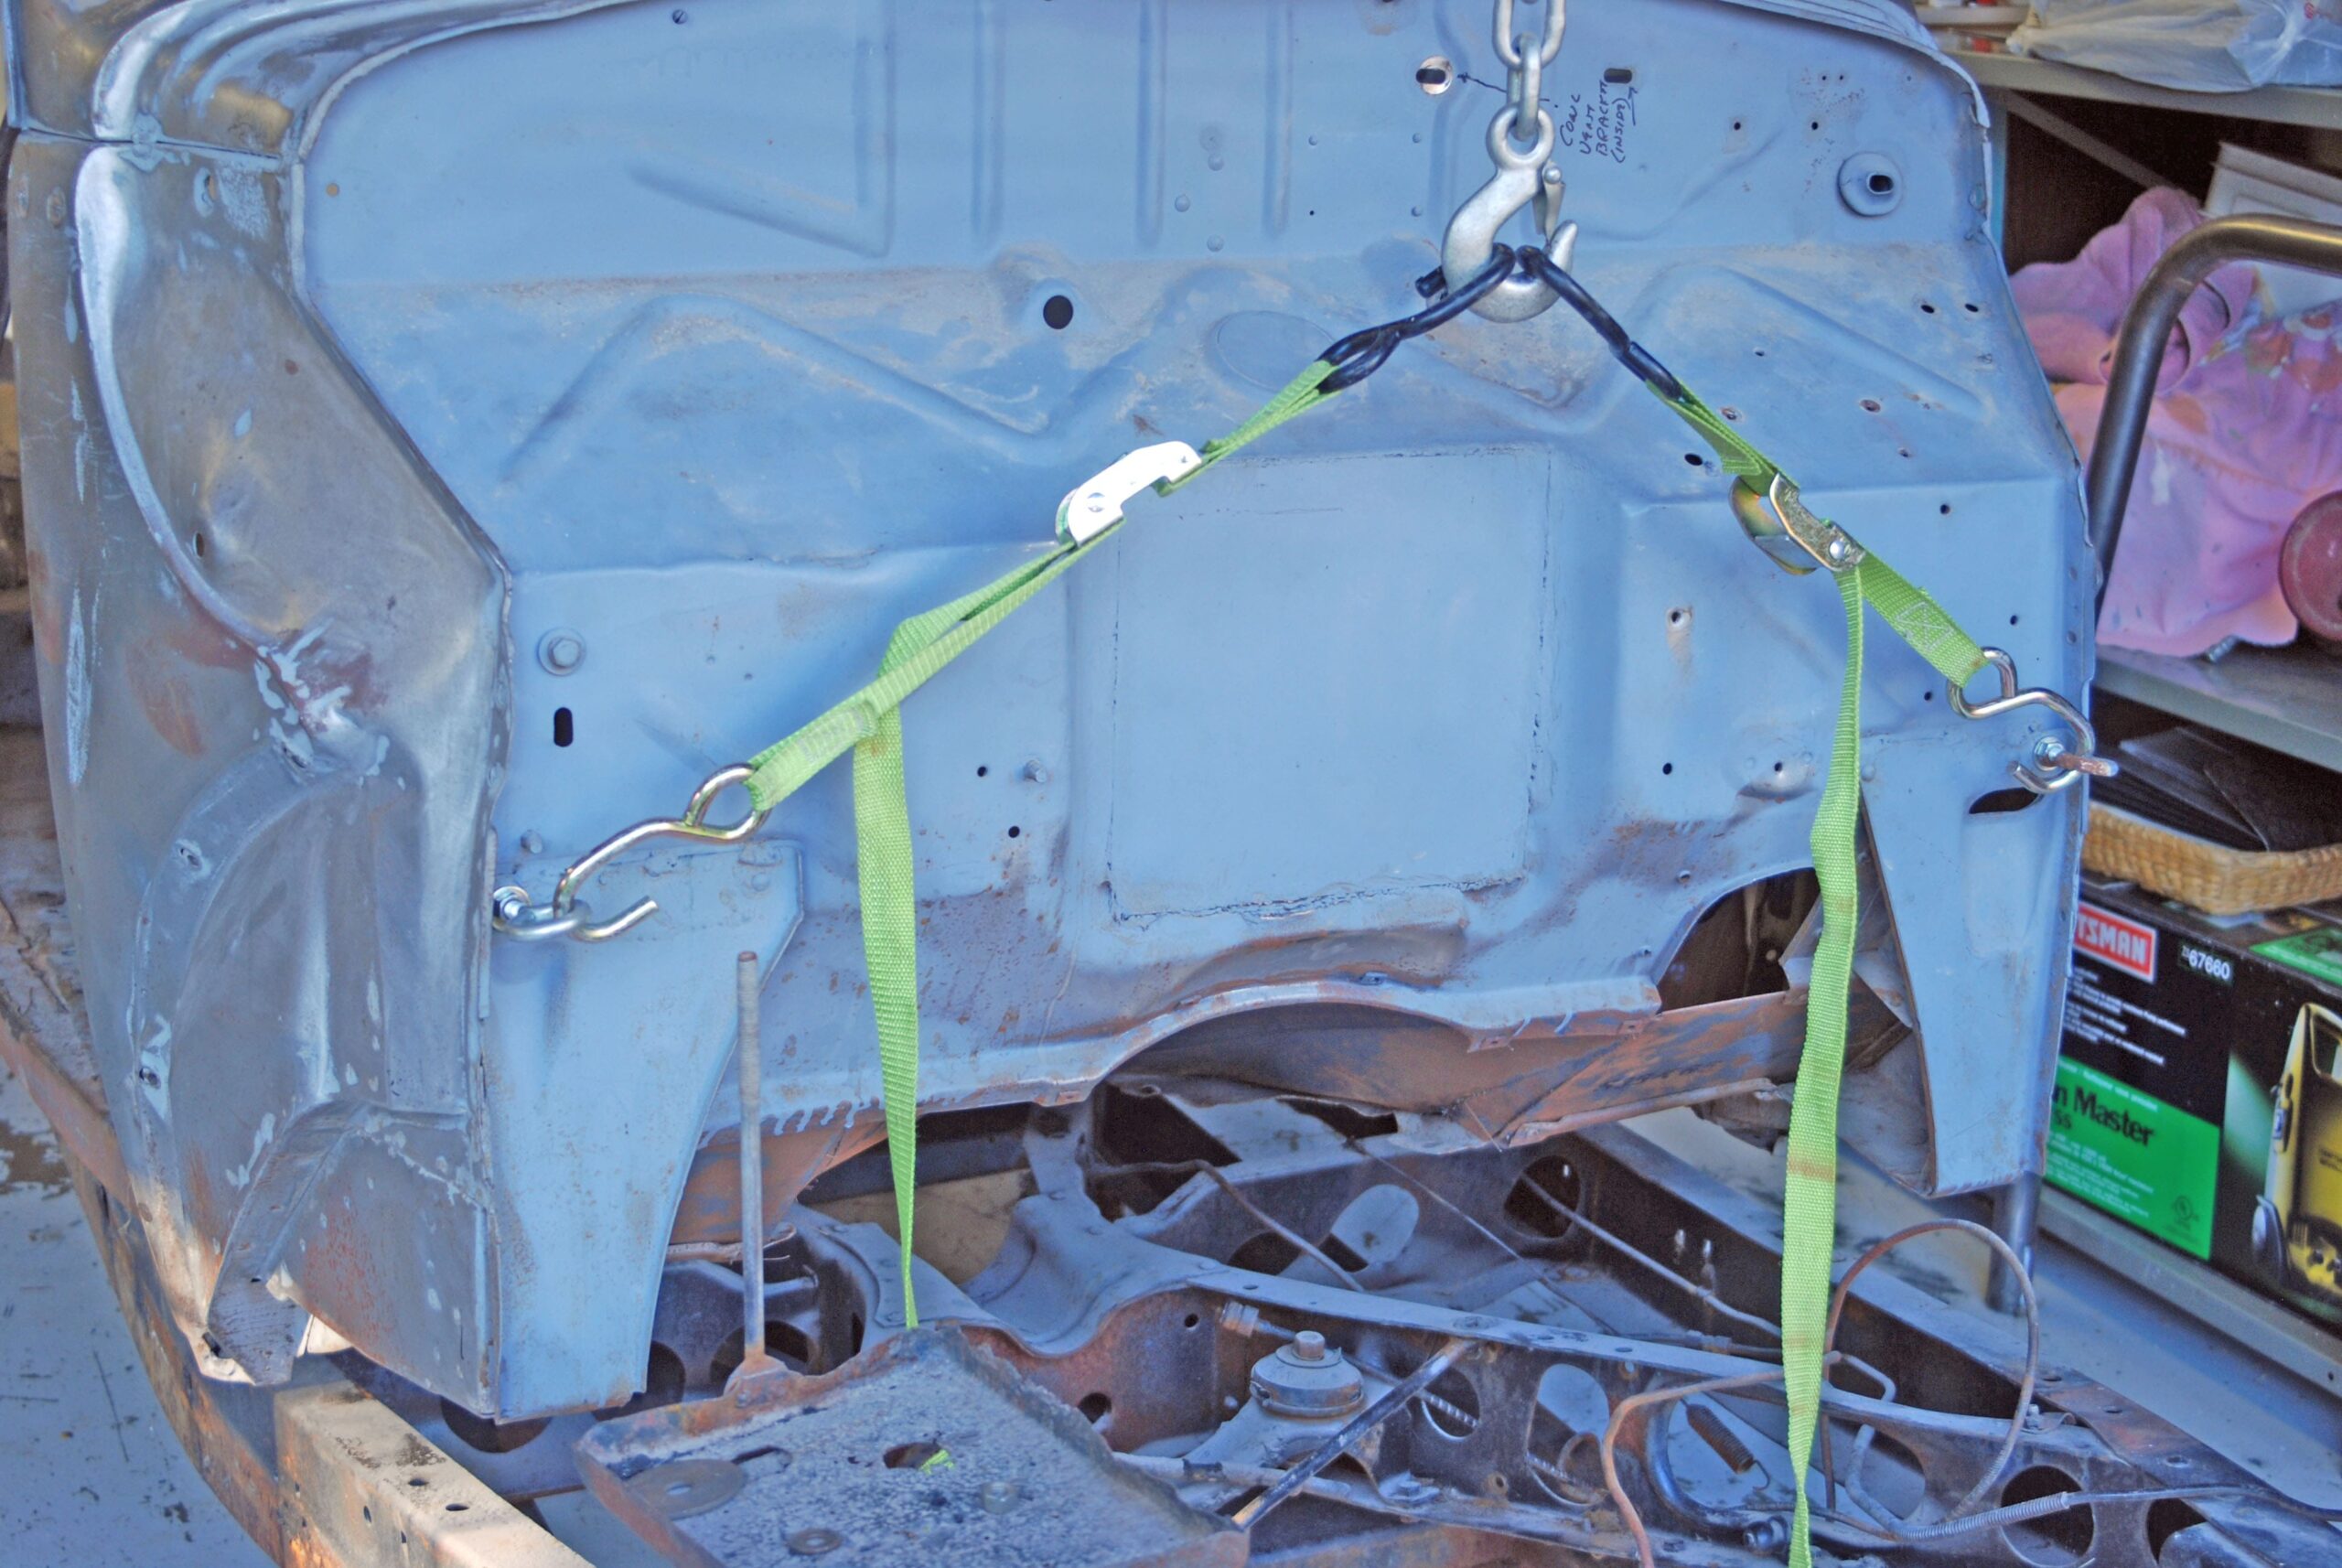
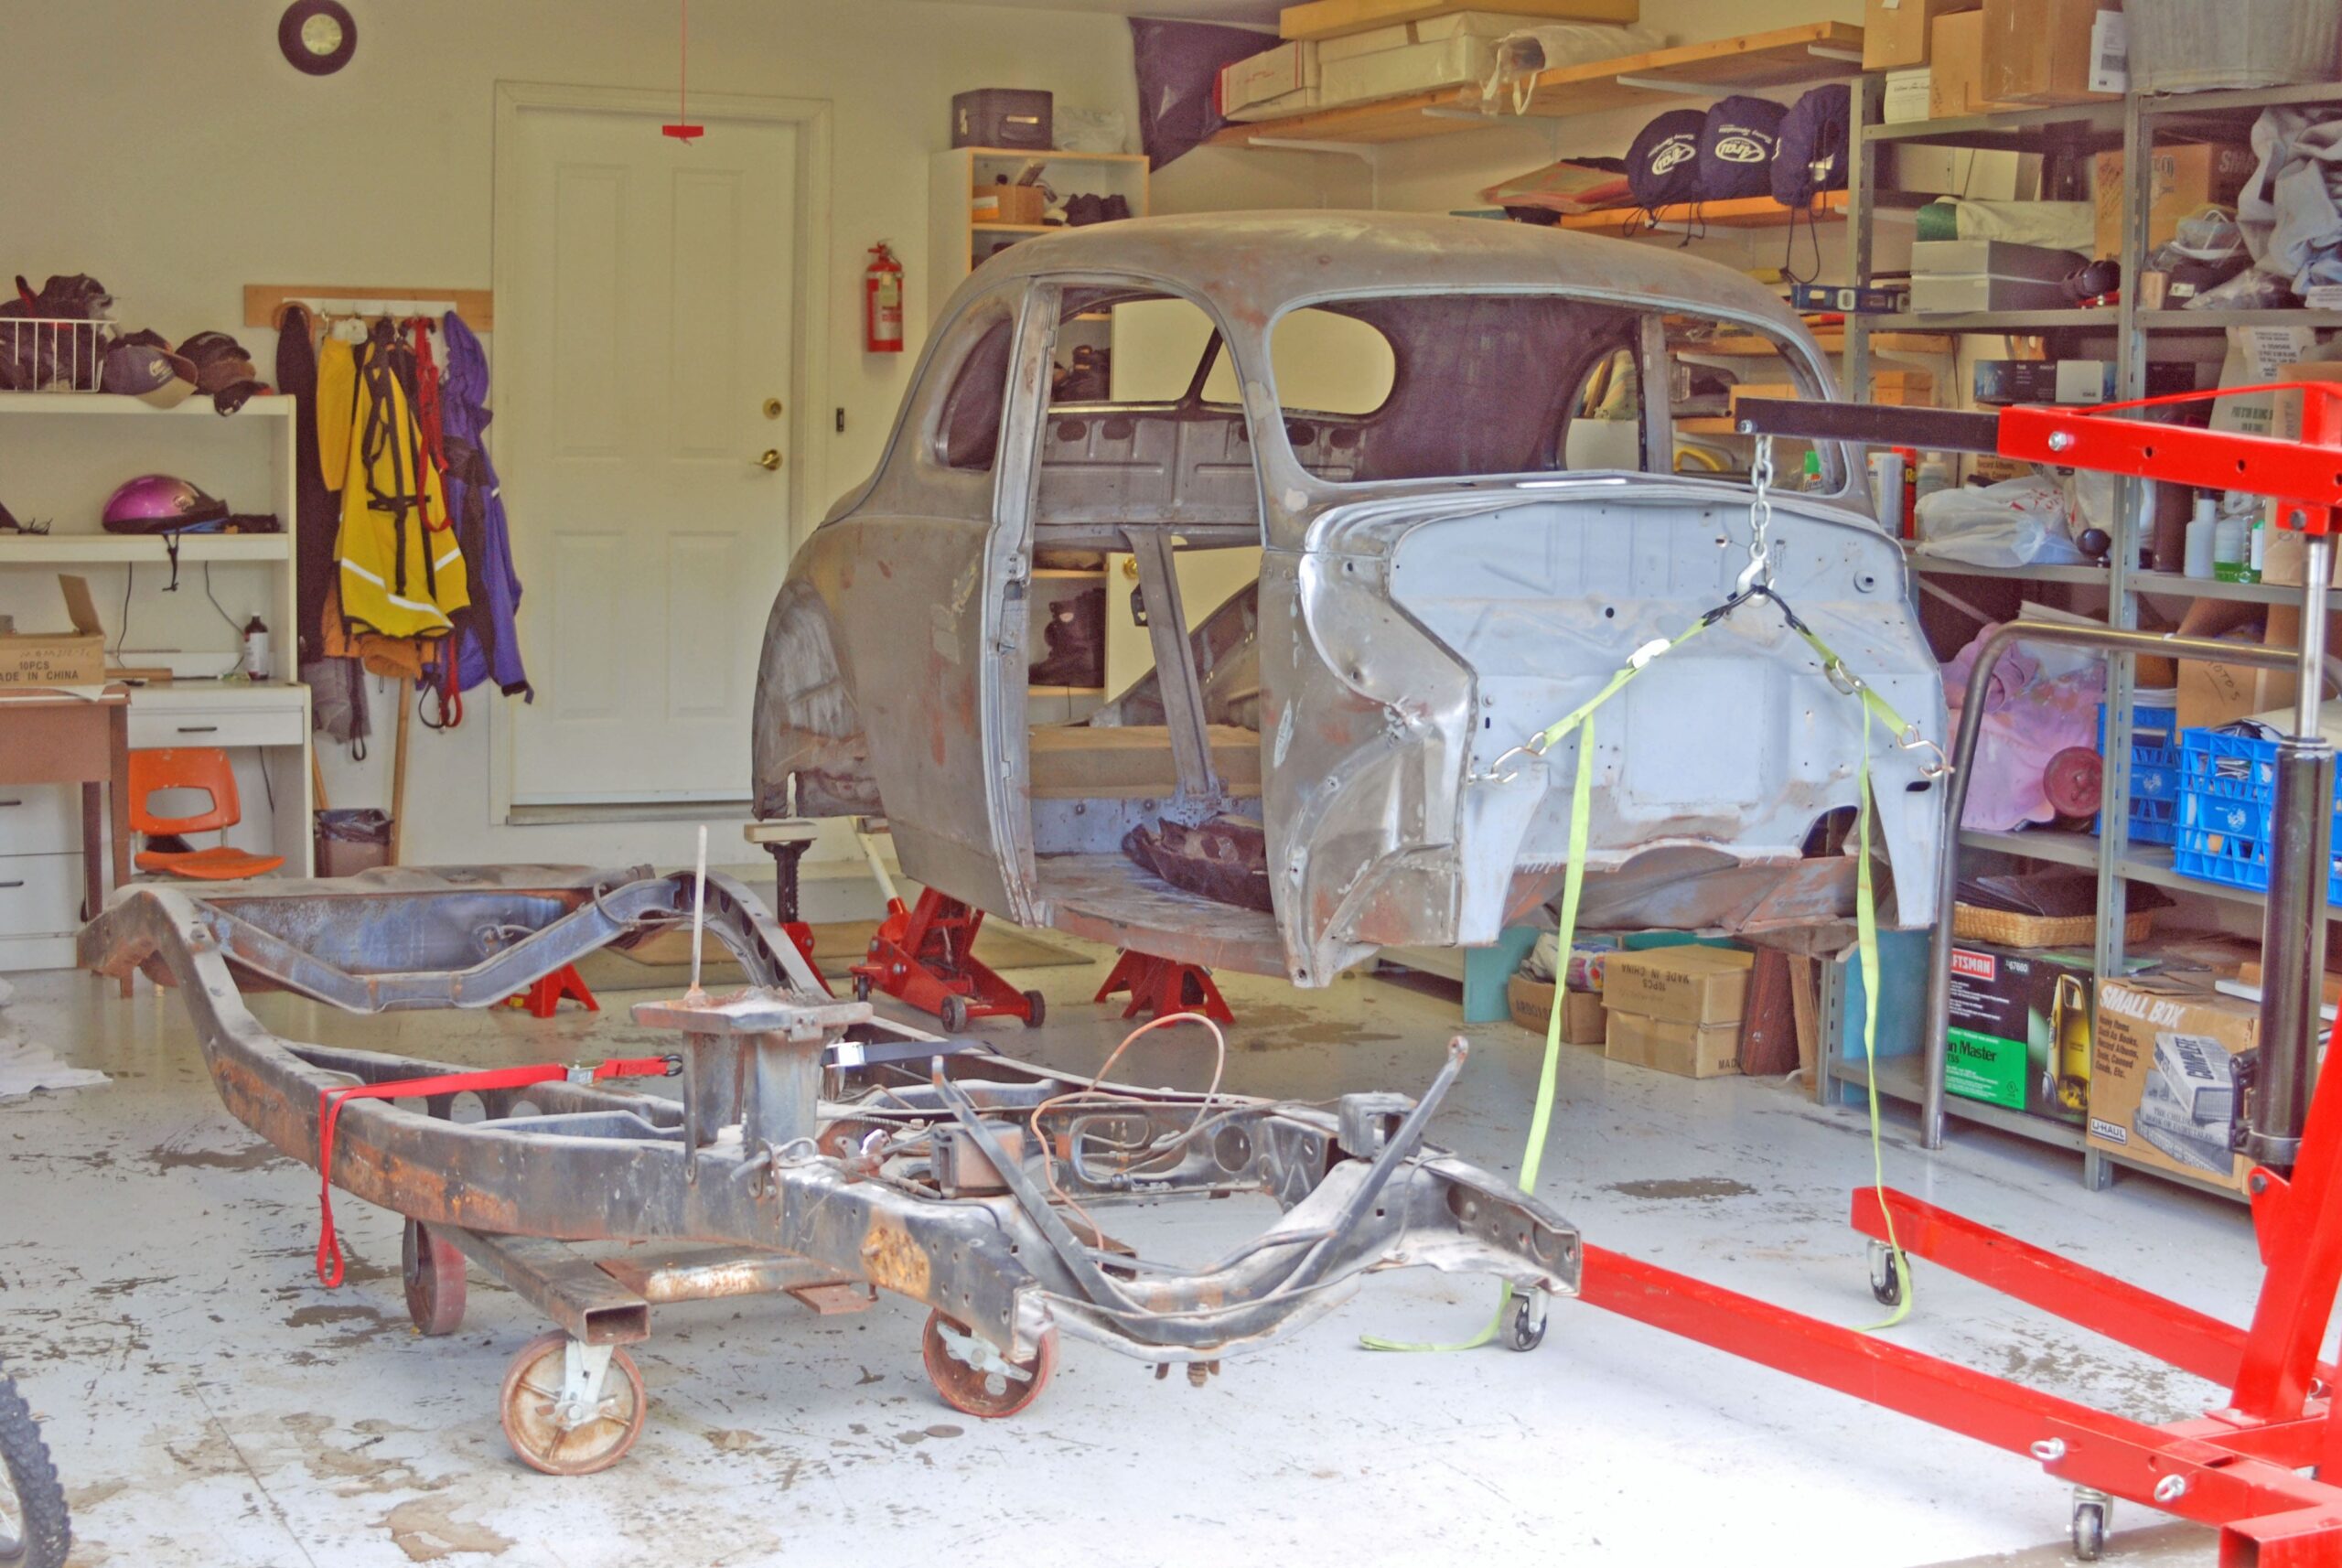
When we last left you, our body cart project was well on its way. To recap, the idea here is to craft a body cart that is easy to construct, relatively inexpensive, and, if you don’t need it anymore, easy to dispose of (hey, you can always burn the wood for a bonfire!). The finished product turns out to be relatively light, too, so you won’t need help setting it up.

In between complete and bonfire, the cart is capable of moving your project car body (or truck cab or bed) around the shop, into or onto a trailer, into a body shop or paint stripping operation and so on. They’re incredibly useful. It also means you don’t have to trip over the body when its in your shop. You can parallel park it in a corner if necessary and when on the cart, that boils down to an effortless one person operation.

The other big bonus with a project such as this is it’s inexpensive. Yes, lumber prices have, over the years, skyrocketed, but lately they’ve settled down somewhat, at least in my neck of the woods. And if you’re truly a scrounger, watch for a demo sale or a find a contractor selling off scrap (one man’s junk is another man’s gold). Nothing here is super costly. Nothing is difficult to source either. It’s all common material.

In the last segment, we completed the perimeter of the cart. This time around, we’ll add crossmembers, and fit it with caster wheels. It’s certainly not difficult work. If I can do it, anyone can! For a closer look, check out the accompanying photos:

12-min

At this point, I bolted in the “cross members”. I used a cross-bolt pattern (figuring if that worked on hi-po 427 Fords, it’d be perfect here).

13-min

This is another look at the basic cart frame, bolted together.

14-min

: Flipped in the normal orientation, here’s the body cart, less the rolling stock.

15-min

Since I couldn’t bolt the caster wheels directly to the cart, I made these wooden plates from scrap lumber.

16-min

3/8X2-inch carriage head bolts were installed on the backside, and then the plates were screwed into the cart frame. Air tools rock.

17-min

Bolt the caster wheels into place with lock washers and nuts. I used swivel casters on all sides. That makes moving it anywhere a breeze.

18-min

This is the completed cart. It’s strong, light and easy to maneuver. Best of all, it’s dirt-cheap and took less than a day to build.

19-min

To get the body on the cart, the back end was lifted with a floor jack, supported with axle stands. Yes, the floor paint in my old shop was ugly.

20-min

Up front, two eyebolts were installed in the firewall, hooked to a pair of lightweight motorcycle tie downs. The cherry picker did the rest.

21-min

Here’s a closer look at how the eye-bolt and tie down arrangement was setup.

22-min

ith body high enough, I placed the frame on a small steel dolly and slid the works out sideways.

23-min

From here, the cart was rolled underneath the body and the body dropped over it. Two motorcycle tie downs wrapped around the cart (and through the door openings) secure it.

Back to Post

Be the first to comment

Leave a Reply

Your email address will not be published.


*

I agree to receive emails from RacingJunk.com. I understand that I can unsubscribe at any time. Privacy Policy