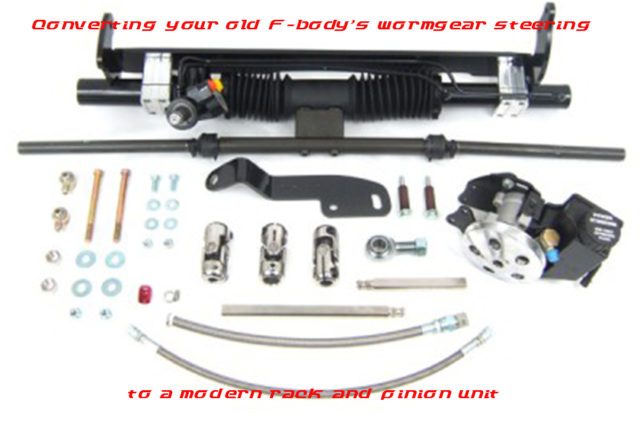
The easiest way to get rack and pinion steering in your first generation F-Body is to install a rack and pinion cradle kit. I’m going to take two articles this week to show you how to install a kit like Flaming River’s FR316KTPW (below) for 70-81 Camaro as completely as possible. Where possible, I’m going to link to other articles to allow even more in-depth coverage of certain operations. A similar kit from Unisteer is shown above. In this article we’ll cover the process of removing everything prior to installation of the conversion cradle kit.
Installing a Rack and Pinion Conversion Kit in Your Early F-Body
The easiest way to get rack and pinion steering in your first generation F-Body is to install a rack and pinion cradle kit. I’m going to take two articles this week to show you how to install a kit like Flaming River’s FR316KTPW (below) for 70-81 Camaro as completely as possible. Where possible, I’m going to link to other articles to allow even more in-depth coverage of certain operations. A similar kit from Unisteer is shown above. In this article we’ll cover the process of removing everything prior to installation of the conversion cradle kit.
Flaming-River-Kit
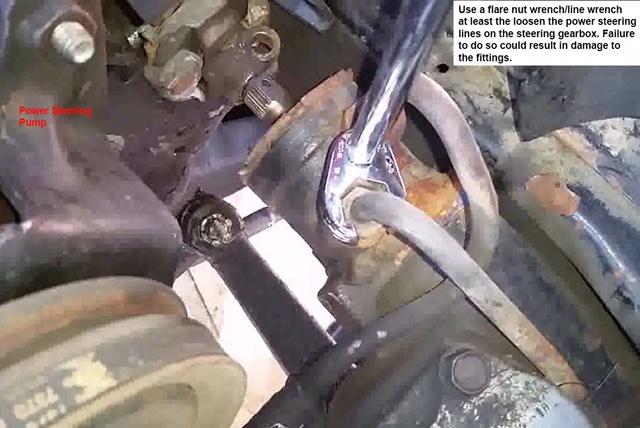
If you have a power steering gearbox, place a catchpan under the car and remove the power steering lines from the gearbox. Be sure to use a crow’s foot wrench on an extension to break the fittings lose or you run the extreme risk of damaging them. Once you have the lines disconnected, remove the cap from the reservoir and let the system drain completely into the pan.
Use-Correct-Tools
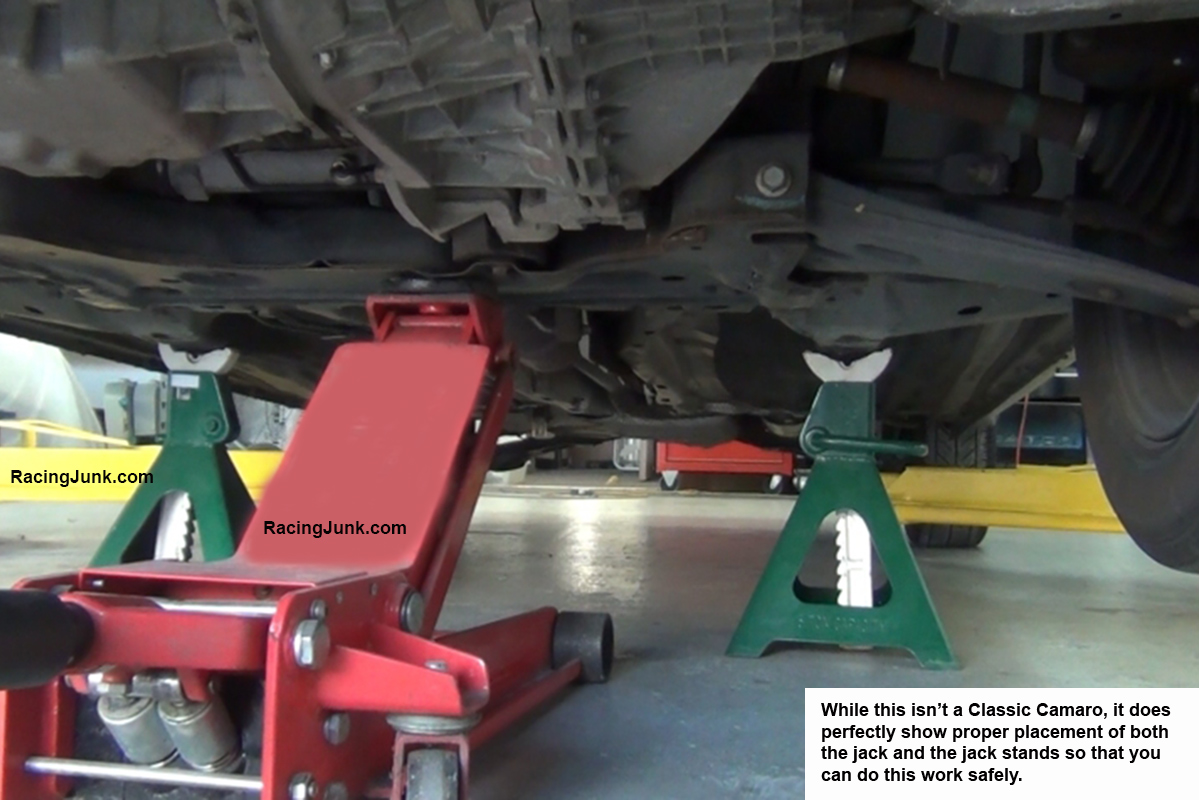
Support the Car Prior to Removal of Steering Components
Proper-Support
Slide the jack under the front crossmember and raise the front of the car until the wheels are off the ground. Slide jack stands under the car behind the front wheels under the subframe. Lower the car onto the stands and make sure there’s room for you to work underneath comfortably. Adjust jack stand placement and height as required. Put on your safety glasses! Disconnect the Steering Column Linkage
Disconnect-Shaft-from-Gearbox
Using a ratchet and socket, remove the pinch bolt from the coupler on the steering column, then remove the bolt from the rag joint at the steering box. There may actually be a universal joint with a pinch bolt like at the top on the column instead of a rag joint. With these removed/loosened, collapse the column and remove it. Wiggling and light tapping with a mallet might be required to loosen them. Remove the Steering Linkage
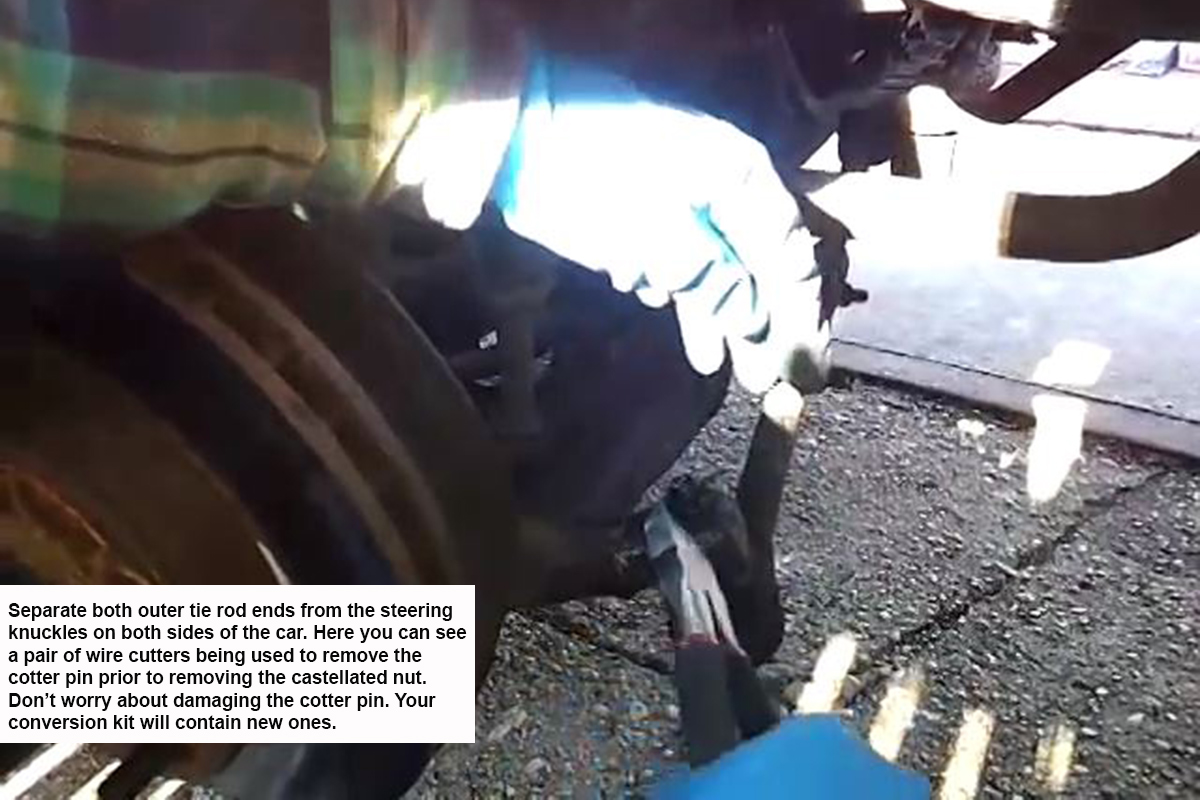
Removing-Cotter-Pin-from-Tie-Rod-End
You’ll need the Pitman Arm puller and/or a pickle fork with a hammer for this step. Measure the distance between the zerk (grease) fittings on the two outer tie rod ends to the center of the frame crossmember and write this number down, you’ll need it during final adjustment. Next, make a mark at the centerline of the car on the crossmember and measure the distance between the outer rod end zerks to this centerline.
Measuring-Toe-Correctly
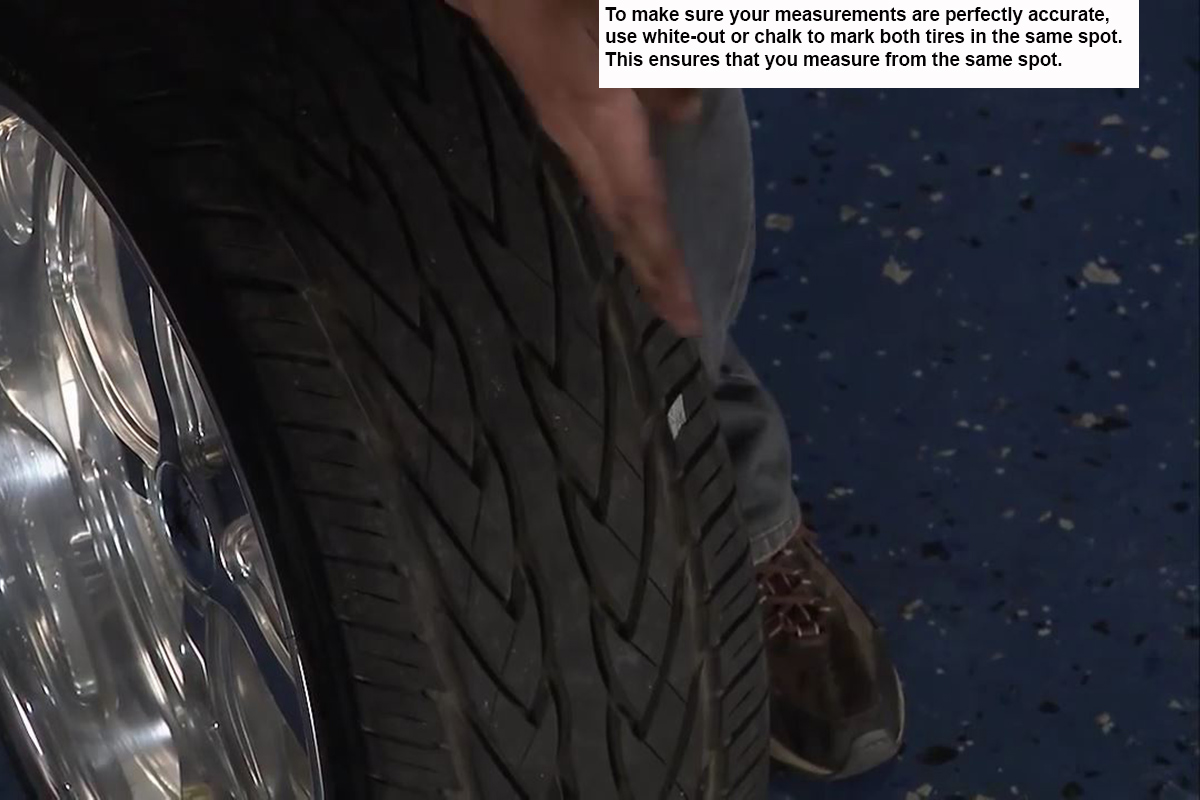
I would also measure the distance between the inner sidewalls of the tires, both front and rear and write this number down. You can also pick the same spot on the tread of the tires, both the front and rear of the tires. Just be sure to use something like a piece of chalk or white-out to mark to spots (see image below) you choose to make these measurements so that you use the same exact spots once the installation is completed and you’re making your final adjustments. Still wearing your safety glasses?
Idler-Arm-Removal
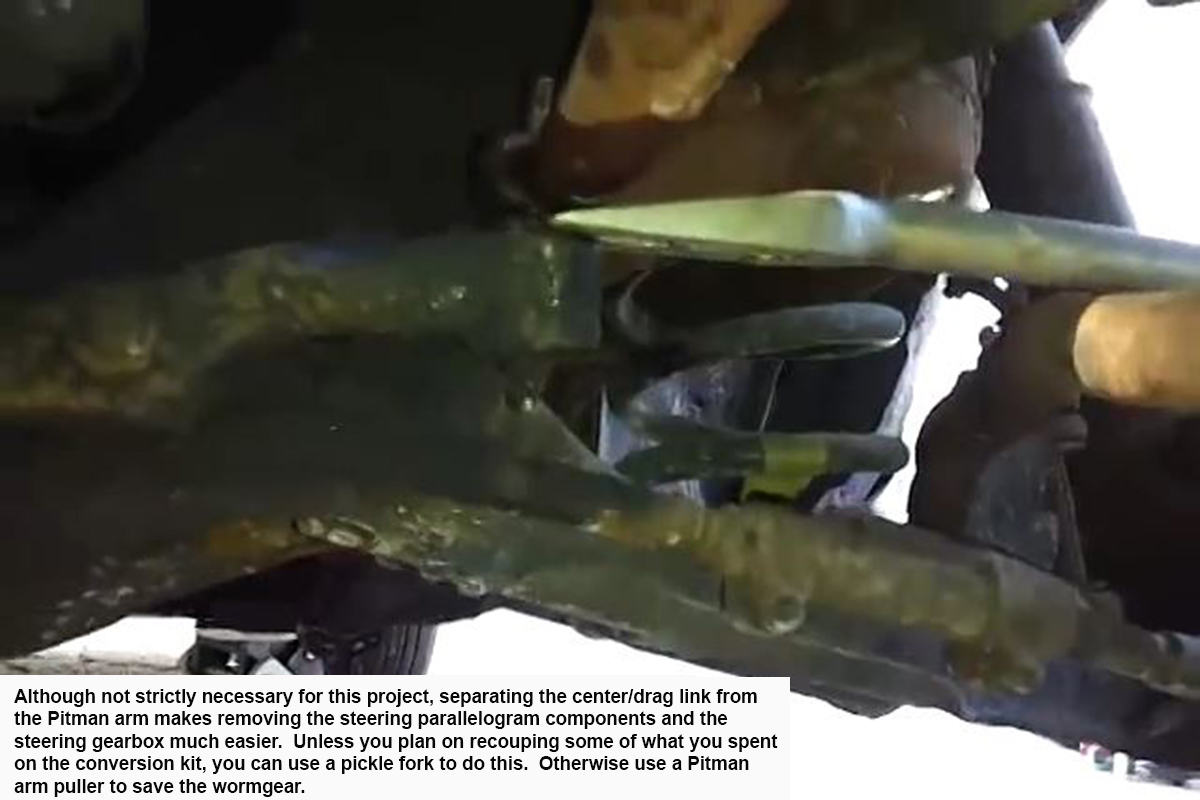
Remove the Cotter pins securing the castellated nuts on the outer tie rod ends and the Pitman Arm. Remove the nuts and separate the tie rods using a pickle fork and hammer. You should use the Pitman Arm puller to take the drag link off the Pitman Arm, especially if you plan on selling the gearbox to recoup some of what you spent on the kit. Remove the two bolts securing the idler arm to the frame on the passenger side and remove the steering linkage as an assembly.
Pitman-Arm-Puller
Note: If you plan on reusing the outer tie rod ends, don’t use a pickle fork to separate them from the steering knuckle. Instead, loosen but don’t remove the castellated nut and smack the steering knuckle repeatedly, HARD to pop the tie rod shaft loose from the knuckle. Conversely, use a Pitman arm puller to do this. Using a pickle fork can tear the dust/grease boot on the tie rod end, at which point you’ll have to replace the rod end.
Separate-Wormgear-and-Pitman-Arm
Remove the Steering (Input) Shaft. This part can be a little tricky if the shaft has never been replaced before. Steering shafts are designed to be collapsible to reduce the risk of injury and the make replacing their components easier, but the collapsing portion of the shaft might be rusted stuck. If the shaft is rusted extended, you’ll need to cut it using a sawz-all.
Remove-Upper-Coupler
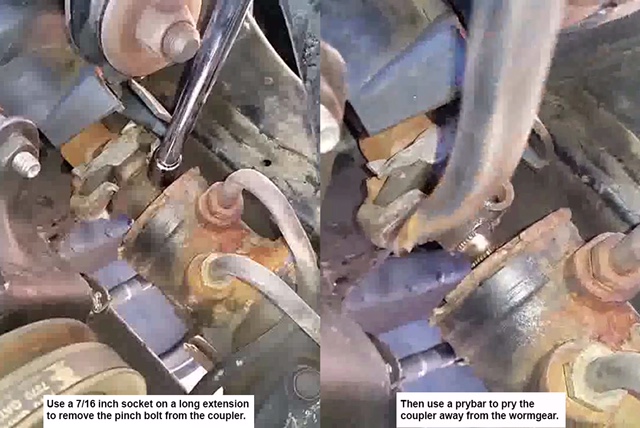
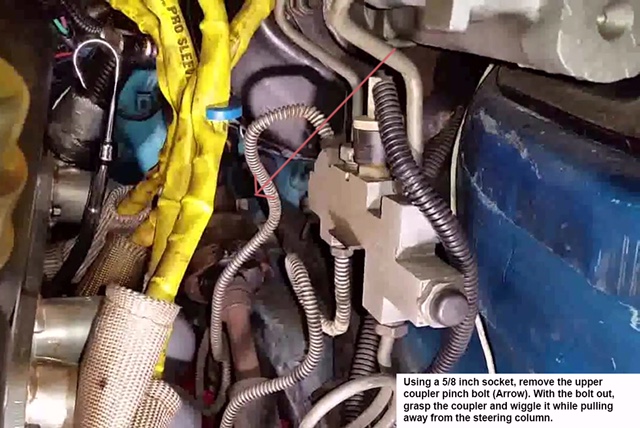
Using a 7/16 inch socket, remove the pinch bolt from the steering shaft connector at the gearbox. Use a prybar to pry the coupler away from the steering gearbox, collapsing (hopefully) the steering (input) shaft. Next, using a 5/8 inch socket remove the pinch bolt from the upper coupler that connects the steering shaft to the steering column. While wiggling, remove the coupler from the shaft and then remove the steering shaft from the car.
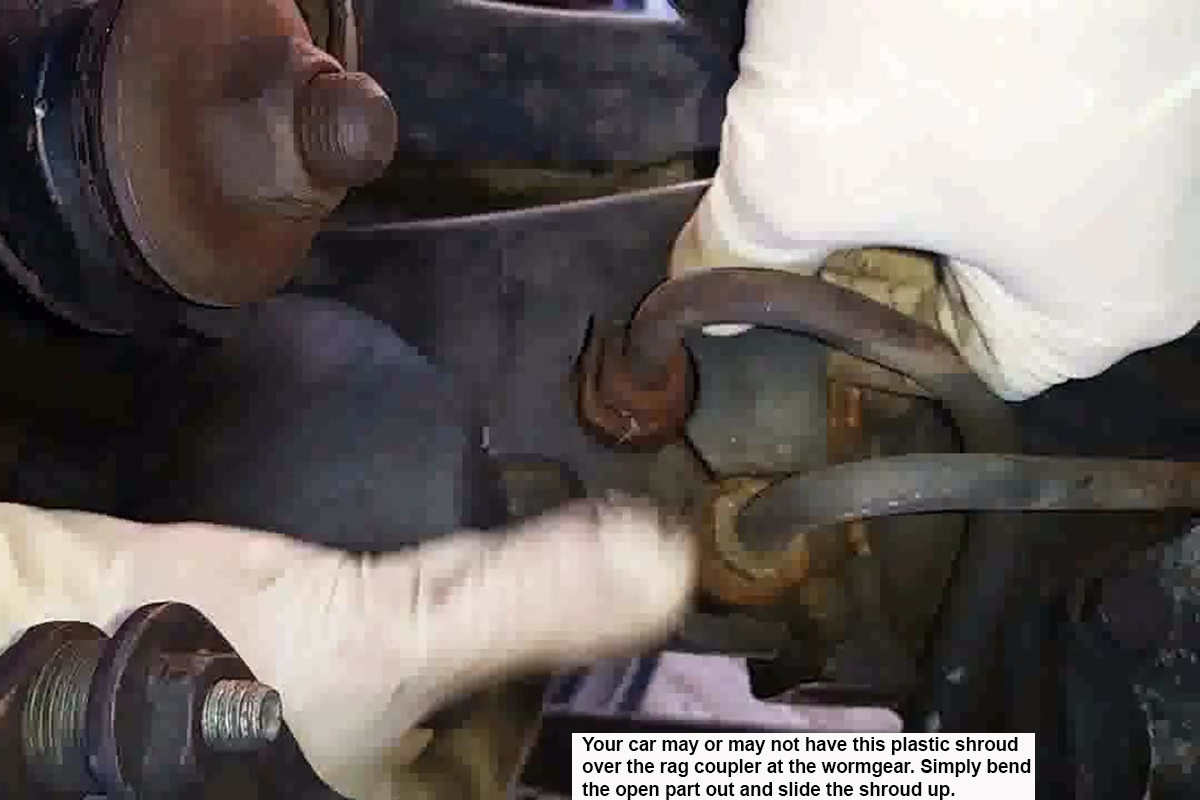
Ragjoint-Shroud
Note: Your car may have plastic covers (See image above) on the top and bottom of the steering input shaft protecting (somewhat) the couplers, u-joints, and rag joints from the elements. These are usually secured with simple clips and removing them to gain access to the couplers should be self-explanatory. Remove the Steering Gear Box
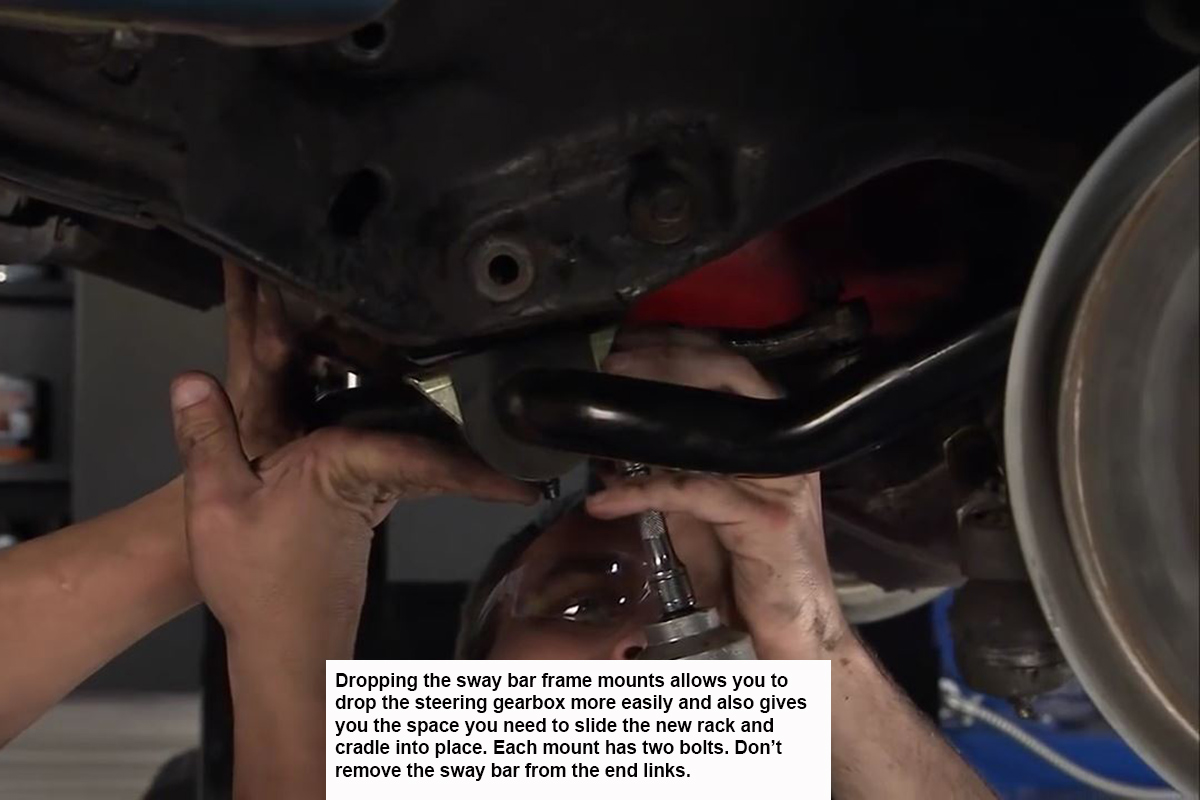
Drop-the-Sway-Bar
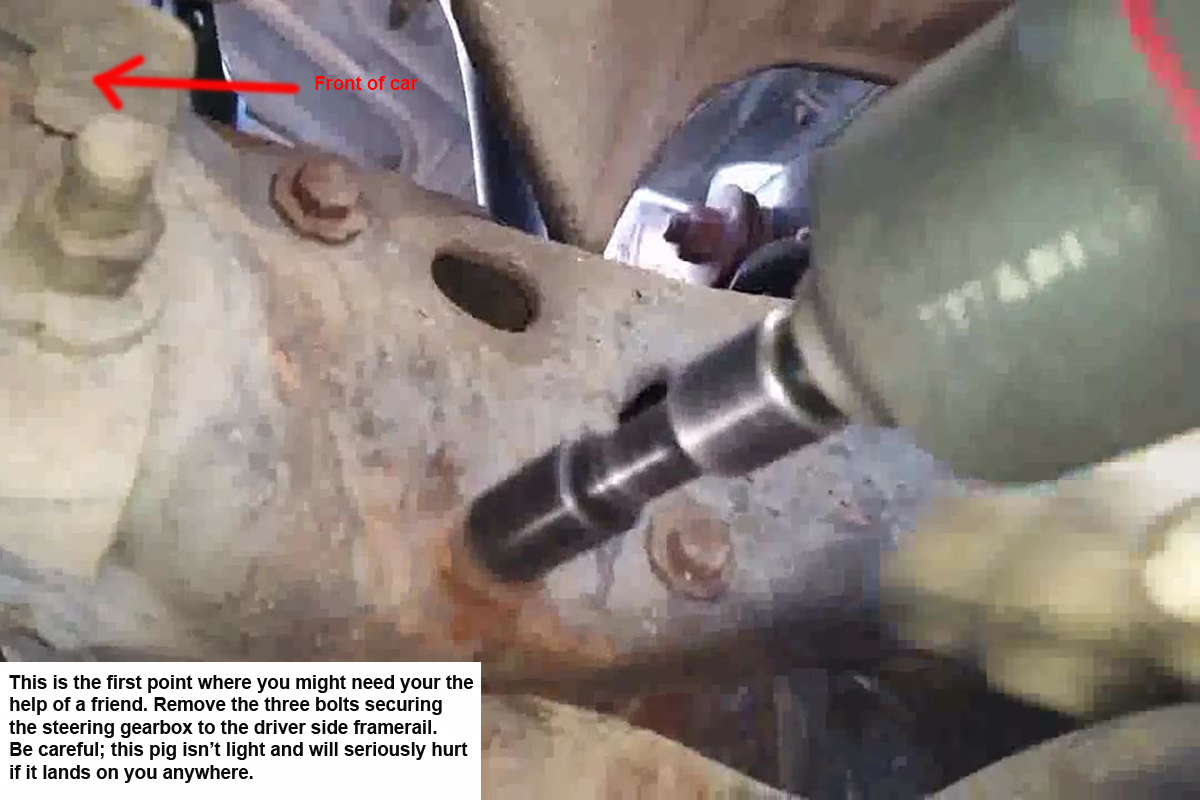
Slide your jack with a block of wood under the steering gearbox (or have your friend handy), leaving access to the bolts securing it to the frame. Remove the three bolts securing the steering gearbox to the frame rail and lower it out of position using the jack. Set the gearbox aside. You may need to loosen or remove the driver side bumper mounting bracket to get at the bolts.
Remove-Wormgear
NOTE: Some kits replace everything between the steering knuckles, while others may require you to reuse or replace the outer tie rods, the rod ends and the adjuster sleeves, or both inner and out tie rod ends and adjuster sleeves on both sides. Some kits will even have you replacing the steering knuckle on the kingpin. I recommend replacing any hardware the kit wants you to reuse. Tie rod ends and adjuster sleeves are pretty cheap. NOTE: The Flaming River kit mentioned above fits 70-81 Camaros and Firebirds. Other kits will fit both Camaro and Firebird from ’67 to ’81, while others will fit ’67-’70, but not Firebirds, etc. Be sure to carefully verify that the kit you order and receive fits your year and model. Stay tuned for Part Two where I show you how to finish up this job and get you back on the road with your more responsive rack and pinion steering system for your Classic F-Body.
Mike's love of cars began in the early 1970's when his father started taking him to his Chevron service station. He's done pretty much everything in the automotive aftermarket from gas station island attendant, parts counter, mechanic, and new and used sales. Mike also has experience in the amateur ranks of many of racing's sanctioning bodies.


![[Gallery] Street Rodders for Life Memorial Day Car Show](https://www.racingjunk.com/news/wp-content/uploads/2026/06/Memorial-day-show_0198-376x206.jpg)
![[Gallery] Townsman Car Show](https://www.racingjunk.com/news/wp-content/uploads/2026/05/916_2843-e1780072552171-376x206.jpg)

Leave a Reply