


![[GALLERY] Our Favorite Picks From Mecum Harrisburg 2026](https://www.racingjunk.com/news/wp-content/uploads/2026/07/312140-376x206.avif)
How to Tune Your Carbureted Car for Conditions – Part 1
Click Here to Begin Slideshow
Do the effects of Mother Nature really matter when it comes to tuning your carb-equipped car? Let’s use a pretty common (but fictitious) racecar setup as the example: During the build, you carefully hand selected a list of quality engine components and had the respective bits machined by a known and meticulous shop. The assembly was done carefully and was equally meticulous. In the end, the powerplant produced a robust, reliable 850 horsepower. That figure is what the dyno printout read once the correction factor was entered into the equation.
That custom-built bullet runs perfectly in your racecar on a cool spring day. Here, Mother Nature’s conditions (cool ambient temperature and low humidity) closely resemble the ideal dyno corrected figures of 60° F, 29.92 barometric pressure and 0% humidity (more on this below). Fair enough. But time doesn’t stand still. The dog days of summer quickly roll in. The thermometer is now pegged at 96° F in the afternoon. The actual track temperature is well into the triple digits. The barometer reads 29.20 inches of mercury. The relative humidity could be worse for the Midwest at a mere 74%. Believe it or not, that super-stout motor you carefully planned and built just lost 90 horsepower (more or less). The humidity bedevils you too. You don’t have the spring in your step that you had in May either.
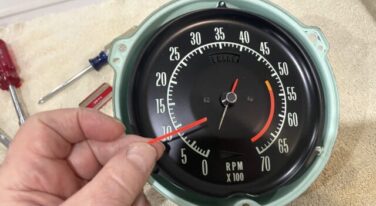
Okeydokey. Is there a way to find some of the power that went missing? Without spending a bunch of money in an effort to physically change the engine combination, there are three inexpensive tuning tools and at least one driving tool you can use in an effort to compensate: The nuts and bolts of the equation include the carburetor jetting, ignition timing and valve lash. From the driving perspective, you can vary the engine RPM level (more on this a bit later). But before going much further, let’s rewind for a minute.
Go back and examine the original engine dyno test. Here, the results were corrected to "dry" air, or air without water vapor. That’s pretty much fantasyland in the real world and you’ll likely never experience those conditions. The weather has a definite effect. If you consider the weather forecast provided by a local TV station, you’ll soon find it doesn't provide all (or maybe even any) of the answers either. In truth, the television broadcast humidity percentage is simply a fuzzy interpretation of reality. Humidity, or water vapor in the air, is critical, particularly if you’re racing a car or flying an airplane. The true amount of water vapor in the air varies with the temperature, even though the humidity percentages seem equal. That's why dew points provide a much better gauge of moisture content in the air (dew points are often provided by local airport weather stations or on dedicated television weather channels).
Dew point? Hold on! What on earth is that? It’s the temperature to which unsaturated air must be cooled, at a constant pressure, to become saturated. The difference between the temperature and the dew point provides an indication of how close the air is to saturation. This numerical difference is often referred to as the "spread." A spread of 0 means the air is saturated. The higher the dew point figure, the more water vapor there is in the air.
When thinking about dew points, the smaller the spread between temperature and dew point, the higher the relative humidity. In this case, you should crosscheck the dew point against the temperature and then use that as a more accurate gauge of water vapor in the air. Another option is to use a sling psychrometer to measure wet and dry-bulb temperatures (those are beyond the scope of this article).
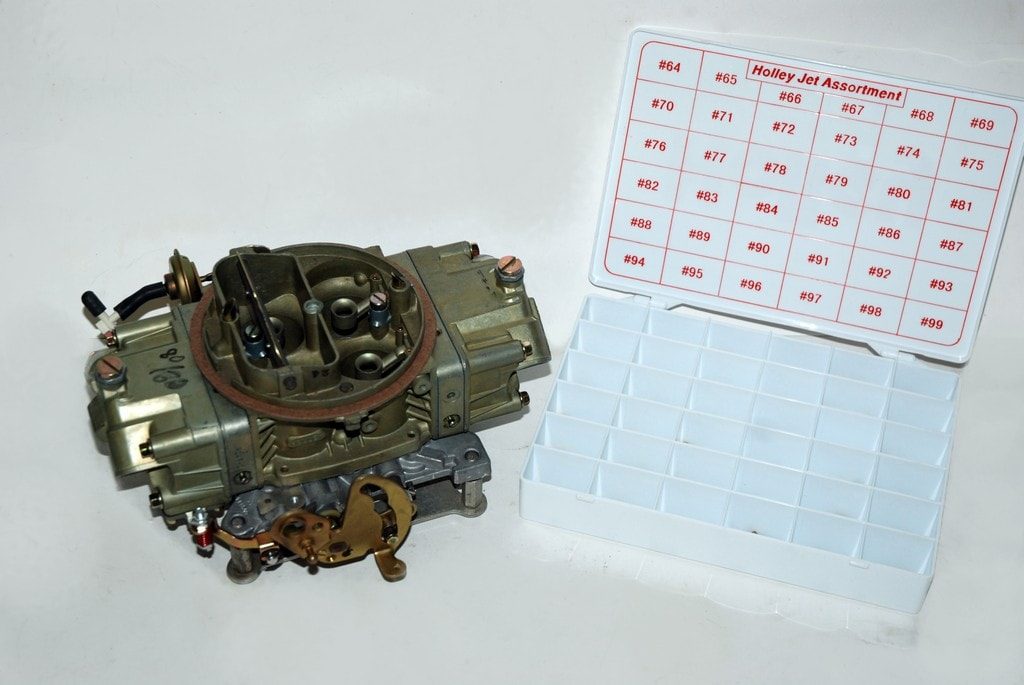
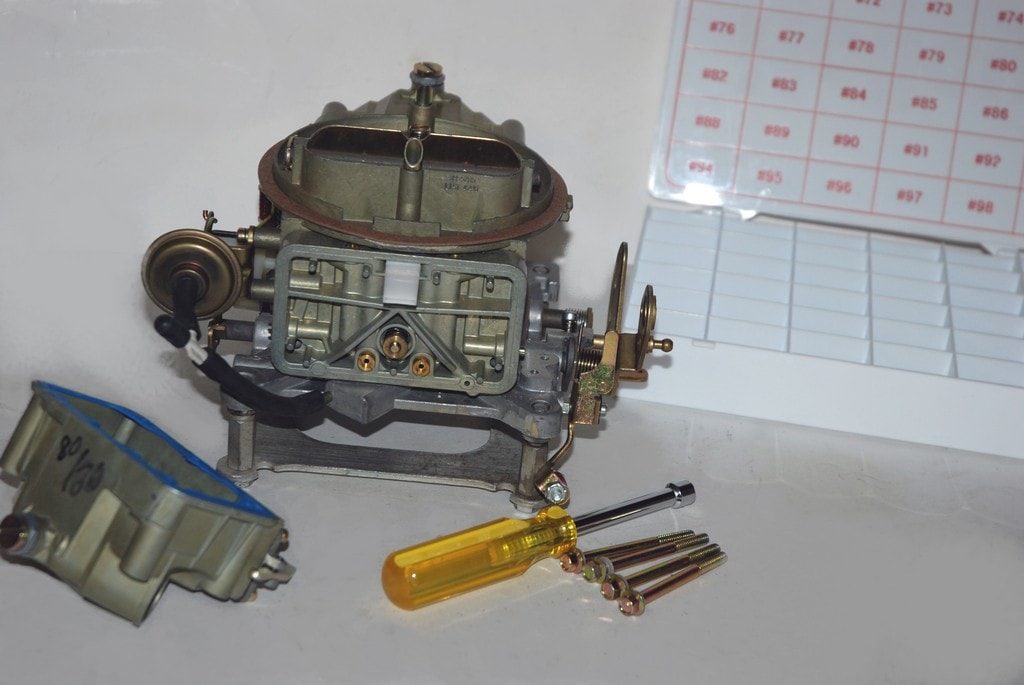
Carburetor Jetting...
The density of air decreases when temperature increases. Hot air is less dense than cold air. There are actually fewer air molecules in a specific volume of warm air than in the same volume of cool air. Since there are fewer air molecules in warm air, the air-fuel ratio in the engine must be changed to compensate. In order to accomplish this you have to reduce the jet size or jet number (in other words, lean out the engine). How big can these changes be? There’s an old racer rule of thumb that states you should reduce by one jet number for every 20° F of temperature increase. Keep in mind that this certainly isn’t an absolute figure either. The best way to compensate is to decrease jet numbers one at a time until the performance improvements cease. Watch the spark plugs in the engine. They’ll show you when the mixture is too lean.
That’s not the end of it when it comes to jetting. There’s one more old drag racer rule of thumb to ponder: For every 700-800 foot change in altitude, the jetting should be adjusted. Basically, this is the same thing as an increase in temperature. As the altitude increases, the available air molecules in a given volume decrease. The solution? Decrease jet size as the altitude increases. And it’s very important to use the same one jet number at a time approach mentioned above, and always (always, always) double-check the spark plug reading.
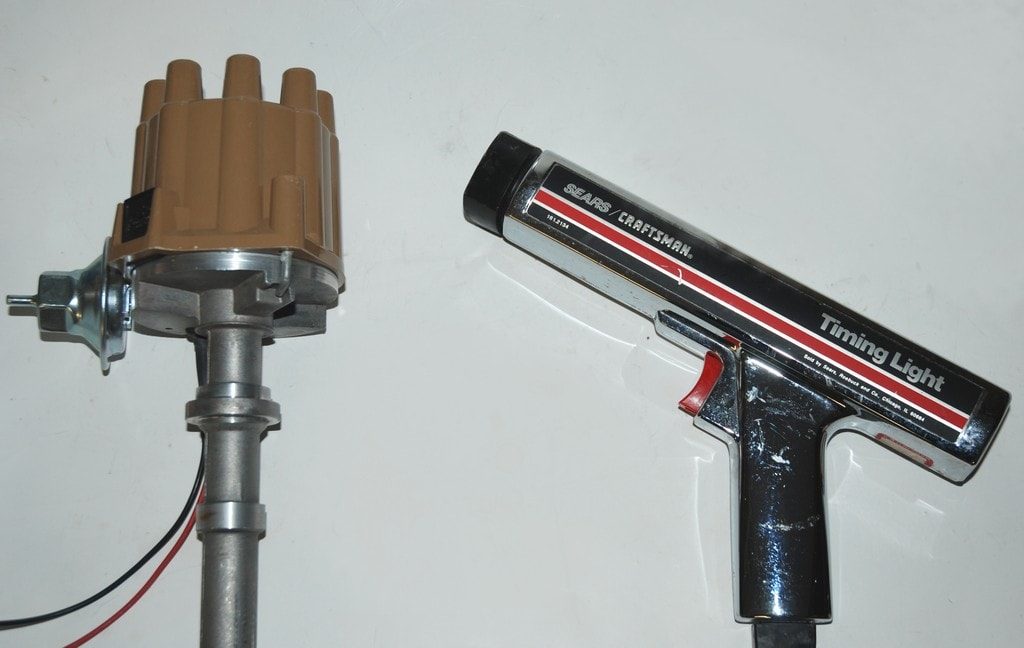
Ignition Timing...
As the dew point spread narrows (this means temperature and dew point become closer numerically - there is more moisture in the air), you can increase ignition timing. If you think about it, this is similar to water injection because there is more water vapor swallowed by the engine. And just like injecting water into an engine, the chance of detonation decreases.
Just how much more timing can you add? That’s a good question. There are more old racer rules of thumb here: It states you can add one degree of timing for every ten percent increase in humidity (to a maximum of four degrees of extra timing). That might still work, but keep in mind that humidity percentages are hardly accurate. There’s something else to consider as well: Engines with flat top pistons are, for the most part, more efficient, and can usually function properly with less timing than engines with a huge-by-large piston dome. Stop adding timing once extra performance seems to stop. Remember how we harped on watching plugs? Any time you add extra ignition timing to an engine, pay very close attention to them. Detonation is a surefire sign you've gone too far.
Valve Lash...
Once the temperature increases and/or the elevation goes up, you can also compensate with valve lash. Here’s how: By adding more lash, what you have done is effectively shorten the camshaft duration (which also decreases the overlap). Due to this, the engine can build more cylinder pressure. When compensating for conditions with lash, it’s best to tune with the intake side first. Try increasing the lash by no more than 0.008-0.010-inch.
If the performance of the racecar improves, follow suit on the exhaust side. Some combinations will pick up with the intake lash change only, while others require both intake and exhaust lash changes. Never wander past the 0.008-0.010-inch lash change figure (and more than likely even less with a tight lash camshaft), unless the cam manufacturer tells you otherwise. Essentially, what you’re doing is artificially increasing the compression ratio of the engine. Because of this, there's a chance that the engine might detonate. And once again, keep an eye on the spark plugs.
That’s a wrap for this issue. Next time around, we’ll look at working with shift points along with some other tips and tricks. Watch for it. You don’t have to be at the mercy of Mother Nature.
Do the effects of Mother Nature really matter when it comes to tuning your carb-equipped car? Let’s use a pretty common (but fictitious) racecar setup as the example: During the build, you carefully hand selected a list of quality engine components and had the respective bits machined by a known and meticulous shop. The assembly was done carefully and was equally meticulous. In the end, the powerplant produced a robust, reliable 850 horsepower. That figure is what the dyno printout read once the correction factor was entered into the equation.
That custom-built bullet runs perfectly in your racecar on a cool spring day. Here, Mother Nature’s conditions (cool ambient temperature and low humidity) closely resemble the ideal dyno corrected figures of 60° F, 29.92 barometric pressure and 0% humidity (more on this below). Fair enough. But time doesn’t stand still. The dog days of summer quickly roll in. The thermometer is now pegged at 96° F in the afternoon. The actual track temperature is well into the triple digits. The barometer reads 29.20 inches of mercury. The relative humidity could be worse for the Midwest at a mere 74%. Believe it or not, that super-stout motor you carefully planned and built just lost 90 horsepower (more or less). The humidity bedevils you too. You don’t have the spring in your step that you had in May either.
Okeydokey. Is there a way to find some of the power that went missing? Without spending a bunch of money in an effort to physically change the engine combination, there are three inexpensive tuning tools and at least one driving tool you can use in an effort to compensate: The nuts and bolts of the equation include the carburetor jetting, ignition timing and valve lash. From the driving perspective, you can vary the engine RPM level (more on this a bit later). But before going much further, let’s rewind for a minute.
Go back and examine the original engine dyno test. Here, the results were corrected to "dry" air, or air without water vapor. That’s pretty much fantasyland in the real world and you’ll likely never experience those conditions. The weather has a definite effect. If you consider the weather forecast provided by a local TV station, you’ll soon find it doesn't provide all (or maybe even any) of the answers either. In truth, the television broadcast humidity percentage is simply a fuzzy interpretation of reality. Humidity, or water vapor in the air, is critical, particularly if you’re racing a car or flying an airplane. The true amount of water vapor in the air varies with the temperature, even though the humidity percentages seem equal. That's why dew points provide a much better gauge of moisture content in the air (dew points are often provided by local airport weather stations or on dedicated television weather channels).
Dew point? Hold on! What on earth is that? It’s the temperature to which unsaturated air must be cooled, at a constant pressure, to become saturated. The difference between the temperature and the dew point provides an indication of how close the air is to saturation. This numerical difference is often referred to as the "spread." A spread of 0 means the air is saturated. The higher the dew point figure, the more water vapor there is in the air.
When thinking about dew points, the smaller the spread between temperature and dew point, the higher the relative humidity. In this case, you should crosscheck the dew point against the temperature and then use that as a more accurate gauge of water vapor in the air. Another option is to use a sling psychrometer to measure wet and dry-bulb temperatures (those are beyond the scope of this article).
Carburetor Jetting...
The density of air decreases when temperature increases. Hot air is less dense than cold air. There are actually fewer air molecules in a specific volume of warm air than in the same volume of cool air. Since there are fewer air molecules in warm air, the air-fuel ratio in the engine must be changed to compensate. In order to accomplish this you have to reduce the jet size or jet number (in other words, lean out the engine). How big can these changes be? There’s an old racer rule of thumb that states you should reduce by one jet number for every 20° F of temperature increase. Keep in mind that this certainly isn’t an absolute figure either. The best way to compensate is to decrease jet numbers one at a time until the performance improvements cease. Watch the spark plugs in the engine. They’ll show you when the mixture is too lean.
That’s not the end of it when it comes to jetting. There’s one more old drag racer rule of thumb to ponder: For every 700-800 foot change in altitude, the jetting should be adjusted. Basically, this is the same thing as an increase in temperature. As the altitude increases, the available air molecules in a given volume decrease. The solution? Decrease jet size as the altitude increases. And it’s very important to use the same one jet number at a time approach mentioned above, and always (always, always) double-check the spark plug reading.
Ignition Timing...
As the dew point spread narrows (this means temperature and dew point become closer numerically - there is more moisture in the air), you can increase ignition timing. If you think about it, this is similar to water injection because there is more water vapor swallowed by the engine. And just like injecting water into an engine, the chance of detonation decreases.
Just how much more timing can you add? That’s a good question. There are more old racer rules of thumb here: It states you can add one degree of timing for every ten percent increase in humidity (to a maximum of four degrees of extra timing). That might still work, but keep in mind that humidity percentages are hardly accurate. There’s something else to consider as well: Engines with flat top pistons are, for the most part, more efficient, and can usually function properly with less timing than engines with a huge-by-large piston dome. Stop adding timing once extra performance seems to stop. Remember how we harped on watching plugs? Any time you add extra ignition timing to an engine, pay very close attention to them. Detonation is a surefire sign you've gone too far.
Valve Lash...
Once the temperature increases and/or the elevation goes up, you can also compensate with valve lash. Here’s how: By adding more lash, what you have done is effectively shorten the camshaft duration (which also decreases the overlap). Due to this, the engine can build more cylinder pressure. When compensating for conditions with lash, it’s best to tune with the intake side first. Try increasing the lash by no more than 0.008-0.010-inch.
If the performance of the racecar improves, follow suit on the exhaust side. Some combinations will pick up with the intake lash change only, while others require both intake and exhaust lash changes. Never wander past the 0.008-0.010-inch lash change figure (and more than likely even less with a tight lash camshaft), unless the cam manufacturer tells you otherwise. Essentially, what you’re doing is artificially increasing the compression ratio of the engine. Because of this, there's a chance that the engine might detonate. And once again, keep an eye on the spark plugs.
That’s a wrap for this issue. Next time around, we’ll look at working with shift points along with some other tips and tricks. Watch for it. You don’t have to be at the mercy of Mother Nature.
Leave a Reply