

![[Gallery] Mecum Kissimmee Auction 2026](https://www.racingjunk.com/news/wp-content/uploads/2026/03/DSC_0717-e1774629242515-376x206.jpg)
![[Gallery] Cruisin’ One Daytona](https://www.racingjunk.com/news/wp-content/uploads/2026/03/DSC_0538-e1774027057404-376x206.jpg)
How to Prep For Your Project Car Part 2
Click Here to Begin Slideshow
In our last issue we looked at stripping a car and starting the process of prepping it for restoration or chassis work. Sounds easy enough, but it’s almost always grueling, time-consuming work. If there is any good news on the topic, a super clean bare chassis makes for a really nice finished product. It will also make your chassis builder or restoration shop much happier.
As noted in that last issue, we regularly start with the easy stuff. Generally speaking, this means starting with the engine compartment. Pull out your plywood "bed" and shampoo the engine and compartment first. Some engine shampoos aren't biodegradable. This means you'll need plenty of water to flush away the residue. When the engine compartment is done, work your way rearward under the car, concentrating on the center section (between the frame rails or rocker panels). Use the Easy-Off and brake cleaner, Scotchbrite pads and rags to clean up the grime. Once that's out of the way and clean, you can begin removing undercoating.
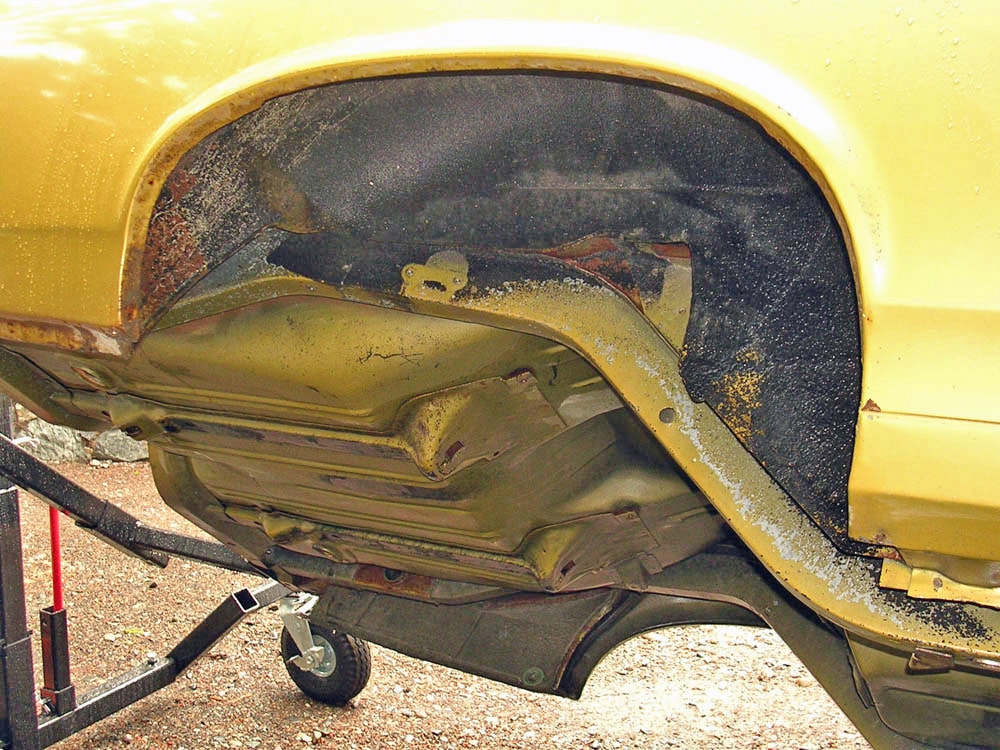
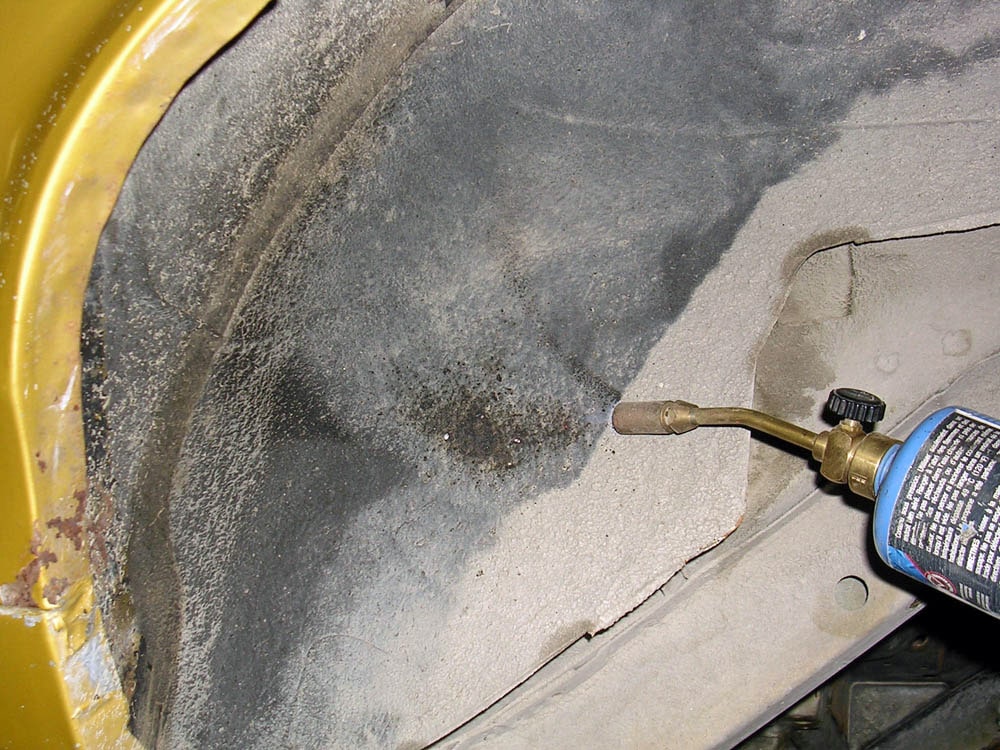
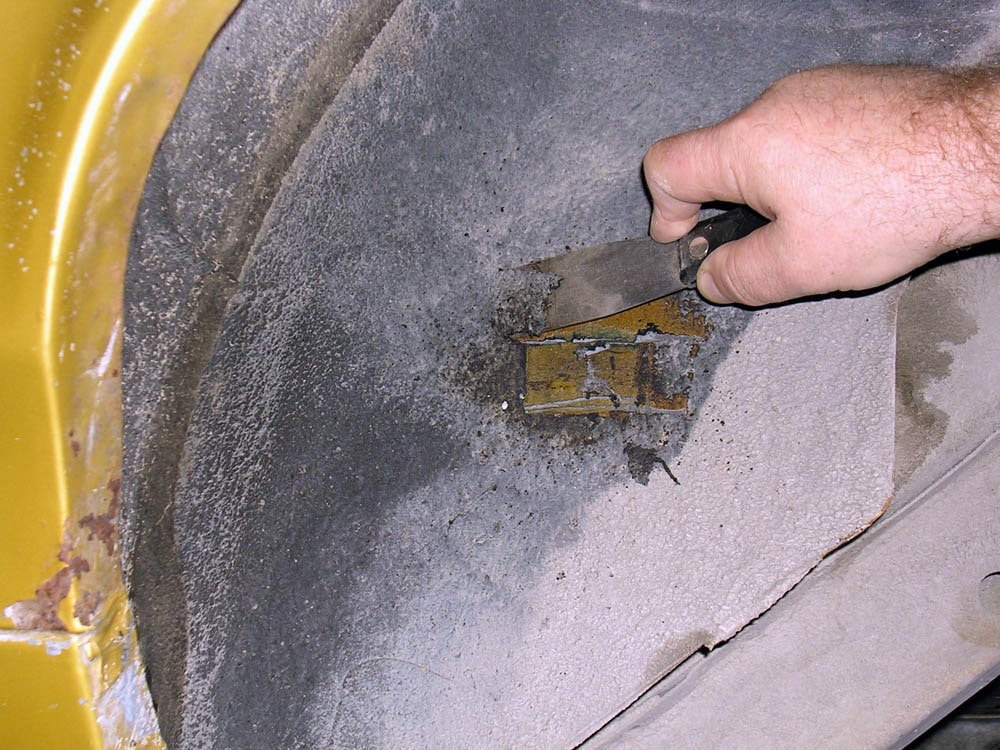
In most cases, vintage cars are undercoated in the wheelhouses (mainly in the rear) along the rocker panels and in the area to the rear of the wheelhouses. To be honest with you, there's no easy way to remove undercoating. Some of the goop is so tough; it's pretty much unfazed by sand blasting. The only solution is to heat the mess with a propane torch and scrape it off. This isn't difficult work, but it's definitely tedious. Once heated, work quickly, because the undercoating hardens immediately as it cools. Usually, only a small section (approximately 6" X 6") can be stripped at once. After all of the big chunks are removed, soak the area with brake cleaner or oven cleaner and scour with the Scotchbrite pad (don't forget to use your rubber gloves). Wipe off the residue with a rag and re-soak the area with brake cleaner. Use another Scotchbrite pad and clean the surface again. You should be down to bare or clean painted metal.
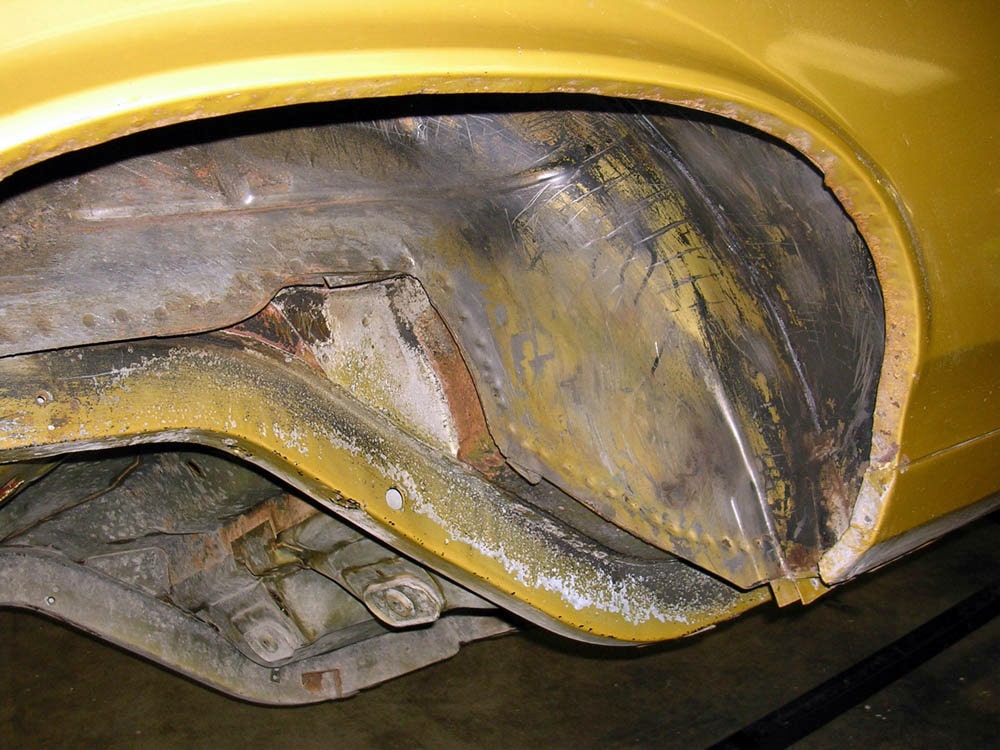
Depending upon how heavy the undercoating is it will probably take three to four hours to clean each wheel well. Once it's shiny and clean, scrub the area again with a good laundry detergent mixed with warm water (a used car wash brush works great for this job). Similarly, scrub the balance of the undercarriage with the soap mixture and then rinse with clean water.
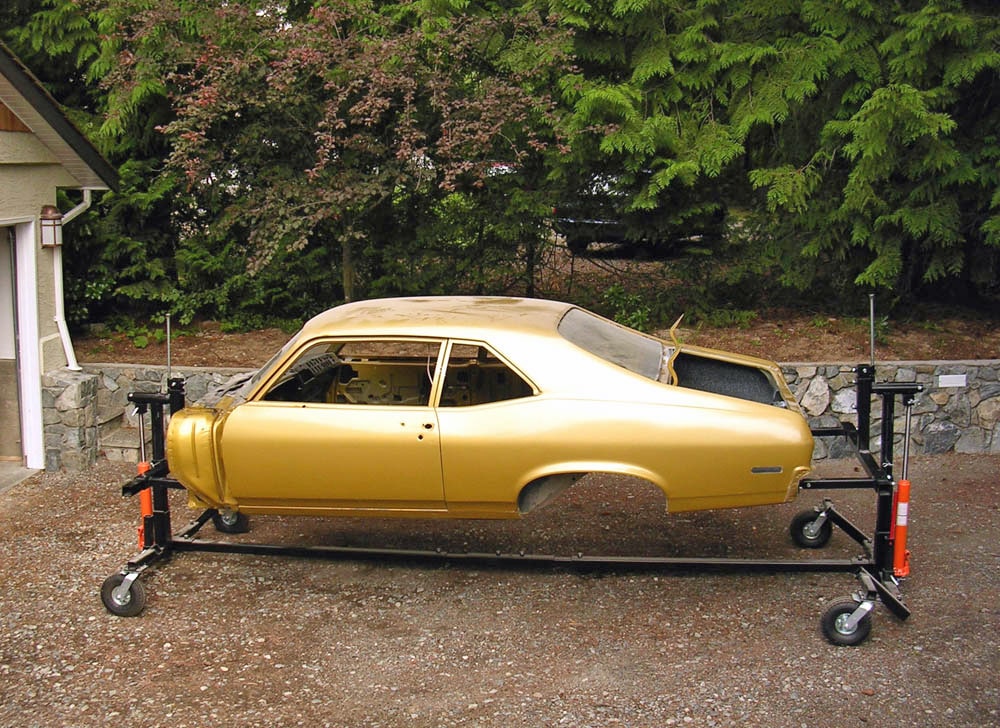
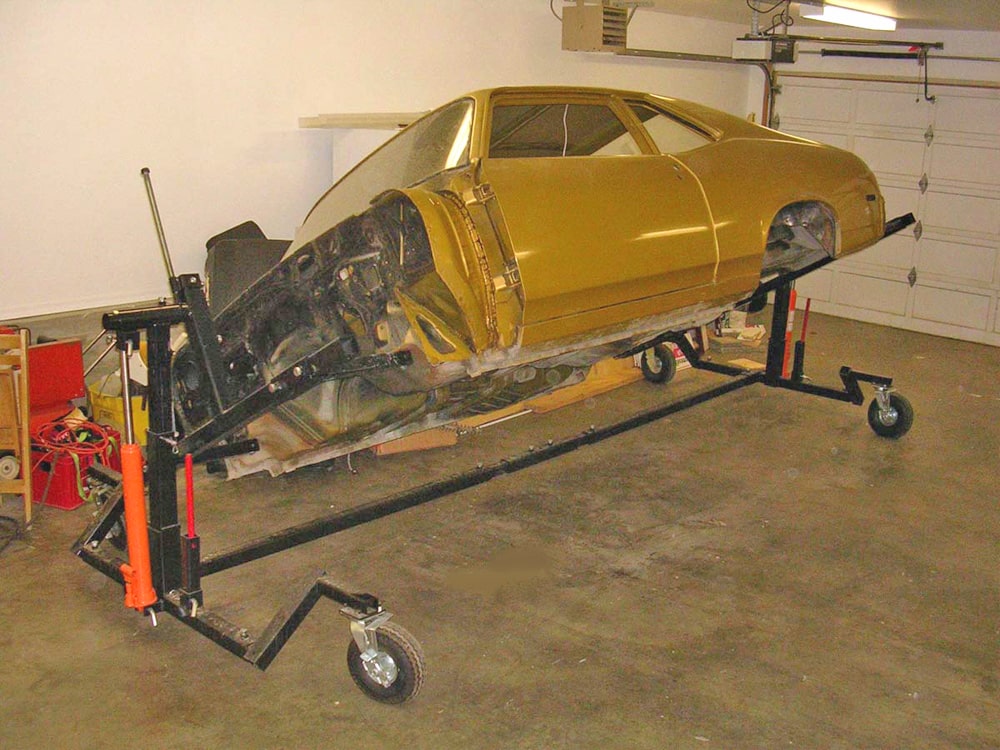
How long does a cleanup like this take? You can’t do it overnight. The ’71 Nova you see in the accompanying photos consumed roughly 60 hours in mechanical disassembly and at least another 20 hours or so in the actual clean-up process (OK – we bagged and tagged everything that came off the car, and that added considerable time). The car was basic (no options) and it was also an unmolested low mileage Grandma piece. Factor in more time if the car isn’t pretty (or clean). Is it worth the effort? Absolutely. Chassis or restoration work will go a bunch faster and your wallet won’t be lightened by nearly as much.
For a closer look, check out the following photos:
Click Here to Begin Slideshow
Part 2 of Wayne Scraba's Prepping Your Project series tackles the cleanup portion of getting your project car ready for resto work.
In our last issue we looked at stripping a car and starting the process of prepping it for restoration or chassis work. Sounds easy enough, but it’s almost always grueling, time-consuming work. If there is any good news on the topic, a super clean bare chassis makes for a really nice finished product. It will also make your chassis builder or restoration shop much happier.
As noted in that last issue, we regularly start with the easy stuff. Generally speaking, this means starting with the engine compartment. Pull out your plywood "bed" and shampoo the engine and compartment first. Some engine shampoos aren't biodegradable. This means you'll need plenty of water to flush away the residue. When the engine compartment is done, work your way rearward under the car, concentrating on the center section (between the frame rails or rocker panels). Use the Easy-Off and brake cleaner, Scotchbrite pads and rags to clean up the grime. Once that's out of the way and clean, you can begin removing undercoating.
In most cases, vintage cars are undercoated in the wheelhouses (mainly in the rear) along the rocker panels and in the area to the rear of the wheelhouses. To be honest with you, there's no easy way to remove undercoating. Some of the goop is so tough; it's pretty much unfazed by sand blasting. The only solution is to heat the mess with a propane torch and scrape it off. This isn't difficult work, but it's definitely tedious. Once heated, work quickly, because the undercoating hardens immediately as it cools. Usually, only a small section (approximately 6" X 6") can be stripped at once. After all of the big chunks are removed, soak the area with brake cleaner or oven cleaner and scour with the Scotchbrite pad (don't forget to use your rubber gloves). Wipe off the residue with a rag and re-soak the area with brake cleaner. Use another Scotchbrite pad and clean the surface again. You should be down to bare or clean painted metal.
Depending upon how heavy the undercoating is it will probably take three to four hours to clean each wheel well. Once it's shiny and clean, scrub the area again with a good laundry detergent mixed with warm water (a used car wash brush works great for this job). Similarly, scrub the balance of the undercarriage with the soap mixture and then rinse with clean water.
How long does a cleanup like this take? You can’t do it overnight. The ’71 Nova you see in the accompanying photos consumed roughly 60 hours in mechanical disassembly and at least another 20 hours or so in the actual clean-up process (OK – we bagged and tagged everything that came off the car, and that added considerable time). The car was basic (no options) and it was also an unmolested low mileage Grandma piece. Factor in more time if the car isn’t pretty (or clean). Is it worth the effort? Absolutely. Chassis or restoration work will go a bunch faster and your wallet won’t be lightened by nearly as much.
For a closer look, check out the following photos:
Click Here to Begin Slideshow
Leave a Reply