

![[Gallery] 3rd. Annual Father's Day Classic Car Show](https://www.racingjunk.com/news/wp-content/uploads/2026/07/Calistoga-2026-18-scaled-e1783026475349-376x206.jpg)

![[Gallery] Blackhawk Museum Stop Over](https://www.racingjunk.com/news/wp-content/uploads/2026/06/DSC_0918-e1782449621944-376x206.jpg)
Building Links Part 2
Click Here to Begin Slideshow
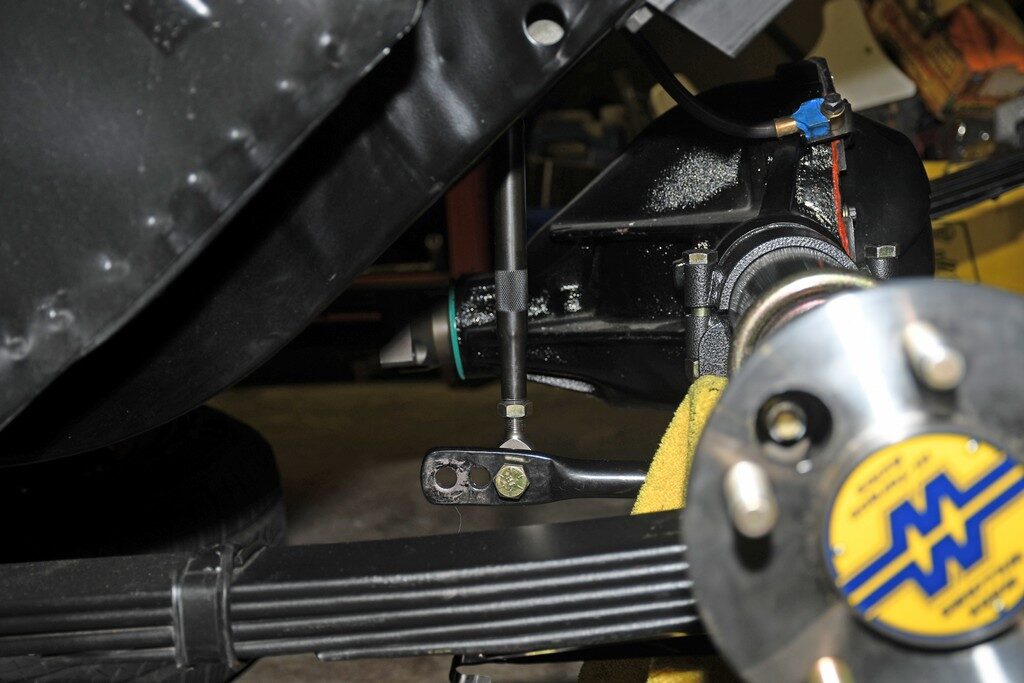
Last issue, we detailed the reasons for needing adjustable ARB links and gave you a preview of how we build them. If you rewind and go back to that initial article, you’ll see that sway bar end links should be perpendicular to the sway bar, while the bar ends should be parallel to the road or track surface. All of this must be established with the car at race weight and ride height. With this issue, let’s start from the top and take a short look at real, high-quality racing rod ends. They’re the heart of the system.
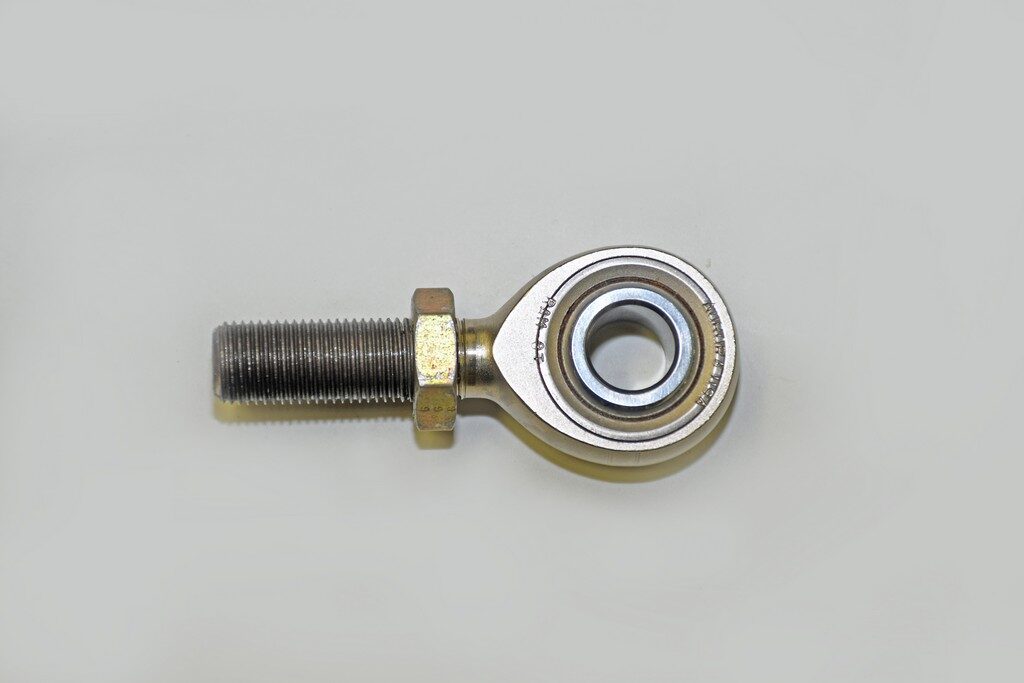
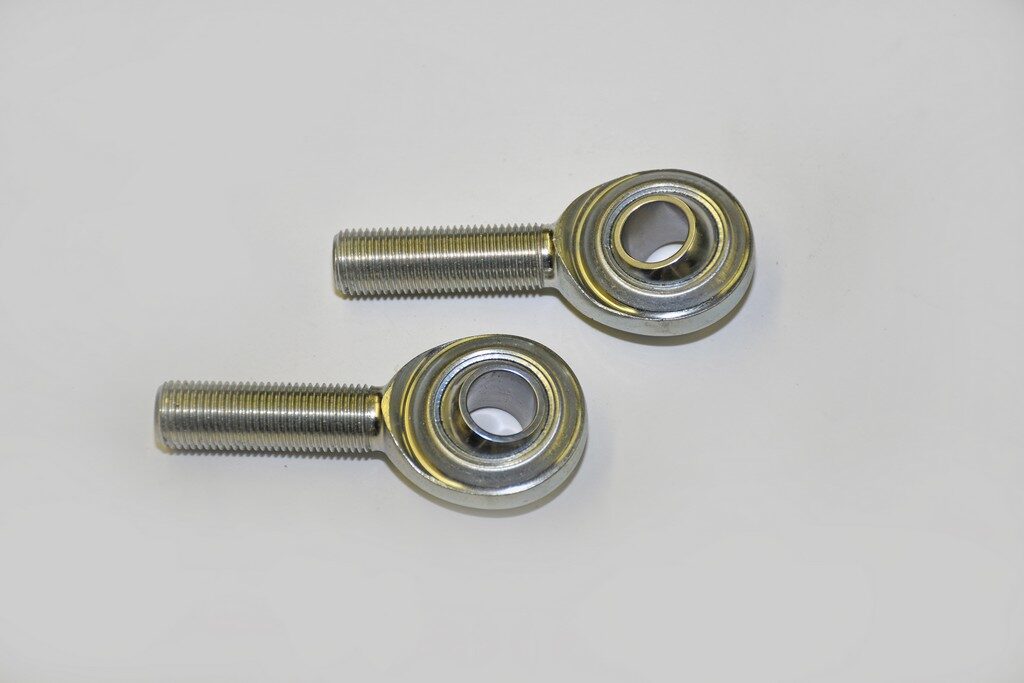
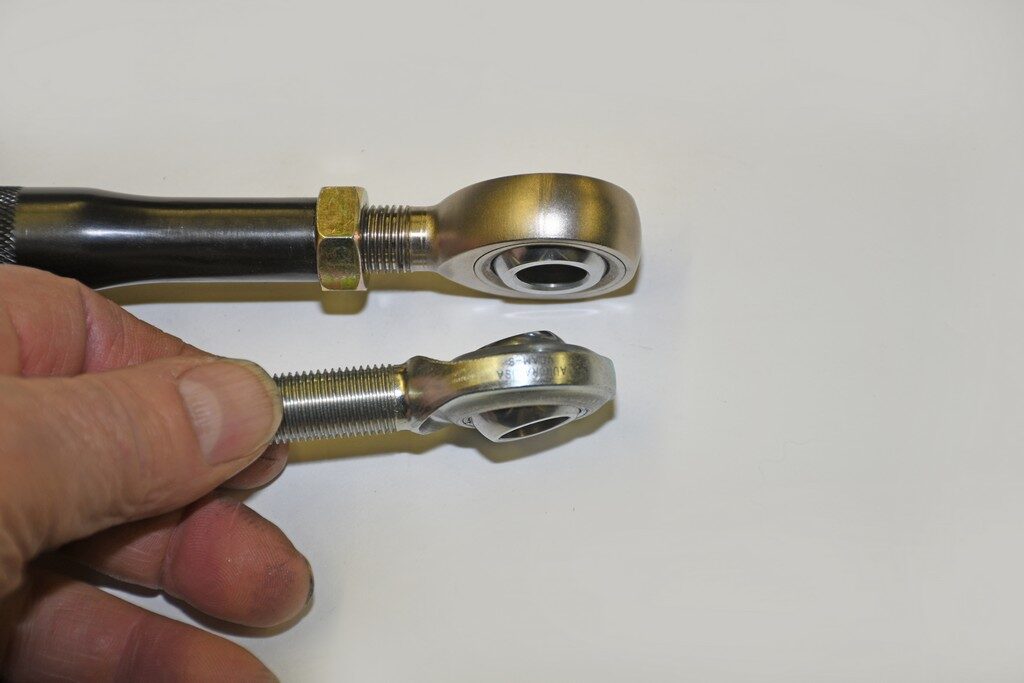
For this application, I’m using two Aurora Bearing Company RAM-8T rod ends and two RAB-8T rod ends. The RAM-8Ts are ½-inch right hand thread; the RAB-8Ts are ½-inch left hand thread. Having a right and a left-hand thread on each link allows you to increase the overall length or shorten the overall length of the link easily.
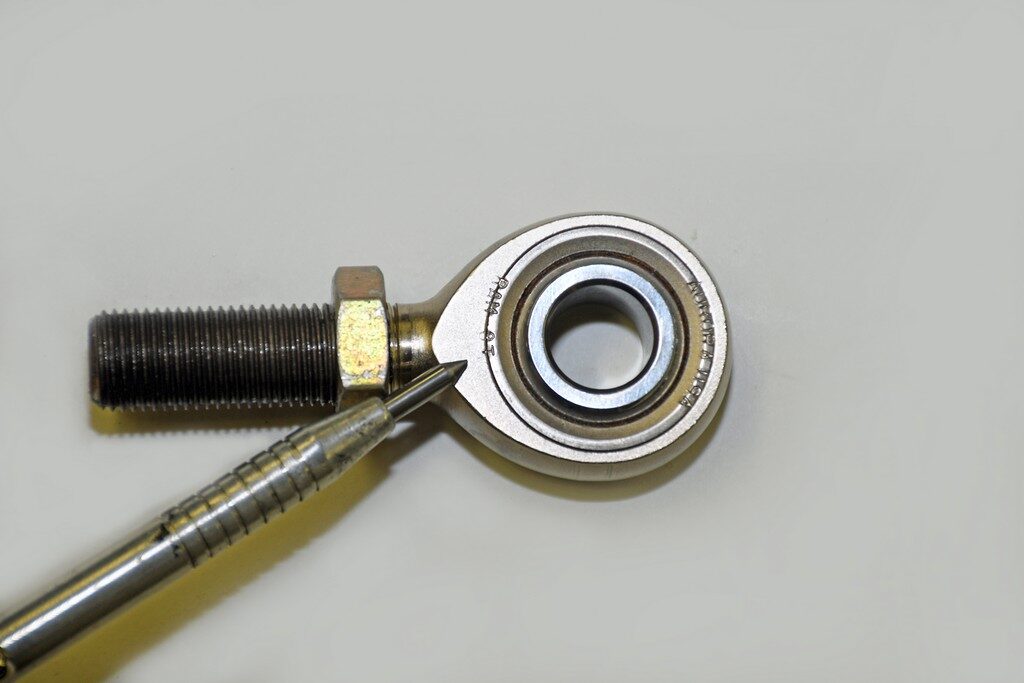
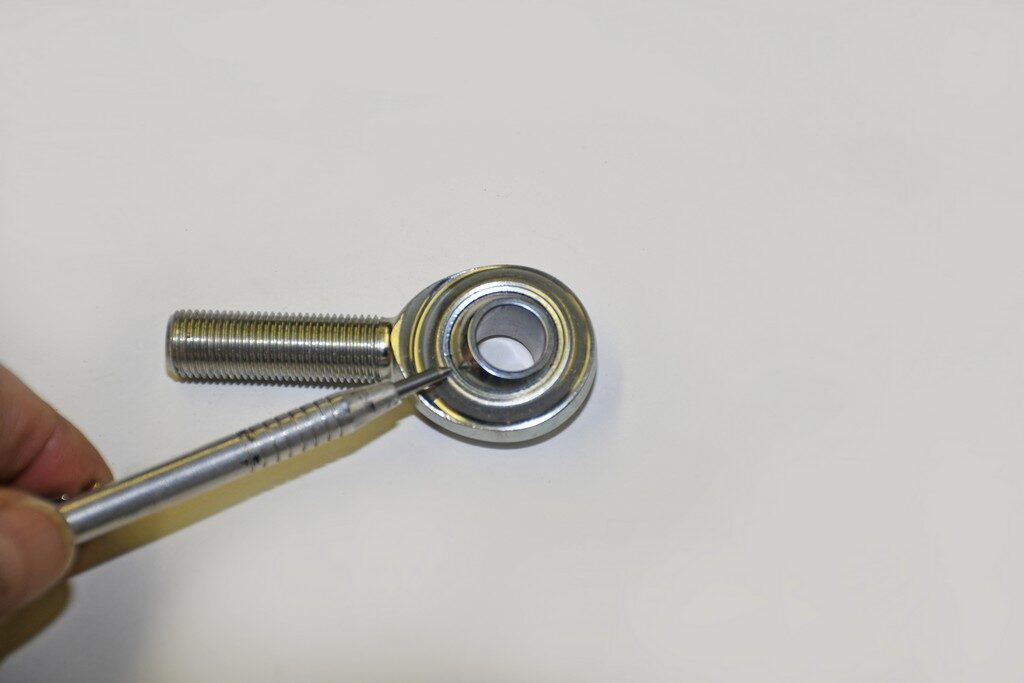
These Aurora rod ends are considered “three-piece” examples. They have bodies manufactured from alloy steel and are heat treated. Typically, they’re nickel or chrome-plated. The ball is heat treated alloy steel and is hard chrome plated. The race is also alloy steel; it too is heat treated and, this time around, nickel plated. Finally, I selected the “T” or Teflon option, which provides a PTFE liner. The liner grants smooth operation and doesn’t require additional lubrication.
RAM-8 rod ends have a ball bore of 0.500-inch. The ball width is 0.625-inch. The head diameter measures 1.312-inches and as mentioned above, the threads are ½-20, left and right hand. In terms of strength, these pieces are stout. They have an ultimate radial static capacity of 15,500 pounds each, which is obviously well in excess to any loads they’ll ever see.
These are not inexpensive components, and Aurora Bearing’s John McCory suggested there’s another less costly option: Aurora Bearing VCAM-8 and VCAB-8. These are Aurora’s self-lubricating economy series bearings. Dimensionally, they’re similar in all respects to the RAM and RAB examples, but the radial static load is very slightly less at 15,479 pounds each. The other critical dimensions are the same as the RAM and RAB series rod ends.
By the way, Aurora Bearing Company has a fabulous website that details all of the specifications (including all dimensions) of their rod ends. Point your browser to https://www.aurorabearing.com/index.html. You can spend a lot of time here looking at the data they’ve compiled and provided. It’s impressive.
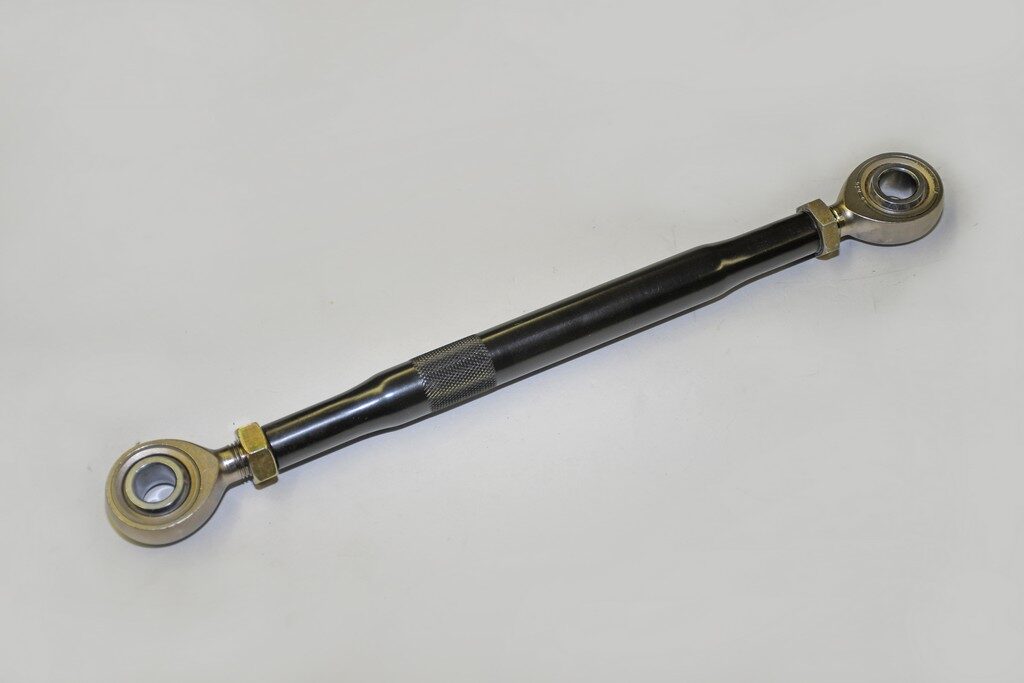
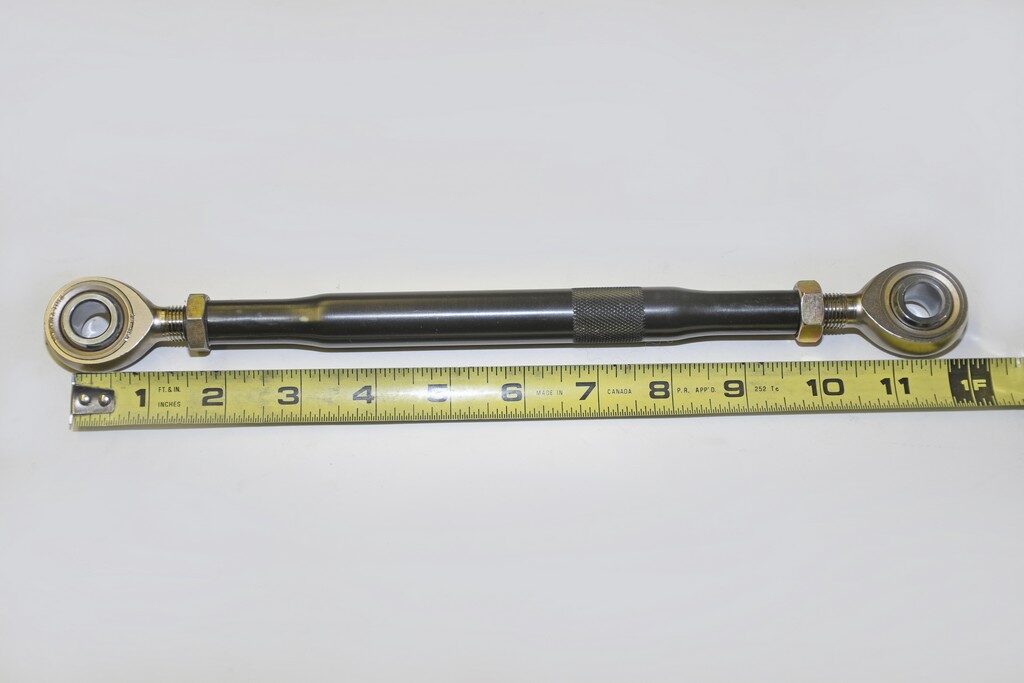
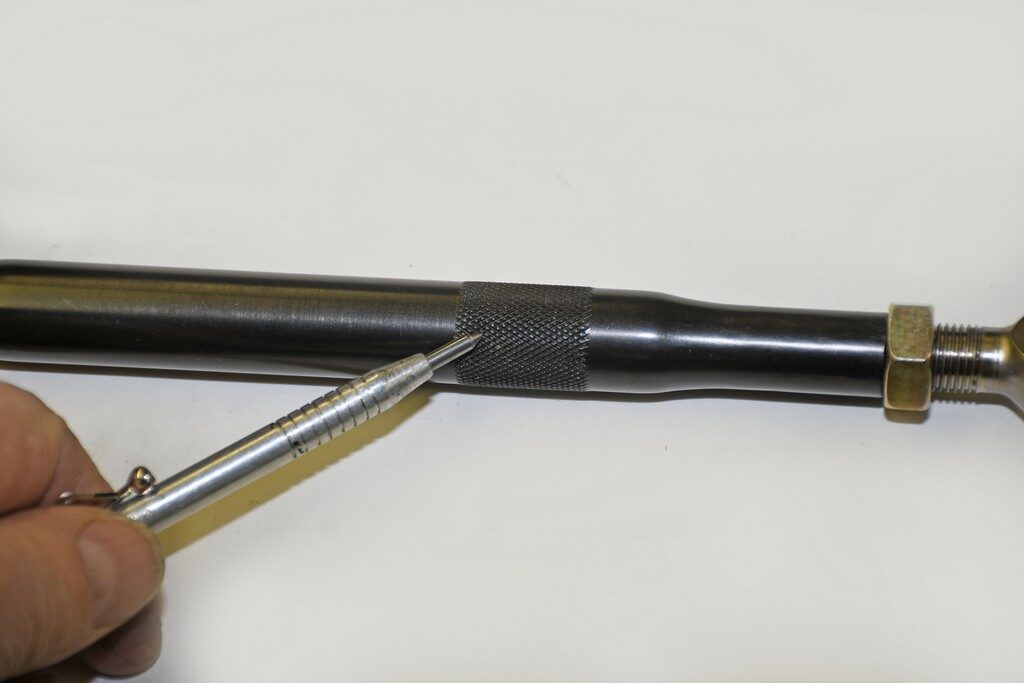
Recall those tubes from Allstar Performance mentioned last issue? The examples selected for the job are ½-inch thread jobs. These are swaged D.O.M. steel ¾-inch OD tubes that measure 0.065-inch at the wall. As mentioned in the first article, one of the swaged ends has ½-inch right hand threads and the other has ½-inch left hand threads. They’re available from four inches all the way up to 28 inches in length (in one-inch increments). The bodies are black zinc coated and, as you can see in the photos, they have knurl on the body to ease adjustment.
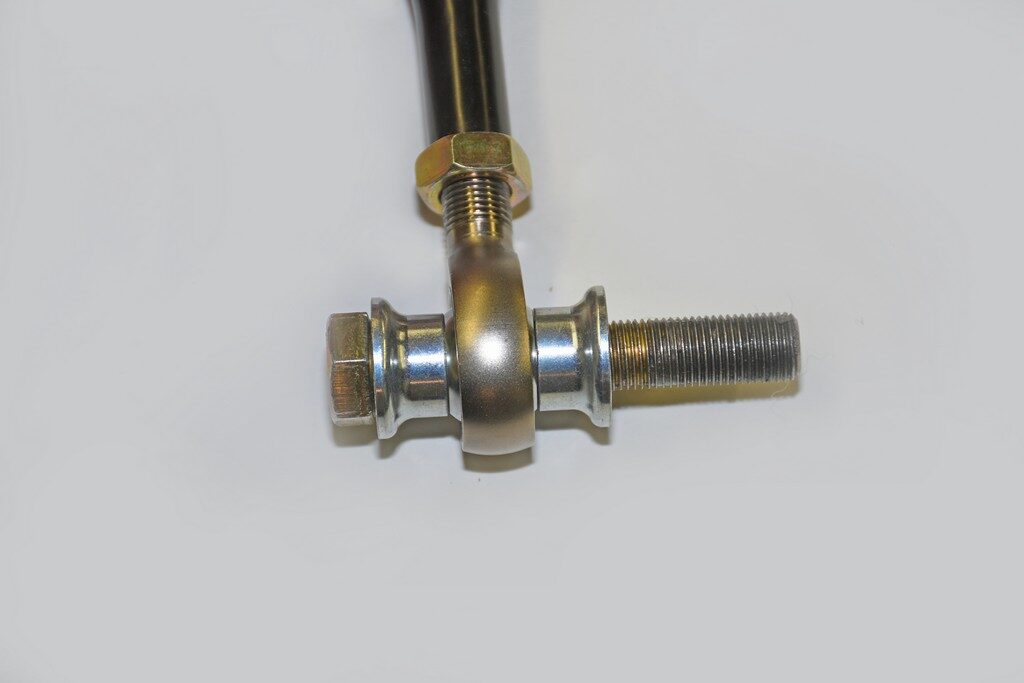
With the setup, you’ll need jam-nuts to lock each rod end in place following adjustment. We used Mark Williams ½-inch RH jam-nuts and Allstar LH jam-nuts (because we had them!).
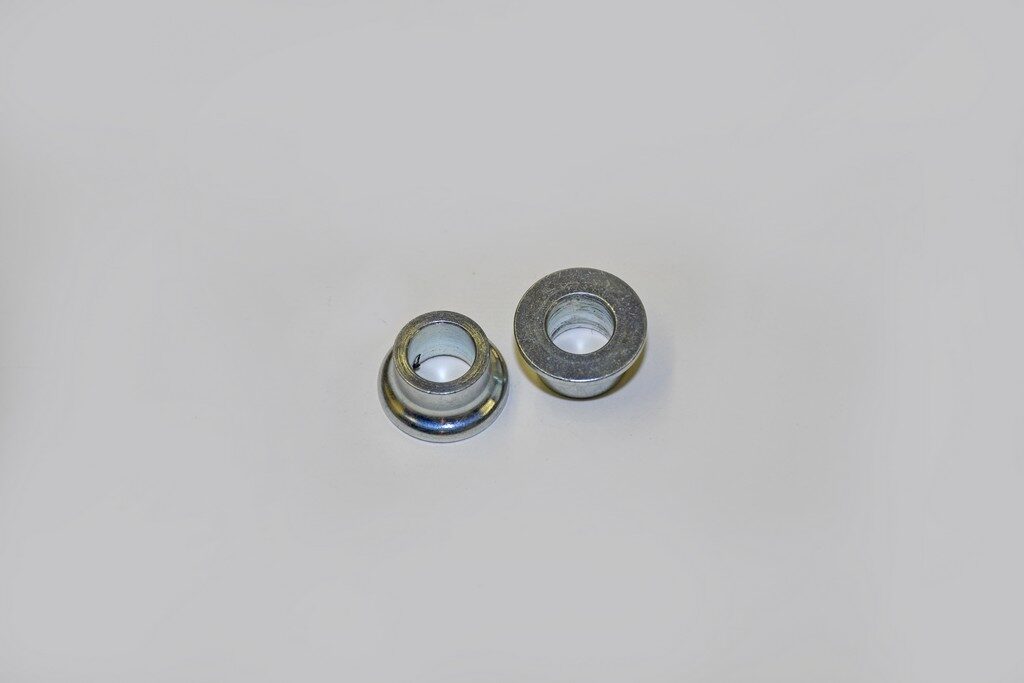
The final pieces of the construction puzzle are the spacers necessary to install the rod end-equipped link into the existing sway bar or ARB brackets. For my application, I used tapered steel spacers from Allstar Performance. They measure ½-inch long and have a ½-inch bore. The OD measures 0.740 on the small end and 0.995 on the big end. Allstar offers steel and aluminum spacers in a wide range of dimensions. FYI, I use a pair of these spacers topside and one on the bottom (sway bar) side.
In terms of assembling these pieces, there’s nothing to it. One word of caution: You really should use anti-seize compound on all rod end threads. That way, they’ll never seize and you can be assured that the links can be adjusted.
Bottom line? Building links isn’t a tough job, but having an adjustment option is good news for any application – particularly when ride heights and vehicle weights can vary. For a closer look at the links, check out the accompanying photos:
Last issue, we detailed the reasons for needing adjustable ARB links and gave you a preview of how we build them. If you rewind and go back to that initial article, you’ll see that sway bar end links should be perpendicular to the sway bar, while the bar ends should be parallel to the road or track surface. All of this must be established with the car at race weight and ride height. With this issue, let’s start from the top and take a short look at real, high-quality racing rod ends. They’re the heart of the system.
For this application, I’m using two Aurora Bearing Company RAM-8T rod ends and two RAB-8T rod ends. The RAM-8Ts are ½-inch right hand thread; the RAB-8Ts are ½-inch left hand thread. Having a right and a left-hand thread on each link allows you to increase the overall length or shorten the overall length of the link easily.
These Aurora rod ends are considered “three-piece” examples. They have bodies manufactured from alloy steel and are heat treated. Typically, they’re nickel or chrome-plated. The ball is heat treated alloy steel and is hard chrome plated. The race is also alloy steel; it too is heat treated and, this time around, nickel plated. Finally, I selected the “T” or Teflon option, which provides a PTFE liner. The liner grants smooth operation and doesn’t require additional lubrication.
RAM-8 rod ends have a ball bore of 0.500-inch. The ball width is 0.625-inch. The head diameter measures 1.312-inches and as mentioned above, the threads are ½-20, left and right hand. In terms of strength, these pieces are stout. They have an ultimate radial static capacity of 15,500 pounds each, which is obviously well in excess to any loads they’ll ever see.
These are not inexpensive components, and Aurora Bearing’s John McCory suggested there’s another less costly option: Aurora Bearing VCAM-8 and VCAB-8. These are Aurora’s self-lubricating economy series bearings. Dimensionally, they’re similar in all respects to the RAM and RAB examples, but the radial static load is very slightly less at 15,479 pounds each. The other critical dimensions are the same as the RAM and RAB series rod ends.
By the way, Aurora Bearing Company has a fabulous website that details all of the specifications (including all dimensions) of their rod ends. Point your browser to https://www.aurorabearing.com/index.html. You can spend a lot of time here looking at the data they’ve compiled and provided. It’s impressive.
Recall those tubes from Allstar Performance mentioned last issue? The examples selected for the job are ½-inch thread jobs. These are swaged D.O.M. steel ¾-inch OD tubes that measure 0.065-inch at the wall. As mentioned in the first article, one of the swaged ends has ½-inch right hand threads and the other has ½-inch left hand threads. They’re available from four inches all the way up to 28 inches in length (in one-inch increments). The bodies are black zinc coated and, as you can see in the photos, they have knurl on the body to ease adjustment.
With the setup, you’ll need jam-nuts to lock each rod end in place following adjustment. We used Mark Williams ½-inch RH jam-nuts and Allstar LH jam-nuts (because we had them!).
The final pieces of the construction puzzle are the spacers necessary to install the rod end-equipped link into the existing sway bar or ARB brackets. For my application, I used tapered steel spacers from Allstar Performance. They measure ½-inch long and have a ½-inch bore. The OD measures 0.740 on the small end and 0.995 on the big end. Allstar offers steel and aluminum spacers in a wide range of dimensions. FYI, I use a pair of these spacers topside and one on the bottom (sway bar) side.
In terms of assembling these pieces, there’s nothing to it. One word of caution: You really should use anti-seize compound on all rod end threads. That way, they’ll never seize and you can be assured that the links can be adjusted.
Bottom line? Building links isn’t a tough job, but having an adjustment option is good news for any application – particularly when ride heights and vehicle weights can vary. For a closer look at the links, check out the accompanying photos:
Leave a Reply