



![[GALLERY] Our Favorite Picks From Mecum Harrisburg 2026](https://www.racingjunk.com/news/wp-content/uploads/2026/07/312140-376x206.avif)

![[Gallery] 3rd. Annual Father's Day Classic Car Show](https://www.racingjunk.com/news/wp-content/uploads/2026/07/Calistoga-2026-18-scaled-e1783026475349-376x206.jpg)

1
Click Here to Begin Slideshow
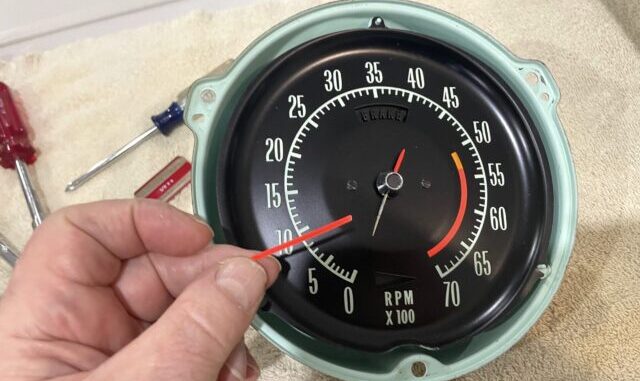
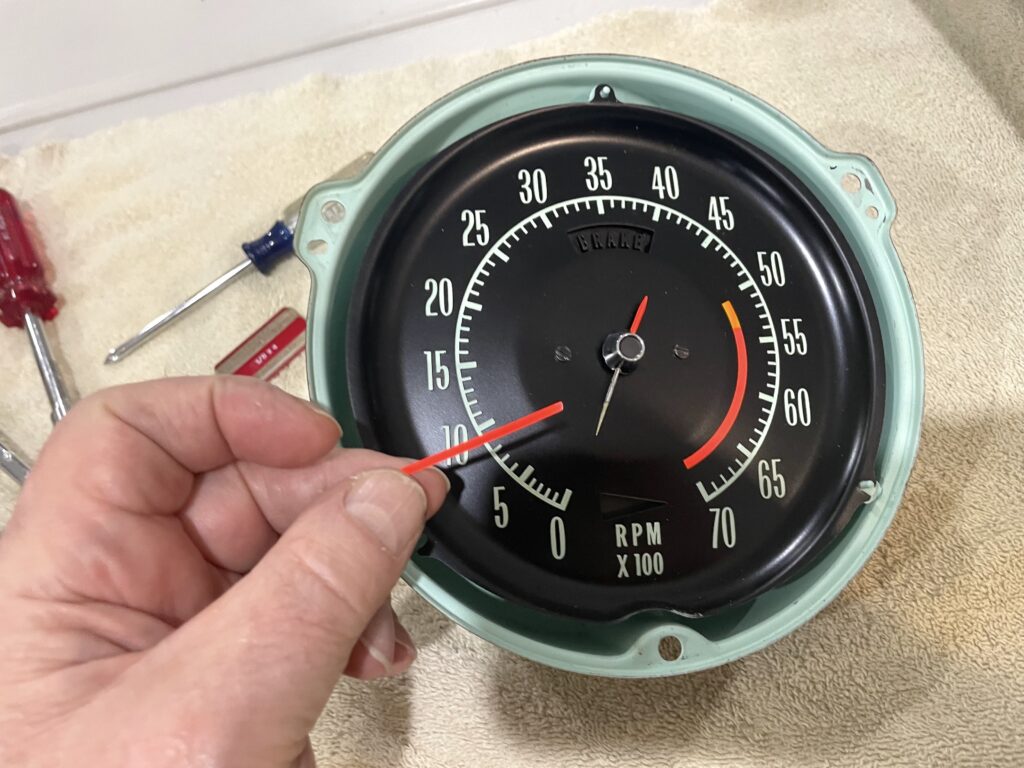
I’m working on a pretty nice 1971 Corvette in the shop (hopefully, not for long). When I bought the car, the previous owner pointed out the tach needle had somehow (mysteriously) fallen off. When the car arrived on the transport truck, sure enough, the tach needle was damaged. Actually, most of the needle was there, but the red pointer was missing. How that happened and figuring out what the total fix consisted of, turned into a real mechanical conundrum.
First things first: When I was getting ready to pull the engine, I discovered the mechanical tach cable was loosely tightened on the distributor body. And I mean loosely. It was finger-tight. Additionally, the tach drive cross-shaft coupler was loose. That seemed odd, but there were a lot of other places on the car where bolts and other fasteners were loose – some precariously loose. I tucked that away in my memory bank, and since the plan was to go through the distributor anyway, I just put it on my shelf for later. I had bigger fish to fry when it came to the Corvette.
Next up, I removed the instrument cluster from the car. The reason for this was twofold: Fix the tach needle and replace the wire harness (and peeling out the dash in a C3 Corvette is not a task for the faint-hearted!). There is no other way to repair the needle other than removing the cluster. Lucky for me, the missing part of the needle was lying loose at the bottom of the tachometer housing. I had ordered a couple of spare reproduction needles in preparation for this job (thinking I might break one in the delicate assembly process). As it turned out I couldn’t use either of them for the simple reason they didn’t fit properly. The fit problem with the reproduction pointers is that they engage too low on the gauge, causing the needle to hang up on the two little screws that affix the tach face to the housing.
I had to go to Plan B: use a strong two-part epoxy to glue the pointer back together. Closer examination had revealed that the pointer was actually manufactured in two parts. I also noticed there was a built-in needle stop for the tach. That meant that if the needle was bouncing around perhaps that was enough to mess it up. Fair enough. I reassembled everything. It all fit. And I declared the tach done! But not so fast:
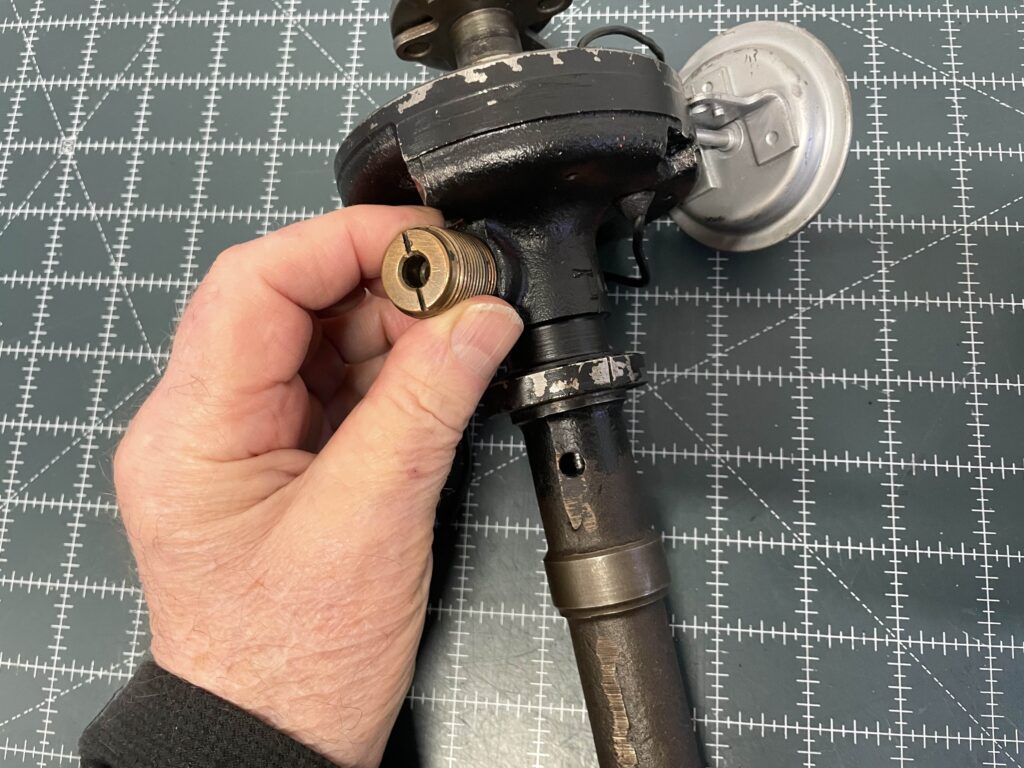
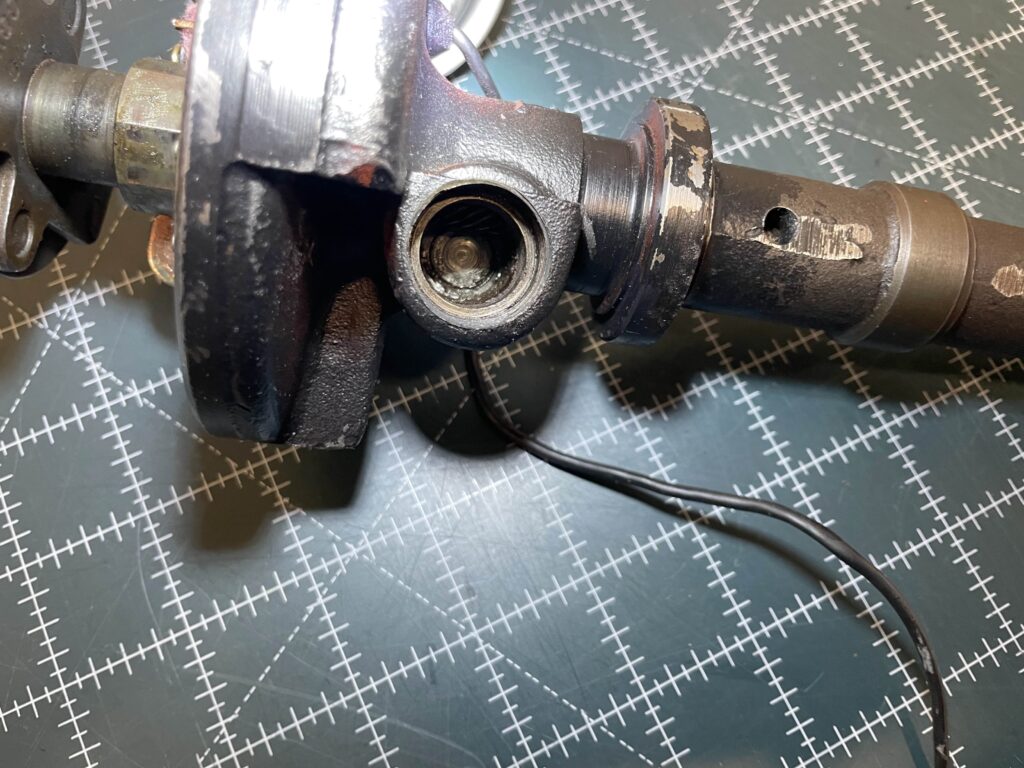
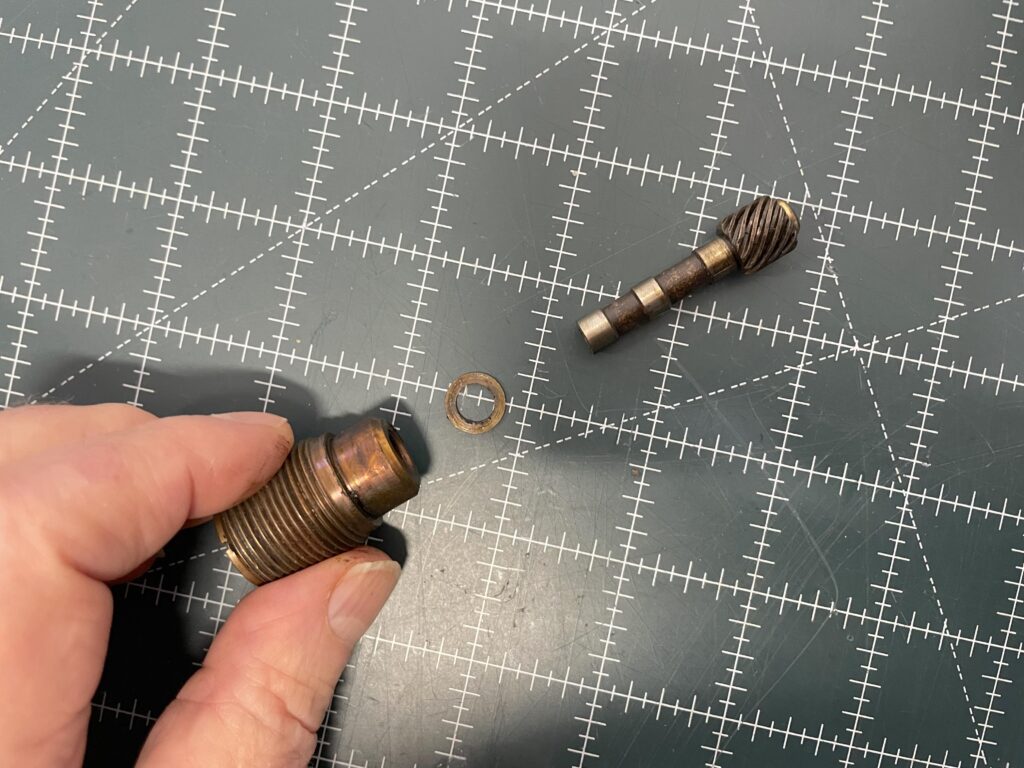
Then I went back to the tach drive distributor. Recall when I took the distributor out of the car, I also discovered the tach drive bronze coupling was installed loosely….very loosely? This seemed like an odd mix: A loose tach drive cable and a loose coupling the cable attaches to. In addition, the distributor had a ton of end clearance (the lower gear had one shim – it needed a bunch more), which I fixed. During the distributor rebuild-recurve, I also discovered the nylon cross-drive gear thrust button was worn pretty badly. This button provides the end clearance for the tach drive cross shaft. I assembled everything, and lightly tightened the tach drive coupling, the cross-drive gear bound up and the distributor shaft would not turn. If I loosened it all up, it would turn, but not very well. As a result, I ordered a new nylon thrust button from a source on EBay (it’s actually the same as a stock Delco piece). When the new button arrived, I installed it. It's a simple task. It just pops in through the empty drive gear opening in the distributor body. Unfortunately, there was absolutely zero improvement.
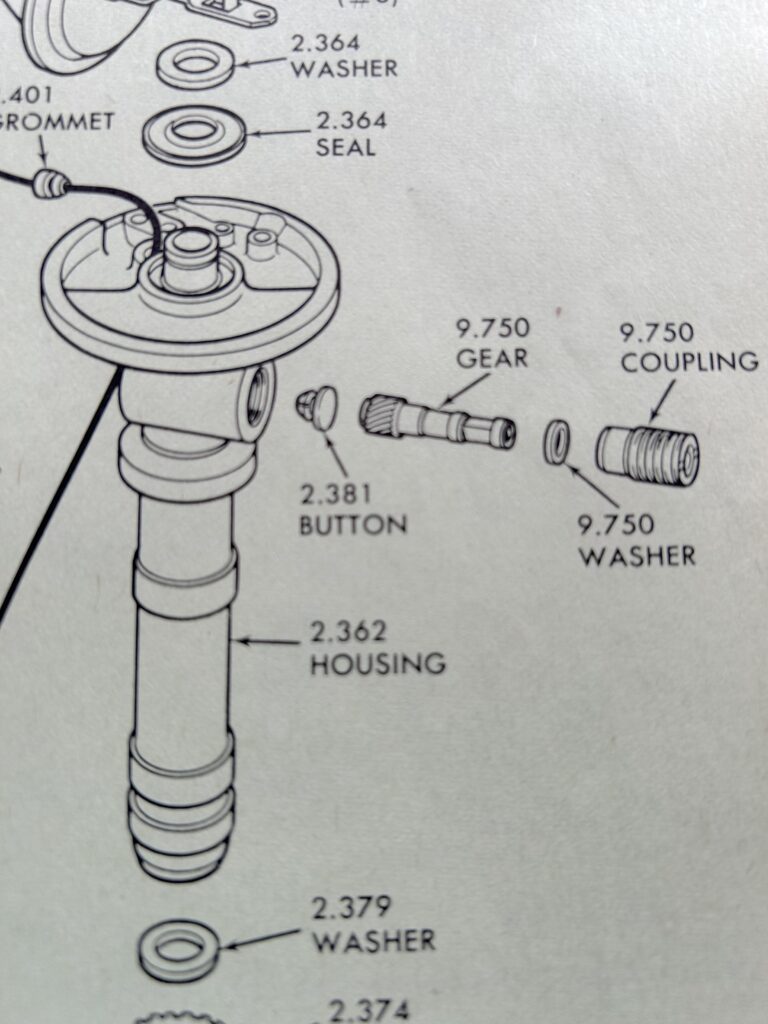
To me at least, it seems like the cross-drive gear is engaging too deep. Or maybe some parts were missing? When I dug into one of my old Chevy parts catalogs (I have a few L-O-L), I double-checked to ensure I had all of the right parts and I had installed them in the proper order. Check!
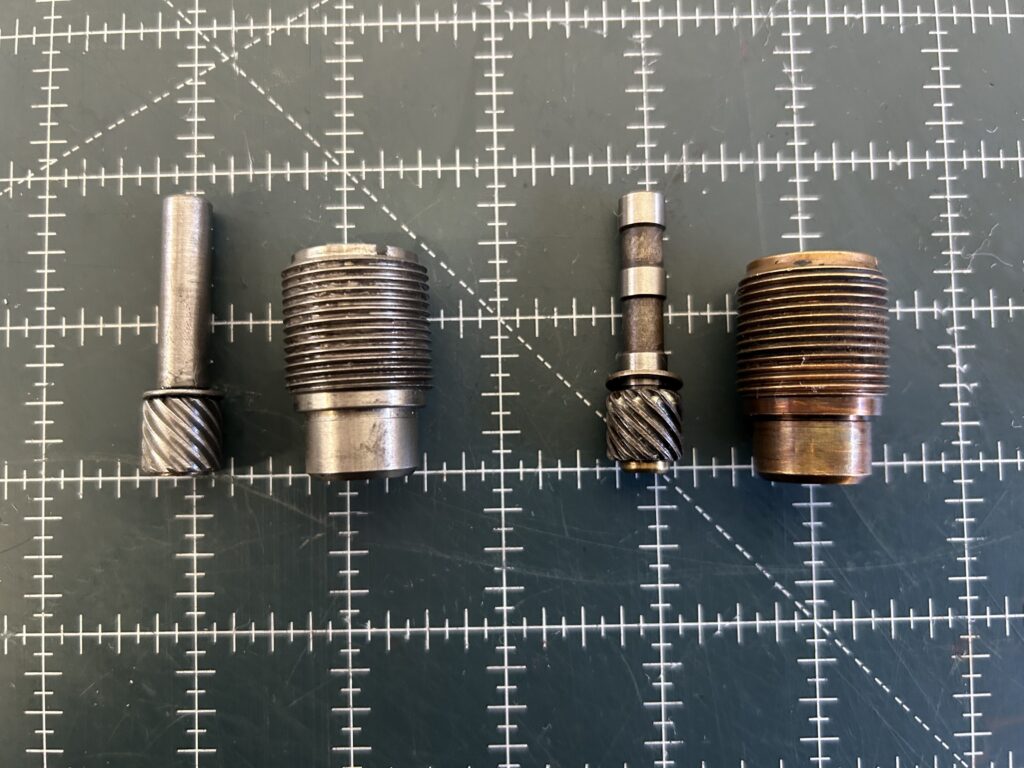
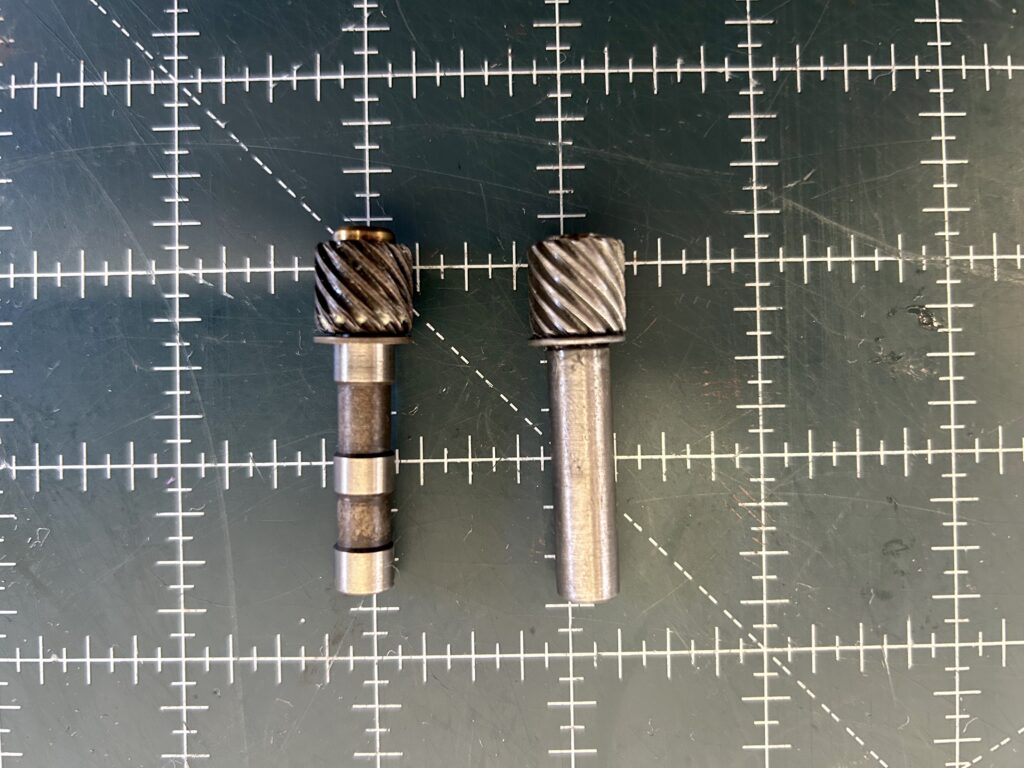
I suppose I could have drilled and tapped the distributor housing and used a set screw to establish the clearance (thrust clearance for the tach drive cross shaft), but I was hoping to find a better solution. Perhaps the original drive gear or the coupling were messed up? Or maybe both are? It’s really difficult to see if the drive gear is excessively worn without a reference to compare it to.
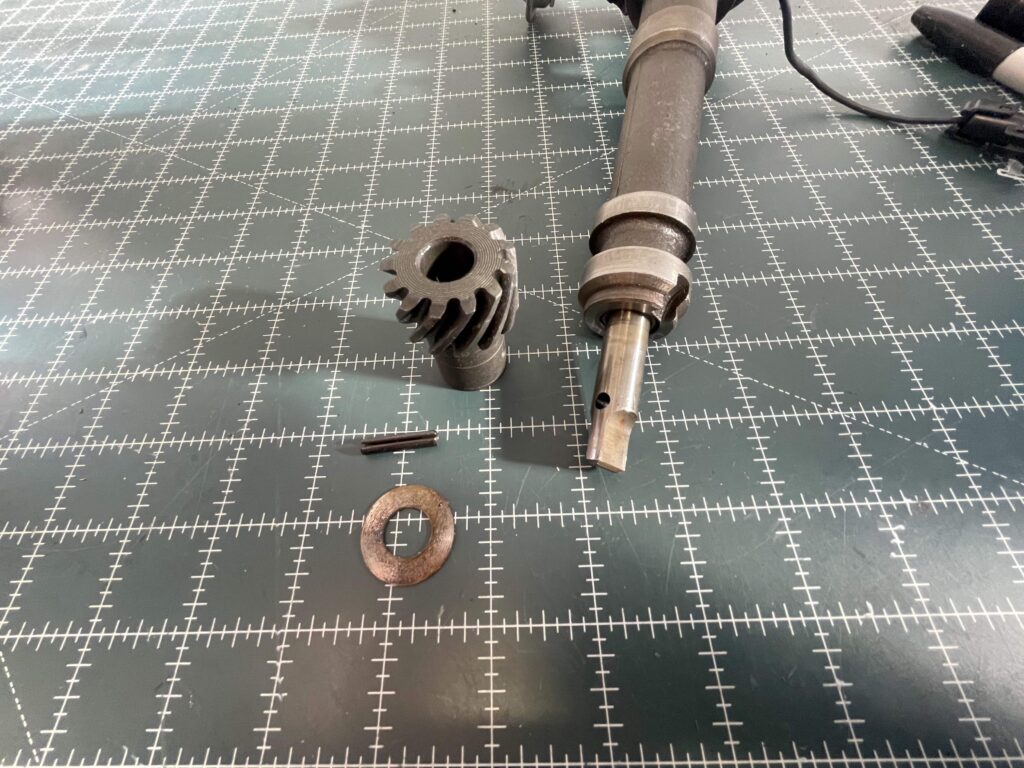
I decided to do more homework. I just spoke with Jeff Vinyard, owner of High Tech Innovations. He machines new couplers and gears for Corvette distributors. He also has an upgraded setup with captured needle bearings and a stainless-steel coupler. He agreed and thought that perhaps the thrust washer in my distributor might be wrong, but it could also be the cross-shaft gear. I ordered a complete new setup from Jeff. Here’s a link to his little website (below). You’ll note he offers a number of machined bits for vintage Delco distributors.https://hightechinnovations.weebly.c...all-years.html
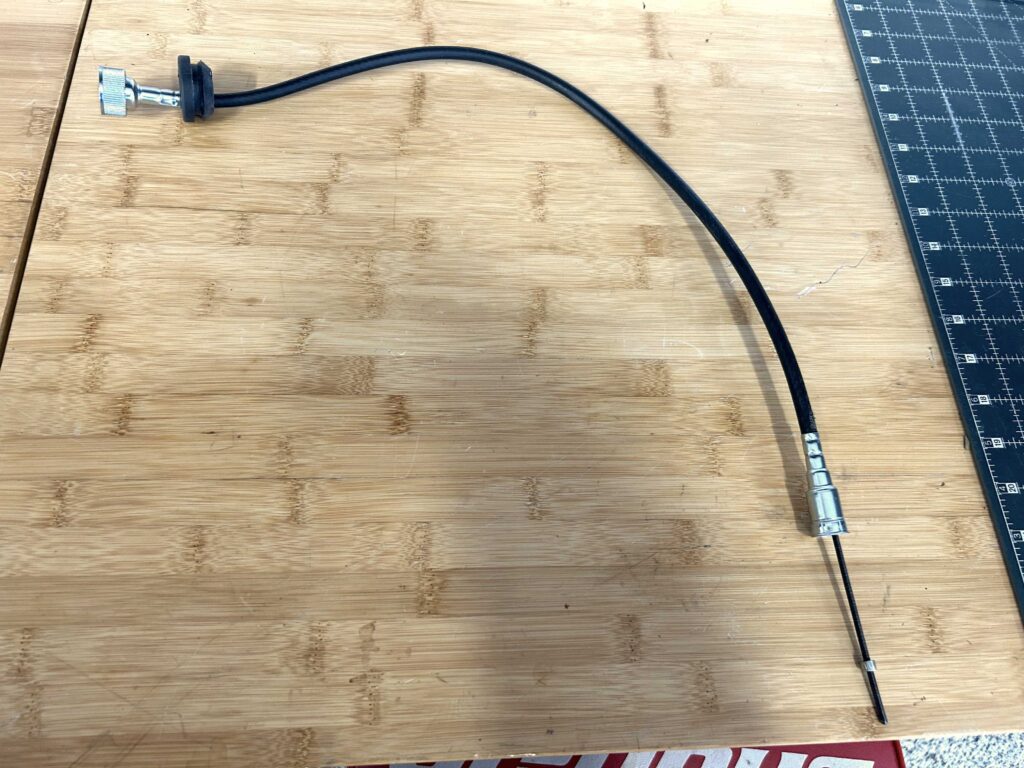
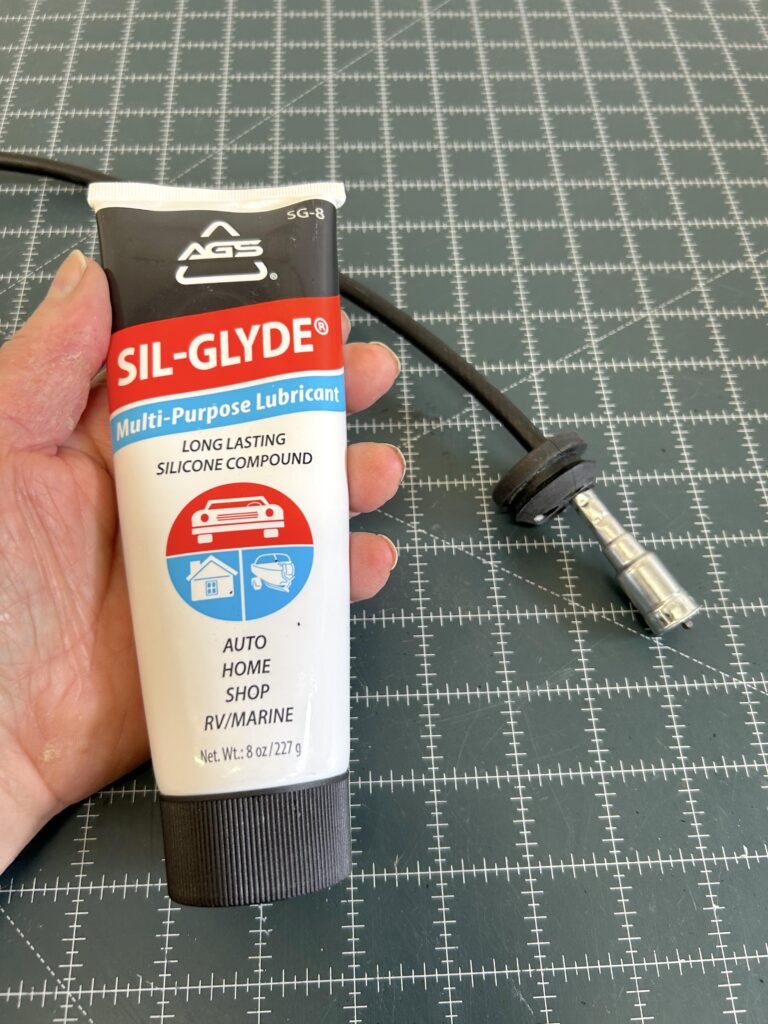
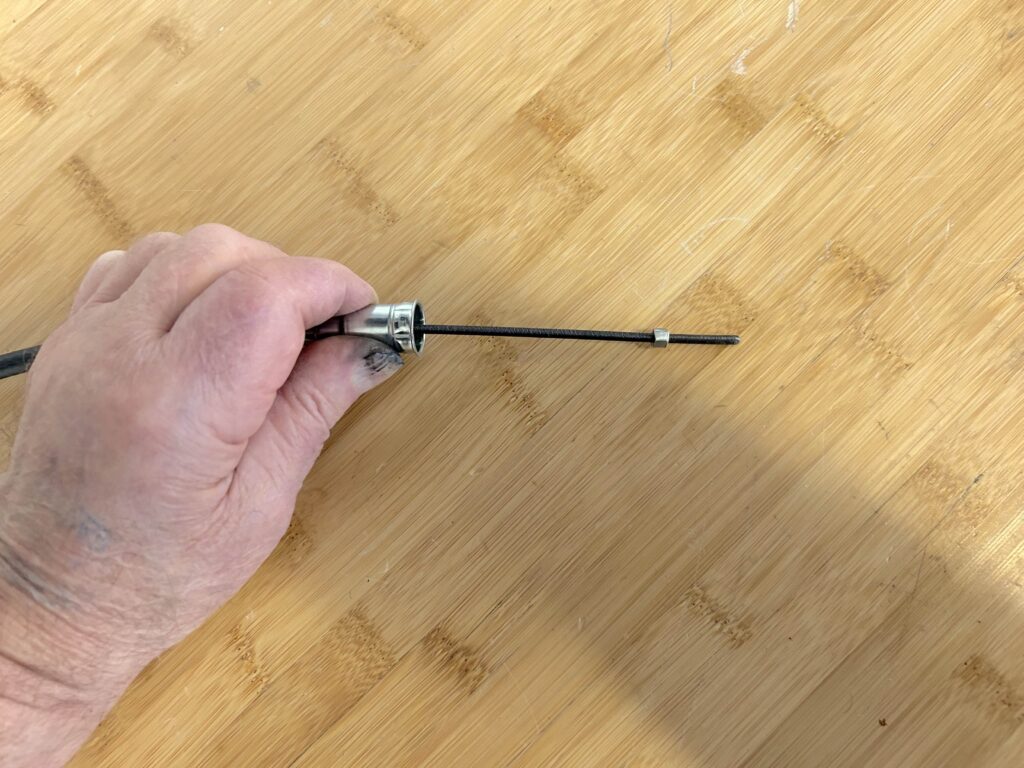
While I was waiting for the new distributor tach drive parts to arrive, I decided to take a closer look at the tach drive cable that came in my car. It was new. But the tach cable has never seen any sort of lube. It was bone dry. This is an easy fix. Typically, I’ll lube the entire core of a tach drive cable, except the last four to six inches on the gauge side, so it doesn’t make a mess while spinning the tach. I used a product called “Sil-Glyde”. It’s a silicone compound grease (and I’ve used it in the past with the Jones Motorola tachs I regularly ran in my old race cars). It works great. Now that I said that I’ll probably get a bunch of fish eyes in the next thing I have to paint.
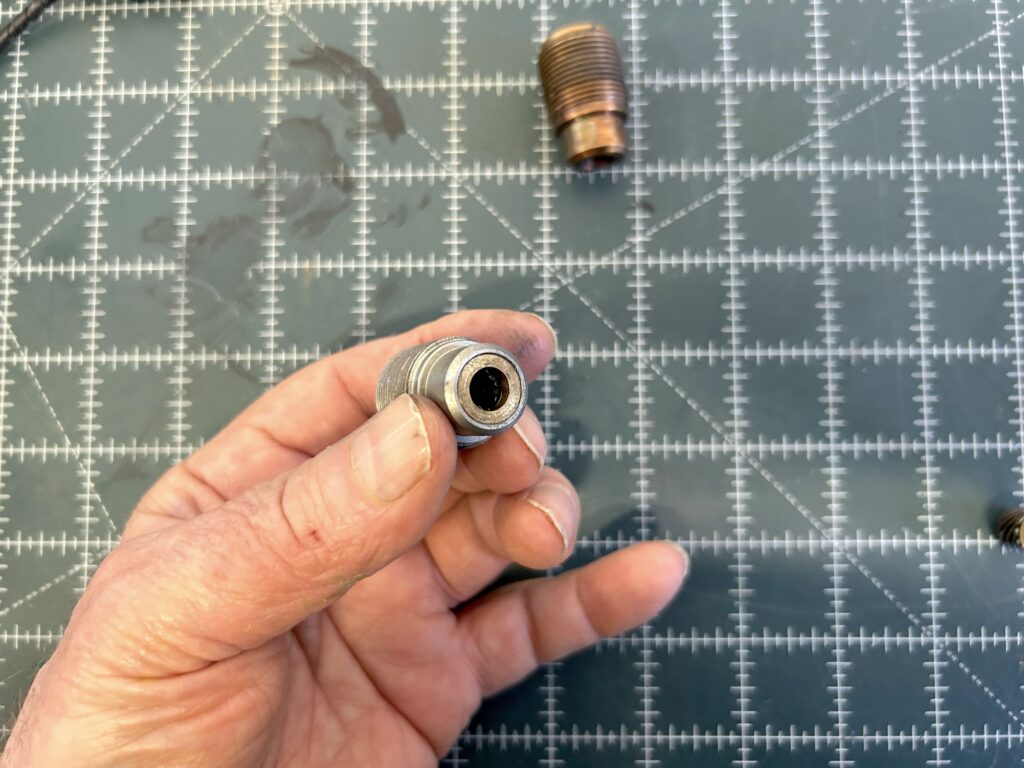
When my new stainless-steel parts arrived from High Tech Innovations, it was a Holy Smokes moment! They’re beautifully machined and install just like OEM. In the accompanying photos, you’ll see the stainless-steel coupler with captured needle bearings and a new gear set. It looks a little dirty, but that’s because I regularly use anti-seize on threads between dissimilar materials (a cast iron distributor body and a stainless steel coupler). It’s not hard for something to seize up with this mix of parts. Don’t ask me how I discovered this years ago! And every time I use the stuff, I end up looking like the Tin Man.
Best of all, with all of the pieces installed and tightened, the distributor now turns super smooth. The tach cable turns freely. And I’m pretty sure my broken needle issue is exorcised. I believe the whole thing was caused by a series of cascading issues: The tach drive gear was worn. The thrust button was severely worn (this most likely caused the tach drive gear to wear). The tach drive cable was never greased. And to compensate for all of this, the distributor's end clearance was increased, along with not tightening the tach cable or the coupler. As a result, everything was moving around inside the distributor, including the tach drive.
The bottom line is that a bunch of issues contributed to my “mechanical mayhem”. And if you’re in the same boat, consider the solution. It worked great!
For more, check out the accompanying photos and captions:
Click Here to Begin Slideshow
I’m working on a pretty nice 1971 Corvette in the shop (hopefully, not for long). When I bought the car, the previous owner pointed out the tach needle had somehow (mysteriously) fallen off. When the car arrived on the transport truck, sure enough, the tach needle was damaged. Actually, most of the needle was there, but the red pointer was missing. How that happened and figuring out what the total fix consisted of, turned into a real mechanical conundrum.
First things first: When I was getting ready to pull the engine, I discovered the mechanical tach cable was loosely tightened on the distributor body. And I mean loosely. It was finger-tight. Additionally, the tach drive cross-shaft coupler was loose. That seemed odd, but there were a lot of other places on the car where bolts and other fasteners were loose – some precariously loose. I tucked that away in my memory bank, and since the plan was to go through the distributor anyway, I just put it on my shelf for later. I had bigger fish to fry when it came to the Corvette.
Next up, I removed the instrument cluster from the car. The reason for this was twofold: Fix the tach needle and replace the wire harness (and peeling out the dash in a C3 Corvette is not a task for the faint-hearted!). There is no other way to repair the needle other than removing the cluster. Lucky for me, the missing part of the needle was lying loose at the bottom of the tachometer housing. I had ordered a couple of spare reproduction needles in preparation for this job (thinking I might break one in the delicate assembly process). As it turned out I couldn’t use either of them for the simple reason they didn’t fit properly. The fit problem with the reproduction pointers is that they engage too low on the gauge, causing the needle to hang up on the two little screws that affix the tach face to the housing.
I had to go to Plan B: use a strong two-part epoxy to glue the pointer back together. Closer examination had revealed that the pointer was actually manufactured in two parts. I also noticed there was a built-in needle stop for the tach. That meant that if the needle was bouncing around perhaps that was enough to mess it up. Fair enough. I reassembled everything. It all fit. And I declared the tach done! But not so fast:
Then I went back to the tach drive distributor. Recall when I took the distributor out of the car, I also discovered the tach drive bronze coupling was installed loosely….very loosely? This seemed like an odd mix: A loose tach drive cable and a loose coupling the cable attaches to. In addition, the distributor had a ton of end clearance (the lower gear had one shim – it needed a bunch more), which I fixed. During the distributor rebuild-recurve, I also discovered the nylon cross-drive gear thrust button was worn pretty badly. This button provides the end clearance for the tach drive cross shaft. I assembled everything, and lightly tightened the tach drive coupling, the cross-drive gear bound up and the distributor shaft would not turn. If I loosened it all up, it would turn, but not very well. As a result, I ordered a new nylon thrust button from a source on EBay (it’s actually the same as a stock Delco piece). When the new button arrived, I installed it. It's a simple task. It just pops in through the empty drive gear opening in the distributor body. Unfortunately, there was absolutely zero improvement.
To me at least, it seems like the cross-drive gear is engaging too deep. Or maybe some parts were missing? When I dug into one of my old Chevy parts catalogs (I have a few L-O-L), I double-checked to ensure I had all of the right parts and I had installed them in the proper order. Check!
I suppose I could have drilled and tapped the distributor housing and used a set screw to establish the clearance (thrust clearance for the tach drive cross shaft), but I was hoping to find a better solution. Perhaps the original drive gear or the coupling were messed up? Or maybe both are? It’s really difficult to see if the drive gear is excessively worn without a reference to compare it to.
I decided to do more homework. I just spoke with Jeff Vinyard, owner of High Tech Innovations. He machines new couplers and gears for Corvette distributors. He also has an upgraded setup with captured needle bearings and a stainless-steel coupler. He agreed and thought that perhaps the thrust washer in my distributor might be wrong, but it could also be the cross-shaft gear. I ordered a complete new setup from Jeff. Here’s a link to his little website (below). You’ll note he offers a number of machined bits for vintage Delco distributors.https://hightechinnovations.weebly.c...all-years.html
While I was waiting for the new distributor tach drive parts to arrive, I decided to take a closer look at the tach drive cable that came in my car. It was new. But the tach cable has never seen any sort of lube. It was bone dry. This is an easy fix. Typically, I’ll lube the entire core of a tach drive cable, except the last four to six inches on the gauge side, so it doesn’t make a mess while spinning the tach. I used a product called “Sil-Glyde”. It’s a silicone compound grease (and I’ve used it in the past with the Jones Motorola tachs I regularly ran in my old race cars). It works great. Now that I said that I’ll probably get a bunch of fish eyes in the next thing I have to paint.
When my new stainless-steel parts arrived from High Tech Innovations, it was a Holy Smokes moment! They’re beautifully machined and install just like OEM. In the accompanying photos, you’ll see the stainless-steel coupler with captured needle bearings and a new gear set. It looks a little dirty, but that’s because I regularly use anti-seize on threads between dissimilar materials (a cast iron distributor body and a stainless steel coupler). It’s not hard for something to seize up with this mix of parts. Don’t ask me how I discovered this years ago! And every time I use the stuff, I end up looking like the Tin Man.
Best of all, with all of the pieces installed and tightened, the distributor now turns super smooth. The tach cable turns freely. And I’m pretty sure my broken needle issue is exorcised. I believe the whole thing was caused by a series of cascading issues: The tach drive gear was worn. The thrust button was severely worn (this most likely caused the tach drive gear to wear). The tach drive cable was never greased. And to compensate for all of this, the distributor's end clearance was increased, along with not tightening the tach cable or the coupler. As a result, everything was moving around inside the distributor, including the tach drive.
The bottom line is that a bunch of issues contributed to my “mechanical mayhem”. And if you’re in the same boat, consider the solution. It worked great!
For more, check out the accompanying photos and captions:
Click Here to Begin Slideshow
Leave a Reply