

In our last issue, we took a look at some of the procedures along with the tools you’ll most likely need to gather before embarking on a major build. As noted in that article, space is always at a premium. Not only do you need room to work on the car, you also need room to store parts. And you have to accomplish it with a certain degree of organization. Honestly, a project will never be complete if you strip a car or truck and stash all of the parts helter-skelter.
Here’s a good example: A long time ago, I looked at Corvette (with the intent of purchasing it) where the owner stripped the car — removing and disassembling virtually every single component. And I mean stripped and disassembled. Virtually every part and sub assembly was stripped bare. None of those parts were grouped together and none were identified (bagged and tagged). Instead it was just a massive pile of parts. It defined the term “basket case”. Honestly it was so daunting I passed on the project. Basically, you don’t want to be “that guy”!
In fact, “that guy” completely influenced how I went about working on cars. I decided it wasn’t that difficult or expensive to become somewhat organized. In the following photos and captions, we’ll show you how it was accomplished:
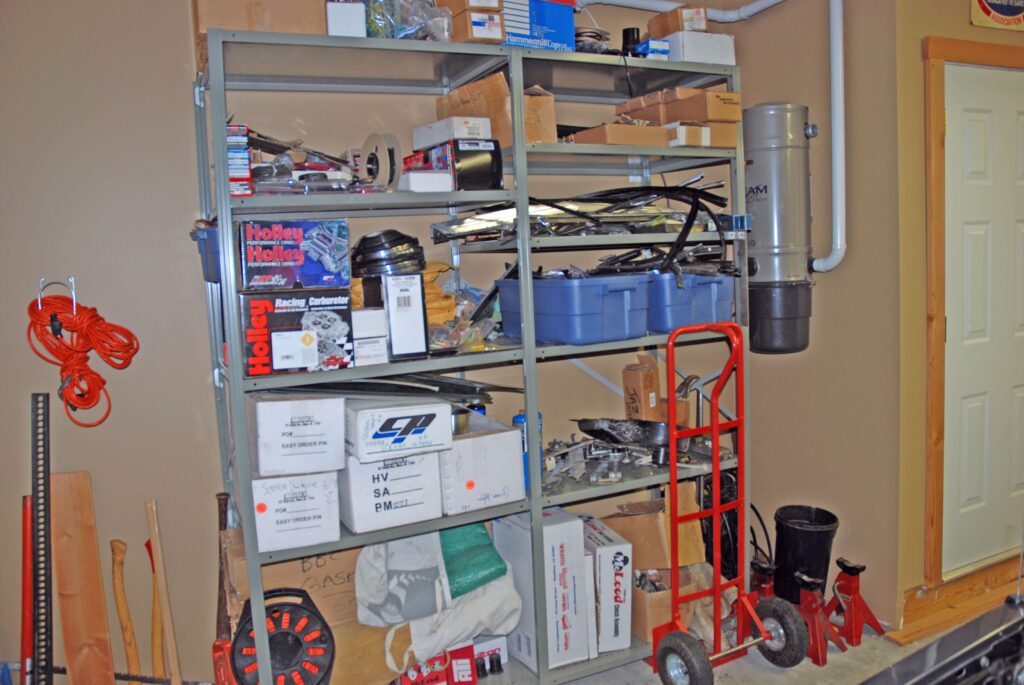
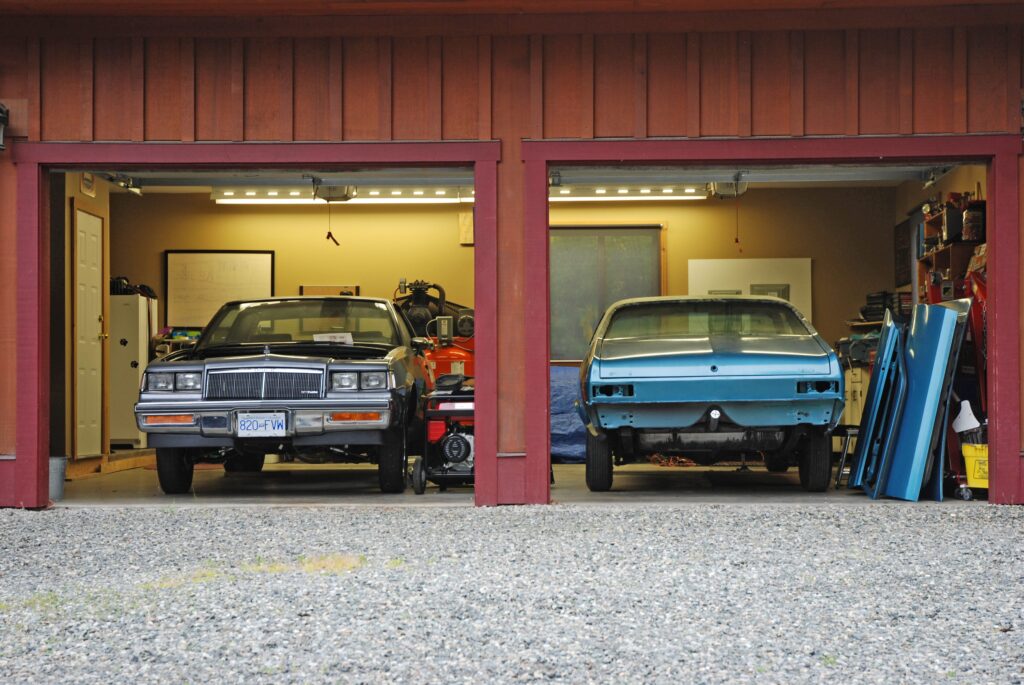
You can buy used warehouse storage racks dirt cheap (look for store supply companies in your neighborhood). I had this 6-foot section in the garage and another 9-foot-long section in the house crawlspace. As you can see, the whole thing was loaded with parts (new stuff and pieces off the Nova project shown in the first article). 
I used folding 8-foot long tables in the crawl space under my house to store parts, particularly pieces that are large and perhaps fragile. Here, the back bumper and windshield cowl pieces share space with the door panels, quarter panel trim, package shelf and other hardware. FYI, you can buy heavy duty folding tables like this from restaurant supply houses (often used). Costco sells similar jobs, but they’re lighter weight with a composite top surface. 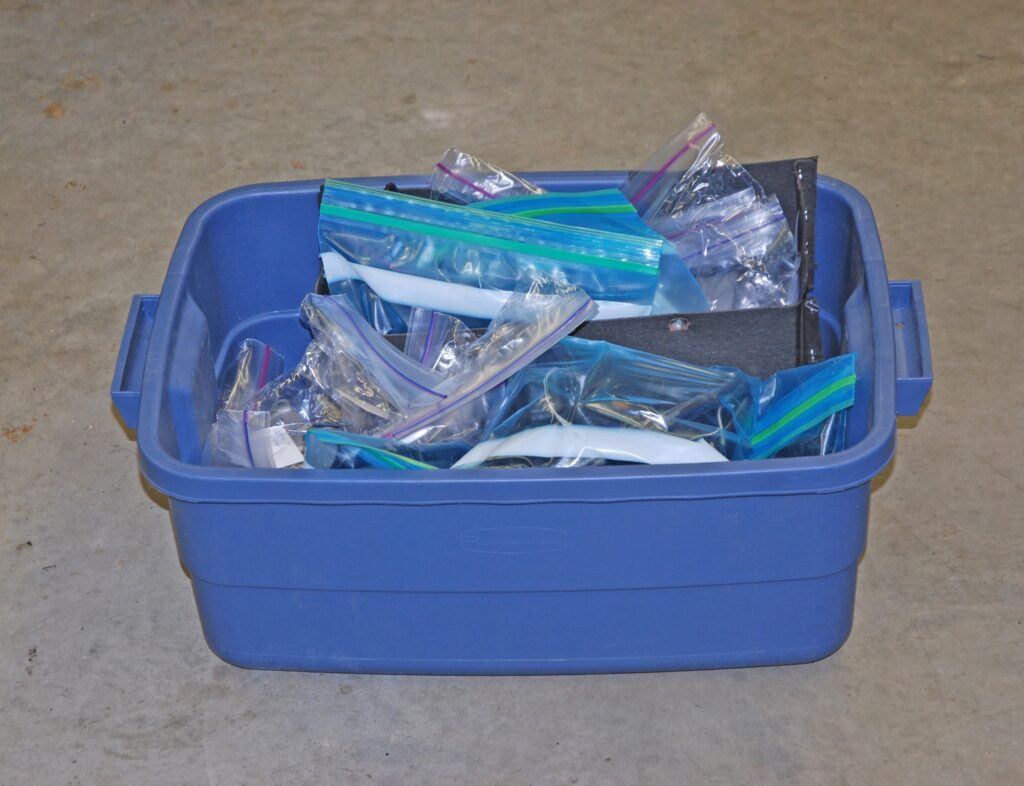
Rubbermaid “totes” are perfect for small parts storage. For most cars, the 21X15.5X9-inch size shown here works and happens to be the most manageable (bigger bins get pretty heavy when filled with parts). When it comes to parts storage, I seldom use the lids they’re supplied with, although you can. Just don’t fill the bins as much. 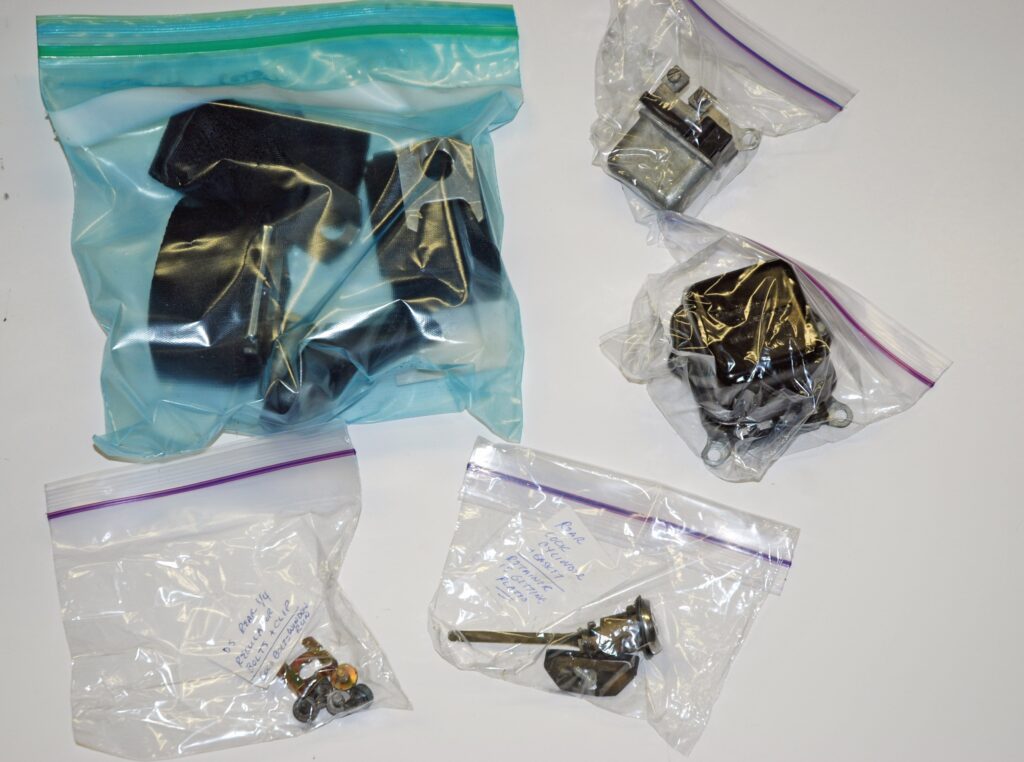
As bits and pieces are removed from the car, I tag and bag them. For most smaller parts, sandwich bags are the best bet. Bigger parts can be stored in freezer bags. 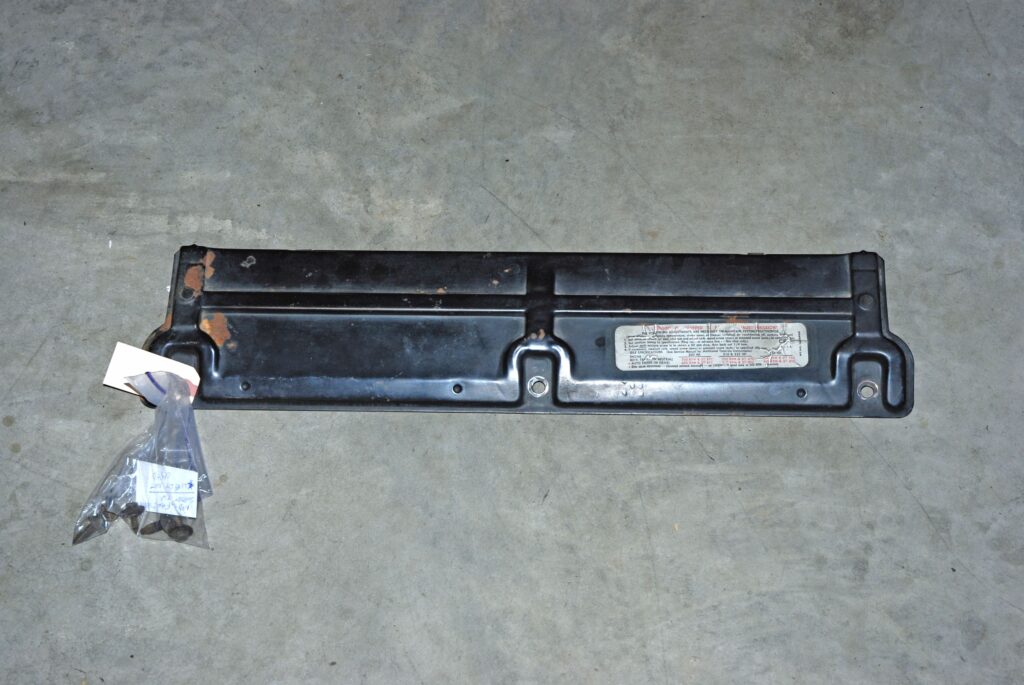
If the part is too big, I simply tag it (using a parts tag as shown in the second photo). In most instances, I’ll include the fasteners that go with the part in the bag. If the part is too big to bag and only has a parts tag, I’ll regularly fasten the accompanying hardware bag right to it. 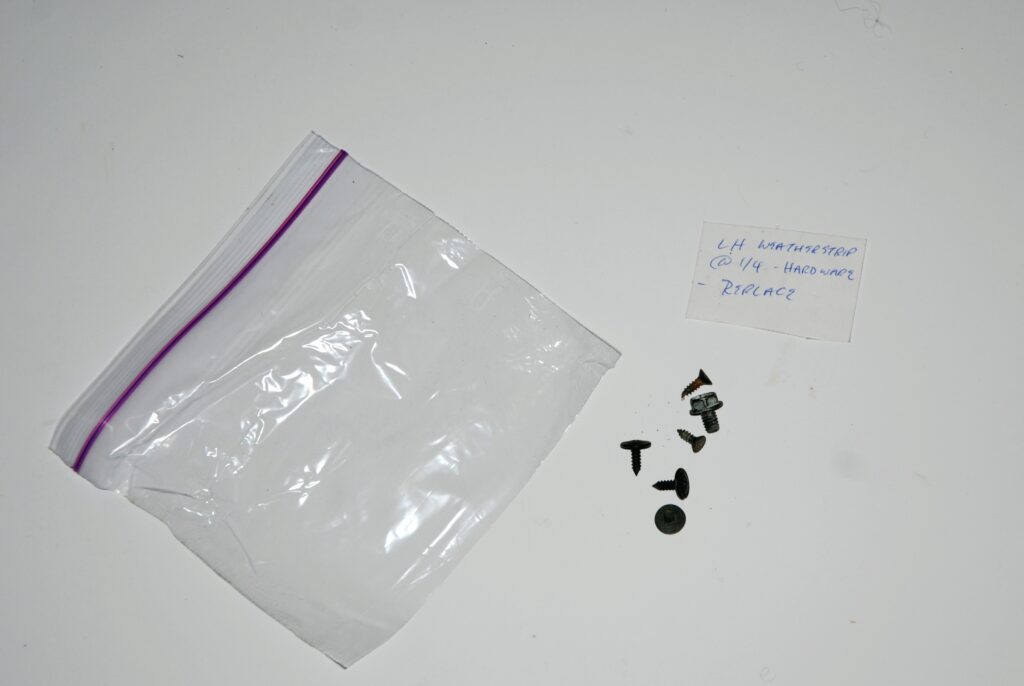
I save almost all parts, even if the parts in question will eventually be replaced (there’s a catch, and it’s mentioned below). A good example is this set of fasteners. I’ll mark them as “replace” on the tag. Then I’ll add the respective fasteners I need to my “want list” (more on that later). This way, I can keep track of what needs replacing instead of searching for new hardware and pieces at the last minute. By the way, I always keep the originals for reference in the event the replacements are not the same. 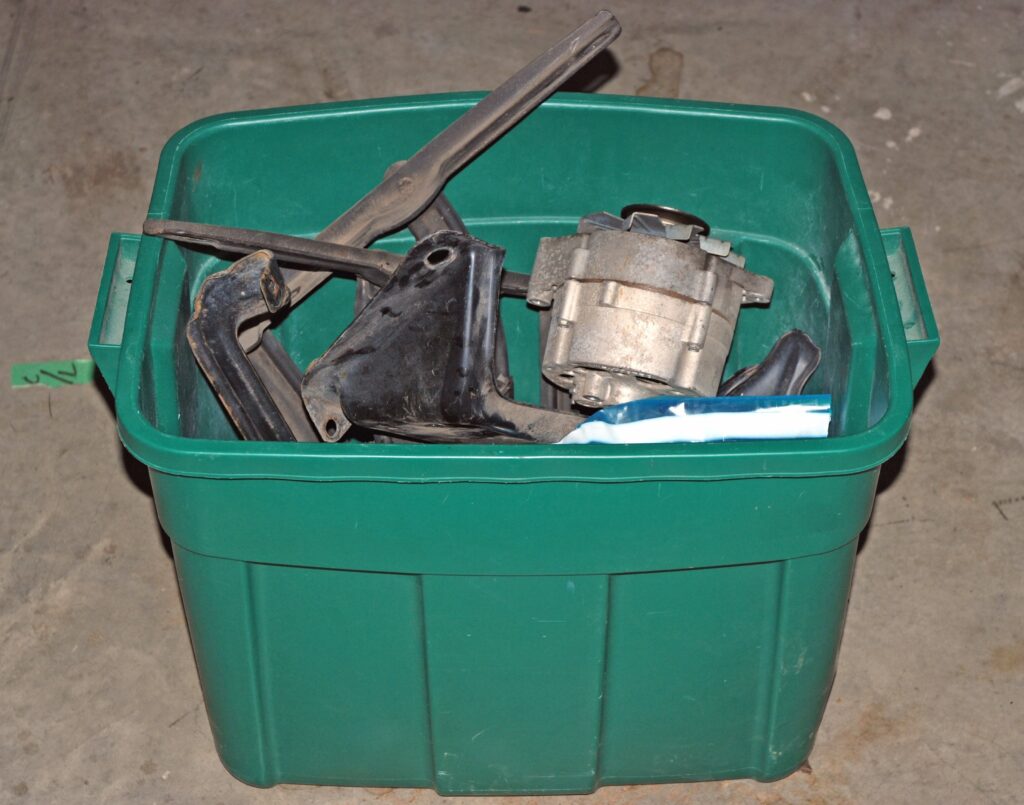
Parts in my builds are generally sorted into five simple categories: Hardware, Exterior, Interior, Engine Compartment, Chassis. Then I also peel out pieces that require outside work for restoration. For example, I usually send things like hood hinges and latches as well as brake boosters to Detail Plating. The alternator and horn relay went to another specialist. The bumper brackets and small chassis items go to my favorite powder coater, All of those items go into a separate Rubbermaid bin. 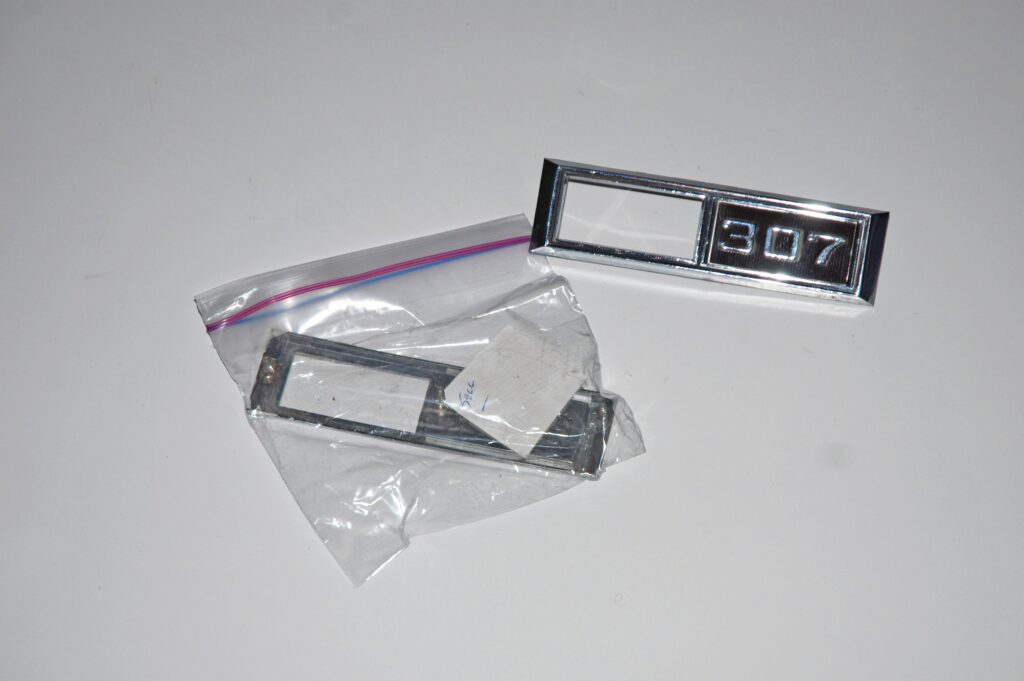
Parts I’m confident I can sell, and where I’m positive the replacement is a perfect fit (for example, these marker lamp assemblies), I mark “for sale”. Eventually, I’ll start a dedicated Rubbermaid bin with “for sale” stuff. 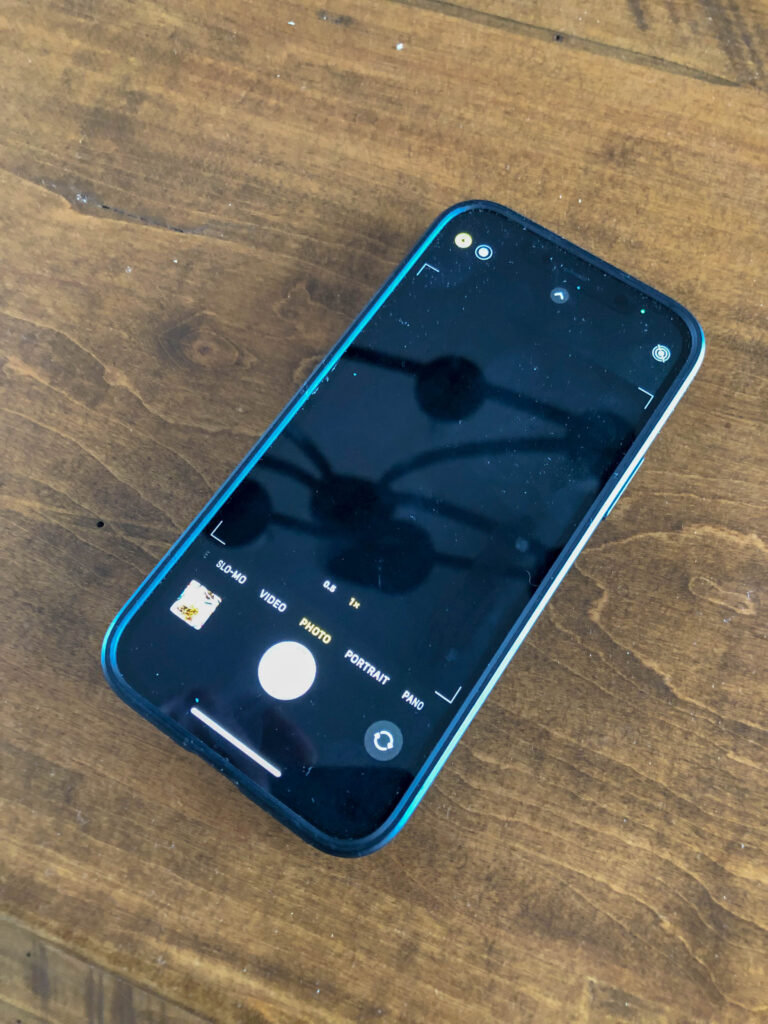
Almost everyone has a cell phone with a camera. Basically, if you shoot photos along the way, it makes reassembly much easier (and in some “scratch-your-head” instances, a whole bunch easier). I just make up a separate folder on my computer desktop for tear down shots. 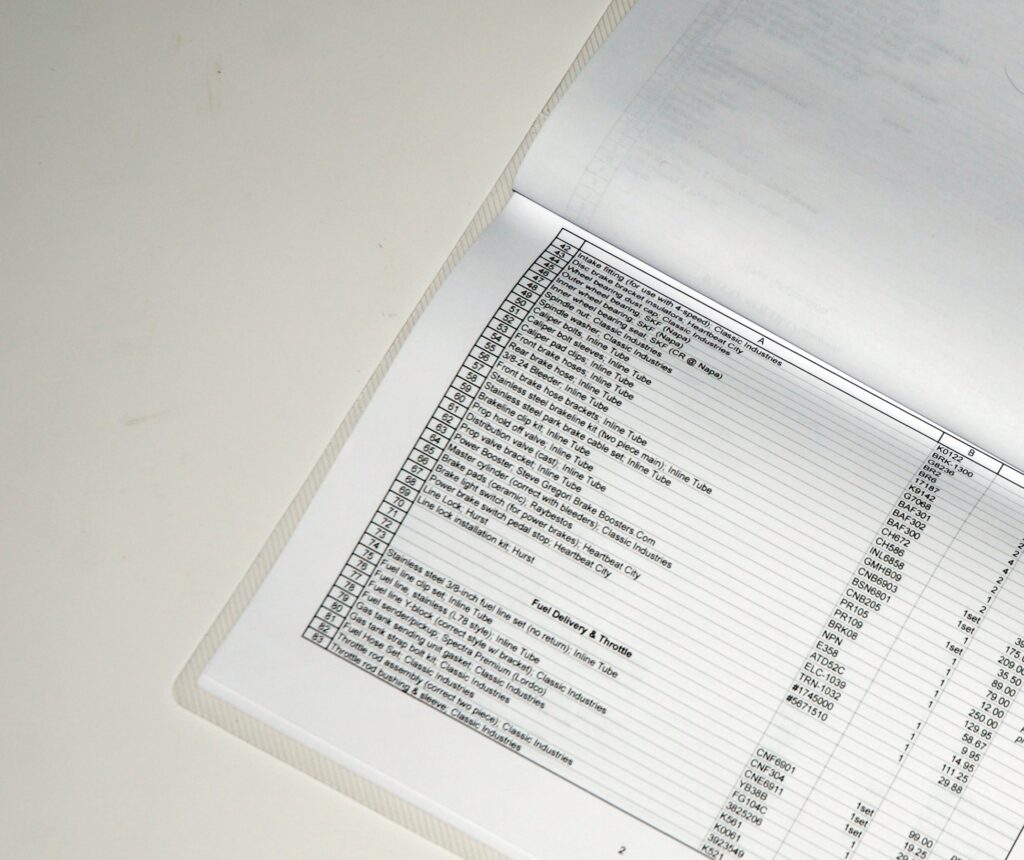
I always maintain an on-going Excel spreadsheet that details each and every one of the parts I need for a project. Over the years, I’ve discovered that most automotive projects (restoration and otherwise) tend to be dynamic. They change as the project evolves. For example, I decided to convert my Nova from an automatic to a stick. That meant a bunch of parts I had weren’t required. Simultaneously a bunch of other pieces were required. The Excel spreadsheet helps to keep me on top of the process.