


![[Gallery] Mecum Kissimmee Auction 2026](https://www.racingjunk.com/news/wp-content/uploads/2026/03/DSC_0717-e1774629242515-376x206.jpg)
![[Gallery] Cruisin’ One Daytona](https://www.racingjunk.com/news/wp-content/uploads/2026/03/DSC_0538-e1774027057404-376x206.jpg)

Piston Persuasion: How To Install Pistons
Click Here to Begin Slideshow
There are a number of different ways to install pistons (with rings, obviously) and connecting rods in your engine. Different builders take different approaches. At the top, here’s the basic procedure I use (and again, the process is shared with many others):
First, wipe the cylinder bores with a clean, lint free towel and apply a small amount of conventional (non-synthetic) oil to the walls. I always apply a liberal amount of oil to the wrist pins and piston rings as well. But there’s a catch: You don’t need to drench the piston in oil (I’ve witnessed folks literally dunking the piston and ring package in a quart of oil). The truth is, you only need sufficient oil to lubricate the rings as they pass through the piston ring compressor!
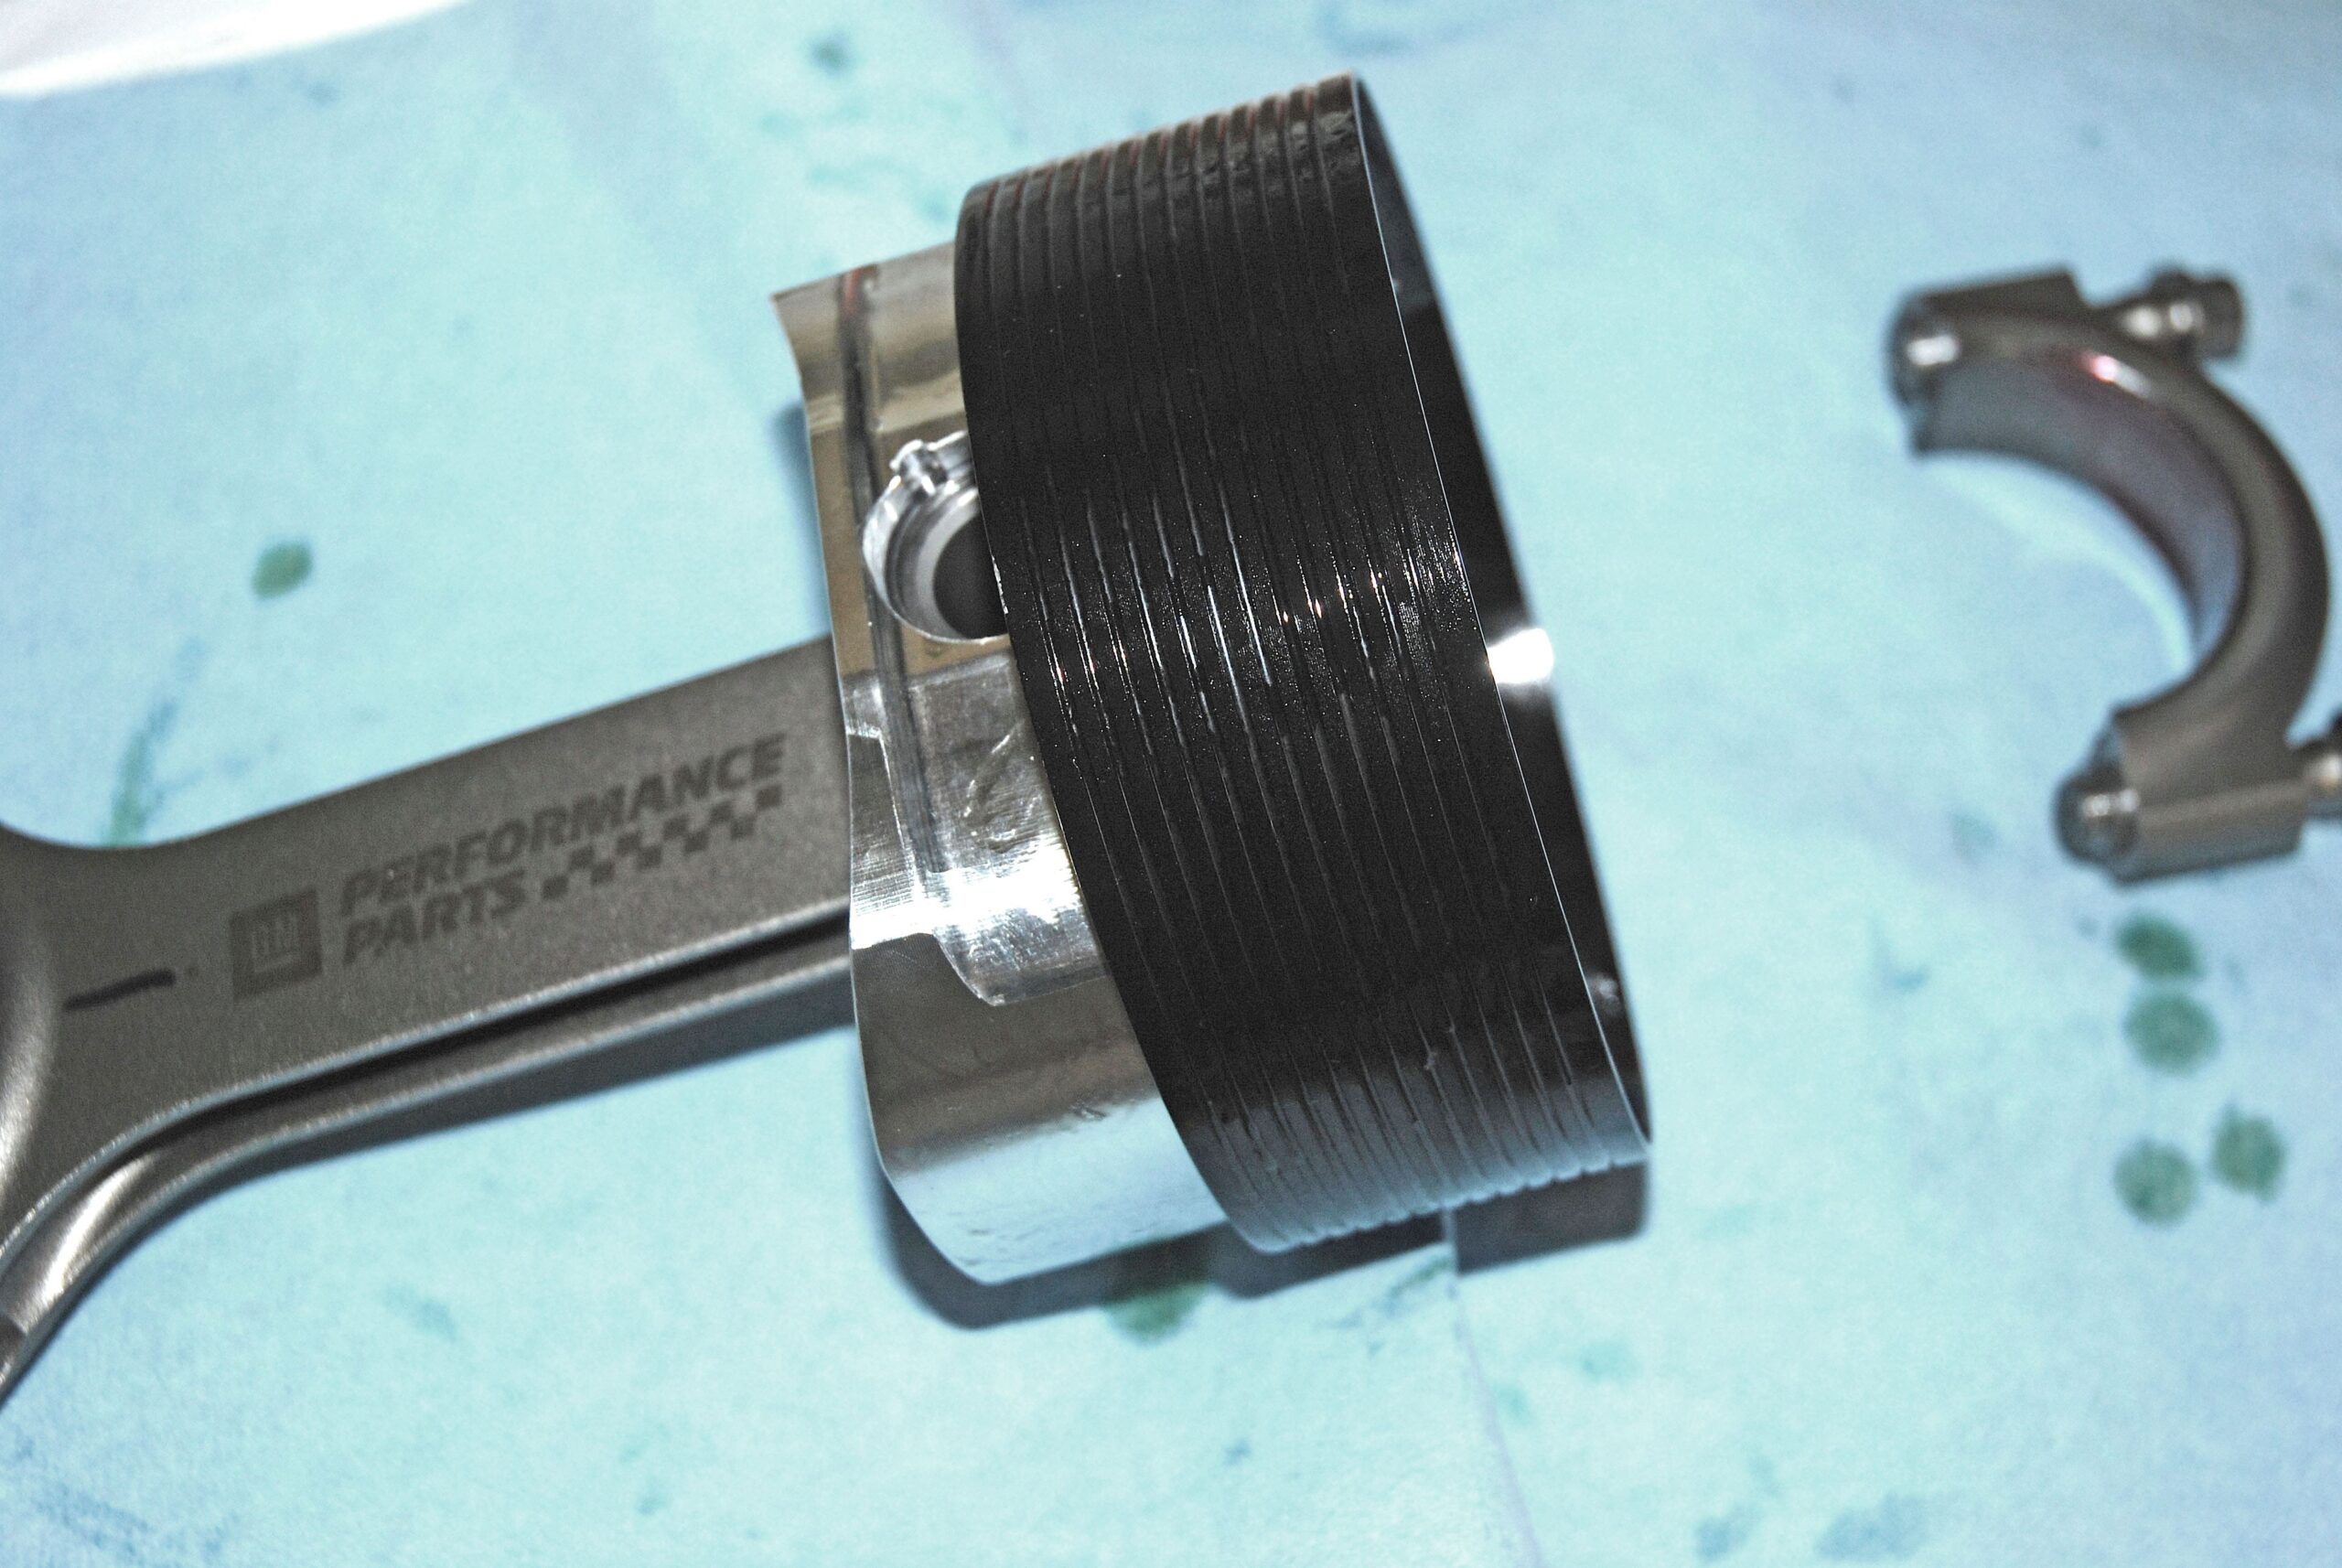
When it comes to ring compressors, there are two common types on the market: Expander models where the tool is clamped over the piston and you tighten it in place or a tapered job where the rings are progressively tightened as the piston is pushed through it into the bore (my preference). In either case, liberally coat the compressor with oil (again, it doesn’t have to be dripping wet!).
At this point, rotate the crankshaft so that the rod journal for the piston you’re installing is at Top Dead Center. Place the piston/ring compressor combination over the cylinder bore. You have to be positive the piston is correctly oriented. Here’s why: If the piston is domed, the dome is on the outside of the block or the valve notches are at the top (nearest the lifter valley). Additionally, be sure you’ve assembled the piston-rod combination correctly so that the chamfer on the connecting rod (and rod bearing) faces the fillet radius on the crankshaft. And last but certainly not least, double check the oil ring(s) to ensure the expander ring end gaps haven’t overlapped.
If the connecting rod is equipped with studs (instead of cap screws), cover them with protectors (most auto parts stores sell inexpensive vinyl jobs) or you can place a length of rubber tubing over the studs. The idea here is to prevent the rod studs from damaging the crank during installation. At this point, I always make it a practice to coat the connecting rod bearing with engine assembly lube.
Now it should be possible to push the piston and rod assembly into the bore, simultaneously guiding the rod so that it falls in place over the crankshaft rod journal. In many cases, you can hand push the piston in. In others, a very light tap with the handle end of a clean plastic hammer handle works. If you need excessive force to push the piston through the ring compressor into the bore, it usually means the oil ring isn’t installed correctly (most often, the expander rails are overlapped).
Rotate the engine on the engine stand. Coat the rod bearing (cap end) with assembly lube and install. You can install the rod cap nuts and torque to specifications at this point, provided you’ve checked the bearing clearances. For a closer look at piston installation, take a look at the accompanying photos:
Click Here to Begin Slideshow
There are a number of different ways to install pistons (with rings, obviously) and connecting rods in your engine. Different builders take different approaches. At the top, here’s the basic procedure I use (and again, the process is shared with many others):
First, wipe the cylinder bores with a clean, lint free towel and apply a small amount of conventional (non-synthetic) oil to the walls. I always apply a liberal amount of oil to the wrist pins and piston rings as well. But there’s a catch: You don’t need to drench the piston in oil (I’ve witnessed folks literally dunking the piston and ring package in a quart of oil). The truth is, you only need sufficient oil to lubricate the rings as they pass through the piston ring compressor!
When it comes to ring compressors, there are two common types on the market: Expander models where the tool is clamped over the piston and you tighten it in place or a tapered job where the rings are progressively tightened as the piston is pushed through it into the bore (my preference). In either case, liberally coat the compressor with oil (again, it doesn’t have to be dripping wet!).
At this point, rotate the crankshaft so that the rod journal for the piston you’re installing is at Top Dead Center. Place the piston/ring compressor combination over the cylinder bore. You have to be positive the piston is correctly oriented. Here’s why: If the piston is domed, the dome is on the outside of the block or the valve notches are at the top (nearest the lifter valley). Additionally, be sure you’ve assembled the piston-rod combination correctly so that the chamfer on the connecting rod (and rod bearing) faces the fillet radius on the crankshaft. And last but certainly not least, double check the oil ring(s) to ensure the expander ring end gaps haven’t overlapped.
If the connecting rod is equipped with studs (instead of cap screws), cover them with protectors (most auto parts stores sell inexpensive vinyl jobs) or you can place a length of rubber tubing over the studs. The idea here is to prevent the rod studs from damaging the crank during installation. At this point, I always make it a practice to coat the connecting rod bearing with engine assembly lube.
Now it should be possible to push the piston and rod assembly into the bore, simultaneously guiding the rod so that it falls in place over the crankshaft rod journal. In many cases, you can hand push the piston in. In others, a very light tap with the handle end of a clean plastic hammer handle works. If you need excessive force to push the piston through the ring compressor into the bore, it usually means the oil ring isn’t installed correctly (most often, the expander rails are overlapped).
Rotate the engine on the engine stand. Coat the rod bearing (cap end) with assembly lube and install. You can install the rod cap nuts and torque to specifications at this point, provided you’ve checked the bearing clearances. For a closer look at piston installation, take a look at the accompanying photos:
Click Here to Begin Slideshow
Leave a Reply