


![[Gallery] Ancient City Auto Club 41st Annual Car Show](https://www.racingjunk.com/news/wp-content/uploads/2025/12/DSC_9441-1-e1766520816593-376x206.jpg)


Moroso’s Street & Strip Battery Charger
If your race car is “resting” between events or if you park your hot rod, muscle car or collector car on a regular basis (i.e.,it’s not a daily driver), one thing becomes painfully obvious: You need to keep on top of the battery charge. The same applies if you have a lawn tractor, a boat or a motorcycle (or two). Fair enough, but there could be trouble on the horizon: Different batteries and different battery needs often mandate different chargers. And there’s more too: Many of today’s vehicles are equipped with sophisticated electronics (or perhaps a race car complete with a high tech aftermarket EFI or ignition system). If the electronic equipment does not have the recommended (available) power, the car will not run correctly. Often, if the battery is dead or weak, the car won’t even start (even though there might be sufficient “juice” to turn the engine over). The reality is, you can waste plenty of time trying to track down and troubleshoot a problem that actually originated with the battery. What’s the solution? There are several, but here’s a real good one:
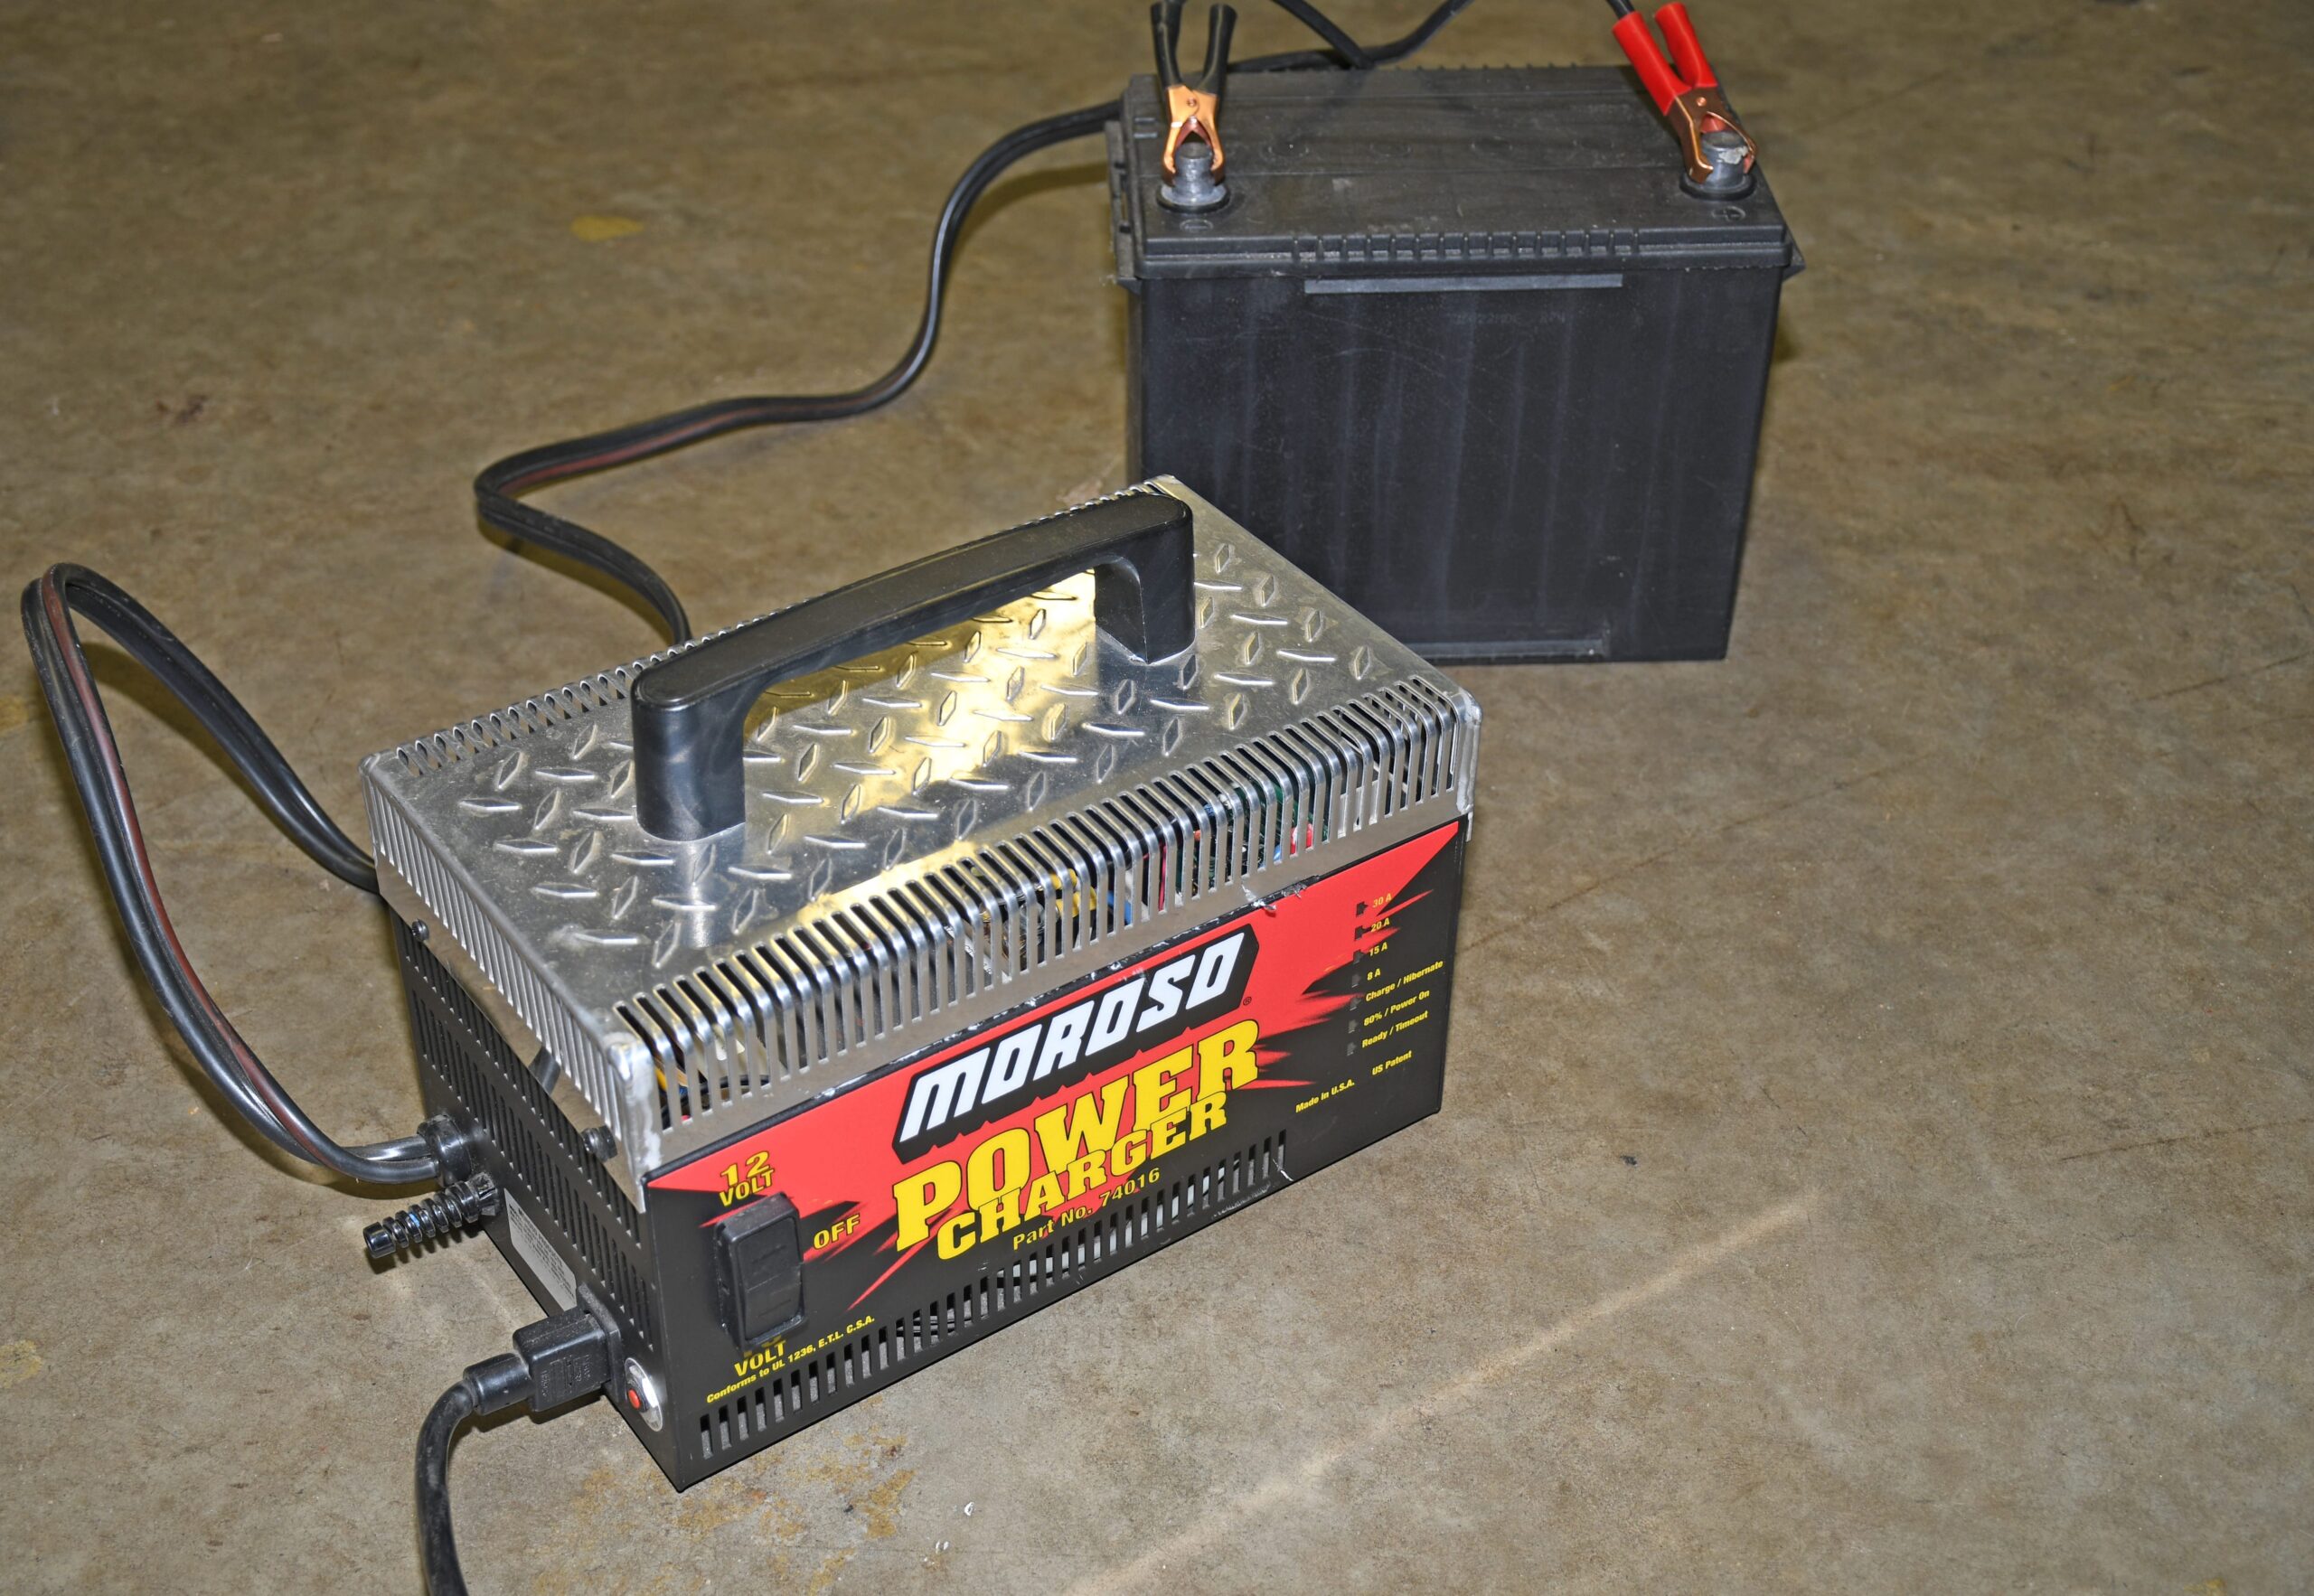
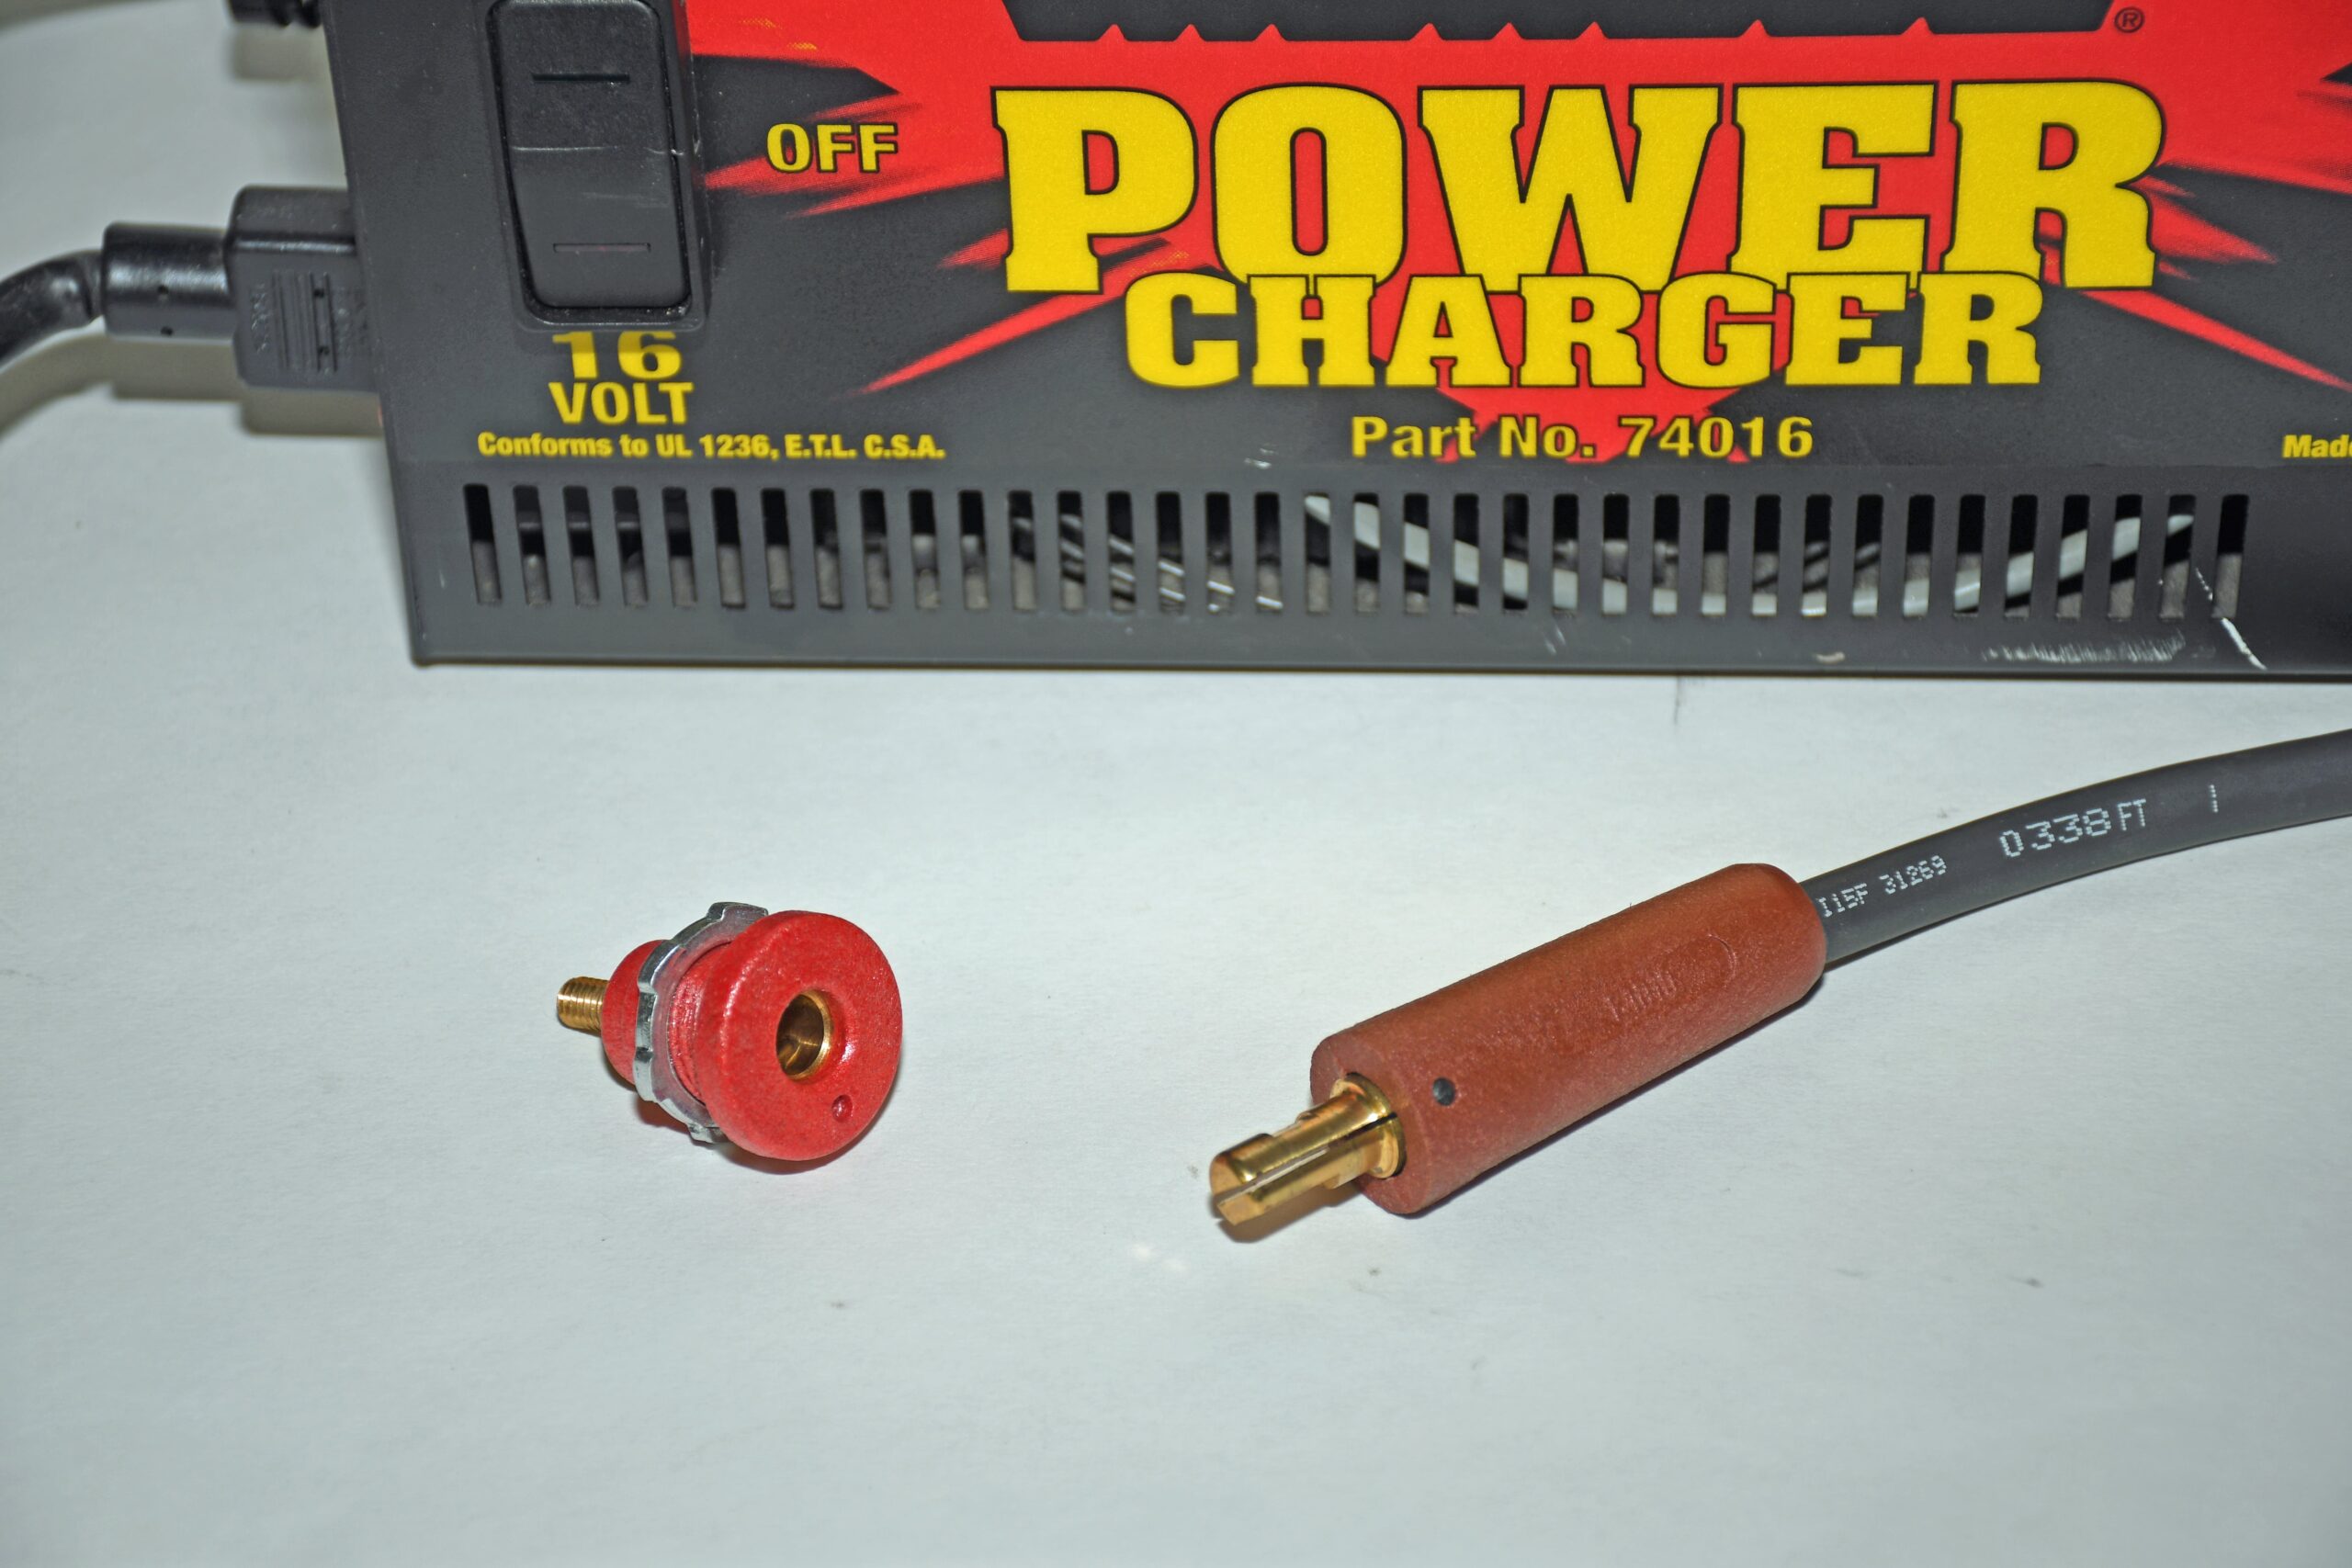
Examine Moroso’s “smart” (as in intelligent) “Power Charger” (part number 74016). The Power Charger not only charges ordinary, everyday 12-volt batteries but will also charge 16-volt batteries, which are increasingly popular in all sorts of racing venues. If that isn’t enough you can charge any type of battery, including Gel Cell, AGM, Sealed, Lead Acid, Wet/Deep Cycle and “Reactor” batteries. This same charger is also a battery maintainer because it can be left to charge and then keep your battery at top working condition while your race car, hot rod, RV, boat, tractor or motorcycle is in storage or isn’t used on a regular basis.
So far so good. How quick does it work? If speed is what you’re after, you can be sure your battery is ready almost immediately. The Power Charger will provide near full battery recovery in approximately 14 minutes, based upon an average voltage drop. Of course, complete charges take longer, but this thing is still wicked fast (amazingly, we had a totally dead motorcycle battery up to full speed in less than an hour using this charger).
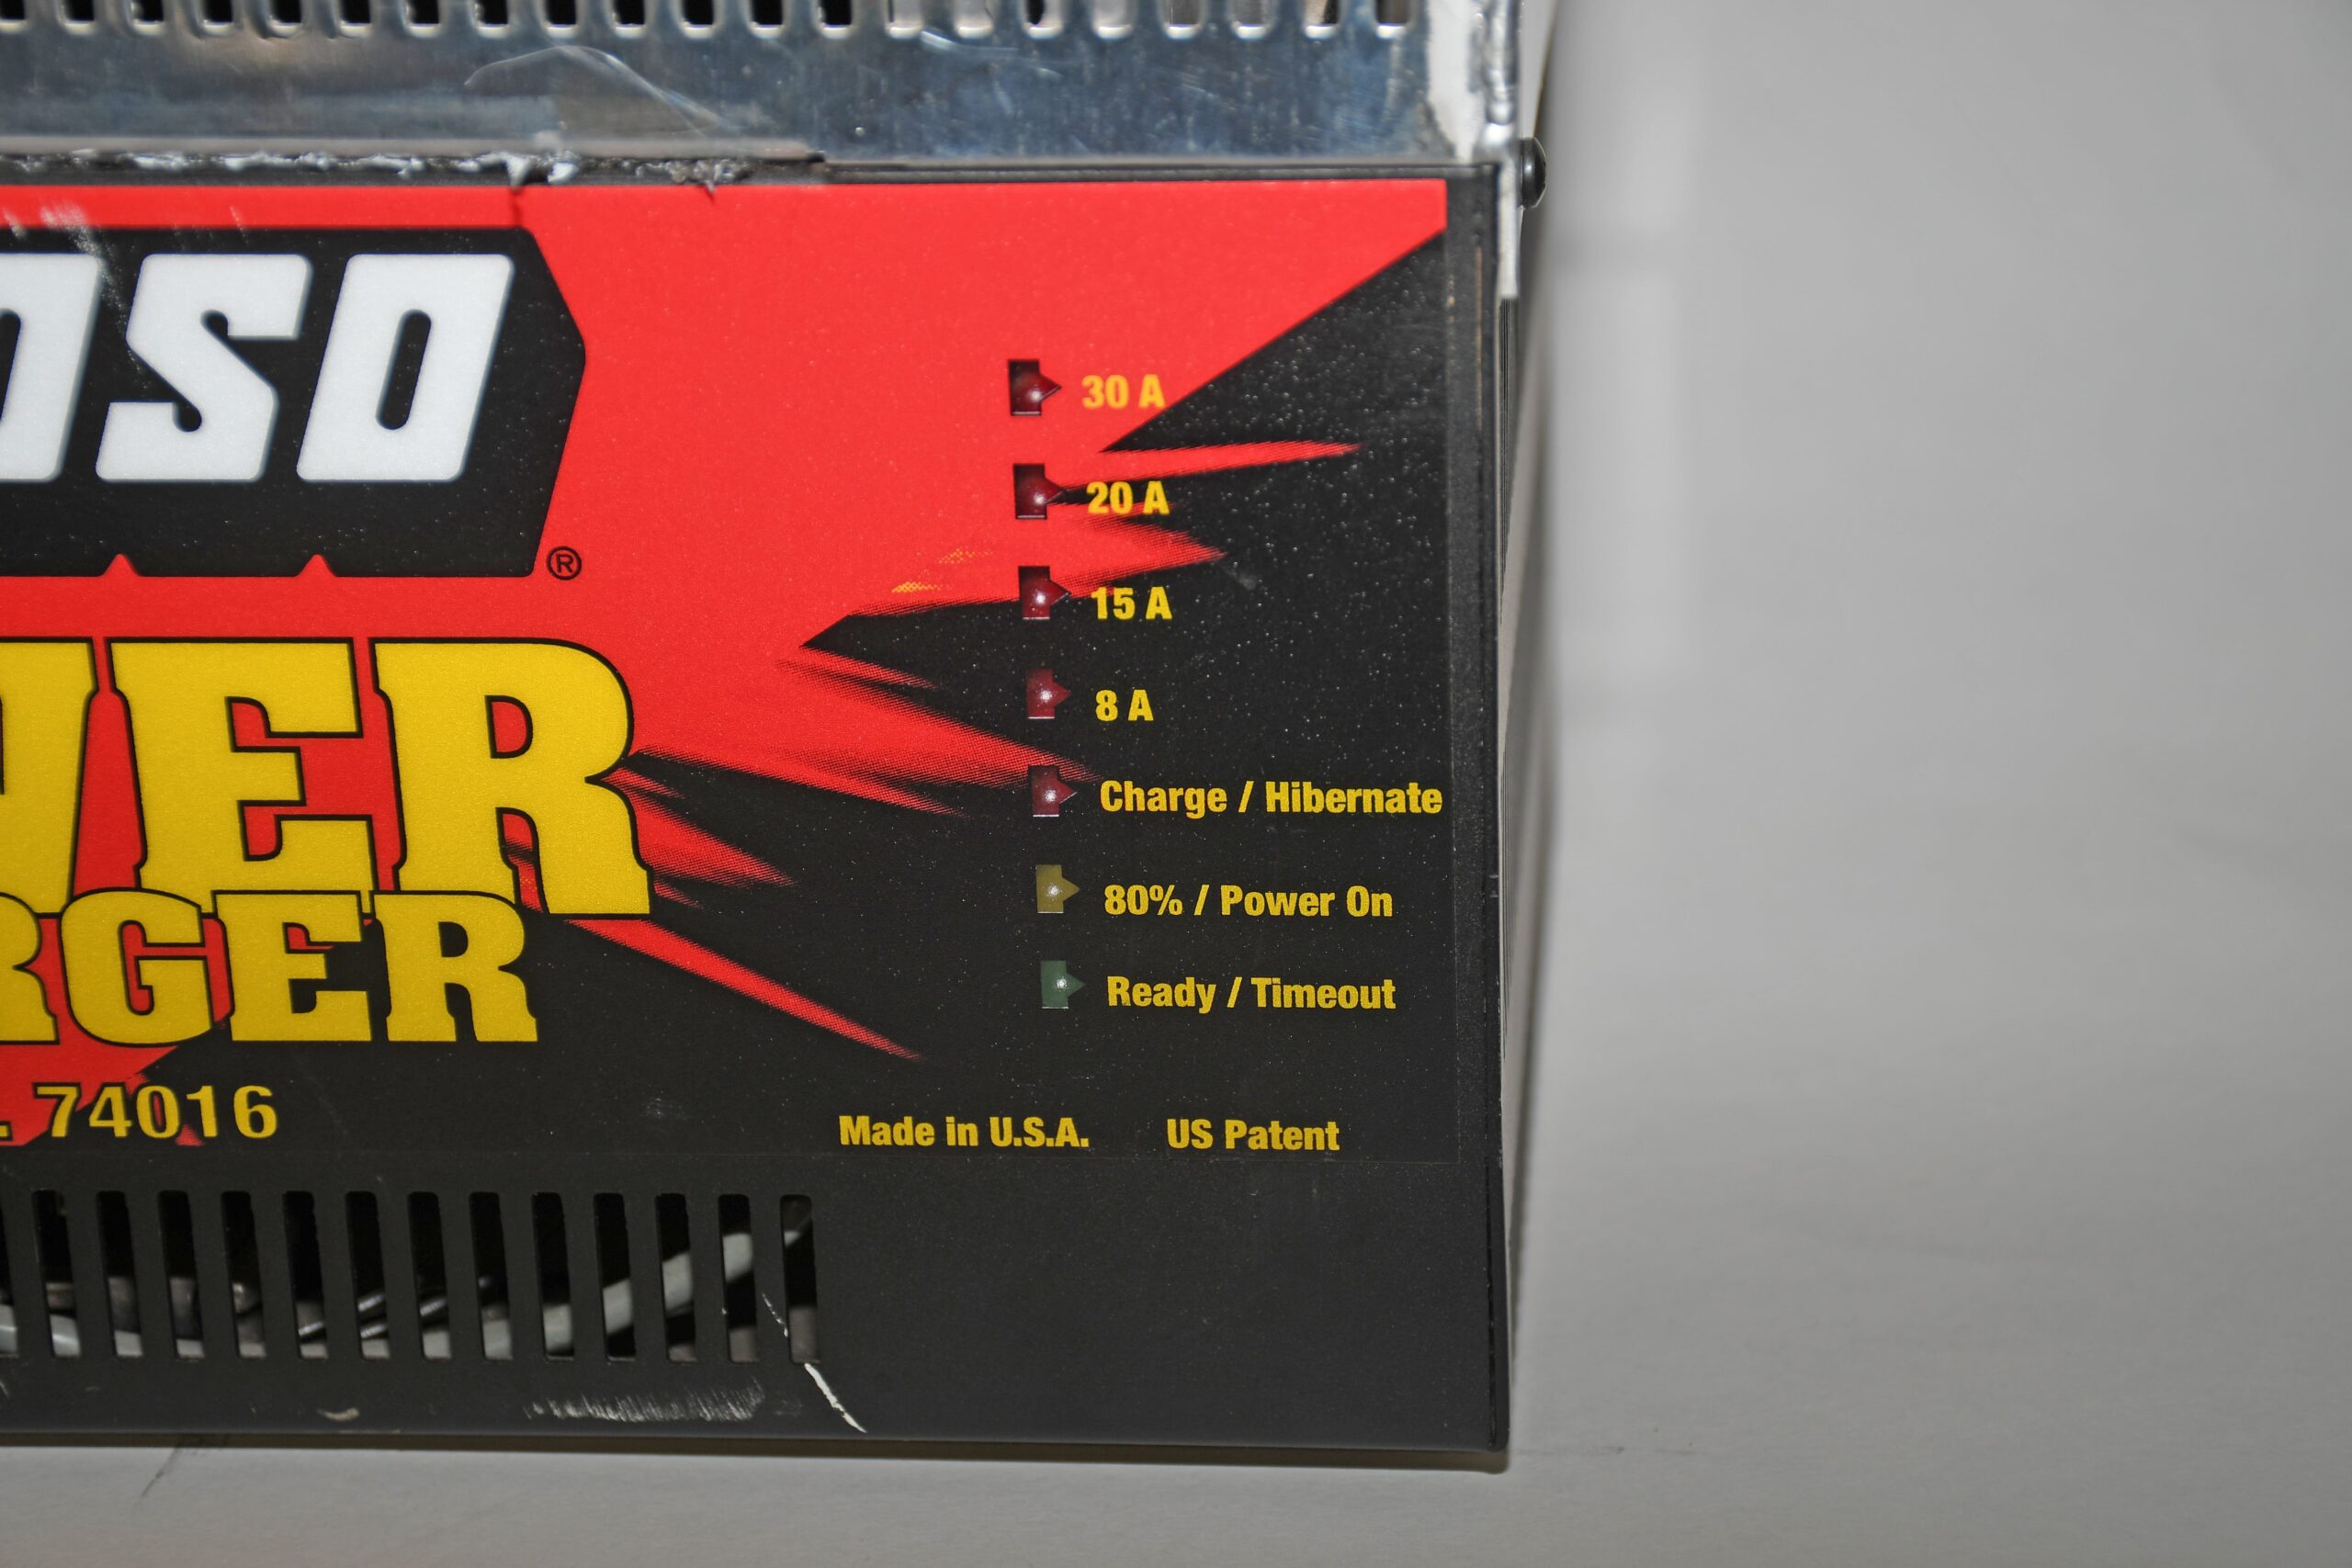
In terms of overall size, this charger isn’t large: It measures 12-inches long by 7-inches wide and is 7-inches tall. But given the internals (and like most battery chargers) it’s relatively heavy at just under 25-pounds. Given the compact size, the charger is definitely portable. Equally important is the dirt simple user interface: The Power Charger’s solid state LED indicators clearly show the current flow into the battery so you know if it is charging, or at 80% or “Ready”. The Moroso Power Charger has a list of features that pretty much will make all of the chargers in your garage obsolete. With this one charger, you have at your disposal a charger that you can use on almost any application. But why is it “smart”? You’ll see it shortly:
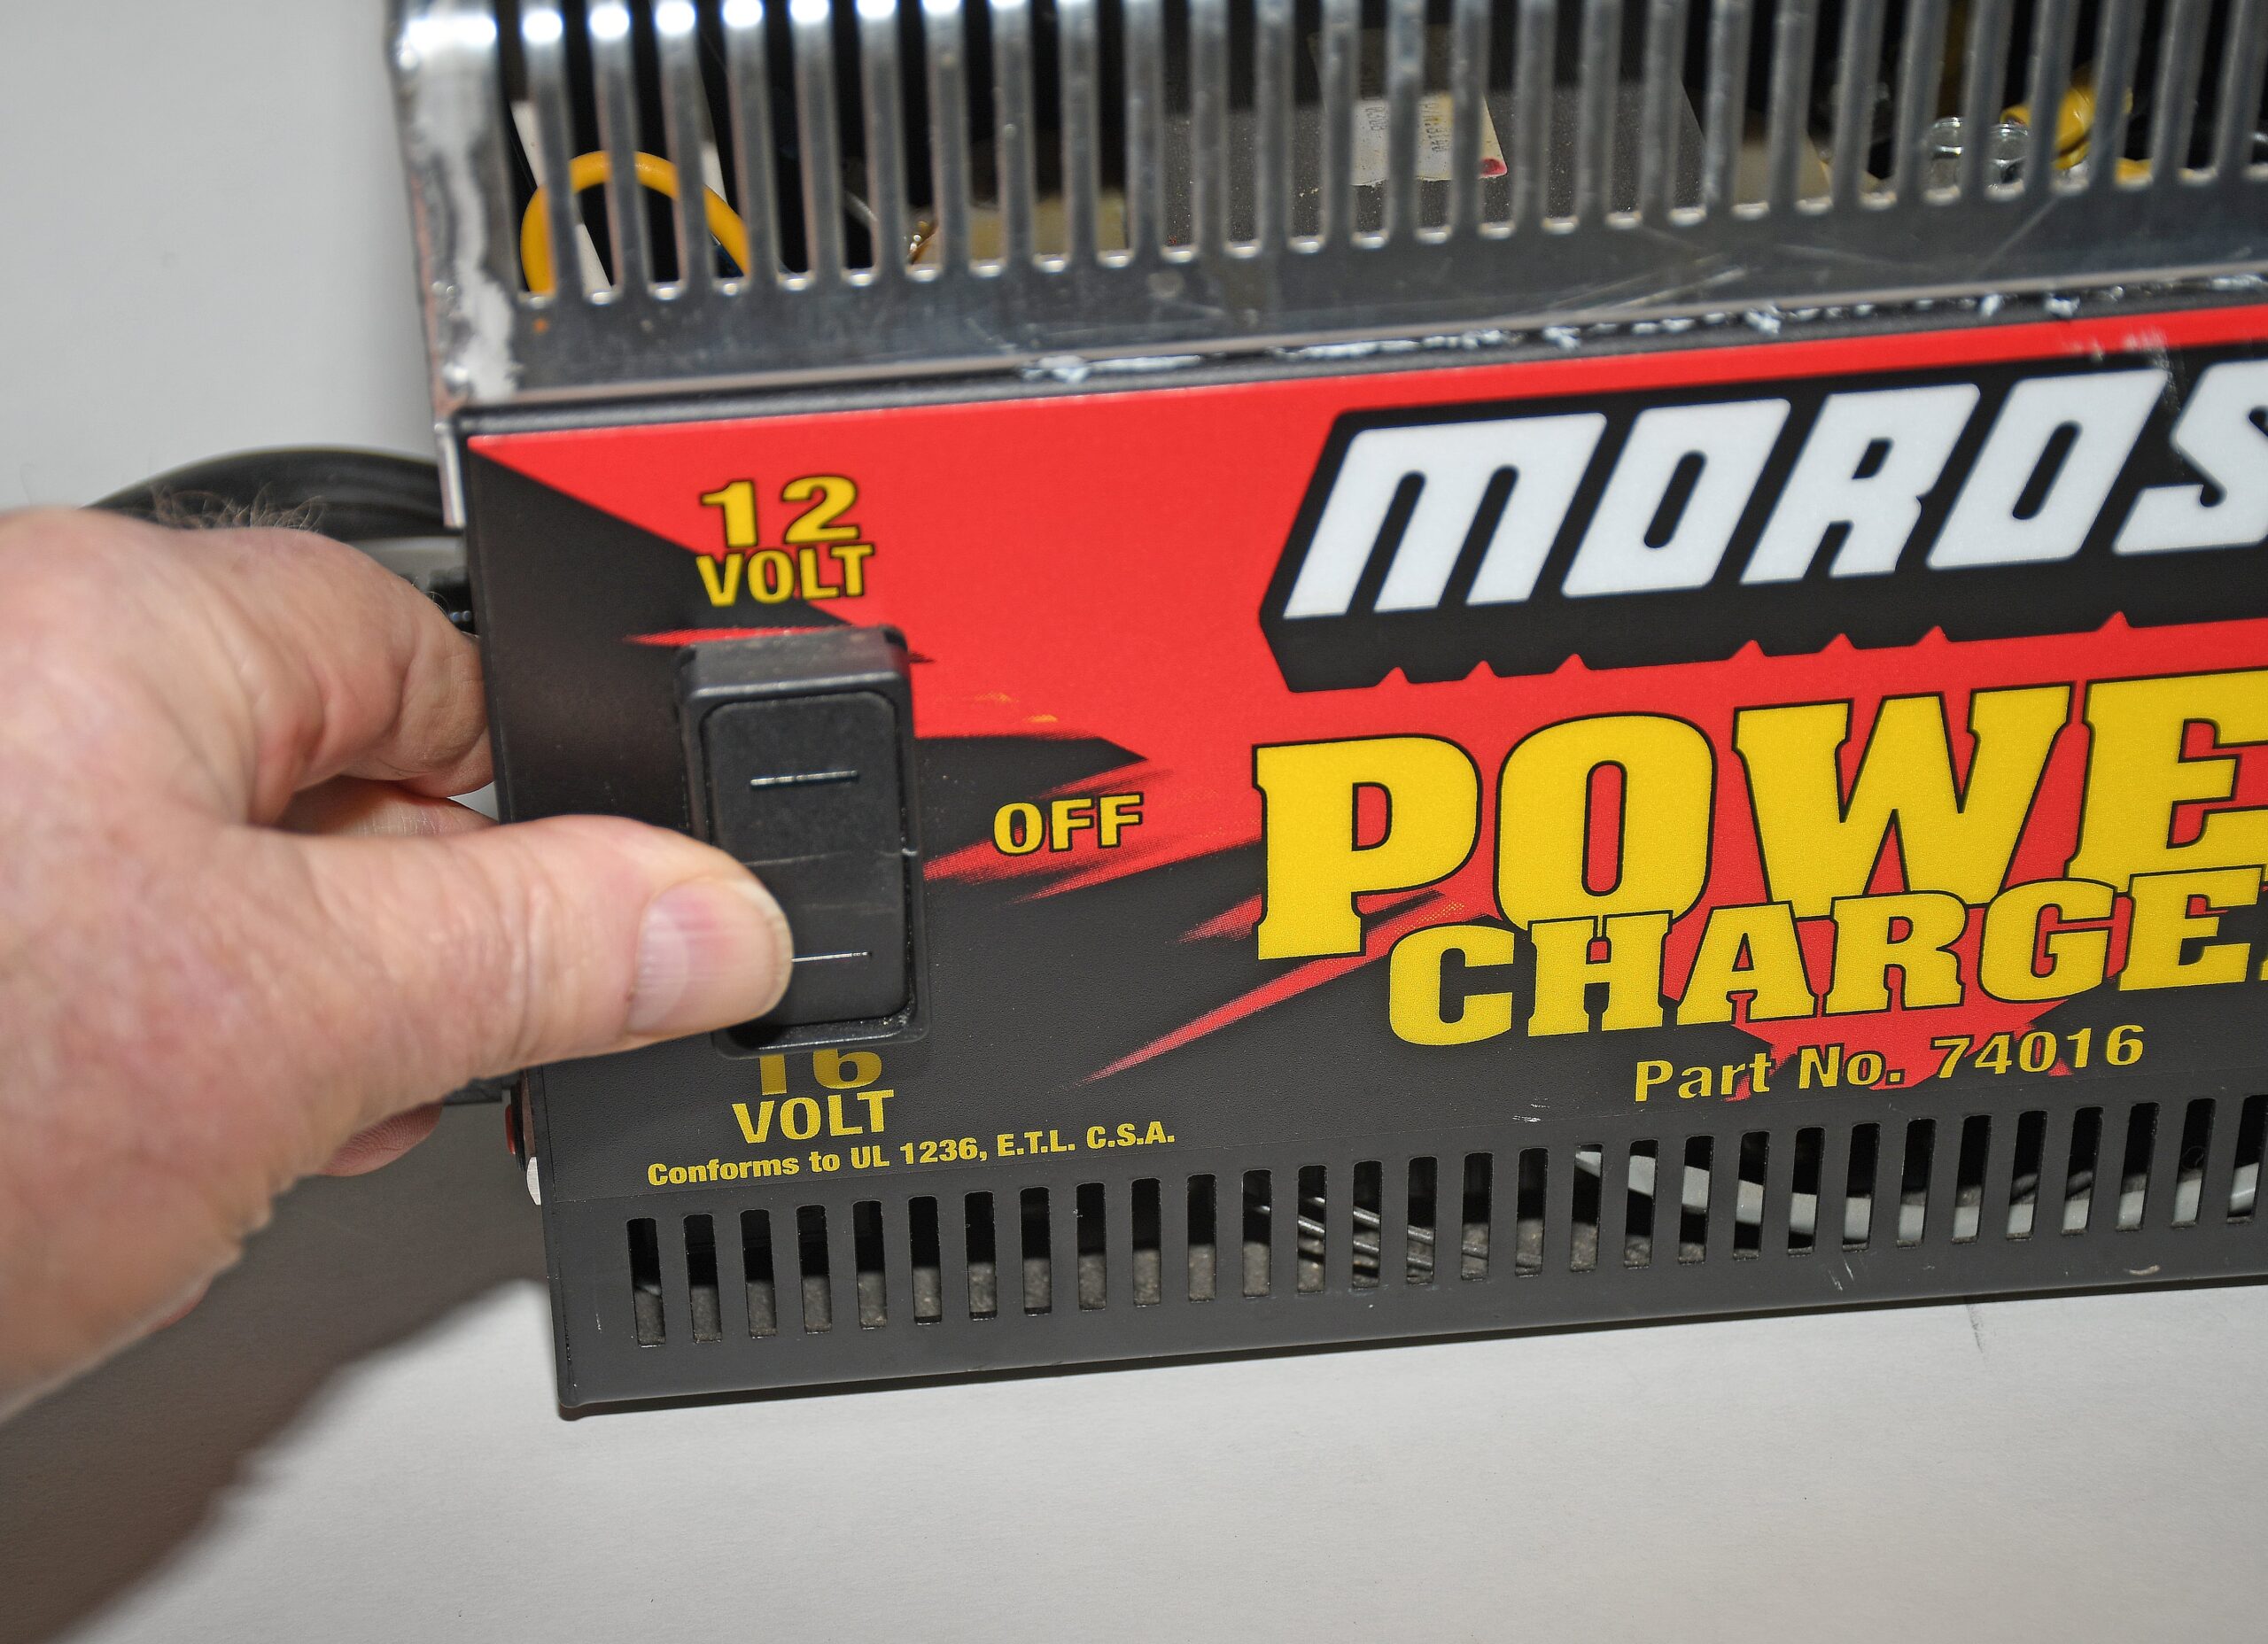
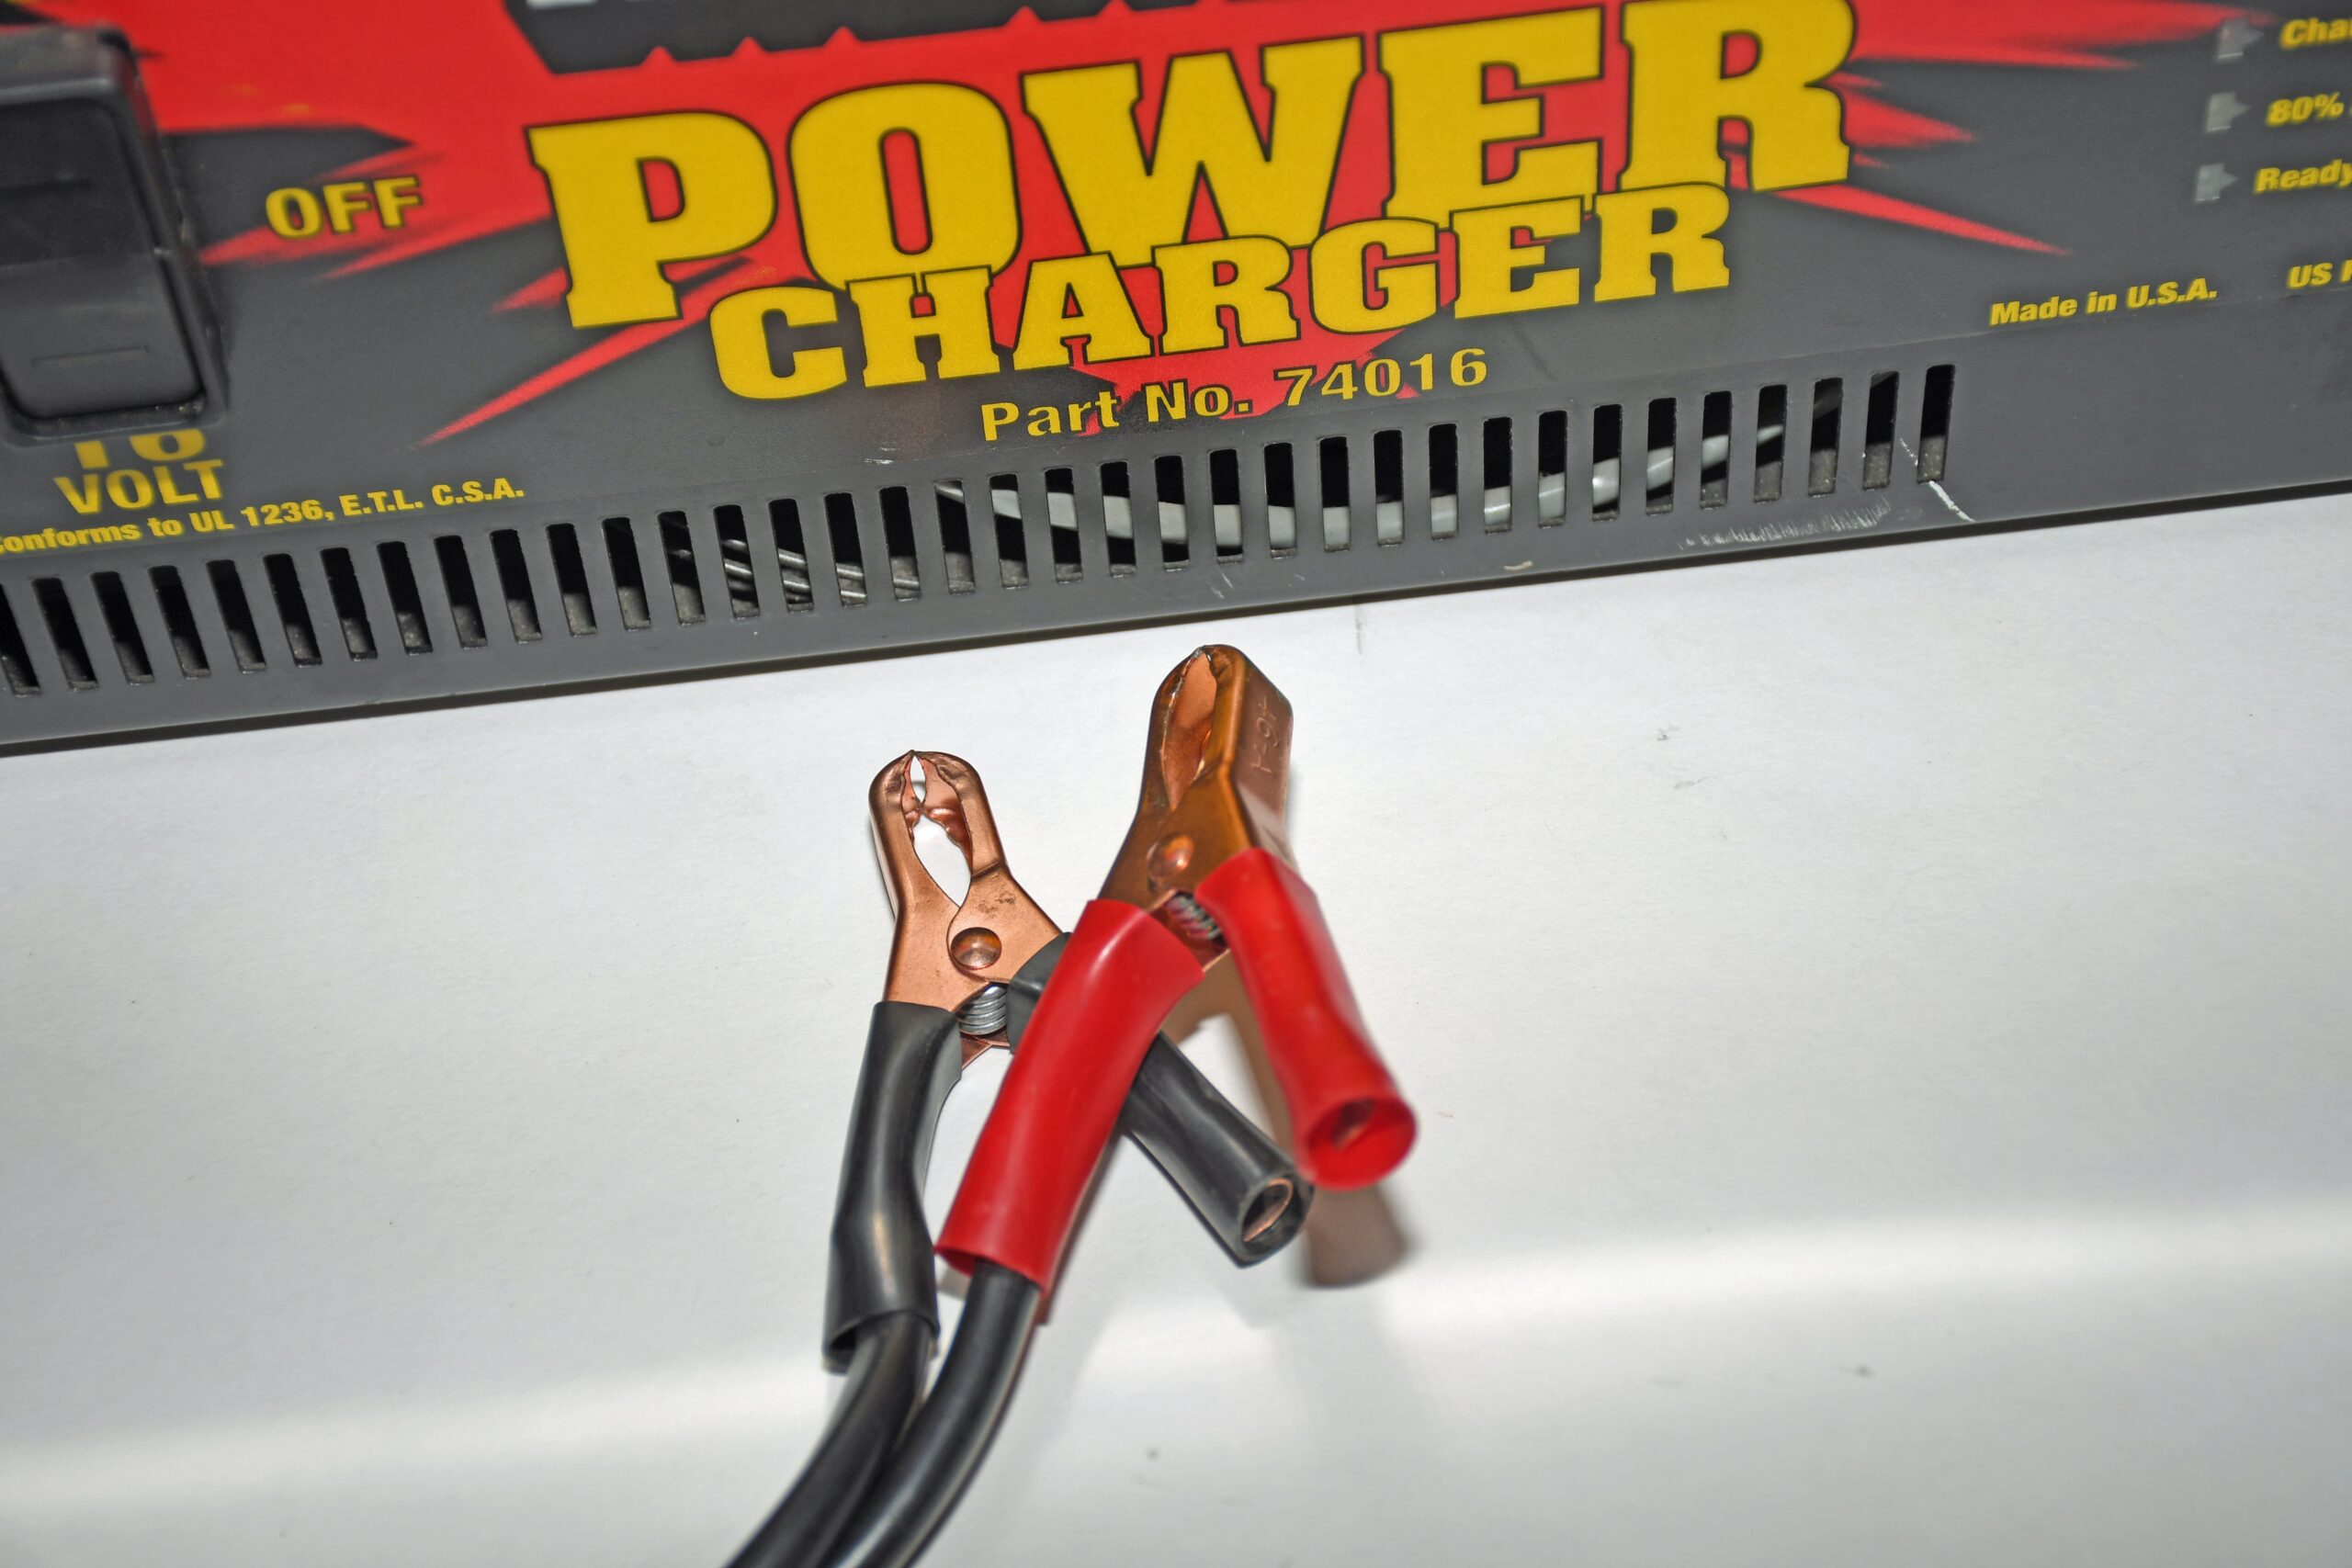
Using this charger is a piece of cake: It hooks up like a conventional charger – black lead to negative, red to positive on the battery, then connect to an AC power supply. Flick the main switch (left side of the charger face) to 12 or 16 volts (dependent upon the battery type), sit back and watch the show. At this point, the internal circuitry of the charger takes over. Once the charger is switched from OFF to ON (choosing the appropriate battery type – 12 or 16V), the Green-Yellow-Red LED’s on the right side of the charger will indicate in sequence the battery charger self-test. After this sequence (which takes roughly two seconds), the Red LED will come ON, indicating the beginning of the charge. If there is no battery connected, the yellow LED will flash briefly once each second, indicating that the AC power to the charger is connected.
With a battery connected, the charger will begin to charge the battery, as indicated by the Red charging LED’s. The length of time the charger remains in the “Charging Mode” depends upon the size and state of discharge of the battery. This is controlled by the charger’s internal “brain” (actually, the solid-state circuitry mentioned above) that constantly monitors the state of the battery and provides the correct charge automatically.
When the Green “ready” LED comes ON, the battery is ready to use. The battery may be connected to the charger in the “Ready” mode indefinitely, in order to maintain the battery in a fully charged state while not in use without the risk of overcharging. Basically, it can function like a battery tender.
During the charging state, the current flowing into the battery is indicated by the LED Amp Meter. At the start of the charge, if the battery is normally discharged, all 4 Red LED’s will be on, and will go out in sequence as the charge current drops. When the last Red LED goes off, the internal proportional timer will start. The Green LED will show proportional to the time of the constant current time. If the battery voltage is less than 1/2 a volt, then the battery is considered very heavily discharged. In this case, the Yellow charging LED will not show.
As you can see, it’s easy to use. Next time around we’ll dig into charging AGM batteries (which are obviously more common today). Moroso’s smart charger handles that job with ease, but for some applications, you may have to change the internal settings on the charger. Stay tuned for more info.
Click Here to Begin Slideshow
Examine Moroso’s “smart” (as in intelligent) “Power Charger” (part number 74016). The Power Charger not only charges ordinary, everyday 12-volt batteries but will also charge 16-volt batteries, which are increasingly popular in all sorts of racing venues. If that isn’t enough you can charge any type of battery, including Gel Cell, AGM, Sealed, Lead Acid, Wet/Deep Cycle and “Reactor” batteries. This same charger is also a battery maintainer because it can be left to charge and then keep your battery at top working condition while your race car, hot rod, RV, boat, tractor or motorcycle is in storage or isn’t used on a regular basis.
So far so good. How quick does it work? If speed is what you’re after, you can be sure your battery is ready almost immediately. The Power Charger will provide near full battery recovery in approximately 14 minutes, based upon an average voltage drop. Of course, complete charges take longer, but this thing is still wicked fast (amazingly, we had a totally dead motorcycle battery up to full speed in less than an hour using this charger).
In terms of overall size, this charger isn’t large: It measures 12-inches long by 7-inches wide and is 7-inches tall. But given the internals (and like most battery chargers) it’s relatively heavy at just under 25-pounds. Given the compact size, the charger is definitely portable. Equally important is the dirt simple user interface: The Power Charger’s solid state LED indicators clearly show the current flow into the battery so you know if it is charging, or at 80% or “Ready”. The Moroso Power Charger has a list of features that pretty much will make all of the chargers in your garage obsolete. With this one charger, you have at your disposal a charger that you can use on almost any application. But why is it “smart”? You’ll see it shortly:
Using this charger is a piece of cake: It hooks up like a conventional charger – black lead to negative, red to positive on the battery, then connect to an AC power supply. Flick the main switch (left side of the charger face) to 12 or 16 volts (dependent upon the battery type), sit back and watch the show. At this point, the internal circuitry of the charger takes over. Once the charger is switched from OFF to ON (choosing the appropriate battery type – 12 or 16V), the Green-Yellow-Red LED’s on the right side of the charger will indicate in sequence the battery charger self-test. After this sequence (which takes roughly two seconds), the Red LED will come ON, indicating the beginning of the charge. If there is no battery connected, the yellow LED will flash briefly once each second, indicating that the AC power to the charger is connected.
With a battery connected, the charger will begin to charge the battery, as indicated by the Red charging LED’s. The length of time the charger remains in the “Charging Mode” depends upon the size and state of discharge of the battery. This is controlled by the charger’s internal “brain” (actually, the solid-state circuitry mentioned above) that constantly monitors the state of the battery and provides the correct charge automatically.
When the Green “ready” LED comes ON, the battery is ready to use. The battery may be connected to the charger in the “Ready” mode indefinitely, in order to maintain the battery in a fully charged state while not in use without the risk of overcharging. Basically, it can function like a battery tender.
During the charging state, the current flowing into the battery is indicated by the LED Amp Meter. At the start of the charge, if the battery is normally discharged, all 4 Red LED’s will be on, and will go out in sequence as the charge current drops. When the last Red LED goes off, the internal proportional timer will start. The Green LED will show proportional to the time of the constant current time. If the battery voltage is less than 1/2 a volt, then the battery is considered very heavily discharged. In this case, the Yellow charging LED will not show.
As you can see, it’s easy to use. Next time around we’ll dig into charging AGM batteries (which are obviously more common today). Moroso’s smart charger handles that job with ease, but for some applications, you may have to change the internal settings on the charger. Stay tuned for more info.
Click Here to Begin Slideshow
Leave a Reply