Click Here to Begin Slideshow
We at Racing Junk have been seriously remiss in our duty to you, our valued readers. We’ve done innumerable articles covering the various types of additive injection systems to let you know what’s available to help make your strip burner go faster than before. We’ve told you about a couple of different nitrous oxide injection systems. However, we have yet to give you anything to help you install any of these injection systems. I’m going to remedy that today with a single article helping you install the three types of nitrous injection systems - plate, wet and dry.
We at Racing Junk have been seriously remiss in our duty to you, our valued readers. We’ve done innumerable articles covering the various types of additive injection systems to let you know what’s available to help make your strip burner go faster than before. We’ve told you about a couple of different nitrous oxide injection systems. However, we have yet to give you anything to help you install any of these injection systems. I’m going to remedy that today with a single article helping you install the three types of nitrous injection systems - plate, wet and dry.
What Types of Nitrous Injection Systems Are There?
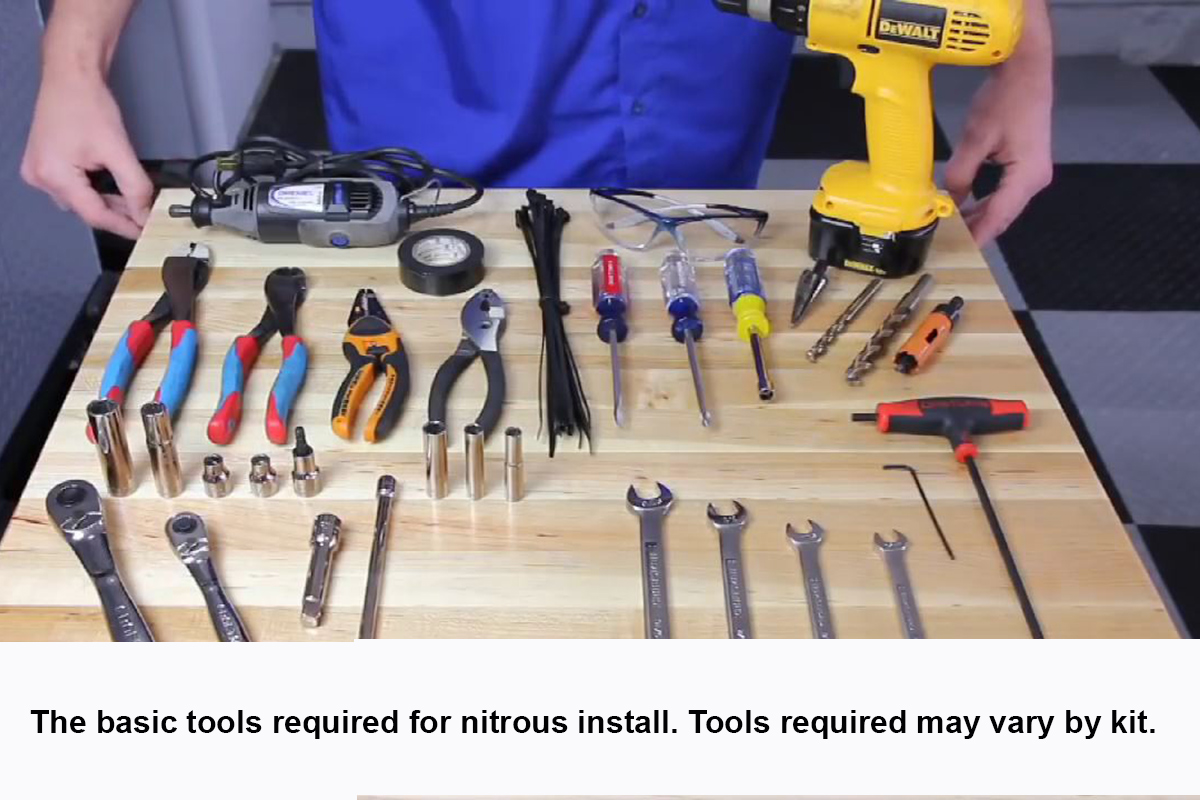
The tools required for most types of nitrous system installs. The tools you need may vary a bit from these.
Other than the different “shots” out there (a shot is the vernacular telling you how much of a horsepower increase you can expect from the injection system), there are three types of nitrous injection systems: wet, dry and plate. A wet system is one where the nitrous is injected with the fuel in a fuel injected engine. A dry system is one where the nitrous injector and the fuel injector(s) are separate units. Finally, a plate system has the nitrous injector between either the throttle body or the carburetor and the intake manifold.
Dry Assemble First
Test-fitting the adapters to the solenoids prior to installation is highly recommended.
Note: Prior to performing any of these steps, dry assemble everything to make sure all the fittings and hoses will thread together properly. You don’t want to find out halfway through the install that the supply hose from the nitrous solenoid doesn’t thread into the nitrous injector.
Mount the Bottle
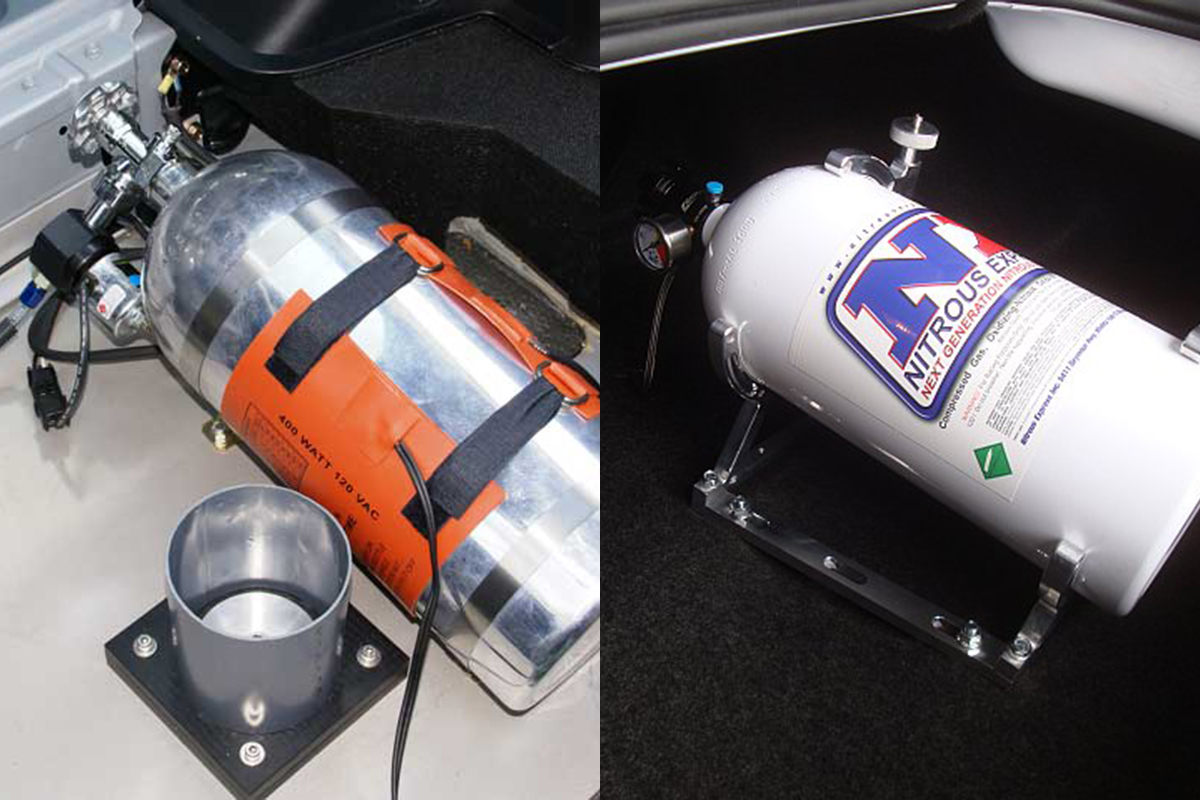
Two bottle installation options. One mounts a single bottle laterally and the other is a dual bottle setup mounted front to rear.
Your nitrous bottle needs to be mounted in the trunk and angled so the valve system is higher than the base of the tank. Some kits will include two big clamps to secure the bottle, while others will only include one. Either way, you need to either drill two bolt holes through the floor of your trunk or weld two bolts, after removing any paint and other contaminants from the bolts and trunk floorpan.
Two More Mounting Options
The bottle on the left is mounted with worm clamps and the one on the right uses a specialty clamp mount.
Run the Nitrous Line and Any Control Cables
Be sure to route the control and bottle heater wires and nitrous line where they can’t be damaged and use grommets for all penetrations through metal bulkheads.
If at all possible, you should run the nitrous line (usually a rubber hose with braided metal cover) and control cables/wires through an existing hole and grommet somewhere so that neither the wires or the nitrous line will get kinked, and so they are away from the exhaust pipes and any pinch points (especially moving parts). The control cables and nitrous line will part company somewhere that is convenient and safe for the wires to enter the passenger compartment.
Note: How many wires lead away from the tank will depend on exactly what system you’re installing and whether you have an electric or manually-opening bottle. Remember, you should never keep your nitrous bottle open at all times, only when you’re actually using it.
Locate and Mount Your Switches
I prefer to mount my nitrous control switches on my console so they’re easier to reach. Mount them where you’re most comfortable with them.
Your nitrous system will have anywhere from one to three switches that you will need to mount somewhere in the passenger compartment where you can reach them easily. I like to put mine on the center console, on the top between the shifter and the seat. I also like to mount a hinged cover over them so I don’t inadvertently trip them while I’m driving around on the street.
Start with as small a drill bit as you can and work up to the correct size. Sure, it takes longer this way, but you can always drill a bigger hole. Once you’ve gone too big, you’re kind of hosed. For oblong rocker-type switches, drill a hole and then use a Dremel tool with a grinding bit, your cutoff tool with a grinding bit, or a small saw blade to create the exact size opening you need for the switch. Connect the control wires to their respective switches. Leave the console loose as there will be wires that you need to run to one or more of the switches from the engine compartment.
Mount the Plate and Solenoid-Carbureted Engines
The injector plate needs to be sandwiched between the two gaskets that came with the kit.
Remove the carburetor and the old carb studs. Make sure the carb mounting flange on the intake is clean of the old gasket. Install the new studs that came with your plate injection kit. Slip one of the gaskets over the studs. Locate the top side of the injector plate. For example, for NOS systems, the NOS logo points upward and you slide the plate over the studs on top of the gasket, followed by the second gasket. Read the instructions with your kit to determine which side of the plate faces up. Usually there’s a hallmark or logo to indicate the top of the plate.
Check the Orientation
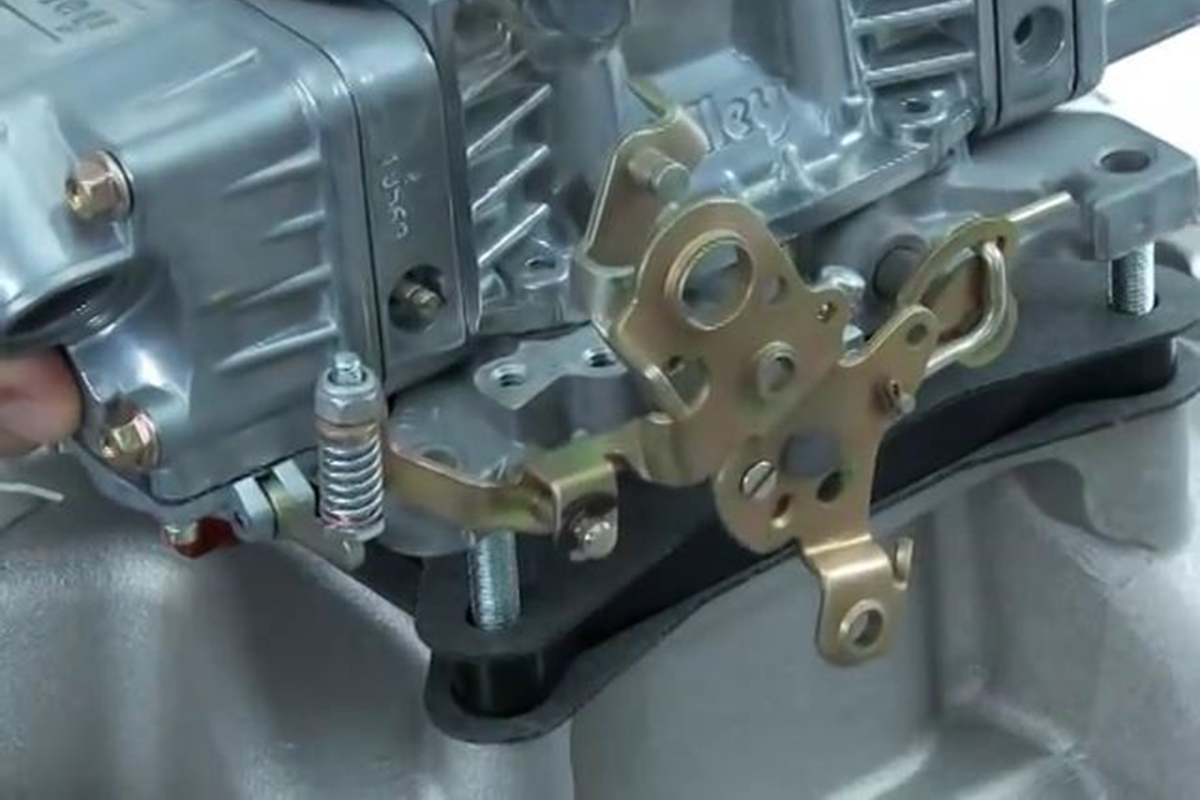
Orientation of the injector plate is vital to proper operation.
The solenoids will go on opposite sides of the carburetor and be secured by sliding the bracket over one of the studs and then tightening the nut over it. Which side of the carb/engine the solenoid(s) go on will depend on from which side of the engine you get the fuel supply for the extra burst of fuel the engine will need with the nitrous enabled and injecting. Some kits will have the solenoids mounted on larger brackets, which slide over both the front and rear studs for better security.
Mount the Plate-Injected Engines
This image shows the injector plate sandwiched between two gaskets as well as the intake manifold and throttle body on a fuel injected engine.
Remove the air inlet pipe between the throttle body and the air filter and set it aside. Remove the throttle body and make sure it and the intake are both free of contaminants and pieces of gasket. Slide the throttle body, a gasket, the injector plate (aligned correctly - NOS logo towards air filter) and another gasket over two of the new bolts or studs that came with the kit.
Tighten It Up
This image shows two solenoid mounting options available to you. The specialty bracket shown on the right can be purchased separately in pairs for a cleaner-looking install.
Align the bolts or studs with the corresponding bolt holes in the intake and snug them down. Insert the other two bolts. Tighten the bolts/nuts in a crossing pattern to ensure the parts are properly secured. Check your kit for the actual torque value to be used. Reassemble the air inlet system.
Connecting the Solenoids on Plate Systems
This image shows the injector plate fully assembled with the solenoids mounted and properly connected.
There are two solenoids on a plate system. One is for fuel and the other is for the nitrous supply. Route the nitrous supply line to the nitrous solenoid, making sure to not kink the hose. Also make sure the hose is routed away from heat sources and pinch points.
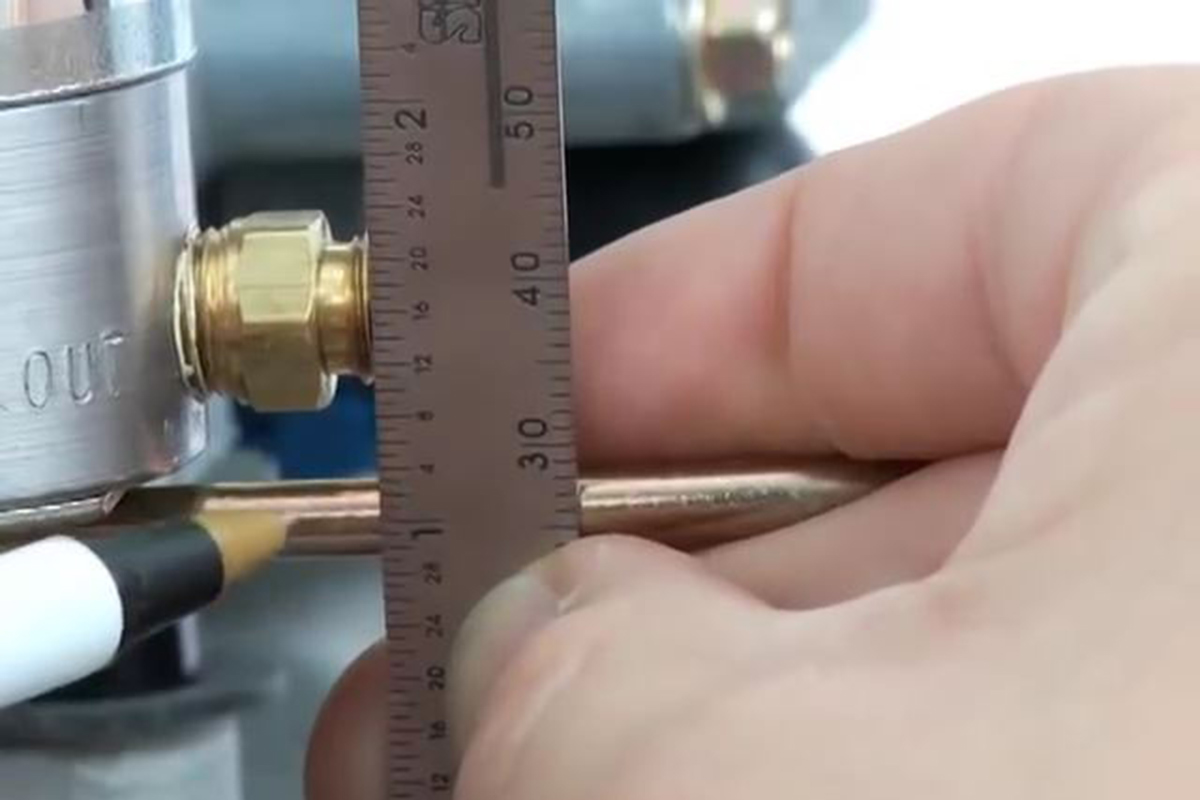
Mark the Hard Line
The first step in assembling the compression fitting on the solenoid is to mark the hard line directly under the inner thread on the fitting.
On carbureted cars, you can get your fuel supply by installing a “T” before the carb inlet. On most injected engines, you get it from the pressure regulator. Disconnect the electrical connector from the regulator and remove the two bolts that secure the regulator to the fuel rail. Place the regulator plate over the solenoid plate and attach these to the fuel rail using the supplied longer screws/bolts.
Cut and Clean
Use a pipe cutter to cut the hard line. Deburr the cut end of the hard line prior to assembly.
The hard lines coming out of the solenoids will need to be cut to size. Hand thread the AN fitting at the plate and hold the hard line under the solenoid. Mark the line directly under the last thread on the compression fitting and use a pipe cutter to cut the pipe. Deburr both the inside and outside of the pipe. Slide the compression nut and ferrule over the pipe and insert the pipe in the fitting in the solenoid. Hold the fitting with a wrench as you tighten the compression nut. Tighten the AN fitting on the plate. Do this for both fuel and nitrous.
Plate-Side-Assembly
Left: Assembly order for compression fittings. This is on the fuel solenoid. Right: Fuel line assembly on the injector plate. The silver piece between the two anodized pieces is the jet. Make sure you install one in the nitrous line as well; they have to match for the power output desired.
Where the Dry Injection System Injector Can Be Installed
One factor that will determine where you install the injector will be where you can install the solenoid assembly.
Dry nitrous injection systems are mostly used on fuel injected engines. We locate the nitrous injector in the air stream between six and 12 inches upstream from (in front of) the throttle body. This can be done in two different ways: Drill and tap into the metal snout of the intake manifold/throttle body housing just in front of the throttle body (being sure the throttle body can actuate properly), or drill into the plastic or metal air inlet pipe.
Installing the Dry Injector in the Throttle Body Itself
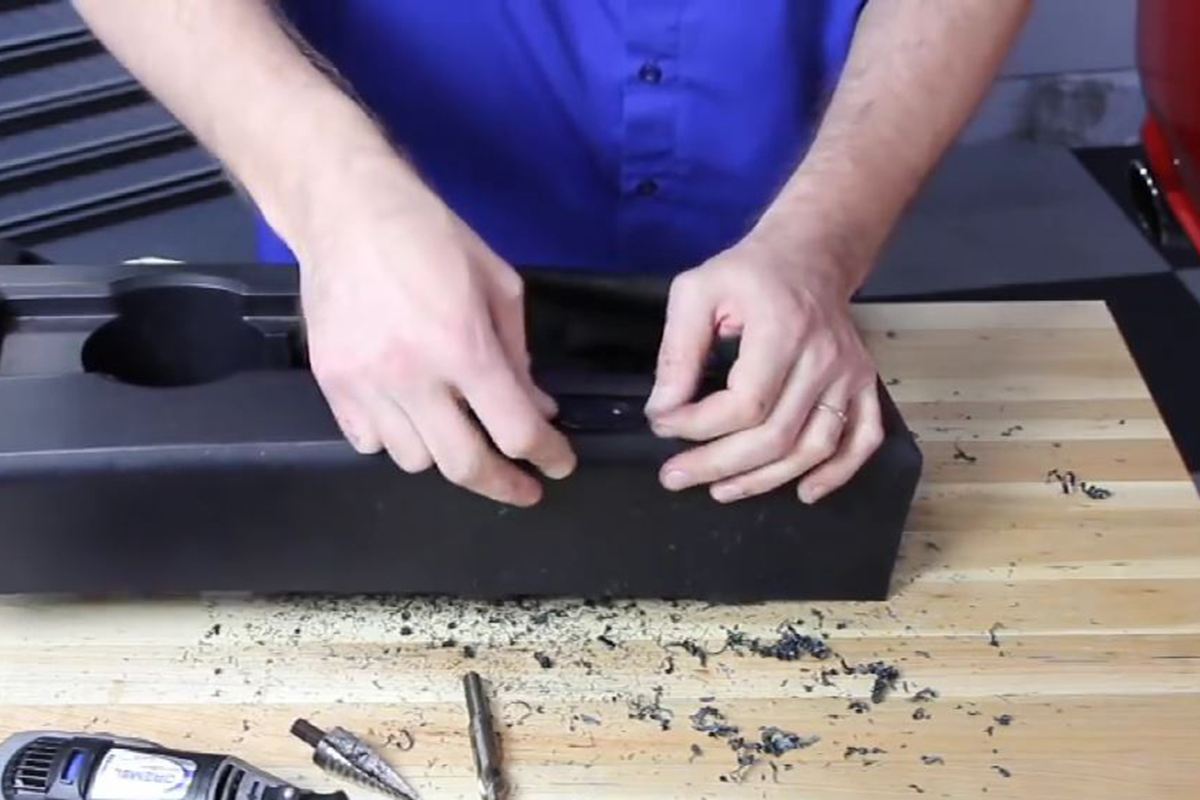
Drill and tap the throttle body and enlarge the hole in the inlet pipe and clamp.
Before removing the air inlet pipe, mark it where you want to install the nitrous injector. Make sure you put it in such a location that you can attach the supply line to it and the line will reach to where the solenoids are to be mounted. Remove the pipe and put a towel or rag against the throttle butterflies to keep metal shavings from entering the engine. Reattach the pipe and clamp. Start with a ¼ inch drill bit and drill through the clamp, plastic or rubber of the inlet, and the throttle body housing. You may need to enlarge the hole in the inlet duct and clamp to 5/16, depending on the kit and manufacturer you’re using.
Seal the Injector
All NPT threads should be sealed using a plumber’s sealant with Teflon.
Remove the inlet pipe and use the proper-sized drill bit to drill into the throttle body housing again. This will usually be a 1/4 inch. Tap this hole using the supplied tap and vacuum or blow out any debris in the throttle body. Reattach the inlet pipe, making sure all three holes line up properly. Mark the top of the injector on the side with the injector opening at the bottom, as this side must point towards the throttle body when installed. Use a liquid Teflon thread sealer and thread the injector into the hole you drilled and tapped, making sure the injector nozzle opening points towards the throttle body.
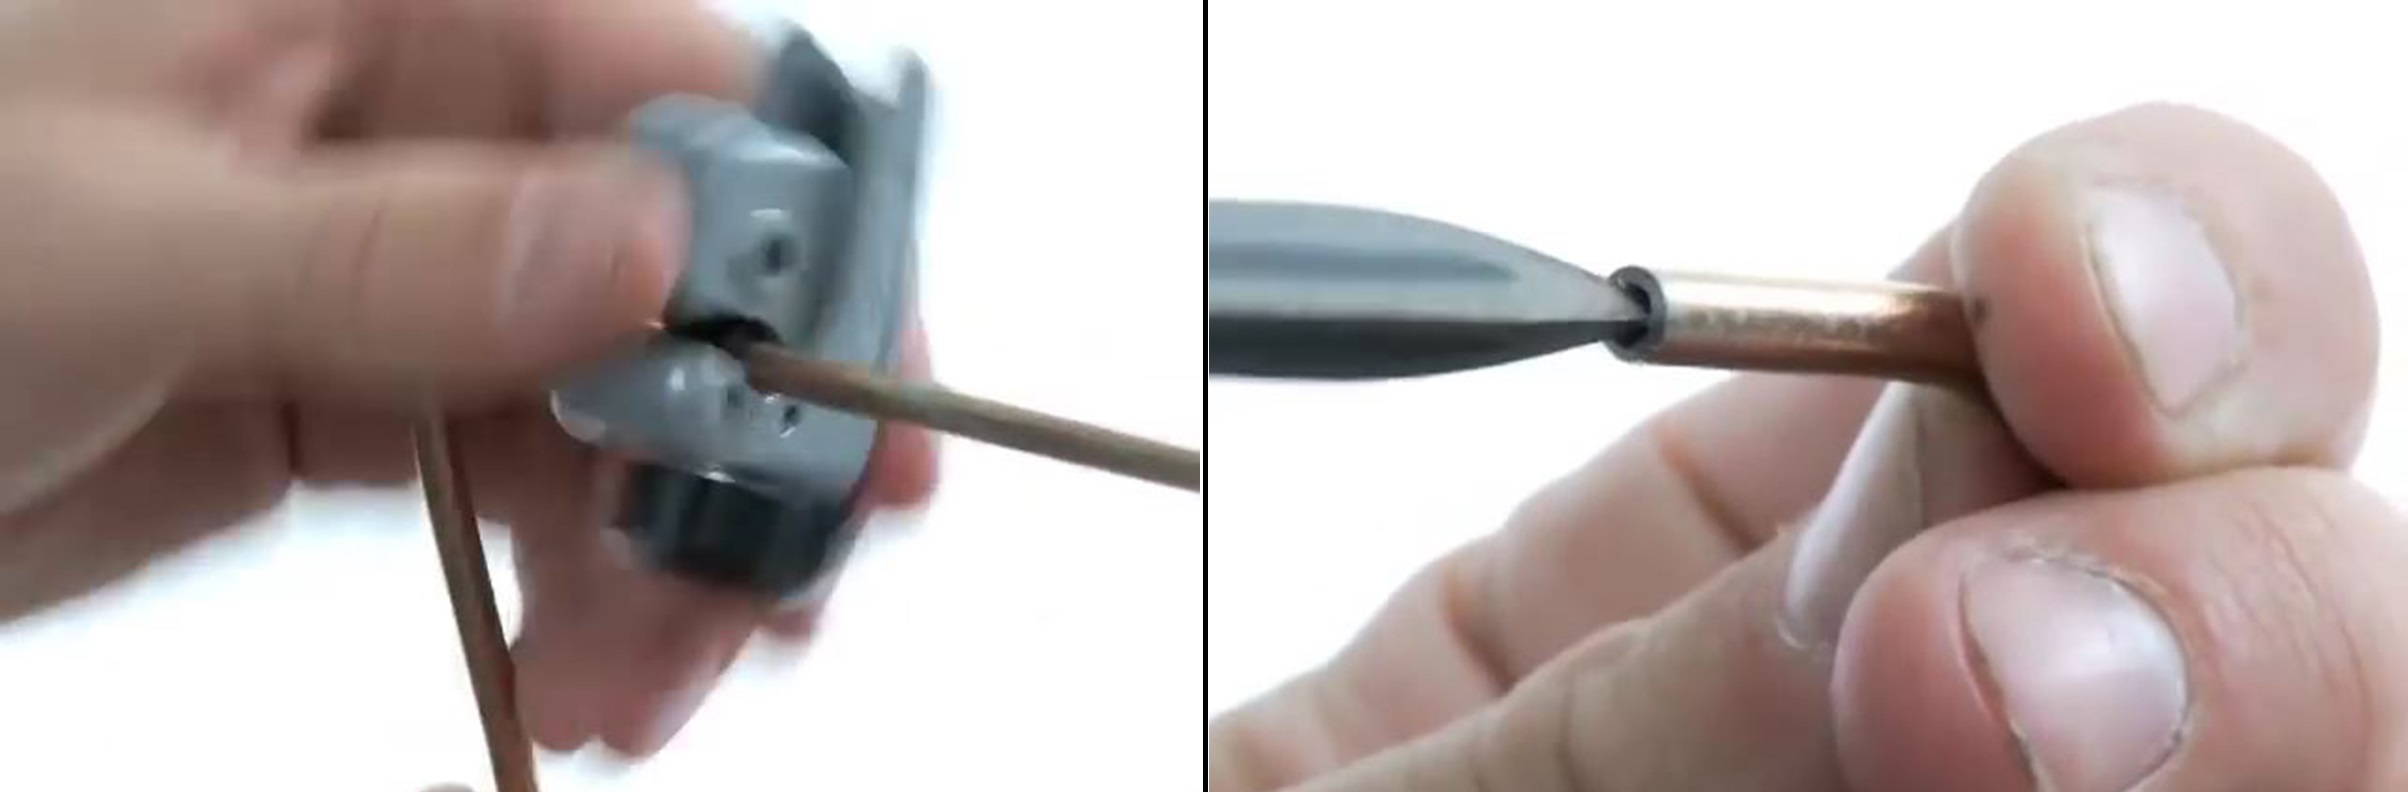
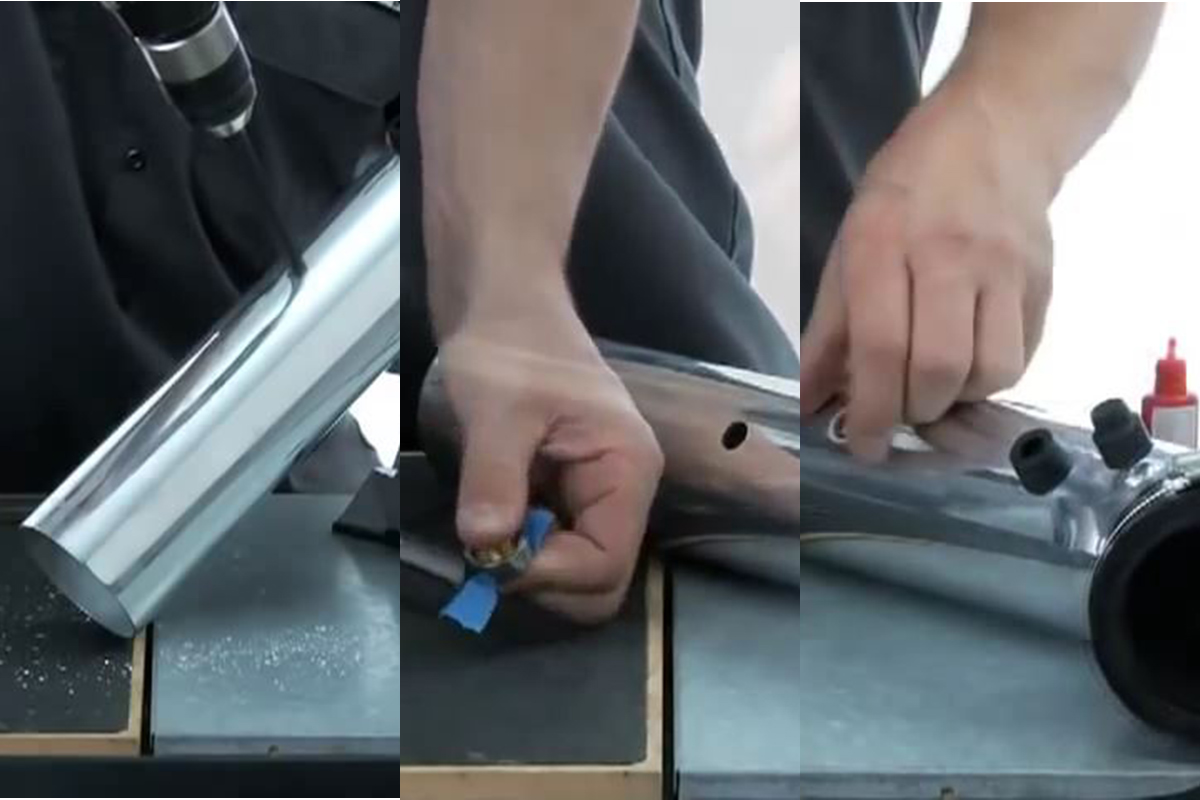
Installing the Injector in the Inlet Pipe
Installing the dry injector in the air inlet tube requires drilling the tube, installing the adapter, and then installing the injector as shown here. Be sure to coat the threads of the injector with PTFE sealant.
Decide on an adequate location for the injector in the air inlet pipe, no more than six inches from the throttle body. Be sure to pick a place where the supply hose won’t get kinked, pinched or run near any heat source. Remove the inlet pipe and use the appropriate drill bit (usually 5/16 inch) where you marked. Remember, you need to be able to reach this location with your hand or a wrench so you can install the injector adaptor.
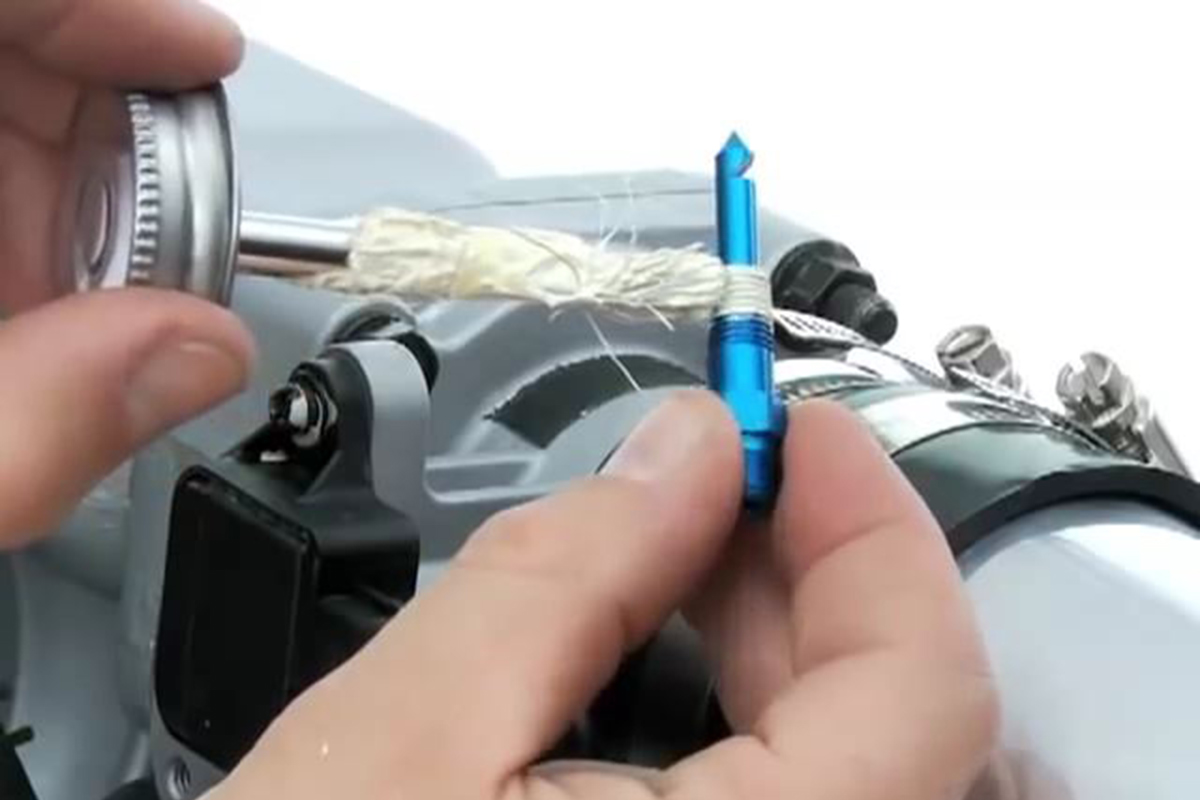
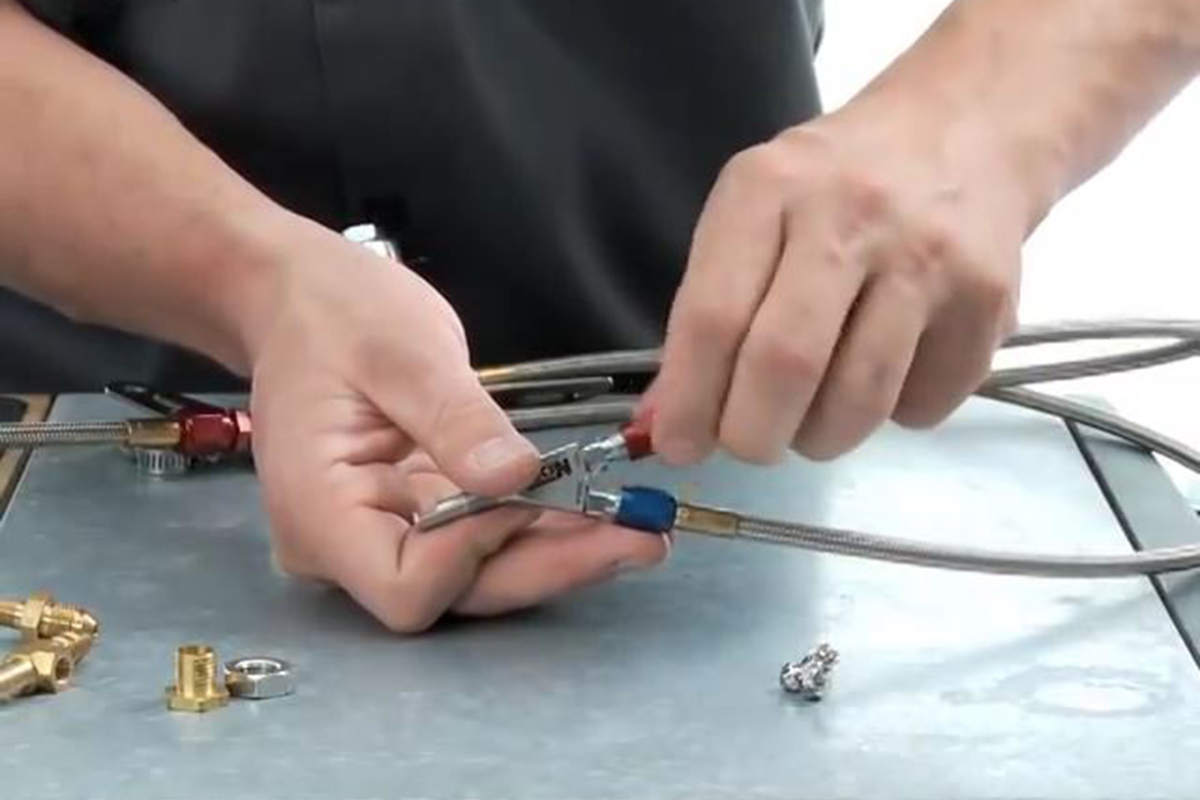
Secure the Injector
Note: The injector must be installed downstream of any Mass Air Flow sensor in the air inlet pipe.
Slip the injector adaptor collar into the wrench and secure it in place with a piece of tape. Slip the adaptor into the hole, coat it with Teflon or thread sealer, slide the nut into place, and tighten the adapter. Apply liquid Teflon thread sealer to the threads of the injector and thread it into the adapter. Don’t bottom it out and be sure the nozzle opening is pointing towards the throttle body.
Connecting the Fuel Injection Dry Injector
Dry injection solenoid assembly and connection order for fuel injected engines.
Using the liquid Teflon, attach the solenoid outlets to the “T” fitting and then the AN fittings to the solenoid inlets. Next, thread the fuel regulator adapter to the “T” and attach the feed line to it. Route the feed line from the output solenoid and attach it to the injector. Connect the nitrous supply to the nitrous solenoid. The order of assembly and connection of the solenoids is important.
Assemble the Injector Feed Line
The nitrous line feeds the nitrous solenoid which is connected via a “T” fitting to the injector solenoid. Off the “T” is the fuel regulator which is connected to the fuel supply. The output or injector solenoid is then connected to the injector. See the image above. Be sure to use the plumber’s sealant on all NPT threads.
Note: Prior to attaching the feed line to the injector, you will need to install a metering jet into the injector. There will also be a metering jet for the fuel supply line. Make sure you match these using the chart with your kit for the desired horsepower upgrade.
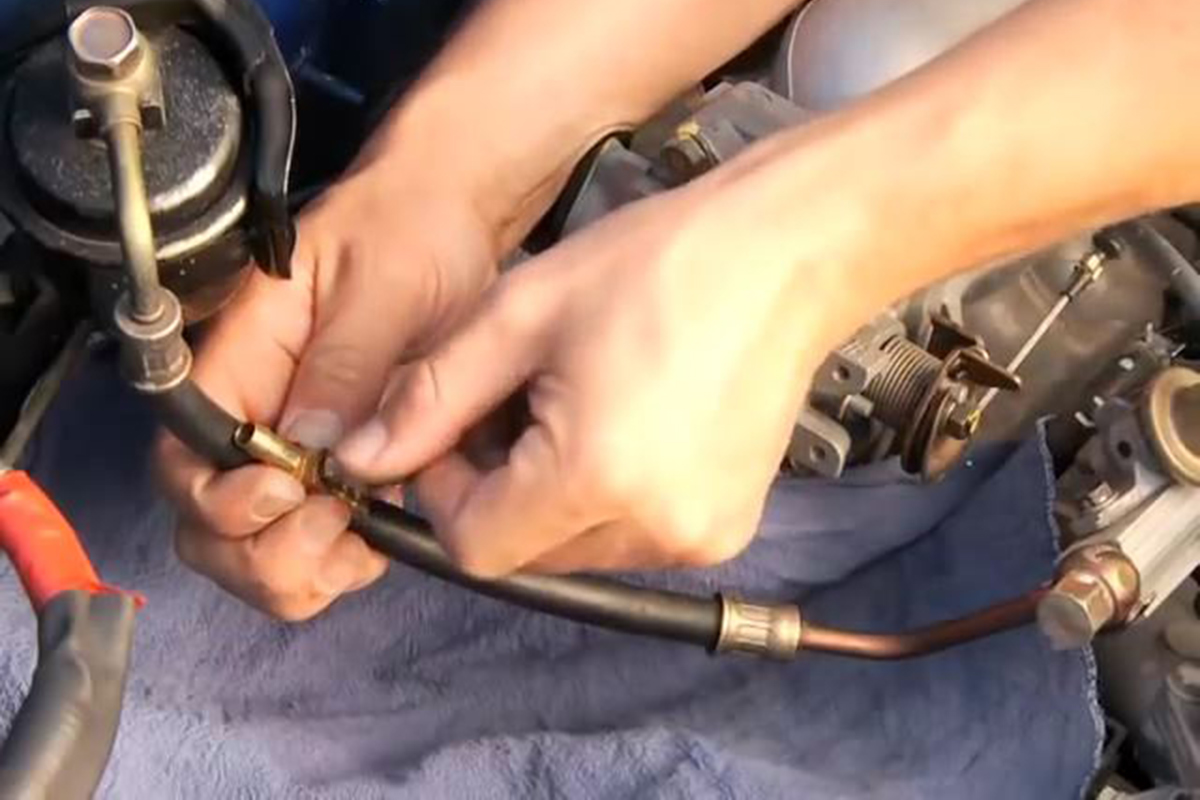
Connecting the Fuel Solenoid
Installing a “T” in the line between the fuel filter and fuel rail is one way to get fuel for the nitrous injection system.
How you connect the fuel solenoid in your nitrous kit will depend on a few things. Most important of these is the provisions of the kit. Second is what kind of car you’ve got. For instance, some kits will have you tapping into the fuel supply line before the regulator, while others, like the one I described above, will have you installing the fuel inlet online with the stock pressure regulator. Holley was nice enough to make a video that shows you a number of ways to get fuel for the fuel solenoid.
The Wiring
Many systems sold today will only activate when you have the throttle wide open. This protects the system and your engine from damage.
Your nitrous kit should have every wire labelled so you know exactly where it goes. Most will have two ground wires, one solid black and the other having a white stripe. The white strip goes directly to the battery ground and the solid goes to the main chassis ground. Route the wires to their appropriate locations and connect the solenoids.
Some kits, the good ones in my opinion, will only allow the injection of nitrous at wide open throttle. These have a wire or wires that tap into the throttle position sensor using blade and spade connectors or wire tappers.
Install the Relay and Controller
The relay and controller will be installed under the hood.
There will also be a controller and a relay that should be mounted on either a fender or the bulkhead using self-tapping screws and then connected to the harness. You’ll also have at least a few wires that need to go through the bulkhead to the switches you installed before. Make sure they go through a hole with a grommet, route and connect them to the switches. Finally, connect the big red lead to the battery positive terminal.
Notes on Wet Injection Systems
This image shows an example of a wet direct port nitrous injection system. Note that each injector has both fuel and nitrous feeds.
The only difference between wet and dry systems is that the wet injector has separate supply lines for fuel and nitrous. This means that instead of a single line going from the solenoids to the injector, a wet system will have lines going to the injector from both the fuel and nitrous solenoids. Both of these lines will require the correct jet to be installed at the injector.
Test-fit the Wet Injector
Additions for Safety
As I mentioned above, you should never do general driving around with your nitrous bottle’s valve open. To help with this, there are electronic valve openers that can be installed. Simply use a screwdriver and a ratchet to remove the existing knob, install the collar over the valve, then install the actuator over this. Finally, route the wires to power and the switch on your console.
Some kits come with a nitrous purge solenoid while others don’t. You should seriously consider installing one when you install your nitrous kit. It’s just a few extra steps, and it makes your car safer.
Another consideration, which is twofold, is fuel supply. Not every stock fuel pump is going to be able to keep up with the increased fuel demands when the nitrous is enabled. For this reason you might want to consider getting a higher pressure high volume fuel pump and install it as you install the nitrous kit. Also, some systems have a low fuel cutoff switch built into the system. Not all kits do, though. If yours doesn’t, I recommend installing a secondary fuel cutoff switch/solenoid. If you run nitrous with insufficient fuel pressure, your engine will be running lean, which can overheat it, causing pinging and other internal damage.
Mike's love of cars began in the early 1970's when his father started taking him to his Chevron service station. He's done pretty much everything in the automotive aftermarket from gas station island attendant, parts counter, mechanic, and new and used sales. Mike also has experience in the amateur ranks of many of racing's sanctioning bodies.


![[Gallery] Amelia Island Kickoff Car Show And Concours D"Lemons](https://www.racingjunk.com/news/wp-content/uploads/2026/04/DSC_2847-e1777055210316-376x206.jpg)


Leave a Reply