

![[Gallery] 3rd. Annual Father's Day Classic Car Show](https://www.racingjunk.com/news/wp-content/uploads/2026/07/Calistoga-2026-18-scaled-e1783026475349-376x206.jpg)

![[Gallery] Blackhawk Museum Stop Over](https://www.racingjunk.com/news/wp-content/uploads/2026/06/DSC_0918-e1782449621944-376x206.jpg)
Bolt On Subframe Frame Connectors
Click Here to Begin Slideshow
Many of the cars we love were originally built as simple machines. Ripping down the quarter mile with the types of performance seen today wasn’t even a twinkle in the engineer’s eye when these things came off the assembly line. The truth is, many of these old cars, with their big honking bolt-on front subframe or simple bolt-on K-member mated to a unit construction body were pretty much flexi-fliers. In most examples, the front subframe or K-member was simply bolted to the body in only four spots. In the case of a subframe (such as those found on early Camaros), what made it worse was the fact that the four bushings attached by those four bolts deteriorated with age and use. When you pounded on the cars, the bodies moved around. Sometimes they moved around a lot! So much so that door and trunk gaps could permanently change. Doors often didn’t close correctly. And you might have even seen some examples where the floor pan or the quarter panels were heavily cracked and buckled. It’s not good.
So what can you do about it? The fix is pretty simple: Add frame connectors to stiffen the car, and replace the body mount bushings if you have them. These pieces add rigidity to the car; they eliminate the buckling and cracking and they allow the door gap and panel gaps to remain consistent. In addition, they’ll definitely help make the car quicker and faster. You won’t lose forward energy that’s spent twisting the car. As a bonus, that old street-strip car might just prove to be more fun to drive.
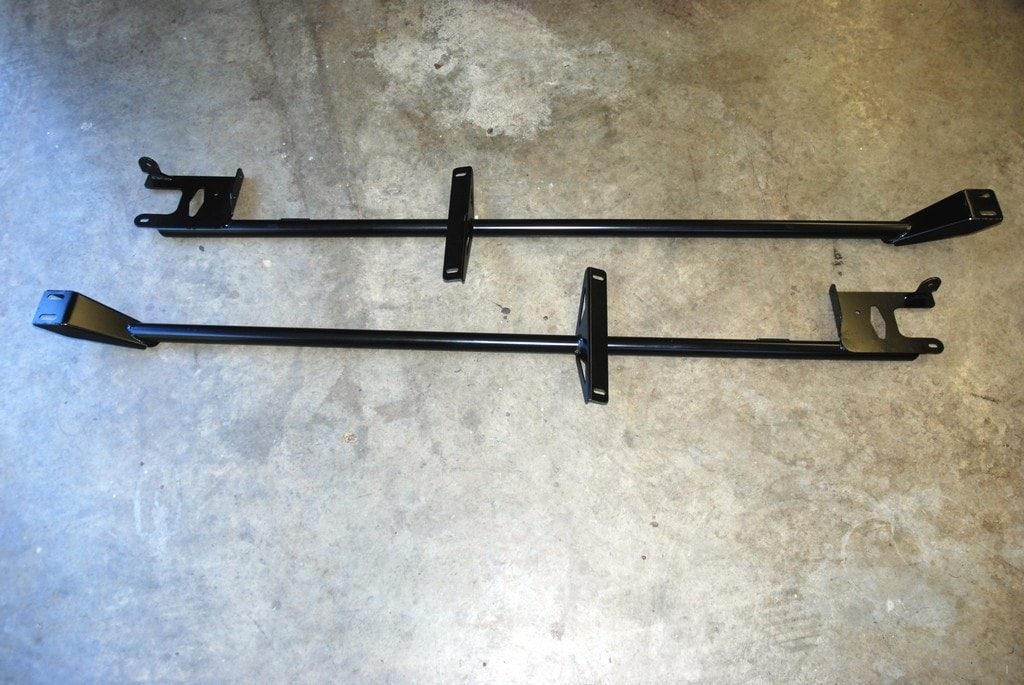
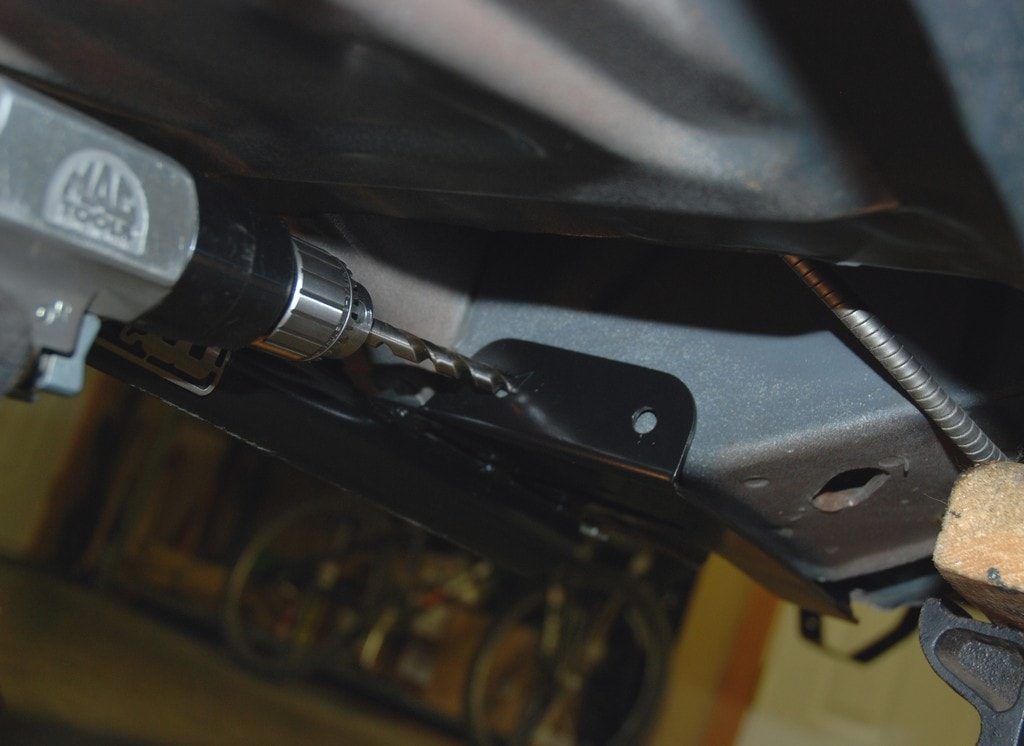
When it comes to connectors, you have a lot of choice. You can find them in weld in, bolt in, square tub, rectangular tube and round tube configurations. There are a lot of choices, and the truth is the bolt-in jobs aren’t as bad as you might think. The reason is, you can do the work at home and you don’t need to cut the car up. Better still, a bolt in connector is reversible. That means if you (or someone else) wants to return the car back to stock, or very close to stock, it’s possible.
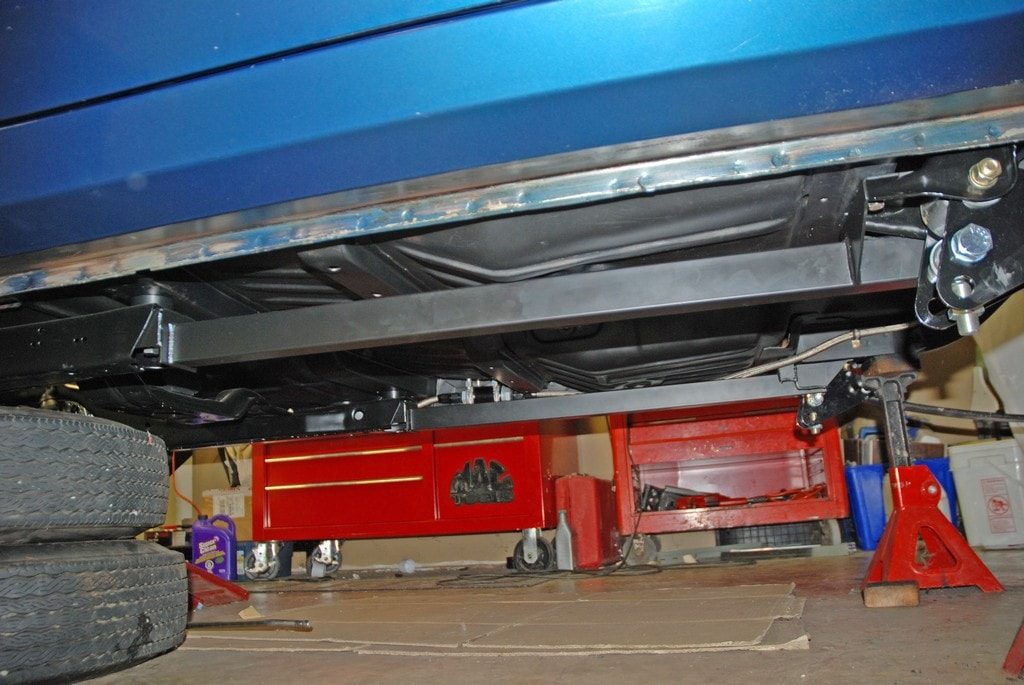
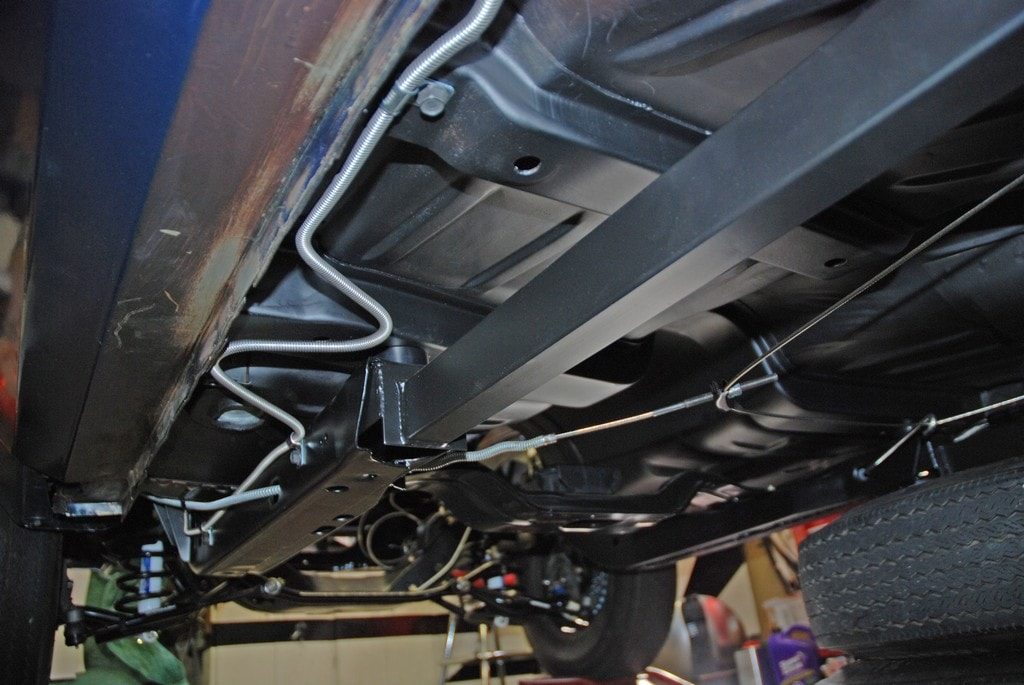
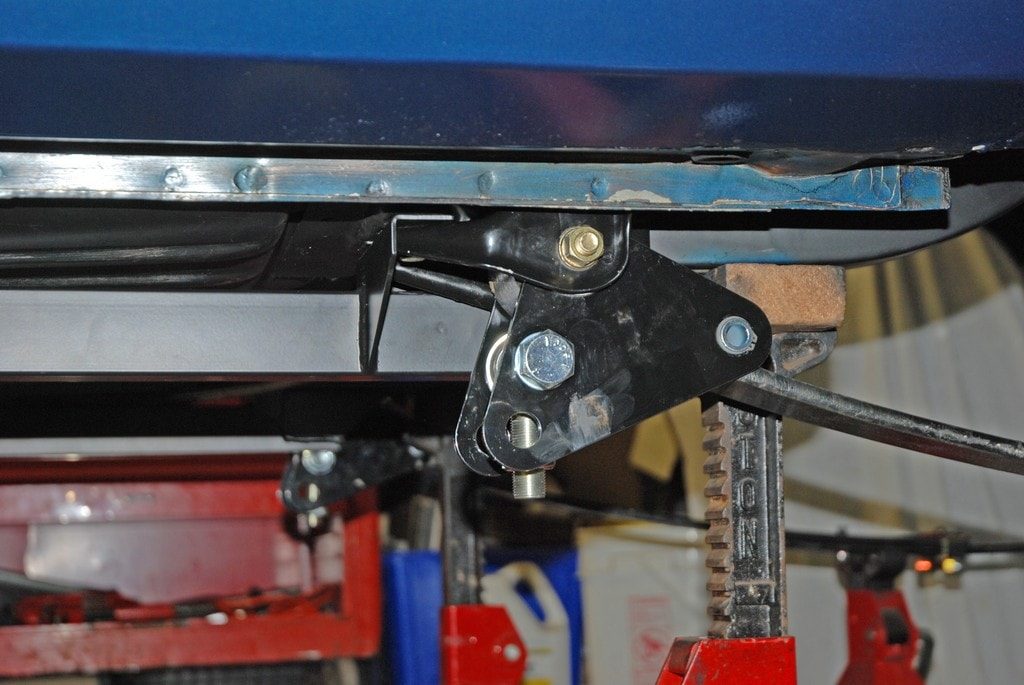
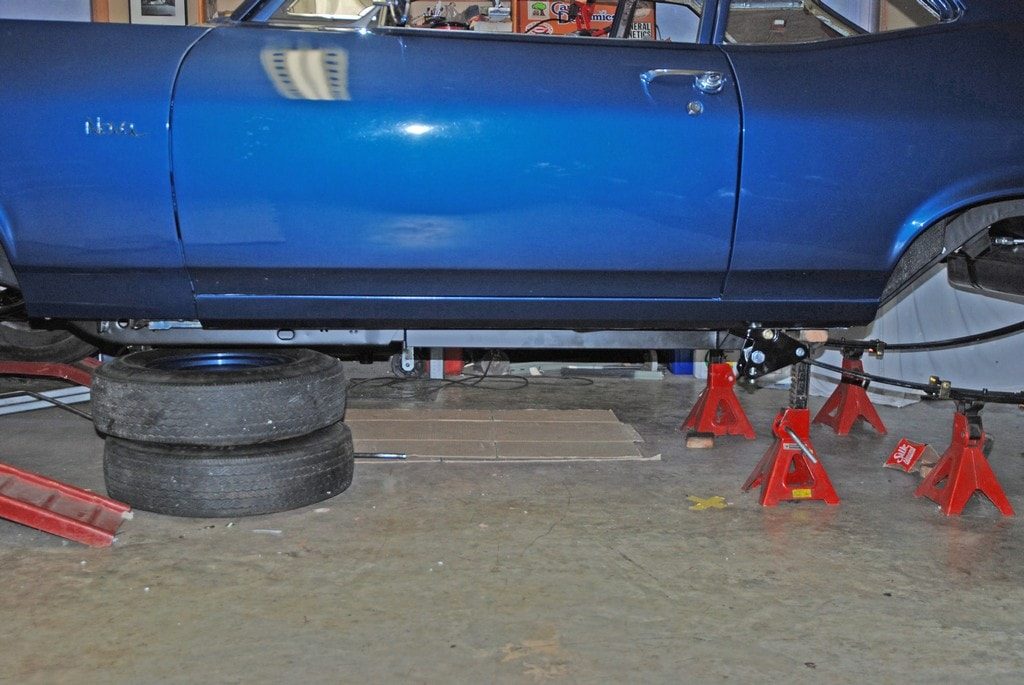
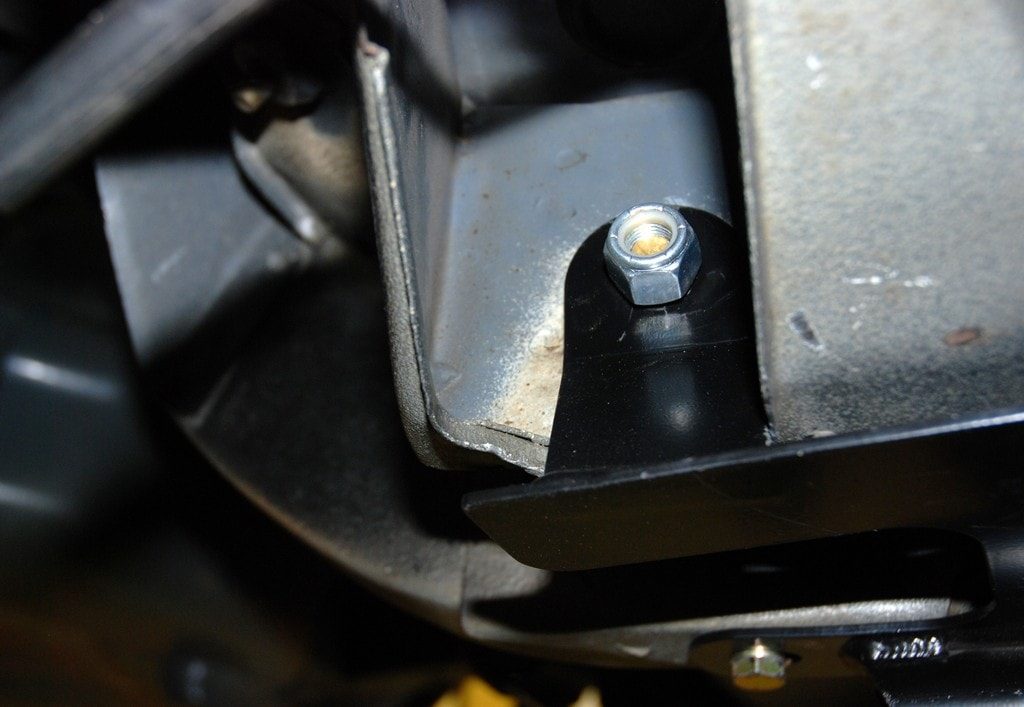
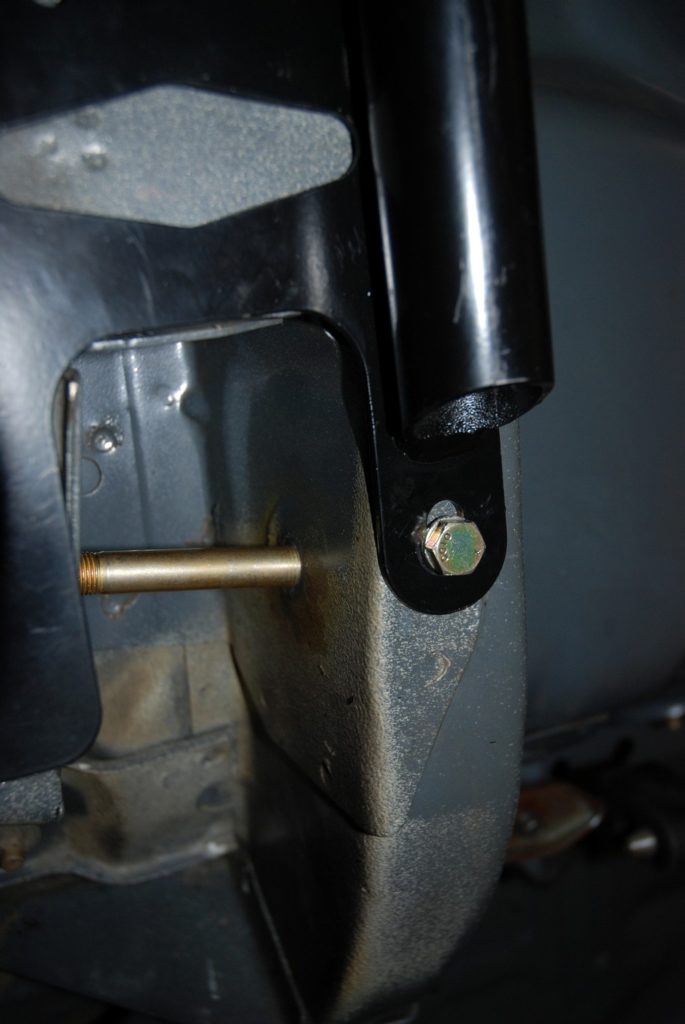
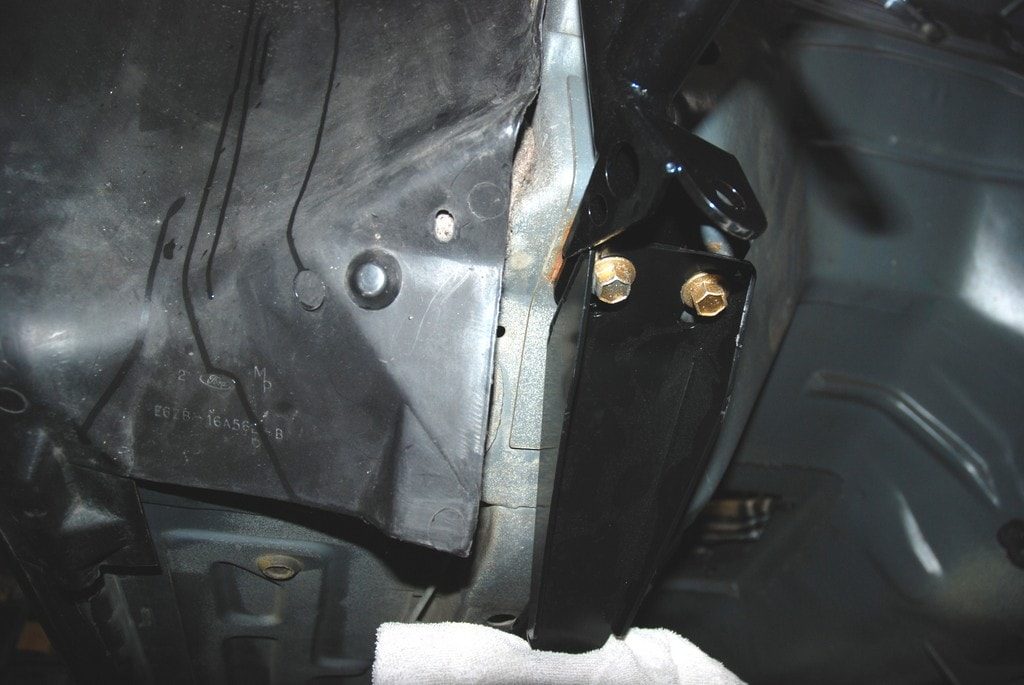
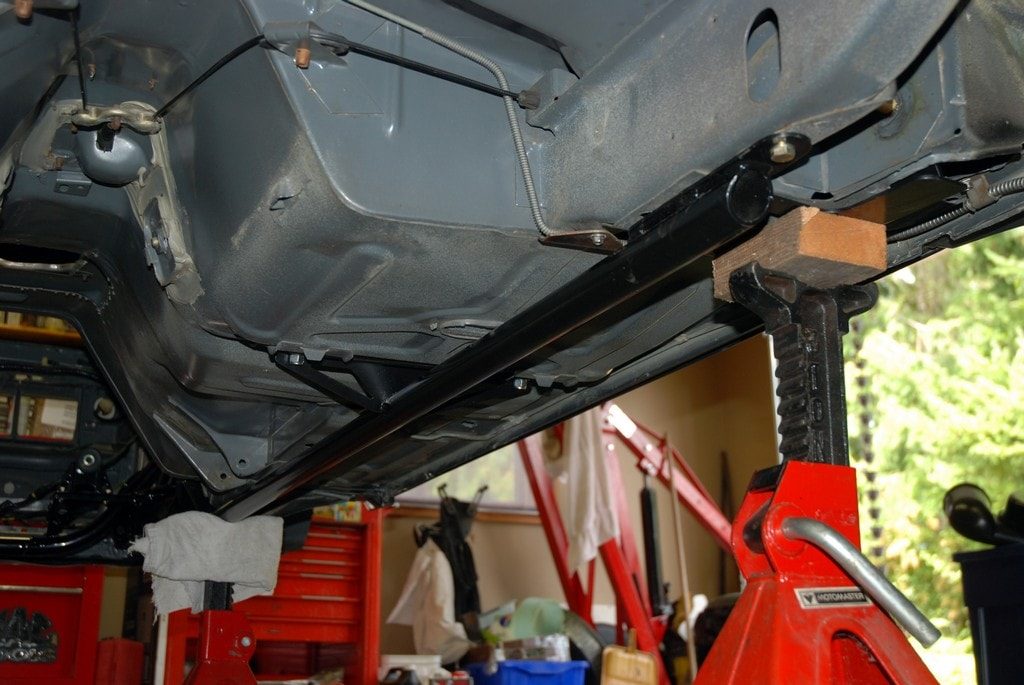
If you examine the accompanying photos, you can see a set of bolt-in Competition Engineering frame connectors installed in a Nova, as well as a set of S&W Race Cars round tube connectors bolted into a Fox-body Mustang. In either case, they fit nicely, but with the Nova, it’s necessary to trim the connector bracket at the spring perch. It’s not a big job, but it does take some time.
Check the photos for a closer look.
Many of the cars we love were originally built as simple machines. Ripping down the quarter mile with the types of performance seen today wasn’t even a twinkle in the engineer’s eye when these things came off the assembly line. The truth is, many of these old cars, with their big honking bolt-on front subframe or simple bolt-on K-member mated to a unit construction body were pretty much flexi-fliers. In most examples, the front subframe or K-member was simply bolted to the body in only four spots. In the case of a subframe (such as those found on early Camaros), what made it worse was the fact that the four bushings attached by those four bolts deteriorated with age and use. When you pounded on the cars, the bodies moved around. Sometimes they moved around a lot! So much so that door and trunk gaps could permanently change. Doors often didn’t close correctly. And you might have even seen some examples where the floor pan or the quarter panels were heavily cracked and buckled. It’s not good.
So what can you do about it? The fix is pretty simple: Add frame connectors to stiffen the car, and replace the body mount bushings if you have them. These pieces add rigidity to the car; they eliminate the buckling and cracking and they allow the door gap and panel gaps to remain consistent. In addition, they’ll definitely help make the car quicker and faster. You won’t lose forward energy that’s spent twisting the car. As a bonus, that old street-strip car might just prove to be more fun to drive.
When it comes to connectors, you have a lot of choice. You can find them in weld in, bolt in, square tub, rectangular tube and round tube configurations. There are a lot of choices, and the truth is the bolt-in jobs aren’t as bad as you might think. The reason is, you can do the work at home and you don’t need to cut the car up. Better still, a bolt in connector is reversible. That means if you (or someone else) wants to return the car back to stock, or very close to stock, it’s possible.
If you examine the accompanying photos, you can see a set of bolt-in Competition Engineering frame connectors installed in a Nova, as well as a set of S&W Race Cars round tube connectors bolted into a Fox-body Mustang. In either case, they fit nicely, but with the Nova, it’s necessary to trim the connector bracket at the spring perch. It’s not a big job, but it does take some time.
Check the photos for a closer look.
Leave a Reply