


Wayne Scraba breaks down the best way to organize your shop for a major build.
Plenty of folks envision themselves building a car from the ground up. It’s easy enough to grab a mental image of assembling perfectly polished chrome and stainless trim onto an equally pristine, beautifully painted body shell. Unfortunately, reality often has a way of crashing head-on into visions. Before you can get to that perfectly polished chrome and stainless (not to mention that perfectly painted body shell), you have to somehow arrive at that point. That means plenty of hours of sweat, dusted knuckles and “dirty” tear down labor (not to mention dollars). It also means you’ll be faced with a need for space to pull the car apart.
Now, there have been articles and even books written with the premise you can simply take a piece off a car, restore it or rebuild it or modify it, put it back on the car and move on. It’s piecemeal build. But the reality is, you’ll never attain the same results as you will with a comprehensive “body off build”.
To do that comprehensive body off build, what you need to do is to establish a functional workshop and simultaneously set up a spot (or more than one spot) to store pieces. Of course, a huge, fully equipped (and nearly empty) shop is perfect for this, but plenty of us just don’t have that luxury. When the accompanying photos were taken, I was in that same boat. We had downsized and as a consequence, I moved away from 1,000+ square feet of dedicated shop space to a basic 24X26 two car garage (but hey, now I’m back to a dream 1,100 square foot shop and a 3,000 square foot Quonset for storage, but that’s another story). Part of that old garage was occupied by my old hot rod Buick Regal. As a result, things were a wee bit crowded. Now, I’ve built cars in plenty of different environments. And some of my favorites actually came out of a crammed one car garage.
When space isn’t a problem, there are probably no hard and fast rules for tearing down a car. Yank the engine and trans, take off the exhaust system, drop the gas tank and you’re a long way into the tear down. For crowded garages you have to take a different approach. Here’s my order of business for a complete tear down in a small garage:
(1) Remove front sheet metal & bumpers
(2) Strip luggage compartment
(3) Remove and strip doors
(4) Remove exterior trim
(5) Strip interior (except for instrument panel and steering column)
(6) Remove remaining side window glass
(7) Remove wiring harnesses
(8) Remove cooling system & heater
(9) Remove exhaust system & brake lines (service brakes and park brake)
(10) Remove engine and transmission
(11) Remove fuel system
(12) Strip balance of car
The reason I use the above process is it leaves the car as a manageable “roller” for the longest possible period of time. If I need to push it outside so that the doors can fully swing open, it’s easy enough. In fact, it also leaves the car more or less operable for a relatively lengthy stretch of time. This system allows me to peel off and deal with the big sheet metal pieces first without tripping over the engine, transmission and other bulky (and usually heavy) hardware that by nature, must be stored on the floor. Once the steps are finished, I end up with a rolling chassis that can either be stripped further (and bolted to a rotisserie) or simply rolled onto a trailer as-is and taken to a body shop. Either way, the above twelve steps keep my workspace “flowing”.
For more, check out the accompanying slide show. And stay tuned! In our next issue, we’ll lay out even more things to consider when “setting up shop”. Watch for it.

Every project has to begin somewhere. When you’re in a tight spot, it’s best to follow a rigid plan of keeping the car as a roller for as long as possible. Here, the hood comes off first. 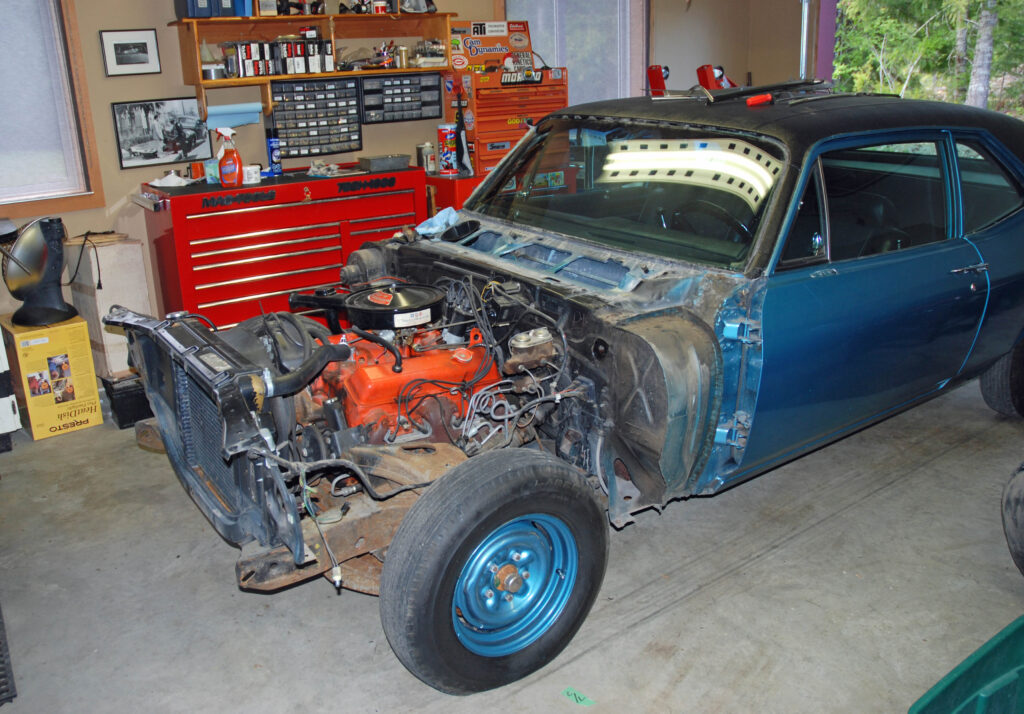
Next up, the front sheet metal was removed. As you can see, the car is actually still drivable. This is actually important because it allows you to move the car if necessary. 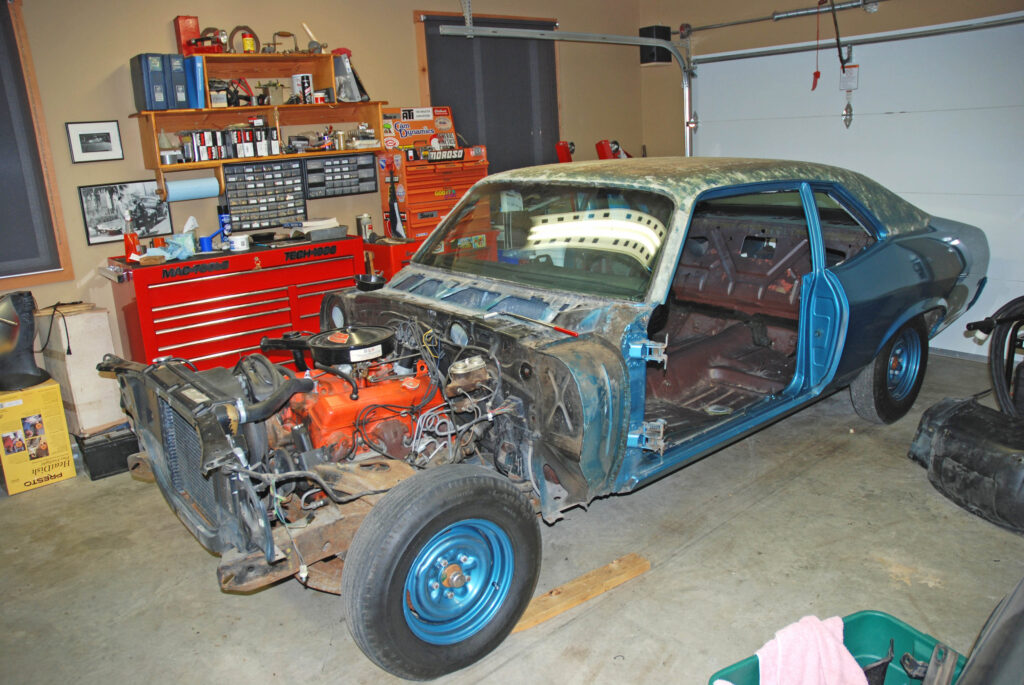
It’s at this point where the decision will have to be made to remove the power train, brakes and other components. As noted in the text, the idea is to have a plan that keeps the project flowing. 
You’ll need tools to perform a restoration. You can’t strip and rebuild a car with a crescent wrench and a screwdriver. That’s a no-brainer. When extended over years, it is possible to assemble a decent tool collection. 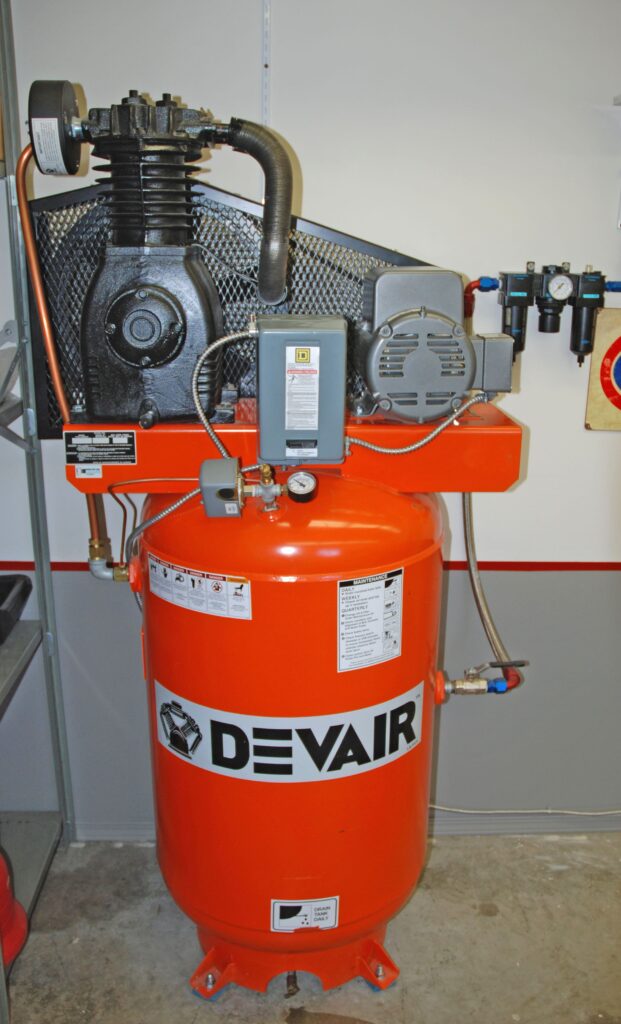
In my situation, this big DevAir compressor in the second photo is what really makes things happen. Good air tools and a large, reliable source of air take a considerable amount of the pain out of disassembling a car. And yes, electric/battery pack tools work too, but I personally prefer air. 
When working in the shop, I make a point of cleaning the tools I’ve used and putting them back in their locations within the pair of tool boxes. It makes things much more pleasant than searching for that long offset 9/16-wrench laying in a pile under the car. 
Aside from general tools, you’ll need vehicle specific tools. For example, GM cars require a unique tool for removing window crank and interior door handles. A special tool is also required for steering column disassembly. There’s also a tool for removing windshield moldings. Special tools are also required for drum brake service. Ditto with harmonic damper (balancer) removal/installation. 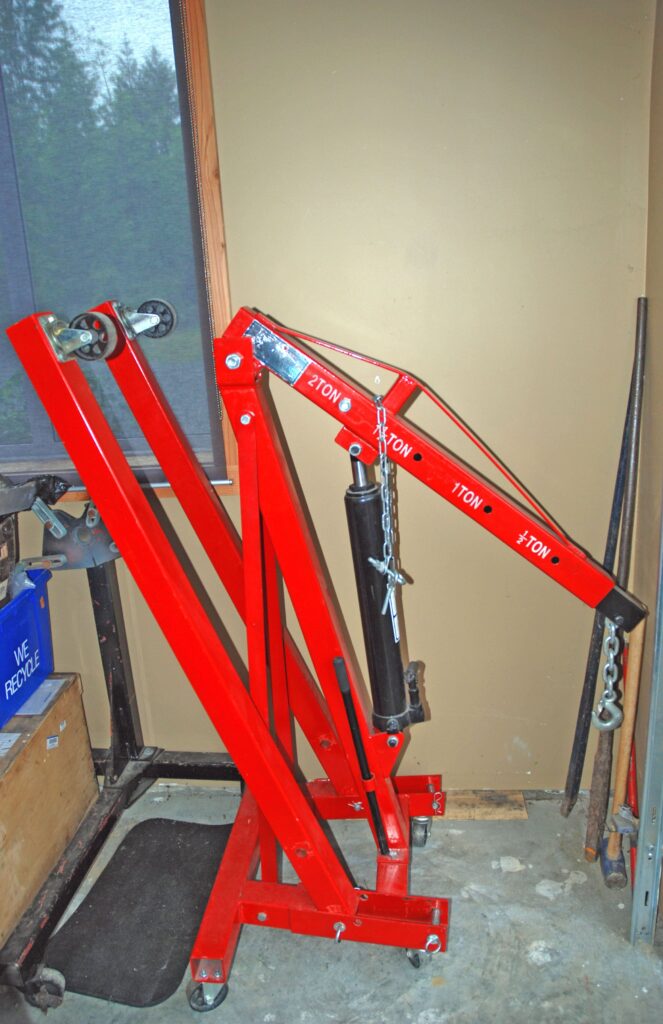
Here’s my folded-up cherry picker. I’ve had one for years and use it regularly. But if you’re performing a single resto, you might be better off renting one. 
Without straying too far off topic, an essential tool you’ll need is a good quality impact driver. Nothing works better for stubborn fasteners (case-in-point: The large Phillips fasteners found in components like door latches. 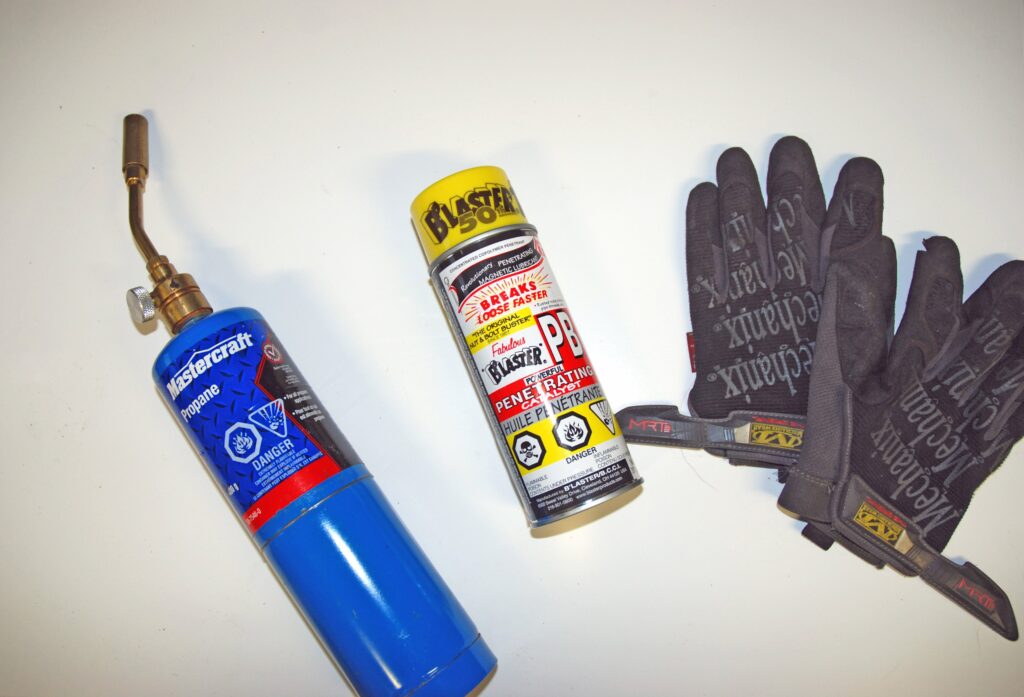
Something else you’ll need for stubborn fasteners is a propane torch and a good penetrating oil. I use PB Blast. It works. By the way, those gloves shown in the photos are from Mechanix Wear. I never used gloves for years, but after a trip or six for stitches and other medical repairs, I now swear by them. 
Aside from storing your tools, you’ll need a good, sturdy workbench. It might not be too pretty, but I used this one for decades. In fact, it’s followed me through a cross-country move and today, it’s parked in its fifth garage (sadly, no more). Keep in mind a heavy bench can take a pounding (literally).