

Working on engines (high performance and otherwise) has evolved considerably over the years, and the various processes differs a bit from those of yesteryear. Some new tools have made the workload less painful and at the same time, allow for faster, more accurate disassembly and re-assembly. Case-in-point is the simple connecting rod. Securely holding a modern connecting rod to do simple things like removing the rod bolts, removing the caps, torquing bolts and measuring bearing clearances in the bore cannot be accomplished without the use of a tool of some sort. Sure a couple of chunks of wood strapped to the jaws of a vise might work in a pinch, but with today’s (often) expensive connecting rods that could be recipe for disaster.
Rather than risking damage to a set of rods, the best bet is to secure them with a rod vise. They’re been around for a while in a wide range of configurations. A good example is the Mr. Gasket connecting rod vise (part number 33290G) shown in the accompanying photos. It’s constructed from billet aluminum and then black anodized. Because of the aluminum construction, the vise is suitable for use with steel, titanium and aluminum connecting rods. In any case (titanium or aluminum rods or steel rods), the vise is large enough and stout enough to hold multiple rods securely. FYI, the working area inside this vise measures 4.75-inches X 2-inches. That’s perfectly suitable for two connecting rods, mounted side-by-side.
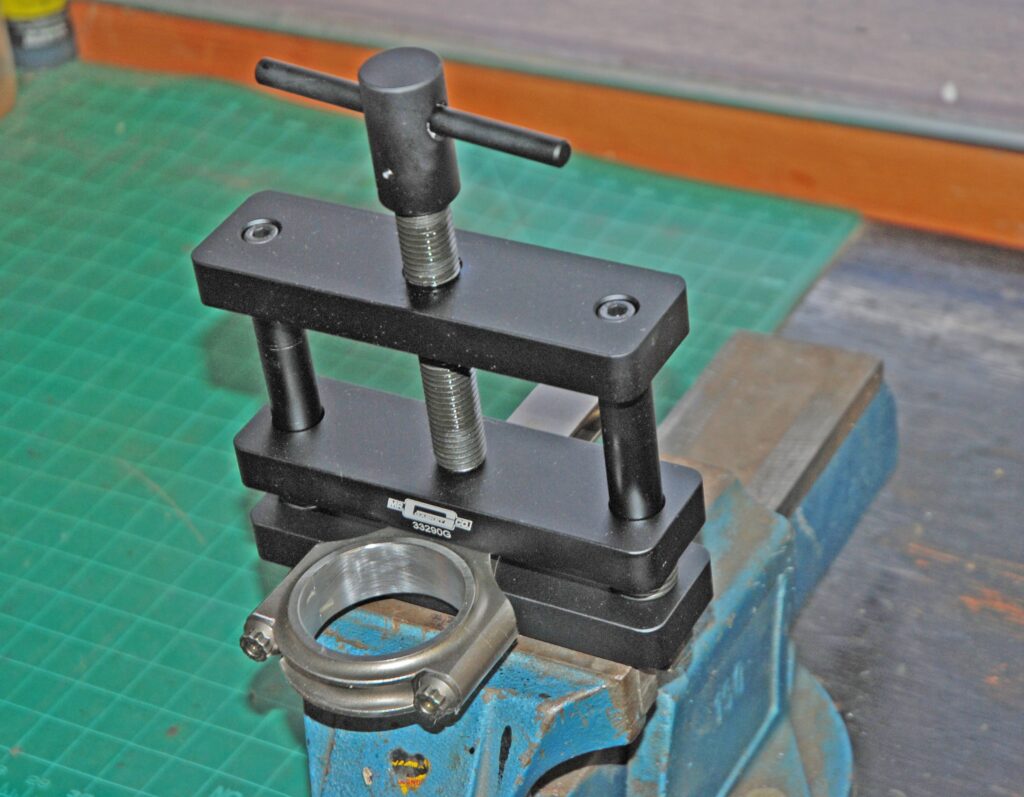
In order to use the vise, you can mount it directly on your bench or (my choice) insert it in your bench vise. The base of the rod vise features a step engineered to fit into the jaws of a bench vise. Given the steel threads of the adjustment bolt running through billet aluminum it’s a good idea to lube the threads carefully (anti seize is perfect here). Ditto with lube on the pair of sprung guide pins on either end.
Using the vise is dirt simple. After it has been clamped in a bench vise or mounted permanently on your workbench, insert a connecting rod (or two) in the rod vise jaws. Tighten the upper t-bolt to secure the connecting rod(s). At this point, you’re ready to go to work. You’ll find it makes chores such as loosening or tightening (torque/stretch/torque-angle) rod bolts super easy. Easy does it? You bet!
For a closer look, check out the accompanying photos:

In terms of external size, the Mr. Gasket rod vise measures 10-inches tall by 7-inches wide by 2-inches deep. 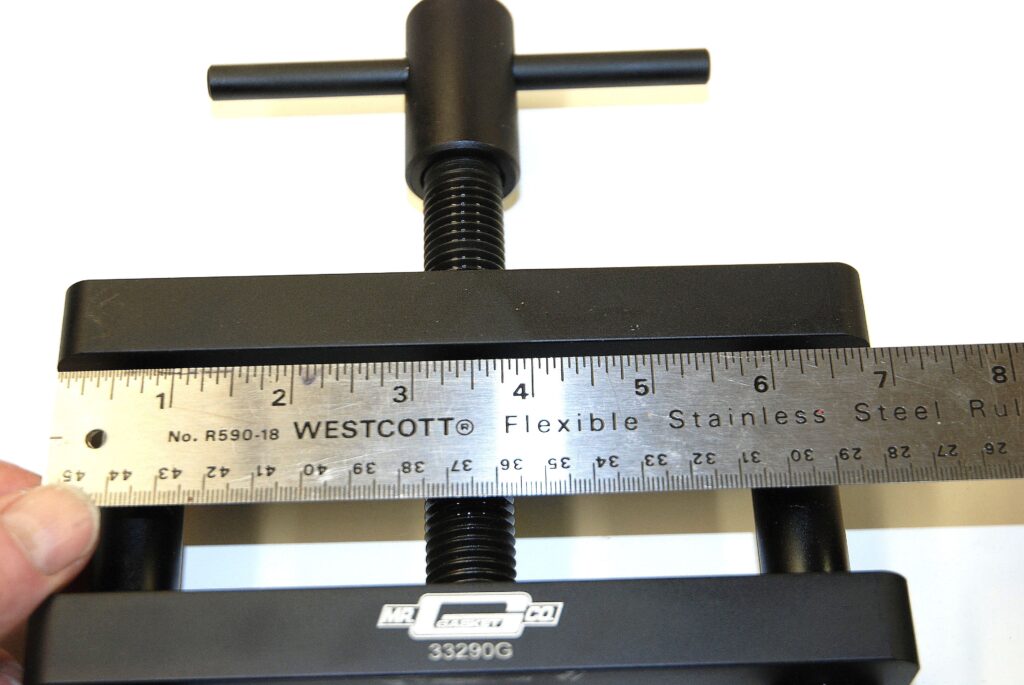
The jaws of the rod vise measure 4.75-inches X 2-inches (7-inches wide on the outside); suitable for two conventional big block connecting rods, mounted side-by-side (see the accompanying photo). 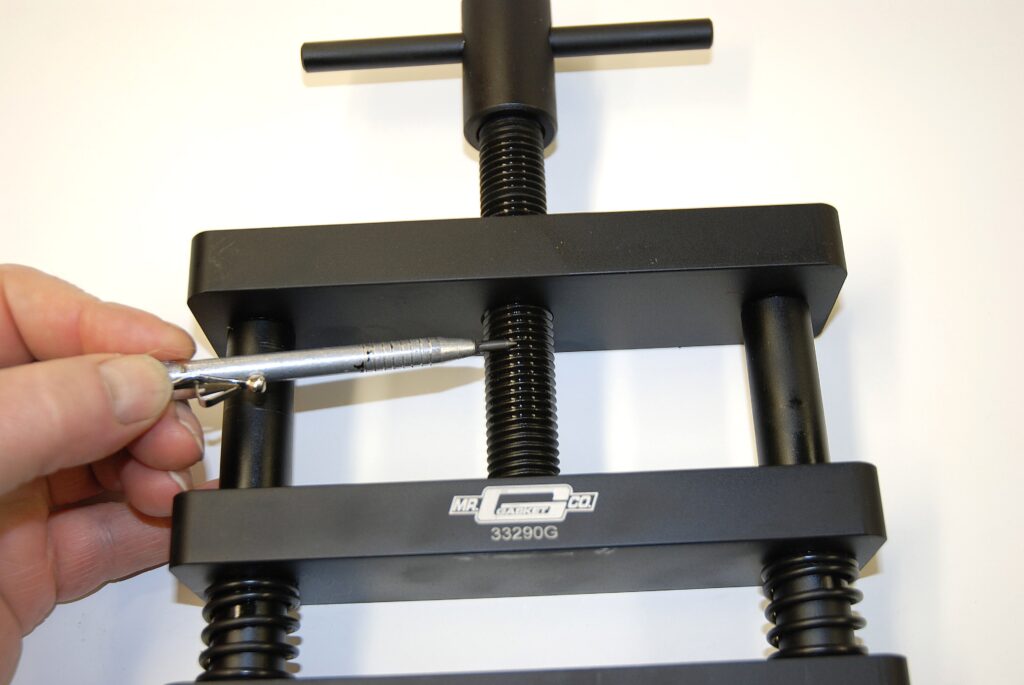
It’s a good idea to carefully lube the large center screw. Otherwise, you run the risk of galling the dissimilar materials during use. Anti-seize compound works on the screw 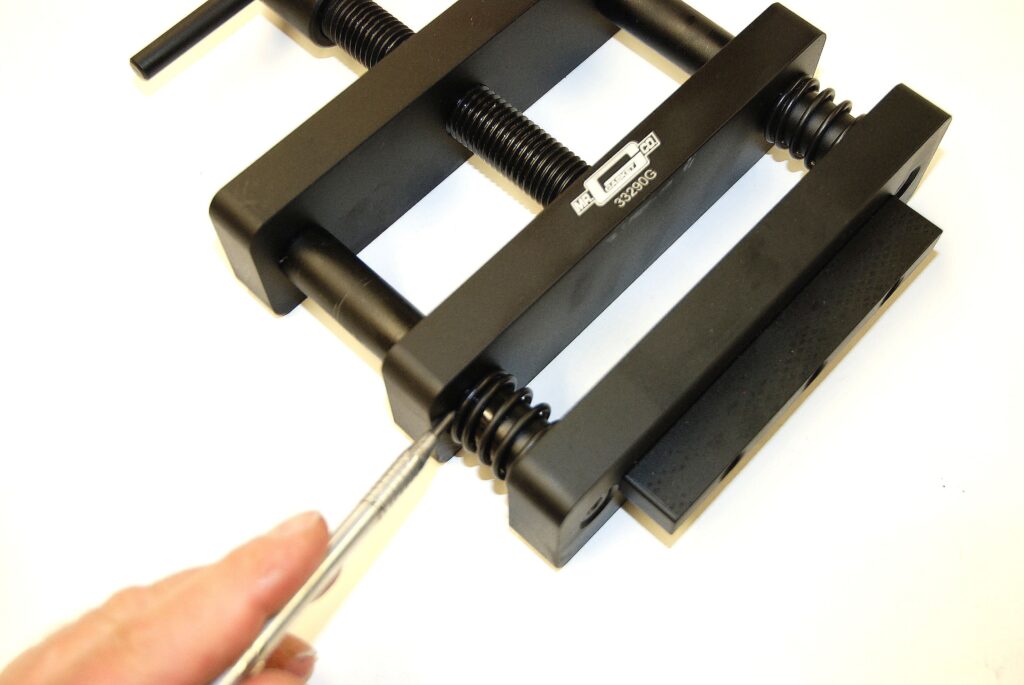
Lube the pair of guide pins before use too. Here, good old fashioned engine oil is also your friend. 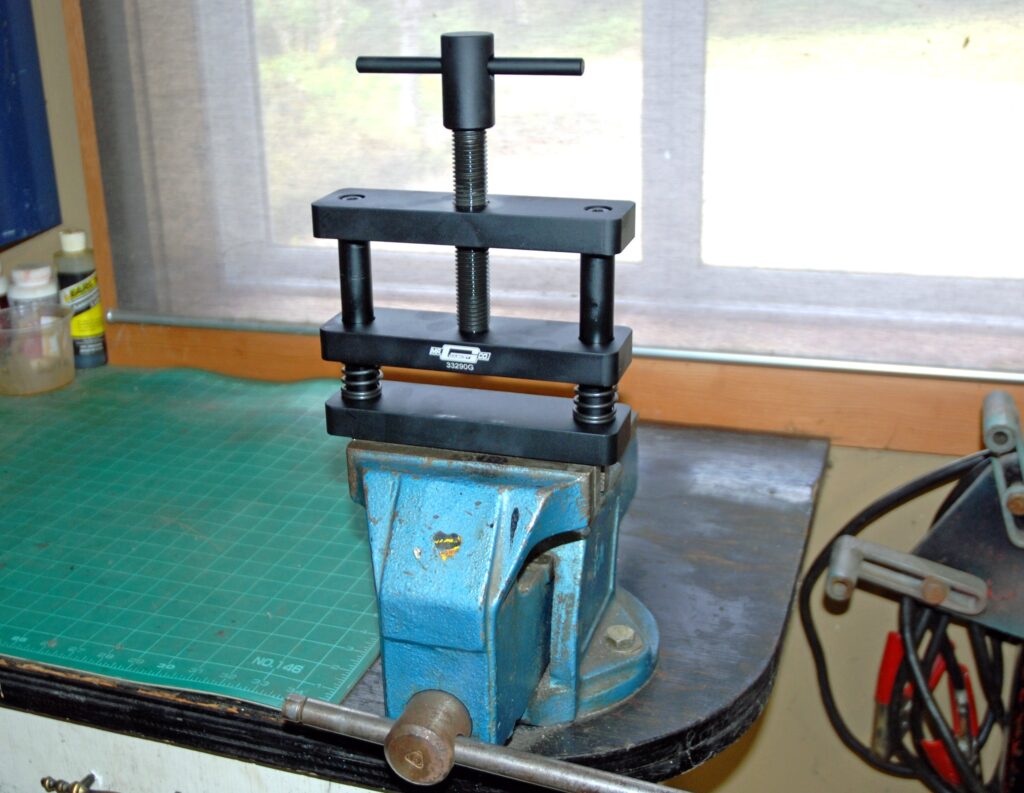
The vise can be bolted directly to a workbench. For our purposes though, we use the bench vise feature included into the base of the tool. Once we’re finished, the tool can go back into the tool cabinet. 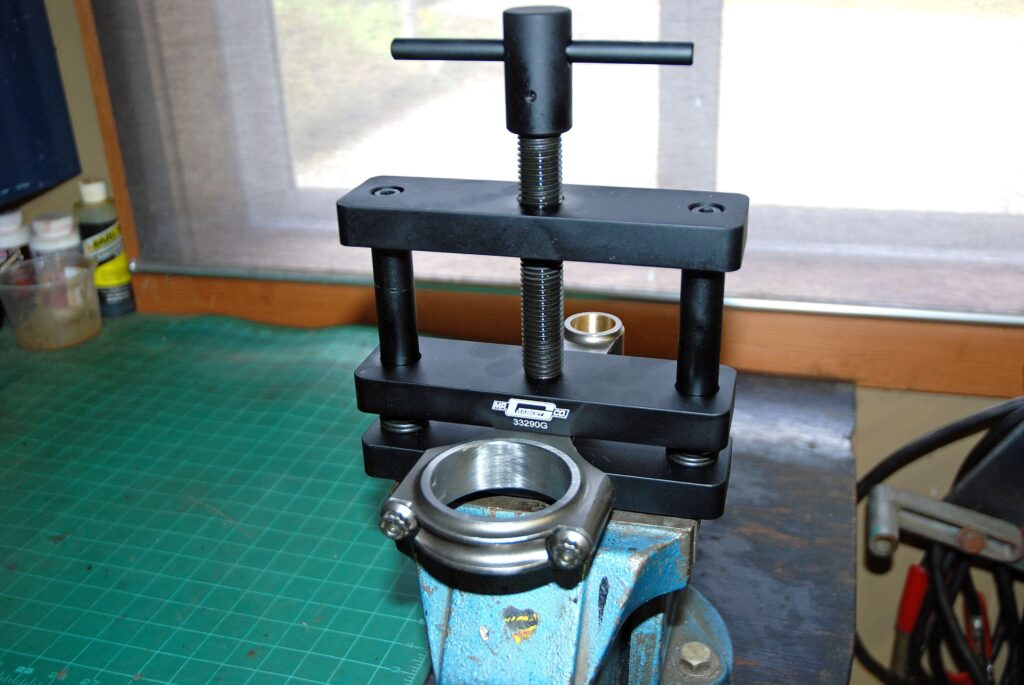
Here’s a look at a one of the writer’s Molnar big block Chevy connecting rods inserted in the vise. It allows for super-easy access to the rod bolts. 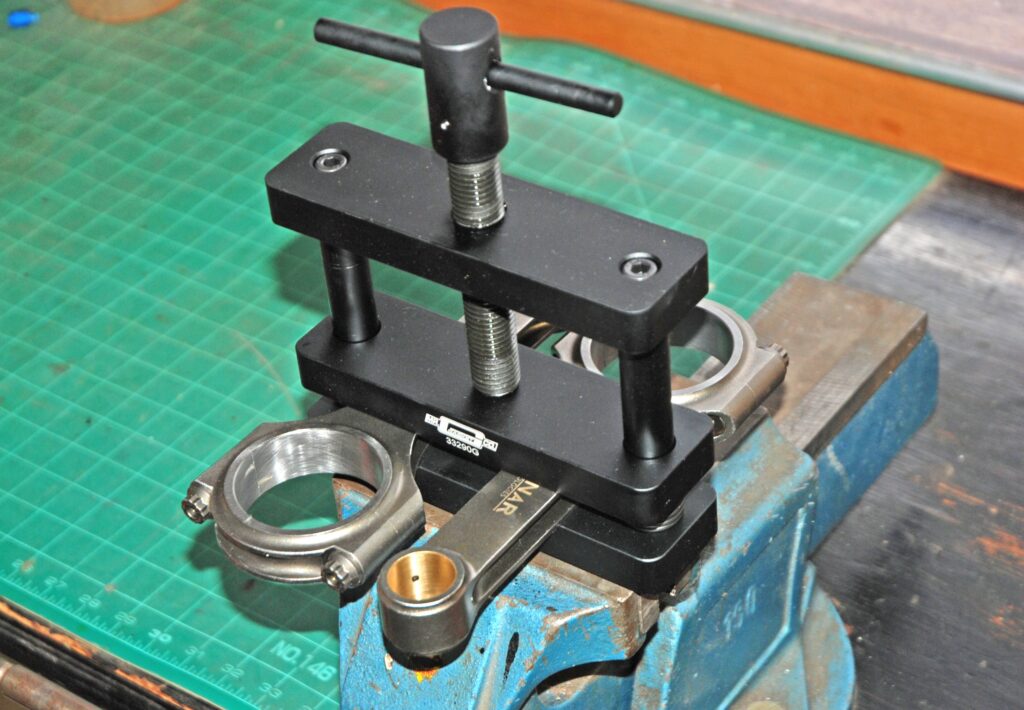
The jaws of the tool are sufficiently large so that two of these BBC rods can be accommodated. Additionally, the aluminum body of the tool also allows you work on titanium and aluminum rods easily too.
Leave a Reply