

![[Gallery] 3rd. Annual Father's Day Classic Car Show](https://www.racingjunk.com/news/wp-content/uploads/2026/07/Calistoga-2026-18-scaled-e1783026475349-376x206.jpg)

![[Gallery] Blackhawk Museum Stop Over](https://www.racingjunk.com/news/wp-content/uploads/2026/06/DSC_0918-e1782449621944-376x206.jpg)
Evaluating Your Project Car Part 2
Click Here to Begin Slideshow
Last week we started with a look at the basics of evaluating project cars (documentation, and particularly documentation that matches the VIN). This time around, the evaluation will expand almost exponentially:
What To Look For…
So what does the appraiser look for? Different appraisers have different tactics, and each situation demands a different approach. In many cases, a road test is not possible. As a result, the appraiser often goes over the car “stationary.” Truthfully, after completing the stationary evaluation, good appraisers already have a very healthy idea of what they’re dealing with. The following is a checklist of sorts for things a skillful appraiser will go over without starting the car or even turning on a switch. It’s also something you can use to evaluate a car personally:
Appraisal Check List
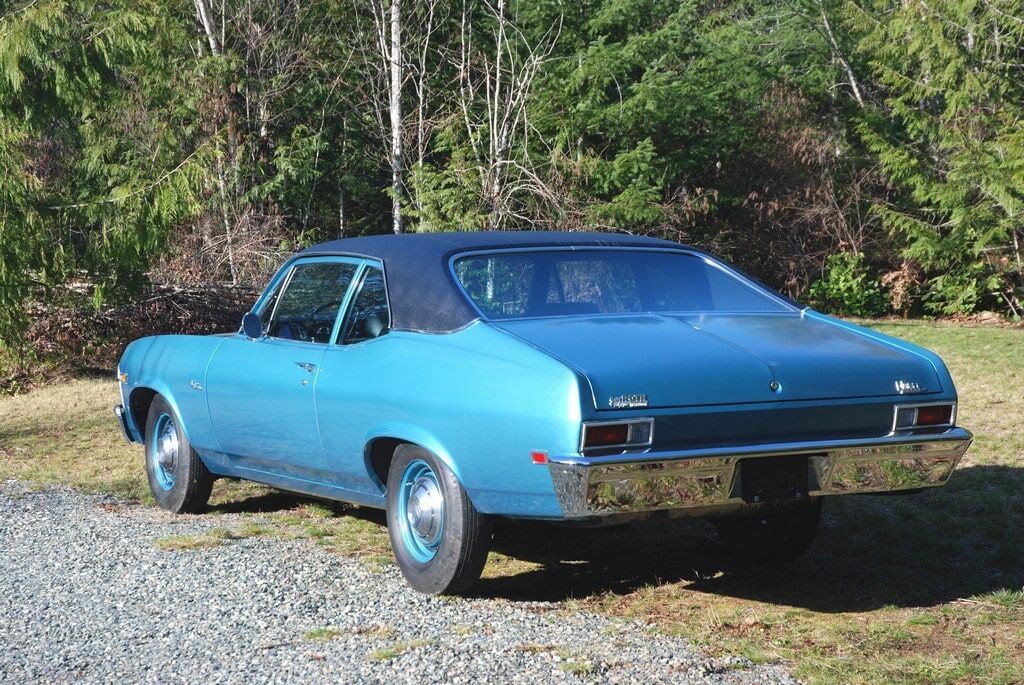
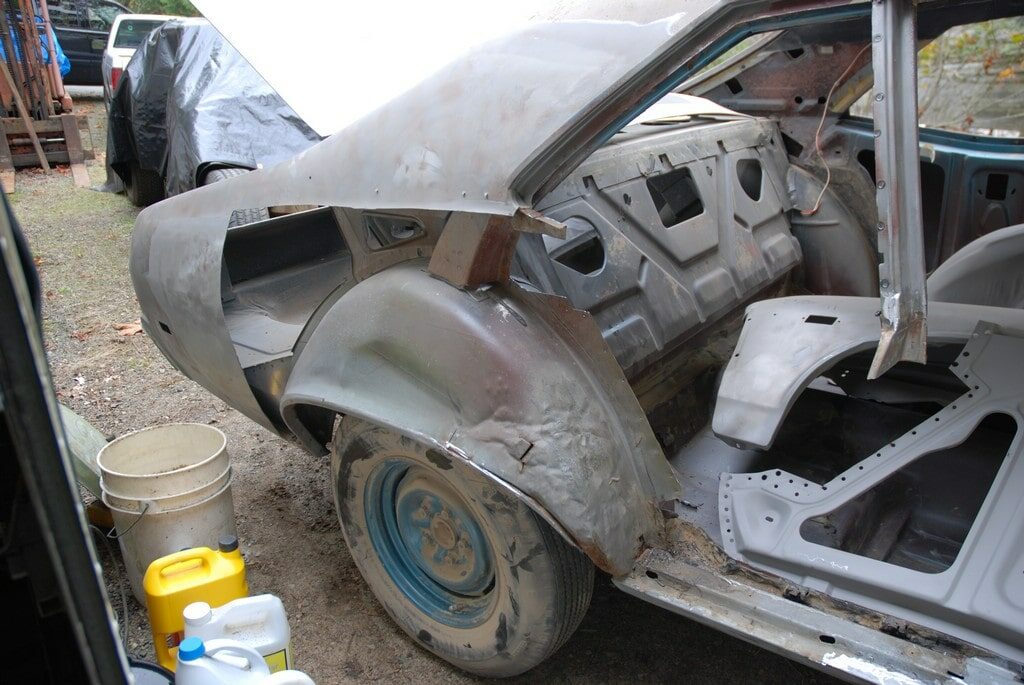
BODY: Take a walk or two around the car before beginning the evaluation. By using this method, you can make mental notes of areas that might need a bit more inspection. Checking the body is split into three separate sections – Rust, Accident Damage and Poor Repaints.
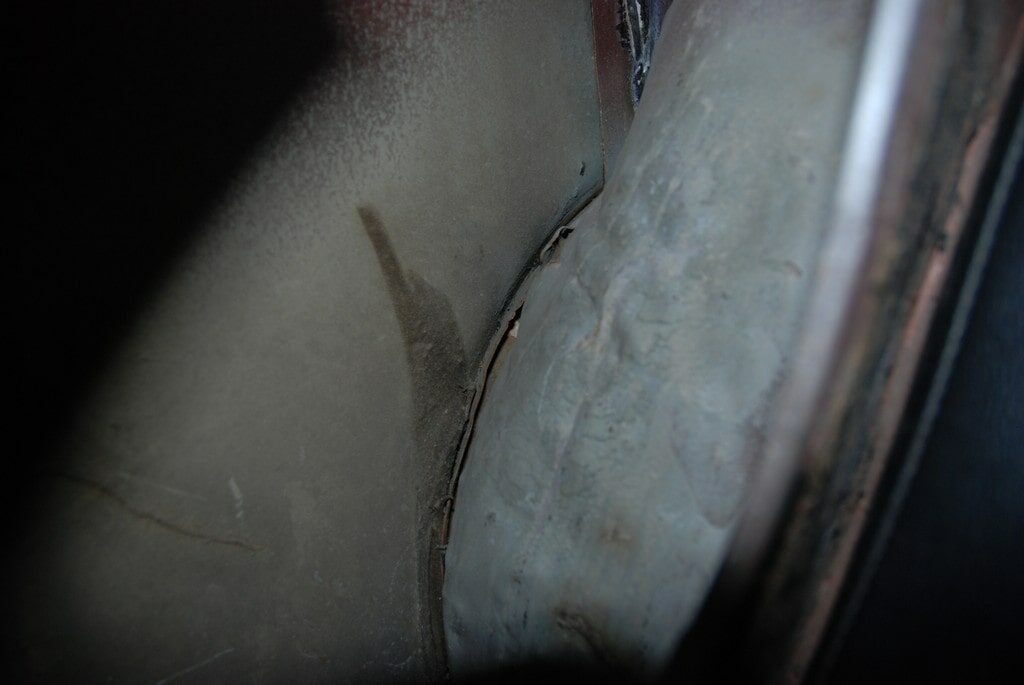
Rust: It shouldn't come as a surprise to you that more than a few potential project cars have been ravaged by rust. This section is devoted to locating potential trouble spots:
(1) Windshield Base - Top of Instrument Panel
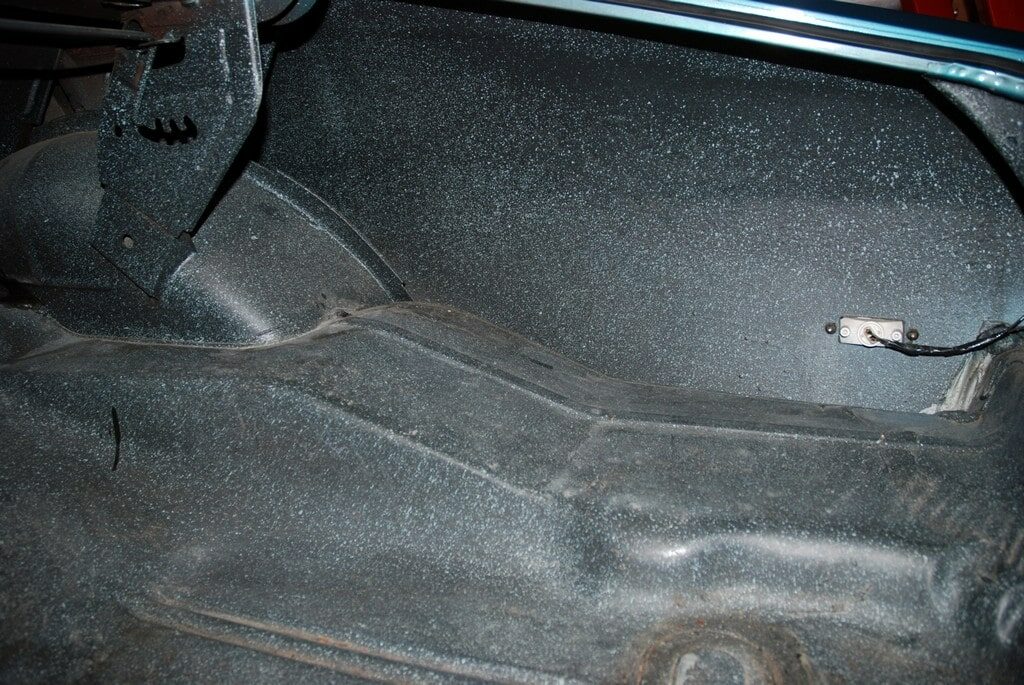
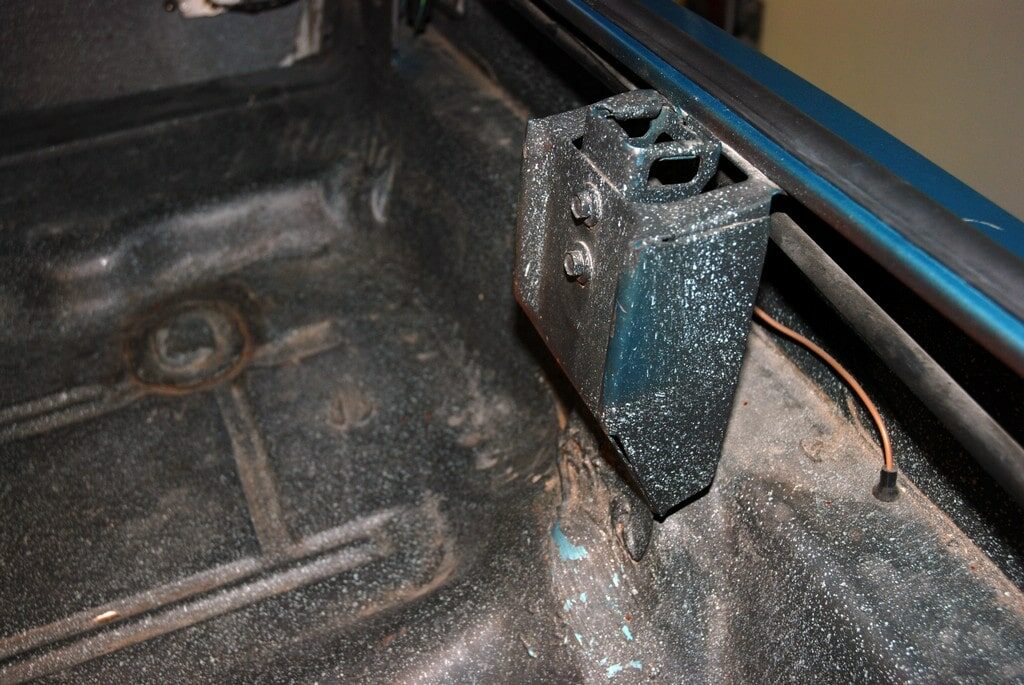
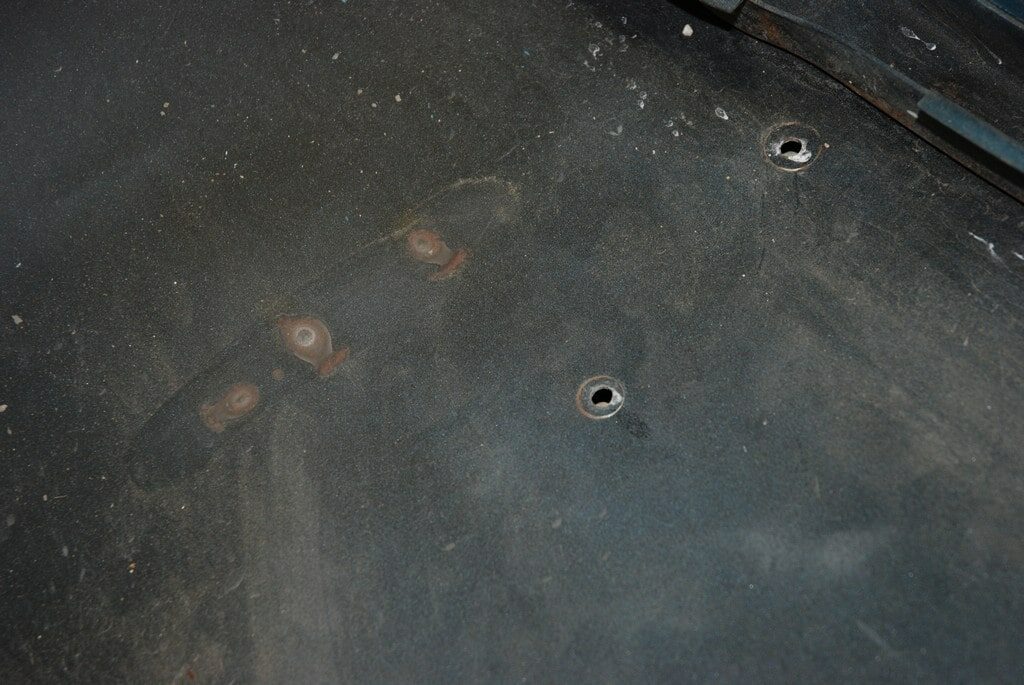
(2) Trunk, Trunk Floor & Inner Rear Quarter Panel Rust
(3) Lower Front Fender - Behind Wheel well
(4) Rocker Panels, Door Jambs, Base of Doors
(5) Rear Wheel Wells - Outer Quarter Panels
(6) Base of Rear Window
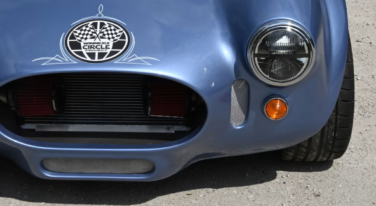
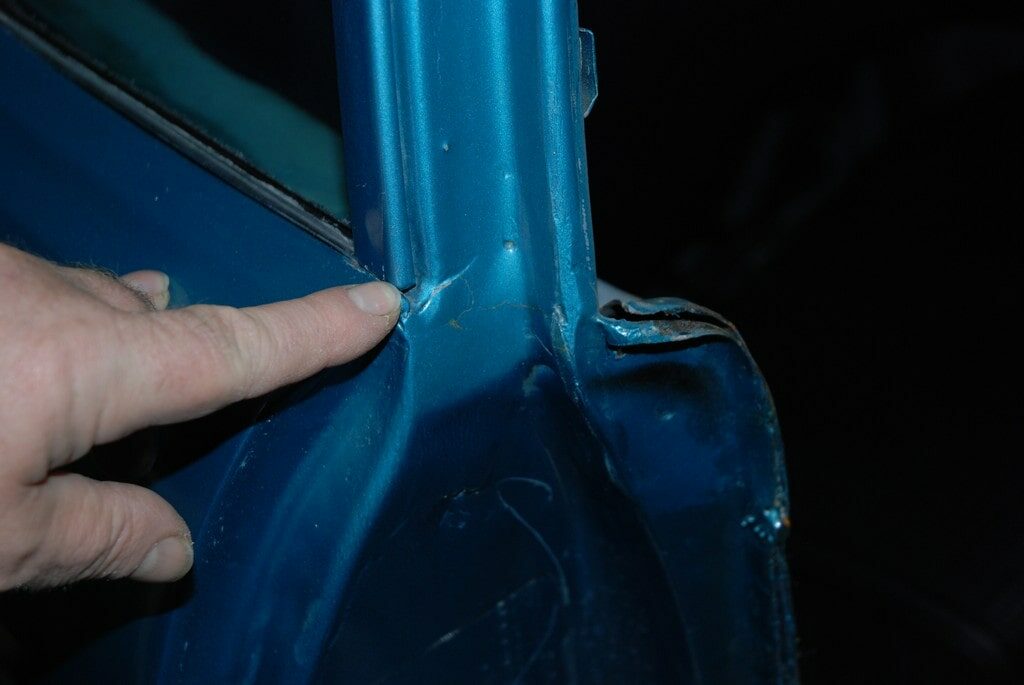
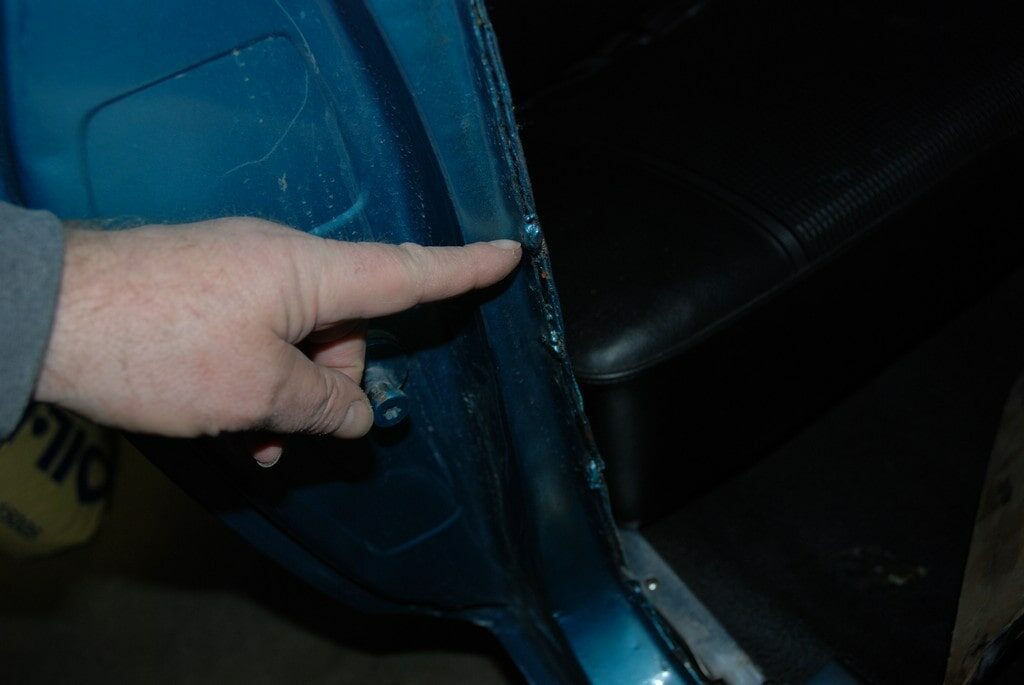
Accident Damage: Aside from rust, the next common area that causes big trouble is prior accident damage. Look for buckled panels, evidence of non-factory welding, splicing, filler, etc. This is also a good time to examine trim, lamps, emblems and so on:
(1) Firewall and Under Hood Areas
(2) Door Hinge Areas
(3) Door Pillars and Jamb Areas
(4) Inside The Rear Fender Quarter Panel
(5) Poor Panel Fit:
(6) Trunk (pay attention to the floor and quarters)
(7) Bumpers & Brackets
(8) Window & Other Trim, Emblems
(9) Headlamps, Tail Lamps, Marker Lamps
Poor Repaints: It's no secret that some paint shops are better than others, but unless you examine a car closely, a $500 paint job might look as good as a $15,000 dollar version - from twenty feet away. This is one big reason yours truly now only buys original paint cars (you’ll see why in the accompanying photos). None-the-less, check the following areas:
(1) Over-sprayed "Fuzzies"
(2) Door Jambs & particularly hinge pillars
(3) Handles, Lock Cylinders and Other External Weatherstrip
(4) Engine Compartment (look at the sheet metal seams, search for overspray)
(5) Trunk (look at the lid and the weatherstrip along with visible wiring harnesses)
INTERIOR: The interior can normally provide a multitude of clues regarding the past history of the car. Look for abnormal wear or recently replaced items (keeping in mind that reproductions for many interior bits are readily available).
(1) Pedal Pads
(2) Steering Wheel & Column
(3) Carpet Heel Pad & Carpet
(4) Door panels (pay careful attention to lower door panels)
(5) Instrument Panel & Controls
(6) Window Moldings
(7) Package Shelf
(8) Seats, front and rear
(9) Center Console
(10) Weatherstrip
ENGINE & ENGINE COMPARTMENT: Check for cleanliness, evidence of “dealer detailing” (many dealership detail shops “spray” engine compartments after cleaning to add luster). Much like the body, before you dig into the engine compartment with a step-by-step evaluation, give it a cursory examination.
(1) Fluid Levels
(2) Battery & Charging System
(2) Radiator, Water Pump, Fan, Coolant Overflow, Cooler Lines, Hoses
(3) Valve Covers, Oil Filler Cap & PCV
(4) Fuel System (air cleaner, carburetor, mechanical fuel pump)
(5) Exhaust Manifolds, A.I.R. System
(6) Distributor& Ignition System
(7) Accessories (heater, air conditioning, cruise control, power steering etc.)
(8) Windshield Wipers & Washers
(8) Linkages & Latches (carburetor, shifter, hood mechanism, etc)
(9) Inner Sheetmetal, Hood
(10) Wiring Harness, Electrical’
(11) Brake Master Cylinder, Booster, Brake Lines
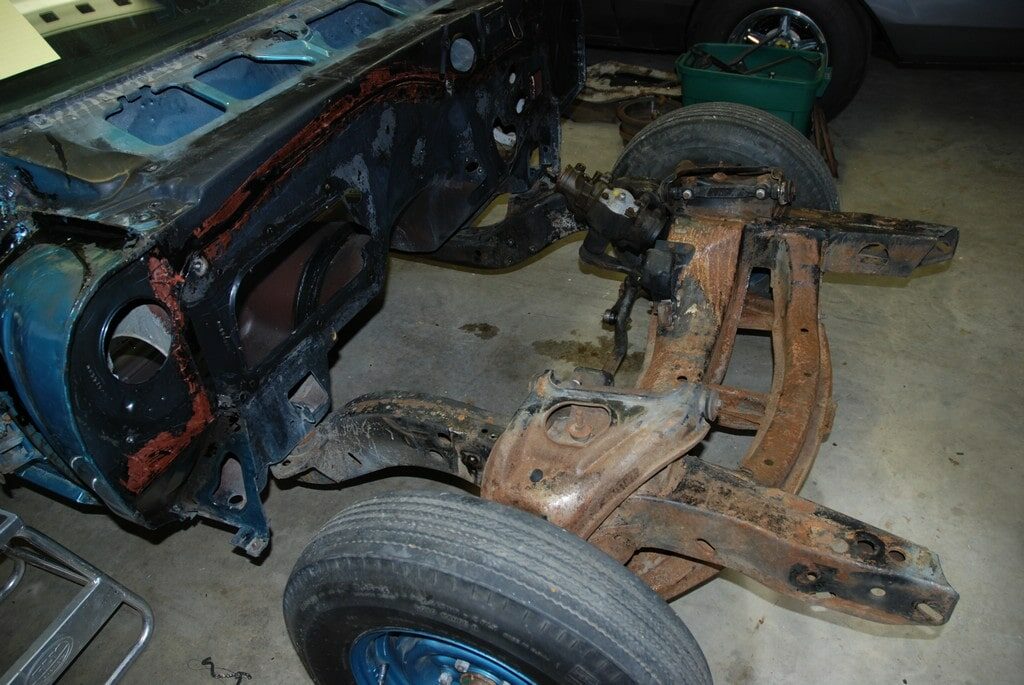
UNDERCARRIAGE: If the car passes the above, then most good appraisers will climb underneath and check the following, looking for major damage (accident) and rust, leaks, replacement components and so on:
(1) Gas Tank, Fuel Lines
(2) Stabilizer Bars, Steering Linkage
(3) Shocks & Springs
(4) Rear Axle
(5) Transmission
(6) Control Arms & Trailing Arms
(7) Frame (subframe)
(8) Exhaust System
(9) Body Mounts
(10) Brake Hoses, Brake Lines, Park Brake Cables
WHEELS & TIRES: The final portion of a static evaluation targets the rolling stock, including the spare. Look for unusual wear patterns, a spare with wear on a low mileage car, loose or missing lug nuts and so on. Examine the jack. It can provide clues of a car’s true mileage.
(1) Tires
(2) Wheels, Trim Rings, Center Caps
(3) Lug Nuts
(4) Spare Tire (if space saver, look for filler bottle)
(5) Jack, Jack Handle, Jack Base (examine attachment hardware)
Next time, we'll talk about transporting your car, including an awful experience I had trying to do just that - and how you can avoid repeating my mistakes! We'll finish by discussing resources for getting everything just right on your new build.
Last week we started with a look at the basics of evaluating project cars (documentation, and particularly documentation that matches the VIN). This time around, the evaluation will expand almost exponentially:
What To Look For…
So what does the appraiser look for? Different appraisers have different tactics, and each situation demands a different approach. In many cases, a road test is not possible. As a result, the appraiser often goes over the car “stationary.” Truthfully, after completing the stationary evaluation, good appraisers already have a very healthy idea of what they’re dealing with. The following is a checklist of sorts for things a skillful appraiser will go over without starting the car or even turning on a switch. It’s also something you can use to evaluate a car personally:
Appraisal Check List
BODY: Take a walk or two around the car before beginning the evaluation. By using this method, you can make mental notes of areas that might need a bit more inspection. Checking the body is split into three separate sections – Rust, Accident Damage and Poor Repaints.
Rust: It shouldn't come as a surprise to you that more than a few potential project cars have been ravaged by rust. This section is devoted to locating potential trouble spots:
(1) Windshield Base - Top of Instrument Panel
(2) Trunk, Trunk Floor & Inner Rear Quarter Panel Rust
(3) Lower Front Fender - Behind Wheel well
(4) Rocker Panels, Door Jambs, Base of Doors
(5) Rear Wheel Wells - Outer Quarter Panels
(6) Base of Rear Window
Accident Damage: Aside from rust, the next common area that causes big trouble is prior accident damage. Look for buckled panels, evidence of non-factory welding, splicing, filler, etc. This is also a good time to examine trim, lamps, emblems and so on:
(1) Firewall and Under Hood Areas
(2) Door Hinge Areas
(3) Door Pillars and Jamb Areas
(4) Inside The Rear Fender Quarter Panel
(5) Poor Panel Fit:
(6) Trunk (pay attention to the floor and quarters)
(7) Bumpers & Brackets
(8) Window & Other Trim, Emblems
(9) Headlamps, Tail Lamps, Marker Lamps
Poor Repaints: It's no secret that some paint shops are better than others, but unless you examine a car closely, a $500 paint job might look as good as a $15,000 dollar version - from twenty feet away. This is one big reason yours truly now only buys original paint cars (you’ll see why in the accompanying photos). None-the-less, check the following areas:
(1) Over-sprayed "Fuzzies"
(2) Door Jambs & particularly hinge pillars
(3) Handles, Lock Cylinders and Other External Weatherstrip
(4) Engine Compartment (look at the sheet metal seams, search for overspray)
(5) Trunk (look at the lid and the weatherstrip along with visible wiring harnesses)
INTERIOR: The interior can normally provide a multitude of clues regarding the past history of the car. Look for abnormal wear or recently replaced items (keeping in mind that reproductions for many interior bits are readily available).
(1) Pedal Pads
(2) Steering Wheel & Column
(3) Carpet Heel Pad & Carpet
(4) Door panels (pay careful attention to lower door panels)
(5) Instrument Panel & Controls
(6) Window Moldings
(7) Package Shelf
(8) Seats, front and rear
(9) Center Console
(10) Weatherstrip
ENGINE & ENGINE COMPARTMENT: Check for cleanliness, evidence of “dealer detailing” (many dealership detail shops “spray” engine compartments after cleaning to add luster). Much like the body, before you dig into the engine compartment with a step-by-step evaluation, give it a cursory examination.
(1) Fluid Levels
(2) Battery & Charging System
(2) Radiator, Water Pump, Fan, Coolant Overflow, Cooler Lines, Hoses
(3) Valve Covers, Oil Filler Cap & PCV
(4) Fuel System (air cleaner, carburetor, mechanical fuel pump)
(5) Exhaust Manifolds, A.I.R. System
(6) Distributor& Ignition System
(7) Accessories (heater, air conditioning, cruise control, power steering etc.)
(8) Windshield Wipers & Washers
(8) Linkages & Latches (carburetor, shifter, hood mechanism, etc)
(9) Inner Sheetmetal, Hood
(10) Wiring Harness, Electrical’
(11) Brake Master Cylinder, Booster, Brake Lines
UNDERCARRIAGE: If the car passes the above, then most good appraisers will climb underneath and check the following, looking for major damage (accident) and rust, leaks, replacement components and so on:
(1) Gas Tank, Fuel Lines
(2) Stabilizer Bars, Steering Linkage
(3) Shocks & Springs
(4) Rear Axle
(5) Transmission
(6) Control Arms & Trailing Arms
(7) Frame (subframe)
(8) Exhaust System
(9) Body Mounts
(10) Brake Hoses, Brake Lines, Park Brake Cables
WHEELS & TIRES: The final portion of a static evaluation targets the rolling stock, including the spare. Look for unusual wear patterns, a spare with wear on a low mileage car, loose or missing lug nuts and so on. Examine the jack. It can provide clues of a car’s true mileage.
(1) Tires
(2) Wheels, Trim Rings, Center Caps
(3) Lug Nuts
(4) Spare Tire (if space saver, look for filler bottle)
(5) Jack, Jack Handle, Jack Base (examine attachment hardware)
Next time, we'll talk about transporting your car, including an awful experience I had trying to do just that - and how you can avoid repeating my mistakes! We'll finish by discussing resources for getting everything just right on your new build.
Great info, thank you.