

To old school hot rodders, there’s nothing more pleasing than the sound of a four barrel carburetor’s secondaries opening wide and sucking in more air and fuel. However, it pains me to admit that carburetors aren’t perfect. They aren’t “set and forget” components by any stretch of the imagination. Typically, they are “set at home” and “set between each pass at the track” components. In this article, we’ll take a look at how to convert from carburetion to fuel injection and how it can enhance the performance of your ride.
There’s also the issue with proper atomization of the air-fuel mixture for optimal combustion and the fact that carbs are extremely difficult to make really fuel efficient while still producing gobs of power. Typically you have to choose between one of the two: either you make gobs of power or you get decent fuel mileage. Carbs are also much easier to install big massive-horsepower-producing blowers on. However, there are manufacturers out now making big superchargers that can produce huge amounts of power with pretty fuel efficient fuel-injected engines. LS engines and Vortech Engineering’s LS-Swap Series supercharger kits are two excellent examples.
In this article we’re going to walk you through the basic steps of converting from a carbureted engine to a fuel injected engine.
Your Available Choices in Fuel Injection Systems
There are three basic types of fuel injection systems on the market today, each more complex than the other. There are variations of each, but we won’t be going into them. Throttle body injection is the quickest and easiest to install. The next is Multiport Fuel Injection. Finally, we have Direct Injection.
The easiest way to describe Throttle Body Injection (TBI) is that it simply replaces the carburetor on your intake manifold. There are some extra things you need to do, which I will describe below, but that’s basically it: Pop off the old carburetor and install the TBI unit and the air intake components.
Multiport Fuel Injection (MFI/MPFI) is quite different. Everything from the heads up has to be replaced. The intake manifold up to right in front of the intake ports is just for air. Each air runner of the manifold has a port that the injector fits into. This one requires a more complex control system than TBI does.
Direct Injection (DFI/DI) is even more complex. The injectors are mounted in the heads, not the intake manifold and they inject the fuel directly into the combustion chamber. This means the injectors have to be more robust-they have to be able to handle the temperatures and pressures seen in the combustion chamber, than MPFI) injectors do. Not only do you need a new intake manifold for this type of fuel injection system, you also need new heads that have the injector ports in them. Direct Injection conversion is a big job requiring new heads and at least a full day in the shop. It’s not something I recommend for the average hot rodder due to its complexity. I pay people to install is type of system for me.
Converting to a TBI System
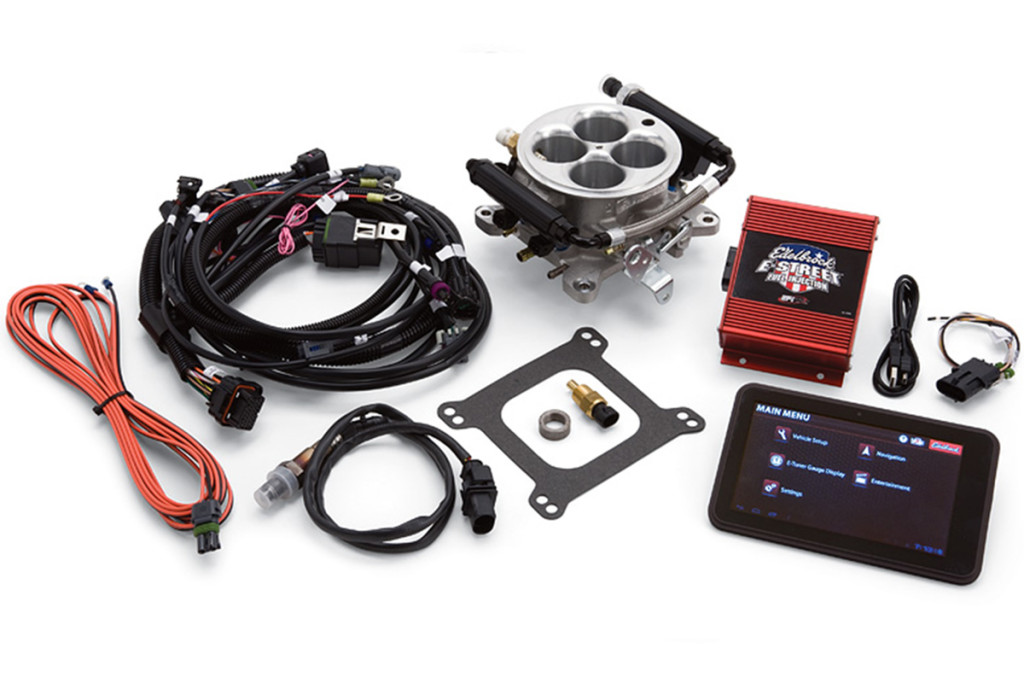
You don’t have to, but you can install a new intake manifold if you’re converting to a TBI system. You’ll need a TBI conversion kit such as Edlebrock’s E-Street EFI system. This kit has everything you need, including the controller and oxygen sensor. It’s even got a seven-inch Android tablet to help you fine tune the system once it’s installed for optimal performance. It’s recommended, but not necessary to install an electric fuel pump that supplies more pressure than your stock mechanical fuel pump is capable of and bypassing the stock pump, but with this type of kit, it’s not a requirement.
The conversion process is simple. All you need is a couple wrenches, wire cutters/strippers/crimpers and maybe a drill and drill bit.
- Label and disconnect everything from your carburetor and then remove carburetor.
- Carefully clean the remnants of the gasket from the manifold, unless you’re installing a new manifold.
- Find a location to mount the control module and securely mount it in that location.
- Route your wiring as required. This may require you to carefully drill a hole in the bulkhead.
- Mount the TBI injector unit where the carburetor was.
- Connect the vacuum lines and throttle cable.
- Install the Oxygen sensor. You may need a new y-pipe with an O2 sensor mount. If you’re going dual exhaust, you’ll need to mount two O2 sensors, one in each header.
- Connect the O2 sensor(s) and all other wiring between power, the control module, and the injector unit.
- Stick your air cleaner back on (Yes, you get to keep your old air cleaner if you want.).
- Start the engine and use the included tablet to tune the system for optimal performance.
Installation time here, without swapping the manifold, should be less than two hours.
Converting to Tuned Port/Multiport Fuel Injection (TPI/MPFI)
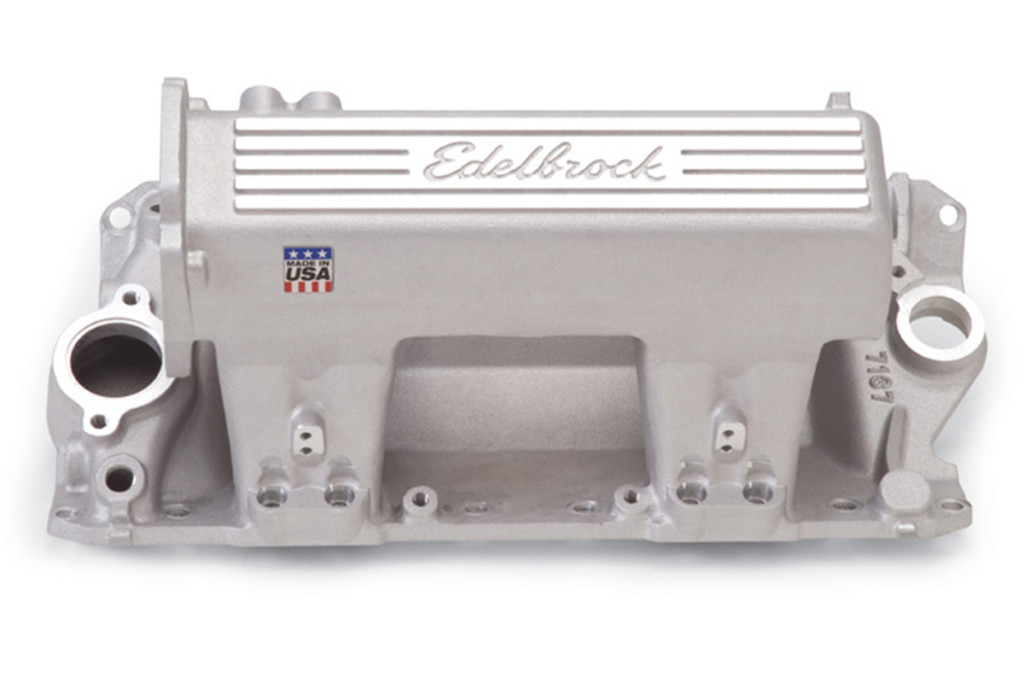
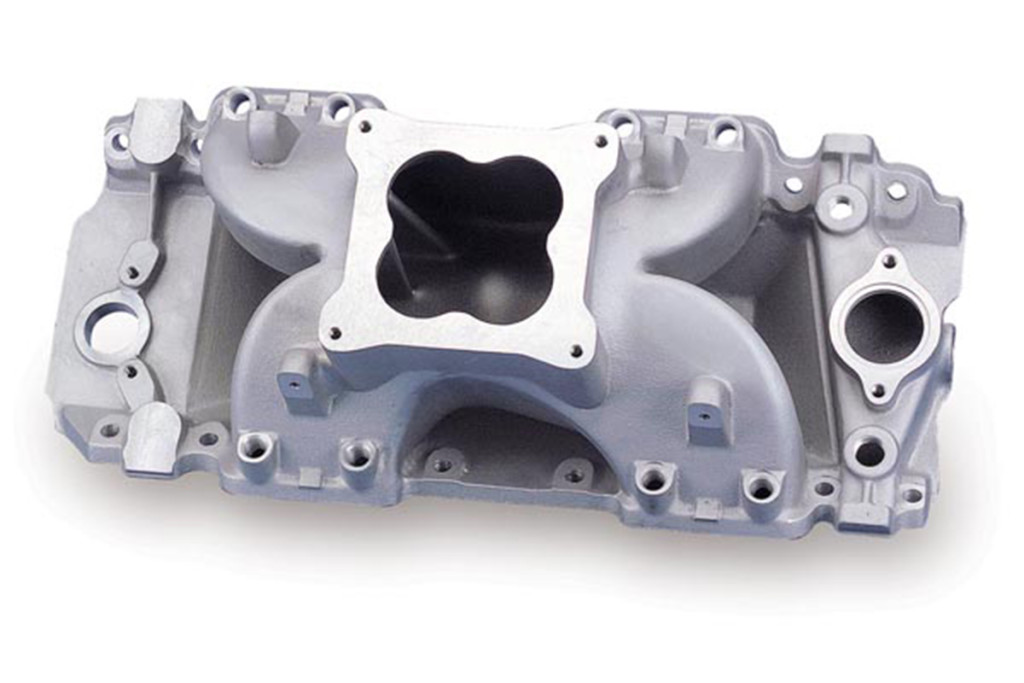
This process is a little more involved. First, you’ll need a special TPI/ MPFI manifold like this one from Holley/Weiand. You’ll notice on this manifold that it has what looks like openings for two carburetors. This is just where the air going to two sets of two cylinders travels for better velocity control. At the bottom of those “legs” are two openings each. This is where the injectors go. Just above each of those two openings you’ll find a location where the fuel rail bolts to the manifold. This secures both the fuel rail and the injectors in place.
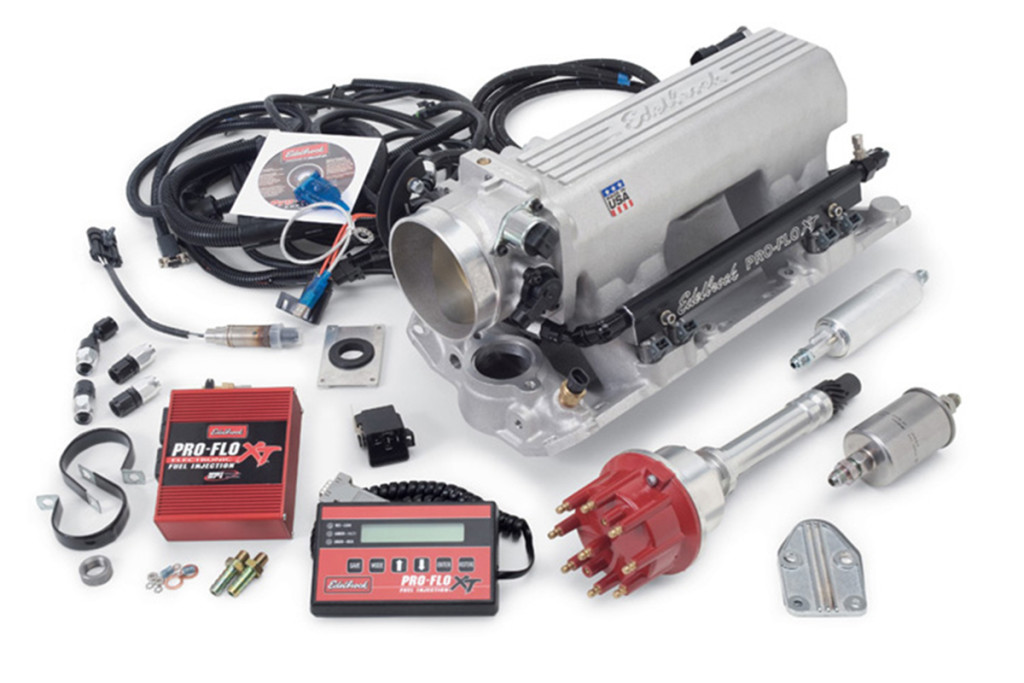
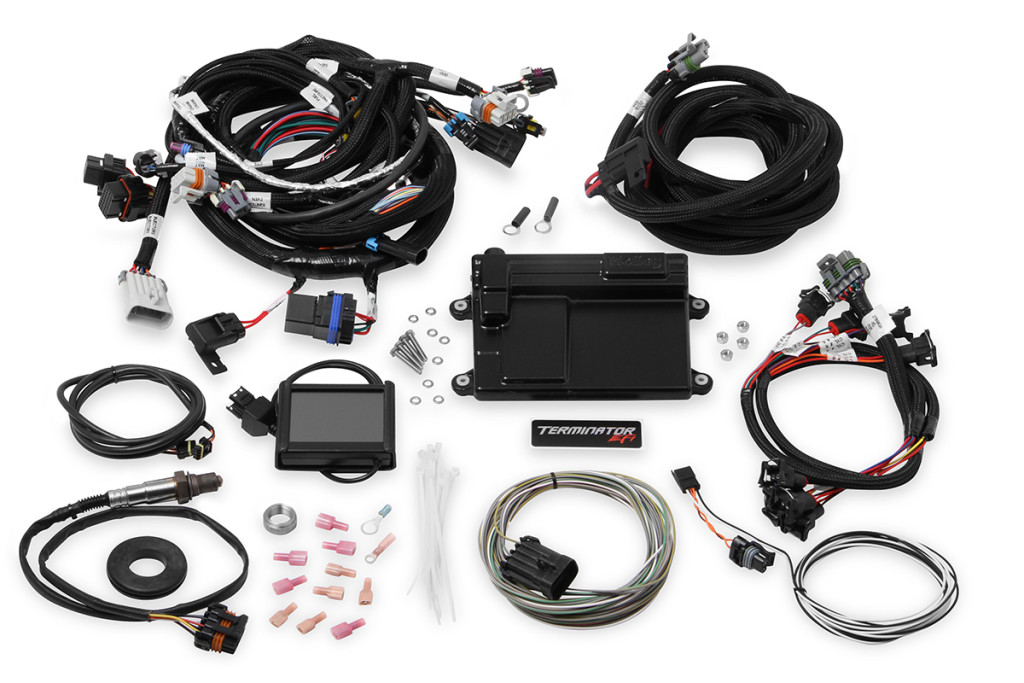
You can also pick up an almost complete kit from someone like Holley that has everything but the fuel injectors. There are also kits available that include everything but the intake manifold. No matter which way you go, once you’ve got all the parts on hand and are ready to go, the installation process isn’t hard, but requires you to have about three to four hours uninterrupted. Tools required are the same as for TBI except you MUST have a torque wrench and gasket scraper/cleaner, plus gasket sealants such as High Tack Gasket Sealant from Permatex and your favorite regular gasket sealer like RTV Blue or Black. You SHOULD also use line wrenches for the fuel line fittings so as to not damage them.
- You may or may not need to remove the valve covers in order to pull the intake manifold. If so, do this now.
- Label and disconnect the carburetor, vacuum tree, thermostat and housing, and the choke, if so equipped.
- Label and disconnect the low voltage wiring from the distributor.
- Pop and remove the distributor cap and set it aside.
- Remove the distributor, making note of where the rotor is pointing for reinstallation.
- Remove the intake manifold and carb as a unit, making sure to remove the bolts from the center outward. This keeps the manifold from warping.
- Place some clean rags in the intake/lifter valley to keep crud from falling in.
- Carefully clean the old gasket from around the intake ports. Be careful to keep as much of the old gasket as possible from falling into the water jacket, intake ports, and the lifter valley.
- Paint the mating surfaces of the heads and intake with the high tack sealant and place the intake gaskets on the heads.
- If end seals were not included, use O2 sensor-safe RTV to create ¼ inch end seals at the front and rear of the block.
- Carefully place the intake manifold over the gaskets without moving the gaskets.
- Depending on what engine you’ve got, you may need to put RTV or threadlocker on the manifold bolts prior to installation.
- Thread the bolts into place BY HAND.
- Following the directions on the instruction sheet, torque the bolts, in the proper order, the half of the required torque setting. Only pull on the torque wrench until you hear and feel it click then stop.
- Reset the torque wrench to the final torque setting and, following the proper sequence again, torque the intake bolts to the final setting.
- Reinstall the distributor, making sure to align the rotor so it points where it did prior to removal. Don’t tighten the hold down clamp yet. You’ll need it loose to time the engine when done.
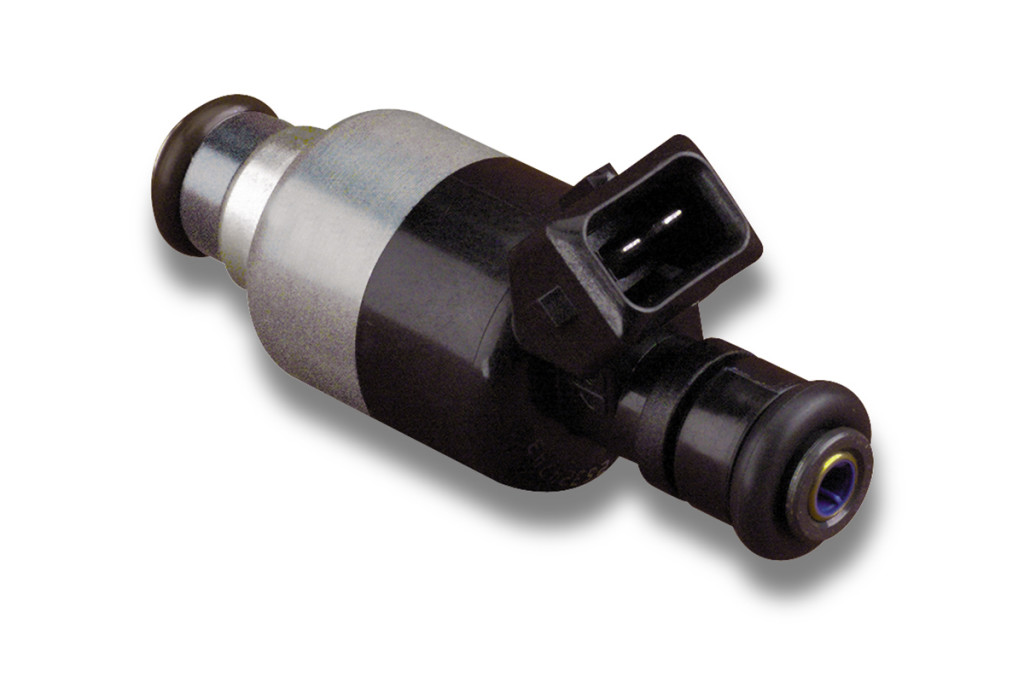
- Carefully lubricate the O-rings on the injectors with either O-ring lube or plain motor oil and carefully install them in the fuel rails.
- Carefully install the fuel rail, making sure each of the injectors seats fully into its corresponding opening and the O-rings aren’t damaged.
- While pushing down slightly on the fuel rails, reinstall the rail retainer bolts/screws and tighten them to the specified torque, if any.
- Make sure the fuel fittings and plugs are tight.
- Install the front crossover tube, if required. Start the threads on the fittings by hand and then use a line wrench
- Check the Schrader valve and fuel pressure regulator to be sure they’re tight.
- Disconnect the fuel lines from the stock mechanical fuel pump on the side of the engine.
- Install plugs in the fuel line fittings on the pump. Conversely, you could remove the old pump and install a fuel pump block off plate. This looks better.
- Install the air intake tunnel, if your kit came with one. If you bought a different type of kit, hook up the air inlet tubing at this time.
- Some kits will require you to hook up lines to the fuel pressure regulator reference, MAP, and other parts and sensors such as the throttle position sensor. Do this at this time.
- Mount the new high pressure high volume electric fuel pump. You may have chosen to retrofit your old fuel level sending unit I the tank to a combination fuel pump and sending unit. If you have, skip this step.
- Install the new fuel filter.
- Connect the high pressure fuel lines to the fuel rail inlet.
- Connect the fuel return lines to the fuel lines returning to the fuel tank.
- Mount and tighten the throttle body and Idle Air Control Motor assembly.
- Hook up the throttle linkage.
- Mount and hook up the fuel injection control unit.
- Install the fuel injection-specific oxygen sensor(s) and connect it (them) to the control unit.
- Install the thermostat, housing, and gasket. Be sure to use RTV Blue or Black to ensure a good seal.
- Install the new coolant temperature sensor in the manifold. Use Teflon tape for this. Connect the wiring to the control module.
- Following the directions with the kit, hook up all vacuum lines.
- Double check everything to be sure you’ve forgotten nothing and everything is as it should be.
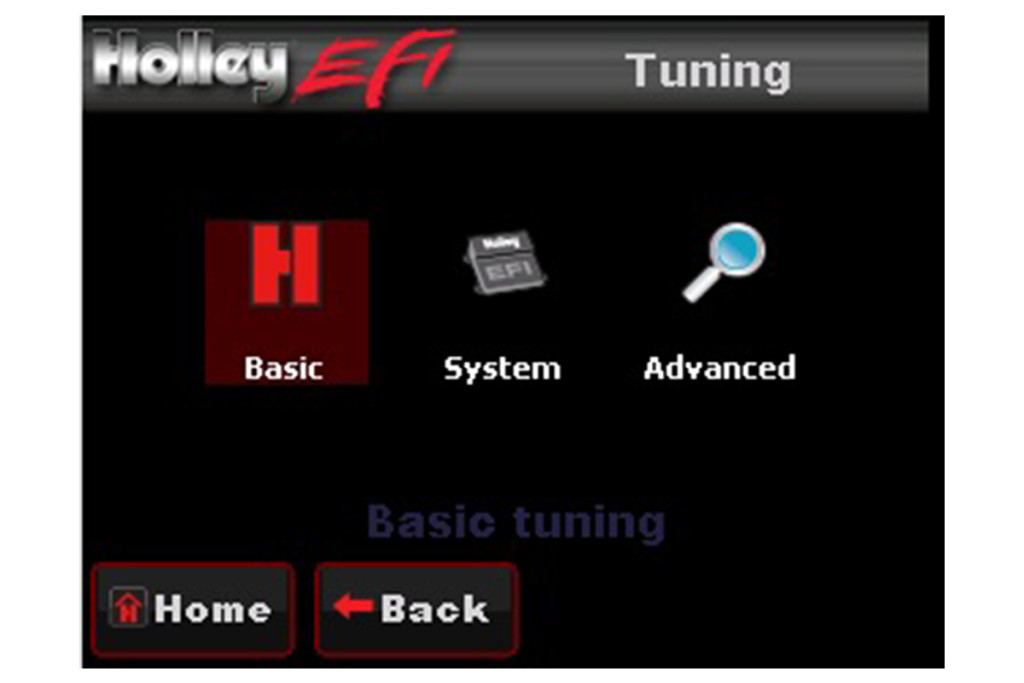
- Fire it up, time it, and tune the injection system following the directions with the kit.
I may have skipped some steps that are required for your car or particular system. As I said, I can’t cover everything for everyone, I can give you the basics so you can decide whether this is something you can tackle on your own or you should pay someone to do it for you. Holley and Edelbrock fuel injection kits come with complete directions that just about anyone can follow. Read through them twice and be sure you understand everything before beginning. Both companies also have good tech support departments that are ready and willing to give advice and tips over the phone when needed.
Leave a Reply