

![[Gallery] Mecum Kissimmee Auction 2026](https://www.racingjunk.com/news/wp-content/uploads/2026/03/DSC_0717-e1774629242515-376x206.jpg)
![[Gallery] Cruisin’ One Daytona](https://www.racingjunk.com/news/wp-content/uploads/2026/03/DSC_0538-e1774027057404-376x206.jpg)

Building Links Part 1
Click Here to Begin Slideshow
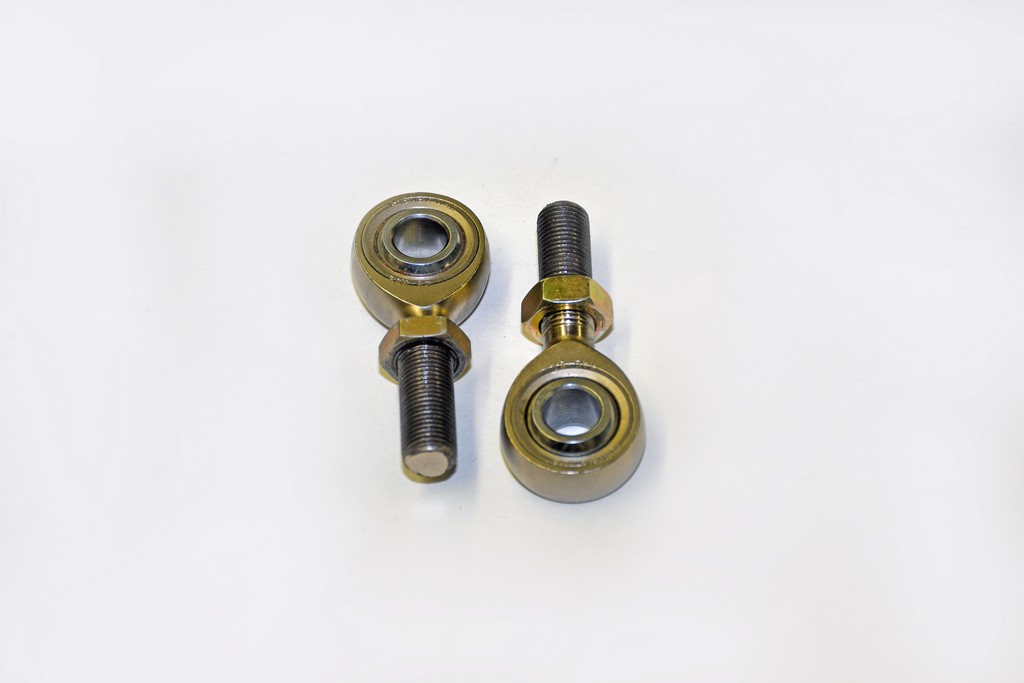
Building a set of adjustable ARB (anti roll bar) or stabilizer bar links isn’t a difficult task. You really don’t need mad fabrication skills to construct them and there are a lot of great quality parts readily available. But before we go any further, ponder the need for adjustable links in the first place:
Sway bars (stabilizer bars or ARBs) are found in a lot of different automotive applications. I’m into drag racing and over time, ARB’s have worked their way into many classes of competition. In essence, the ARB works to intervene as the chassis roll rotates on the launch. Sure, you can attempt to control this motion by using spring preload and messing with shock adjustment, or by adding airbags, but the real key here is to allow the springs to do their job (hold the car up and, in some cases, apply the forces necessary to allow the car to hook) and at the same time, allow the shock absorbers to do their job (control the motion of the spring).
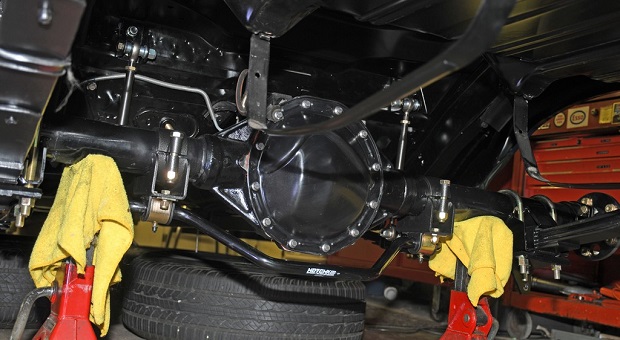
In operation, the ARB or sway bar is just another spring. As the car starts to roll rotate on the leave, the sway bar, which is attached to both sides of the rear end housing as well as to the chassis will twist and attempt to keep the left and right sides of the body level with the suspension. Without an ARB or sway bar, as the car starts to roll rotate on the launch, the rear passenger side of the body drops into the pavement and the driver side nose rises. Obviously, there’s a lot of wasted energy here, not to mention the potential to cause permanent damage to the car. The ARB is used to curb this motion. And most examples do it rather well.
When installed, the sway bar or ARB should be in a neutral position with no preload on either side when the car is on level ground and at ride height. And when discussing ride height, this means the car is at race weight with the driver (or driver’s weight) seated in the car.
What you want is the arms on both sides of the ARB to be positioned in such a way that the end links become perpendicular to the body. Another big issue with more conventional sway bars is the fact that the sway bar can come into contact with the rear end housing (bind) when the links are the wrong length. Those are the big reasons why adjustable links are important. Unfortunately, many mass-produced links are sold with incorrect link or “dogbone” lengths.
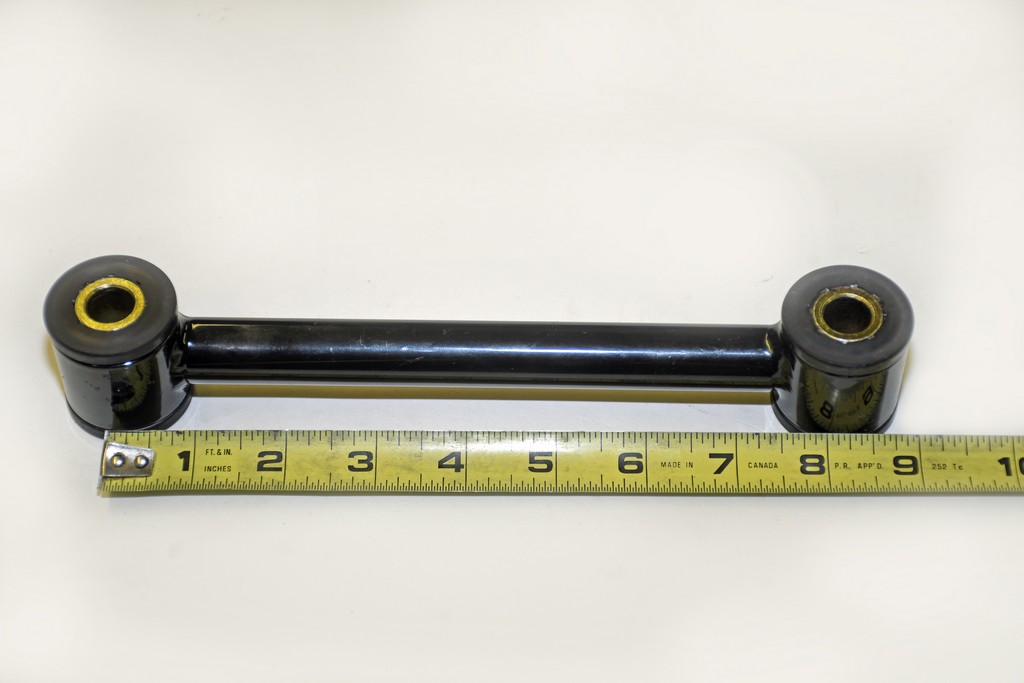
Fair enough, but how do you determine the length of the link? That’s the easy part: With the car on level ground at ride height and at race weight, position the sway bar ends parallel to the ground. Measure from the mounting point on the sway bar to the mounting point of the chassis. This is the length of the adjustable sway bar link that you need.
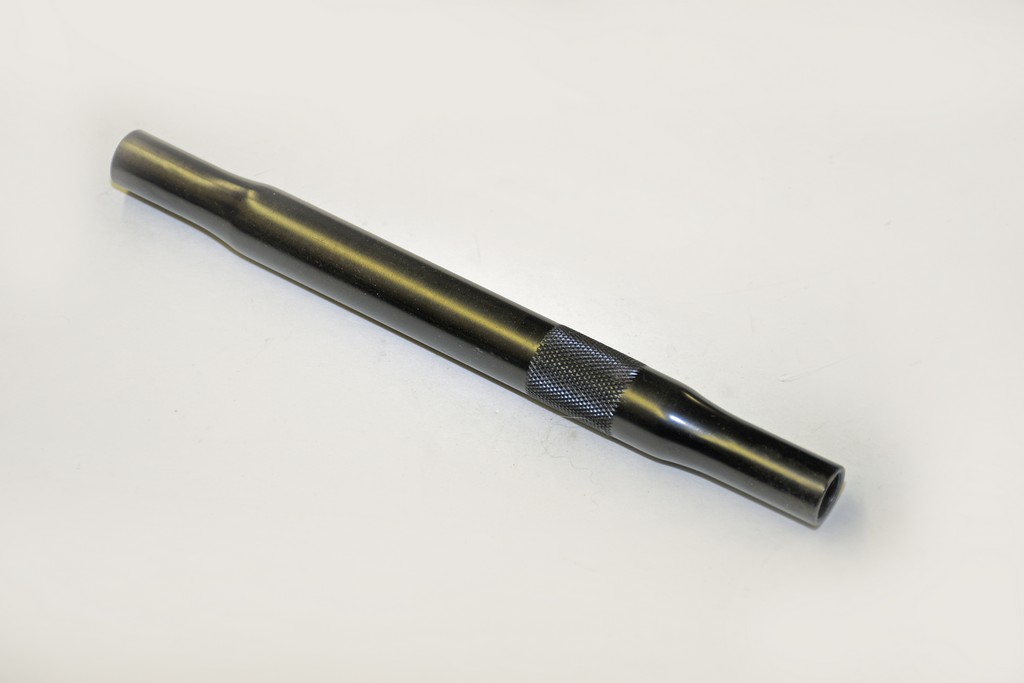
We'll have the second part of this series for you in the near future. Meanwhile, in the photos that follow, I’ll begin the process of building those links. Check it out:
Building a set of adjustable ARB (anti roll bar) or stabilizer bar links isn’t a difficult task. You really don’t need mad fabrication skills to construct them and there are a lot of great quality parts readily available. But before we go any further, ponder the need for adjustable links in the first place:
Sway bars (stabilizer bars or ARBs) are found in a lot of different automotive applications. I’m into drag racing and over time, ARB’s have worked their way into many classes of competition. In essence, the ARB works to intervene as the chassis roll rotates on the launch. Sure, you can attempt to control this motion by using spring preload and messing with shock adjustment, or by adding airbags, but the real key here is to allow the springs to do their job (hold the car up and, in some cases, apply the forces necessary to allow the car to hook) and at the same time, allow the shock absorbers to do their job (control the motion of the spring).
In operation, the ARB or sway bar is just another spring. As the car starts to roll rotate on the leave, the sway bar, which is attached to both sides of the rear end housing as well as to the chassis will twist and attempt to keep the left and right sides of the body level with the suspension. Without an ARB or sway bar, as the car starts to roll rotate on the launch, the rear passenger side of the body drops into the pavement and the driver side nose rises. Obviously, there’s a lot of wasted energy here, not to mention the potential to cause permanent damage to the car. The ARB is used to curb this motion. And most examples do it rather well.
When installed, the sway bar or ARB should be in a neutral position with no preload on either side when the car is on level ground and at ride height. And when discussing ride height, this means the car is at race weight with the driver (or driver’s weight) seated in the car.
What you want is the arms on both sides of the ARB to be positioned in such a way that the end links become perpendicular to the body. Another big issue with more conventional sway bars is the fact that the sway bar can come into contact with the rear end housing (bind) when the links are the wrong length. Those are the big reasons why adjustable links are important. Unfortunately, many mass-produced links are sold with incorrect link or “dogbone” lengths.
Fair enough, but how do you determine the length of the link? That’s the easy part: With the car on level ground at ride height and at race weight, position the sway bar ends parallel to the ground. Measure from the mounting point on the sway bar to the mounting point of the chassis. This is the length of the adjustable sway bar link that you need.
We'll have the second part of this series for you in the near future. Meanwhile, in the photos that follow, I’ll begin the process of building those links. Check it out:
Who makes a complete kit fro this assembly for 1969-1972 nova that’s been mini-tub