

![[Gallery] 3rd. Annual Father's Day Classic Car Show](https://www.racingjunk.com/news/wp-content/uploads/2026/07/Calistoga-2026-18-scaled-e1783026475349-376x206.jpg)


![[Gallery] Blackhawk Museum Stop Over](https://www.racingjunk.com/news/wp-content/uploads/2026/06/DSC_0918-e1782449621944-376x206.jpg)
How to Replace Your Brake Pads
Click Here to Begin
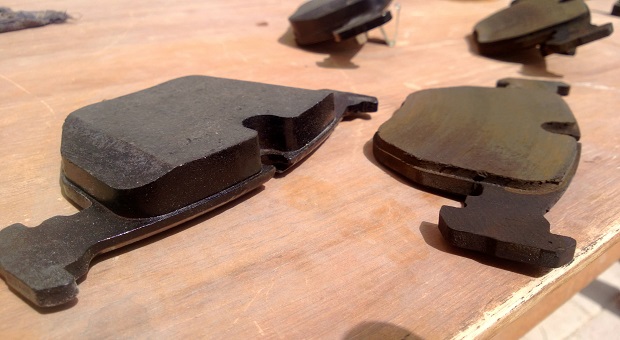
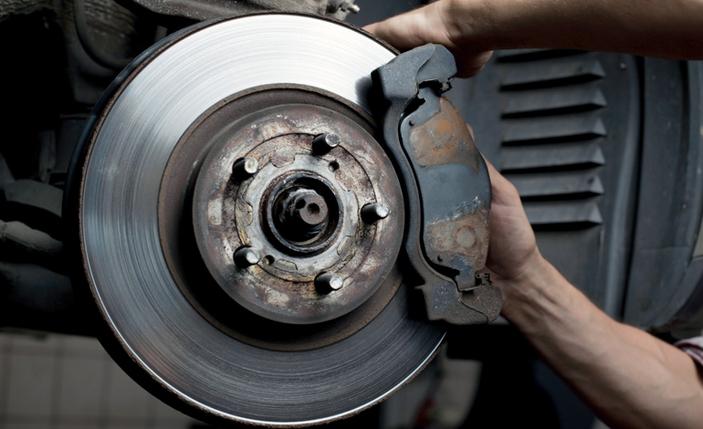
The brake pads are the hardest working components in your car; after all they do sacrifice themselves for you. The brake system is a pressurized system. When you step on the brake pedal, the pressure pushes the brake fluid through the brake lines, and then the fluid forces the brake calipers’ pistons to clamp down, causing the brake pads to rub on the brake rotors. The friction created by the pads and the rotors is what stops your car. Unfortunately, with such a difficult job, the brake pads don’t live forever. The average life for brake pads can vary from one driver to another. If you are heavy-footed on the brake pedal, then you might get 25,000 miles on the brake pads; however, if you take your time to stop and you are gentle with the pedal, it could last you up to 60,000 miles. Of course if you like to take your car on track then expect it to last no more than 25,000 miles, maybe even less. The guessing game is fun but there are other ways to tell if your pads need replacement. The rule is whenever you start hearing squealing noise when you step on the brakes then you may be in the market for new pads. Get comfortable with removing your wheel and checking the thickness on your brake pads. The minimum legal thickness for brake pads is one millimeter, so if your pads are near that then you should replace them. When you are purchasing new brake pads, think of your braking needs. There are different brake pads for different purposes. So if you like to use your car on the track, consider getting performance and track brake pads, if you hate brake dust, consider getting dust-free pads, and if you like completely silent pads, there is that as well. Learn what is important specifically for you, and then research the popular brands that make them. Most brake pad replacement procedures are the same; you just may need different socket sizes for the bolts. You should always replace the front brake pads together, the rear ones together, or all four together; don’t replace only one side. Read on to learn how to replace your brake pads.
Tools Required:
Jack
Jack stands
Tire iron
Socket set
Flathead screwdriver
C-clamp
New pads
Leave a Reply