Click Here to Begin Slideshow
With the tow vehicle figured out, the trailer figured out and the hitch and overall setup figured out, the final thing one should ponder are the tie down straps and key tie down accessories you’ll need (aside from a winch – someday we’ll zoom in on that).
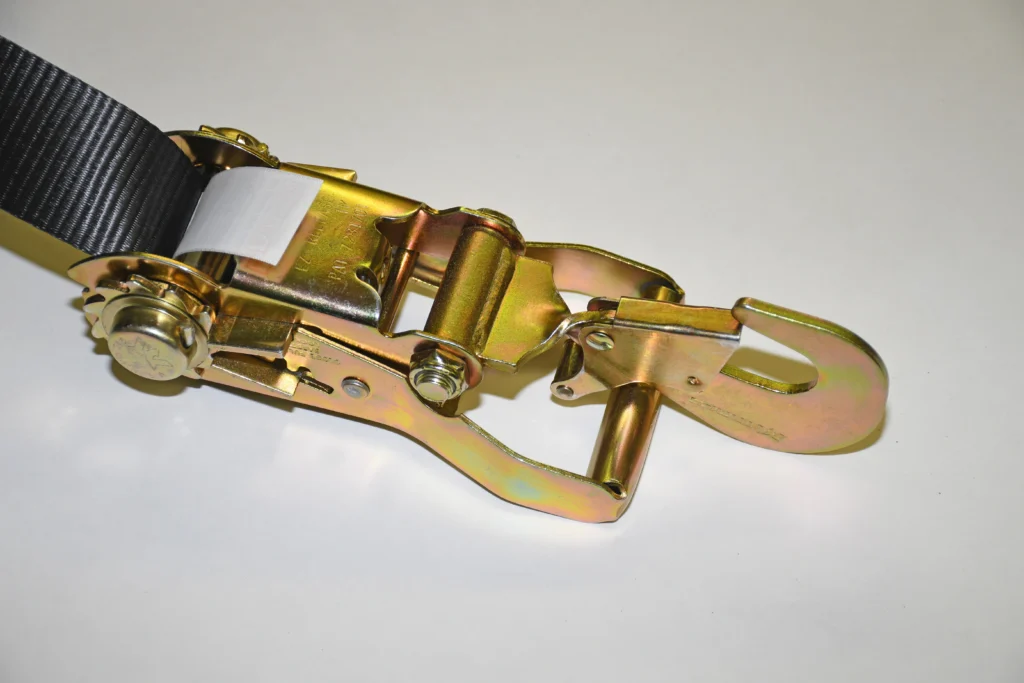
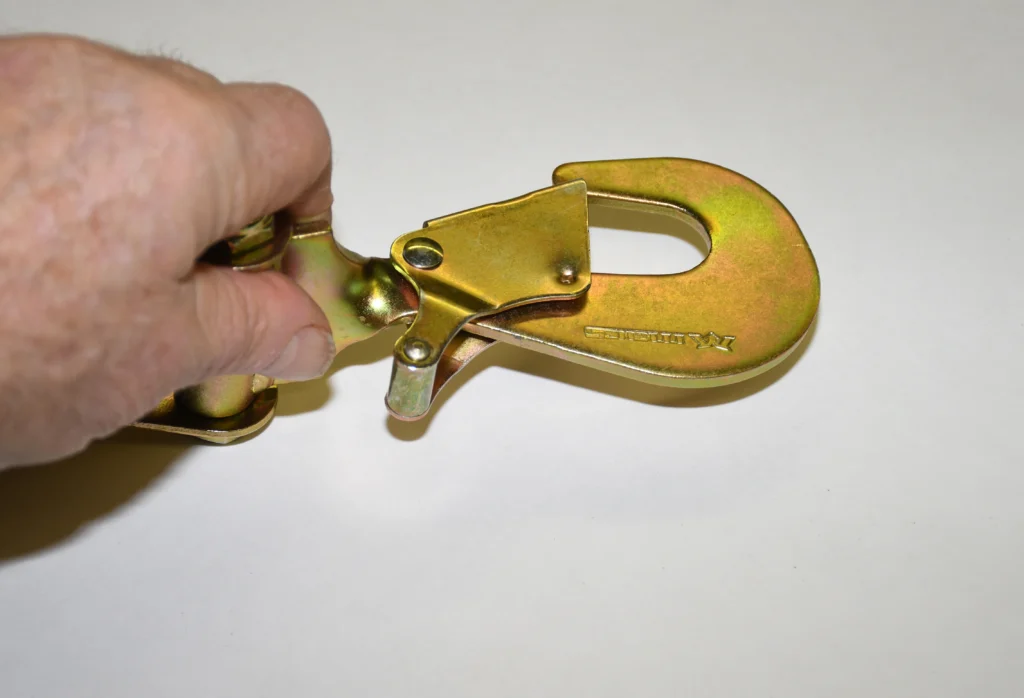
Of course, chains and load binders are an ancient option, but most folks use tie downs with webbing. There are a number of versions out there. You can buy tie downs with flat hooks or in a twisted hook configuration. Typically, a flat snap hook can place a twist in the webbing following the install. Meanwhile the twisted snap hook arrangement is (I believe) a far better choice for most vehicles and trailers. It allows you to line up things neatly in conjunction with the trailer anchor points. I use Mac’s tie downs for this reason. They also have a special “thumb release” (see the accompanying photos), that makes hook removal simple.
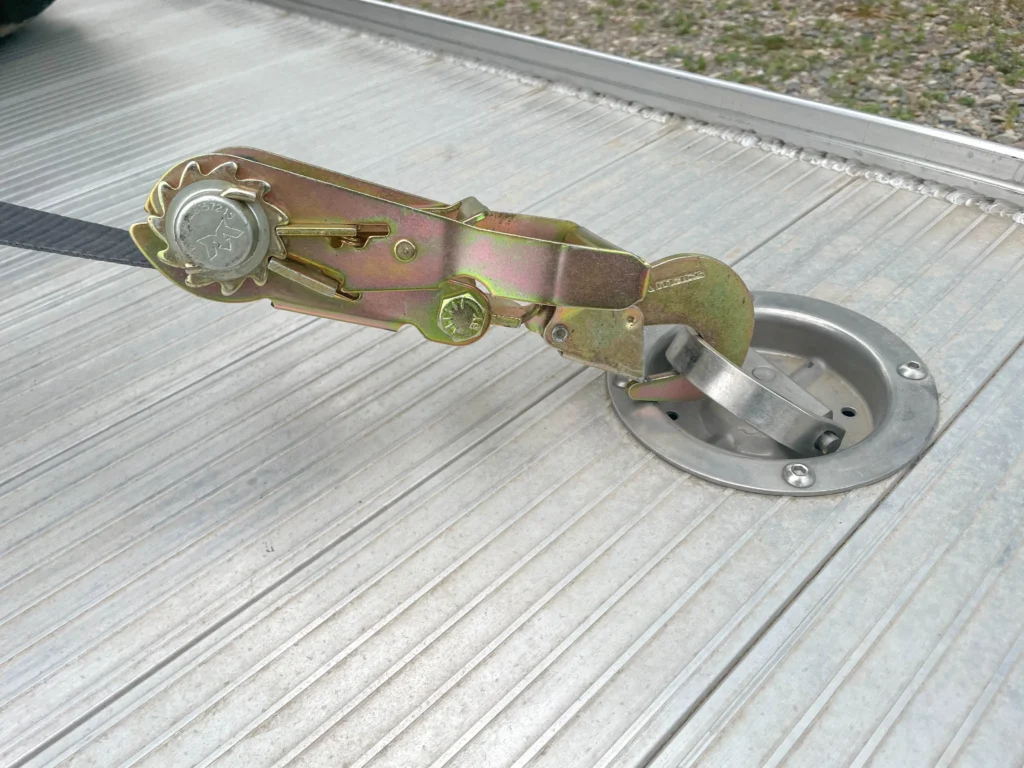
When it comes to the section of the tie down that attaches to the trailer, you can specify “sewn” or “direct hook” end configurations from Mac’s (their direct hook option is by far the most popular). Here’s the lowdown: The sewn end is the traditional end configuration, where a fixed length of webbing separates the attachment hook from the ratchet handle. On the other hand, the direct hook connects the attachment hook directly to the ratchet handle. This moves it away from the car, right next to the trailer “D” ring. This makes access to the ratchet handle much (much) simpler. Essentially, the “direct hook” design makes it far easier to adjust the tie downs because the ratchet mechanism isn’t buried up under the car. It saves lots of agony laying under the car (and that always seems to happen when it’s raining or miserably hot outside).
There’s more to the Mac’s tie downs: The layout is different. For example, the easy release ratchet handle eliminates any adjustment stickiness. The strap mandrel is free-wheeling and because of that, they were able to eliminate the “stiction” you’ll regularly find when adjusting most other ratchets. Their one piece handle design makes the Mac’s handle 40% more rigid and also helps to keep debris out of the mechanism. From my perspective, the handle design ends up being easier on your hands when releasing the ratchet.
The tie downs are available in a number of different lengths. Lengths are usually dependent upon your trailer, what you’re tying down and how you configure the straps. Six and Eight foot long tie down straps are probably the most common for passenger car setups. I have two of each.
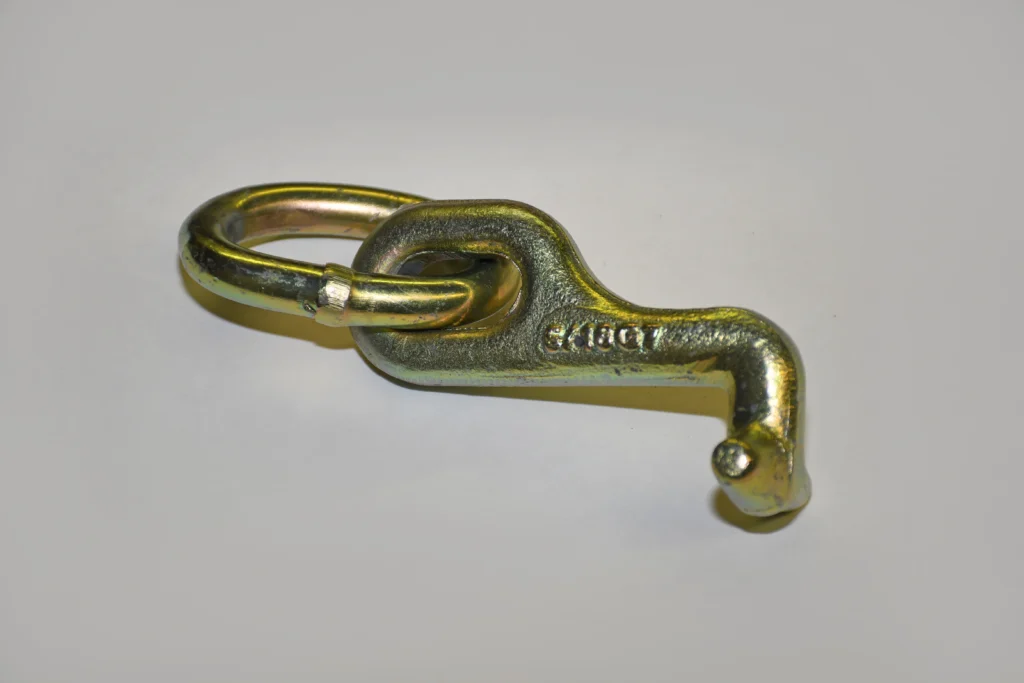
There are obviously a number of ways to attach the straps to the car. A slick idea Mac’s has is the forged t-hook. The t-hook configuration is designed to slip into the OEM tie down opening in the vehicle frame (this is where many cars – particularly older jobs are tied down when shipped from the factory to the dealership). A built in heavy duty link allows you to hook up the tie down strap.
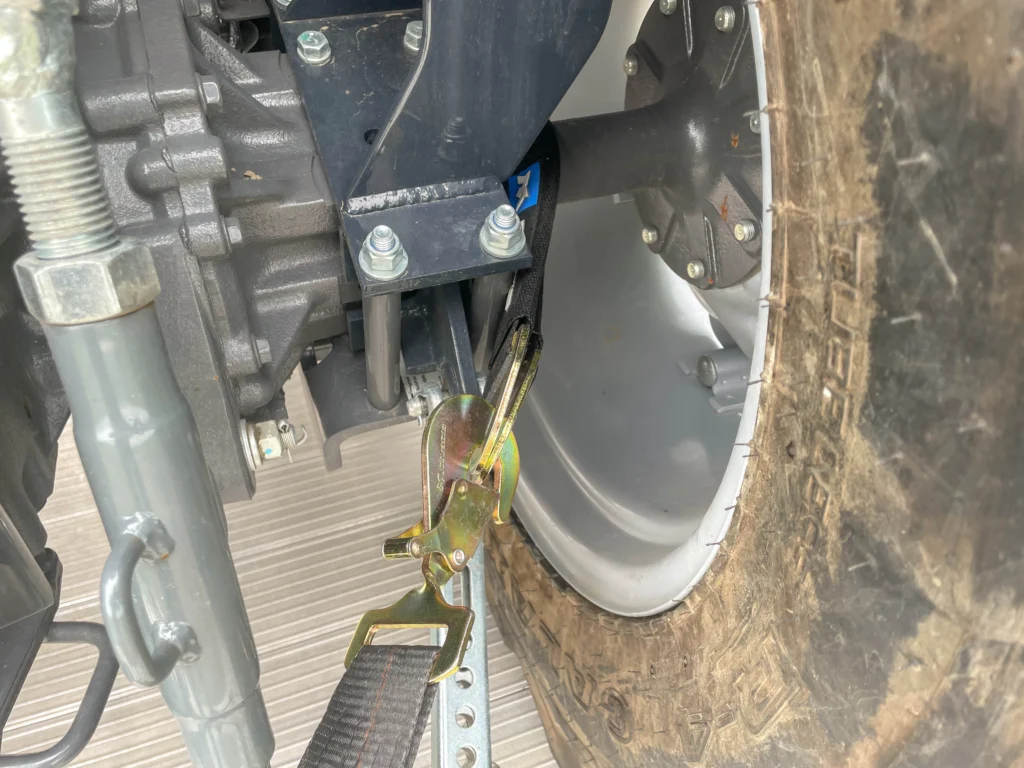
One more option (and one I prefer at the rear of the car) is a simple axle strap. And yes, I know the theory about tying down at the rear end housing and how it can heat up the shocks. So here goes: I once tested this with a good friend. I accompanied him to an NHRA Division 6 event. We traversed some of the worst (bumpy, frost heaved and pot-holed roads in the Pacific Northwest). We stopped about 100 miles into the journey and dropped the back door on the trailer to check the car (and almost 2 ton NHRA Stocker). The back end was tied down at the axle housing. The car hadn’t moved. Out of curiosity, we checked the back shocks. We didn’t need a temperature gun to tell us they were cool to the touch. But on the other hand, your results may vary. By the way, the trailer had torsion axles, and that makes a considerable difference.
But I digress. Mac’s manufactures axle straps with a sleeve for added protection. These axle straps are built with seamless Delta rings on both ends and they also have eight inches of stitching on both ends. The result is an impressive 10,000 pound capacity. You can see them in use in the accompanying photos.
For me at least, I’m glad the tie down industry has some innovations aimed squarely at folks like us. There’s more to tie downs than you might first think. For a better look, check out the accompanying photos:
Click Here to Begin Slideshow
Here’s a comparison between an old Moroso tie down (I’ve had them for oh – 45 years!) alongside a new high tech Mac’s tie down. Note the twisted hook layout on the Mac’s tie down. This keeps the straps from twisting. More info in the text.
In this photo you can see how the ratchet assembly is laid out at the very end of the tie down. This works perfectly for D-ring attachment as it keeps the ratchet in a spot where it’s easy to reach.
This is the hook thumb release I mentioned in the text. This is it. This way, you don’t get your fingers jammed inside the jaws of the hook trying to release it.
Here’s a look at the forged T-Hook I spoke of. The hook is extremely beefy and the idea is to insert it into the OEM tie down locations in the frame (second photo). Mac’s offers several different configurations and they work great!
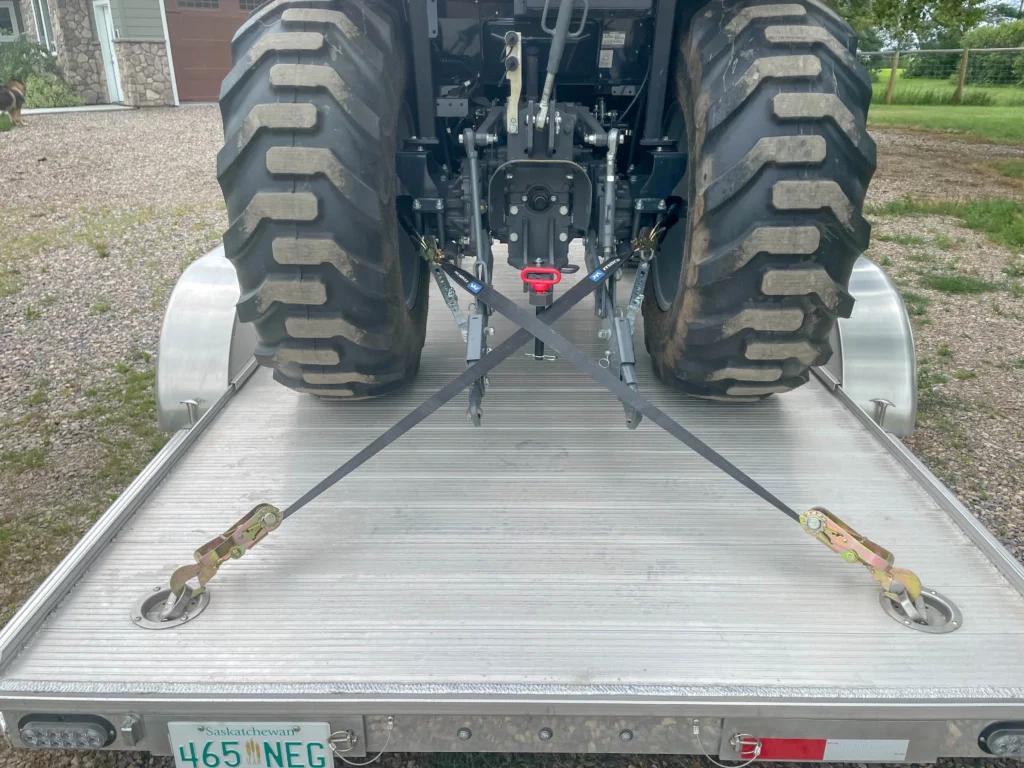
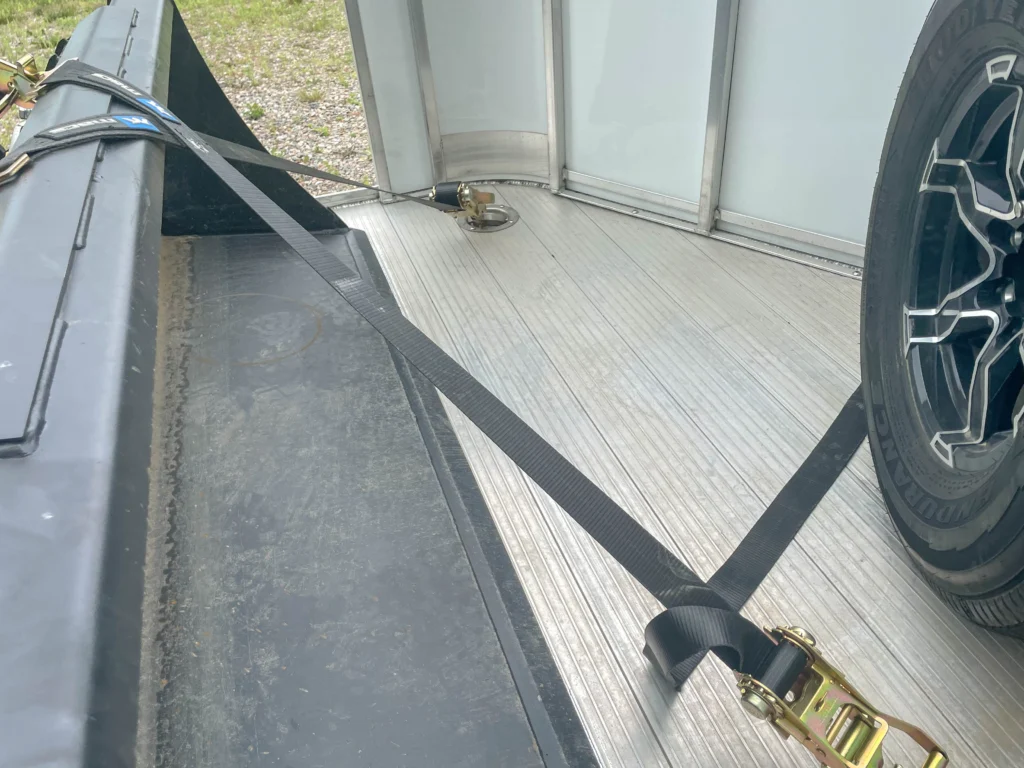
Remember that tractor I hauled? Here’s my tie down arrangement out back. You can see how convenient it is to have the ratchet right next to the D-Ring. Plus the twisted hook rather than a flat hook works far better too.
There are two things going on here: I used axle straps here because they were convenient. Plus the tie downs incorporate a twisted hook here as well. The overall layout makes the job so much simpler.
This is a better look at the Mac’s tie down ratchet arrangement. Having the twisted hook along with the ratchet handle right at the end of the tie down is just a fabulous idea. No more climbing around stuff to tie down and no more twisted straps.
I used the same cross-over layout in the front – this time over the bucket. I towed through some rough roads in this adventure, and I’m really happy to report the tractor didn’t move an inch on the deck of my trailer.