Installing a New Front Subframe on a ’67-’71 F-Body, Part 1
Mike Aguilar
Click Here to Begin Slideshow
You’re replacing the upper and lower control arms on your first generation (67-71) F-body and you notice that there’s a significant amount of rust that can’t easily be repaired. Maybe you’ve decided to upgrade your car’s steering with a power rack and pinion unit in a front subframe assembly built specifically for the purpose.
Whatever the “why” the “how,” changing out the front subframe assembly sounds intimidating - but it really isn’t. In fact, there are people who will remove their subframe when they’re replacing the engine and trans or doing heavy work on the engine. I’m going to highlight the process in two parts. This part will cover removing it. Next week we’ll come back with putting the new one in.
Although this is sold as a motorcycle jack, it can make this process much easier by giving you the ability to roll the subframe in any direction you need as you remove the old assembly and install the new one. You can also tilt it forward and backward, which helps with alignment.
Image courtesy ebay.com
Step one in the process is to get the engine and transmission ready, like we’re going to remove them. Some people recommend removing them now, but I don’t. We then lift the car in the air and support it so it is level from front to rear. We remove the three bolts securing the front subframe to the body on each side. Lastly, we lower and roll the front subframe out on the front wheels with a jack under the transmission.
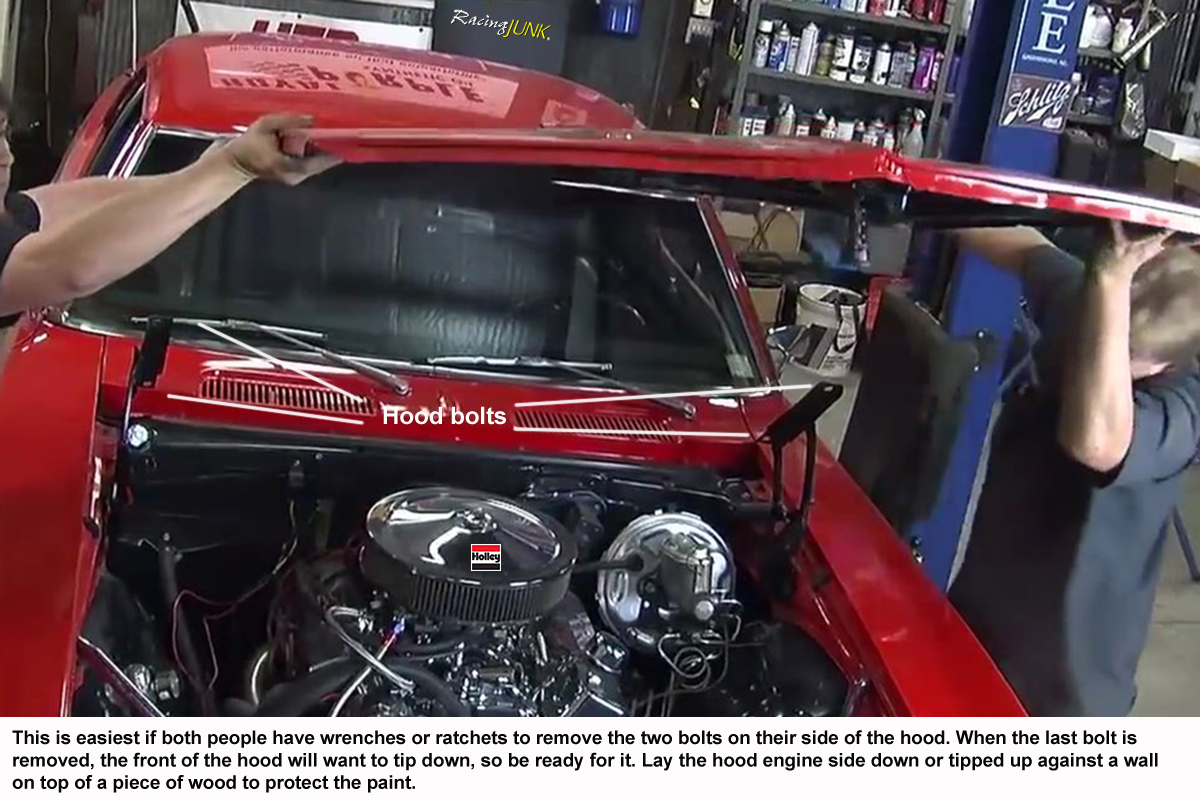
Removing the hood just makes everything much easier. Each hood hinge uses two ½ inch or 9/16 bolts to bolt it to the hood. This is a job that requires two people.
Take a few pictures of your engine compartment from a few different angles to help you get everything reconnected correctly during the new subframe installation.
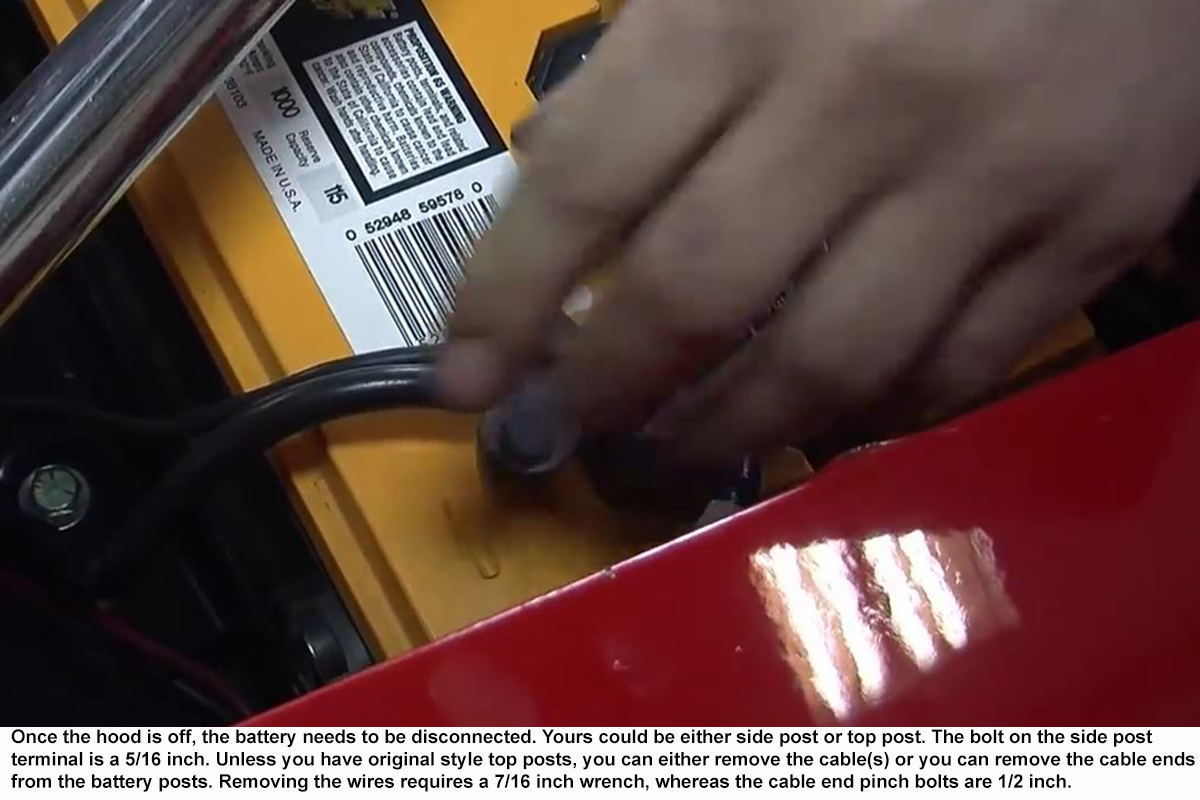
You don’t have to remove the battery now, but you will need to if you’ll be using it with the new front subframe.
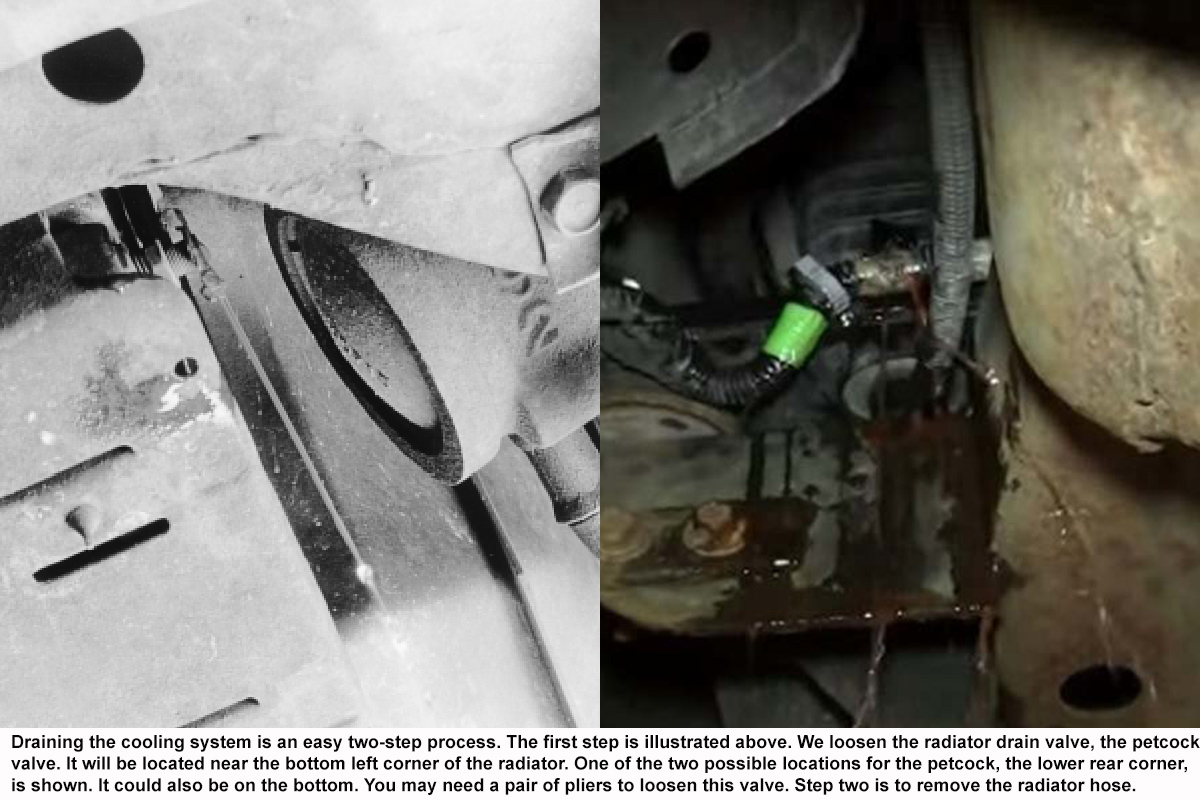
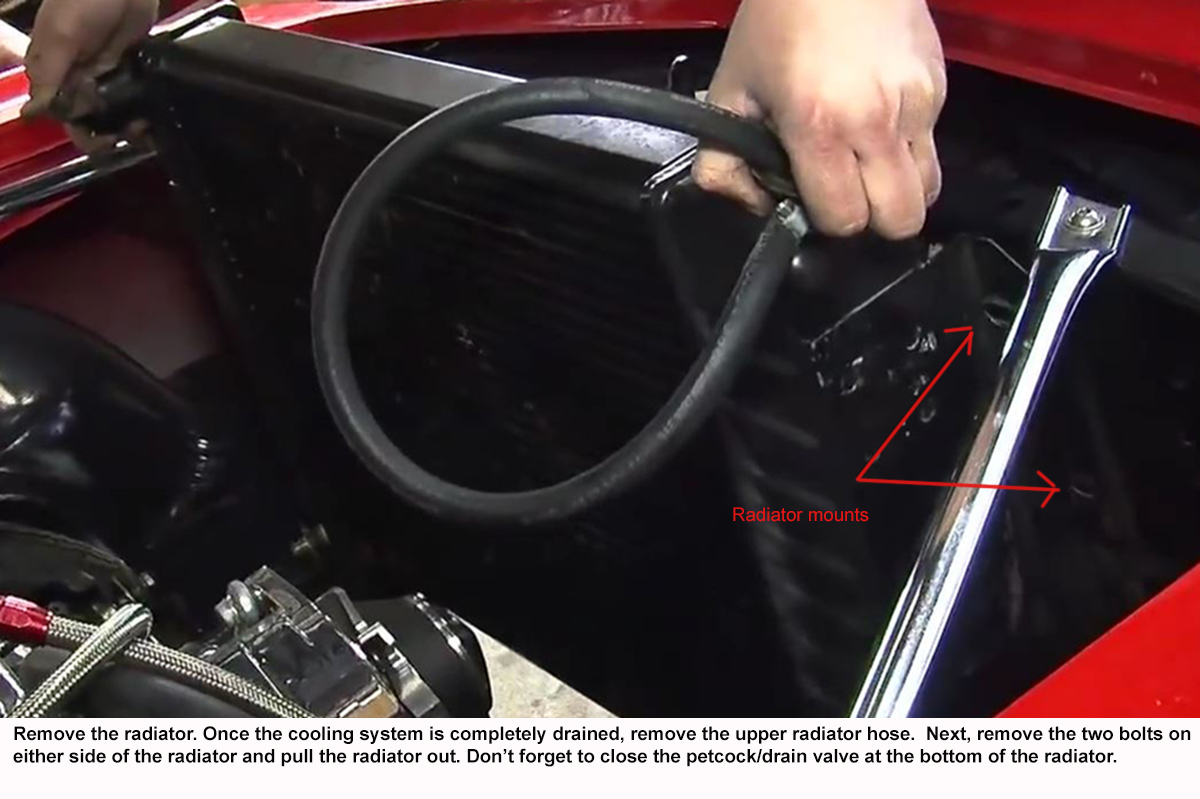
Remove the caps from the radiator and overflow bottle. Place a drain pan under the front crossmember/lower radiator brace. Loosen the petcock on the bottom of the radiator and allow the radiator to drain. Loosen and remove the lower radiator hose so the cooling system can continue draining.
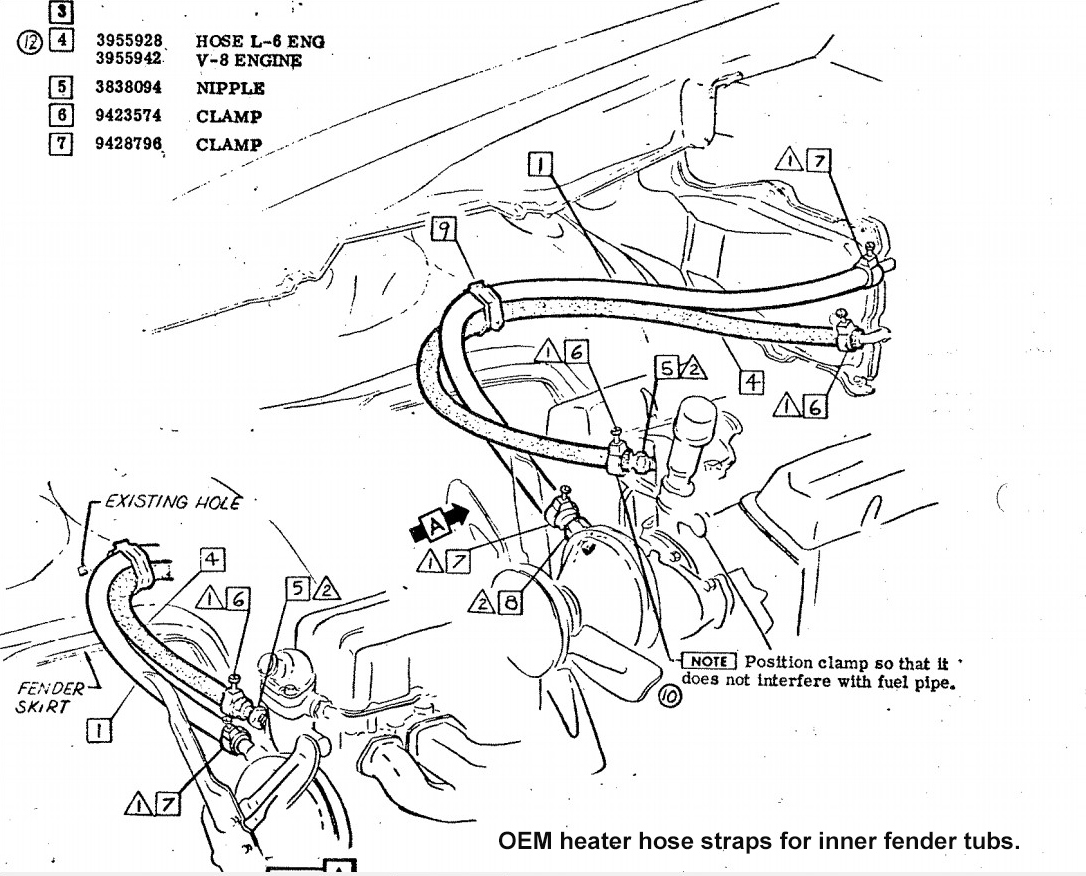
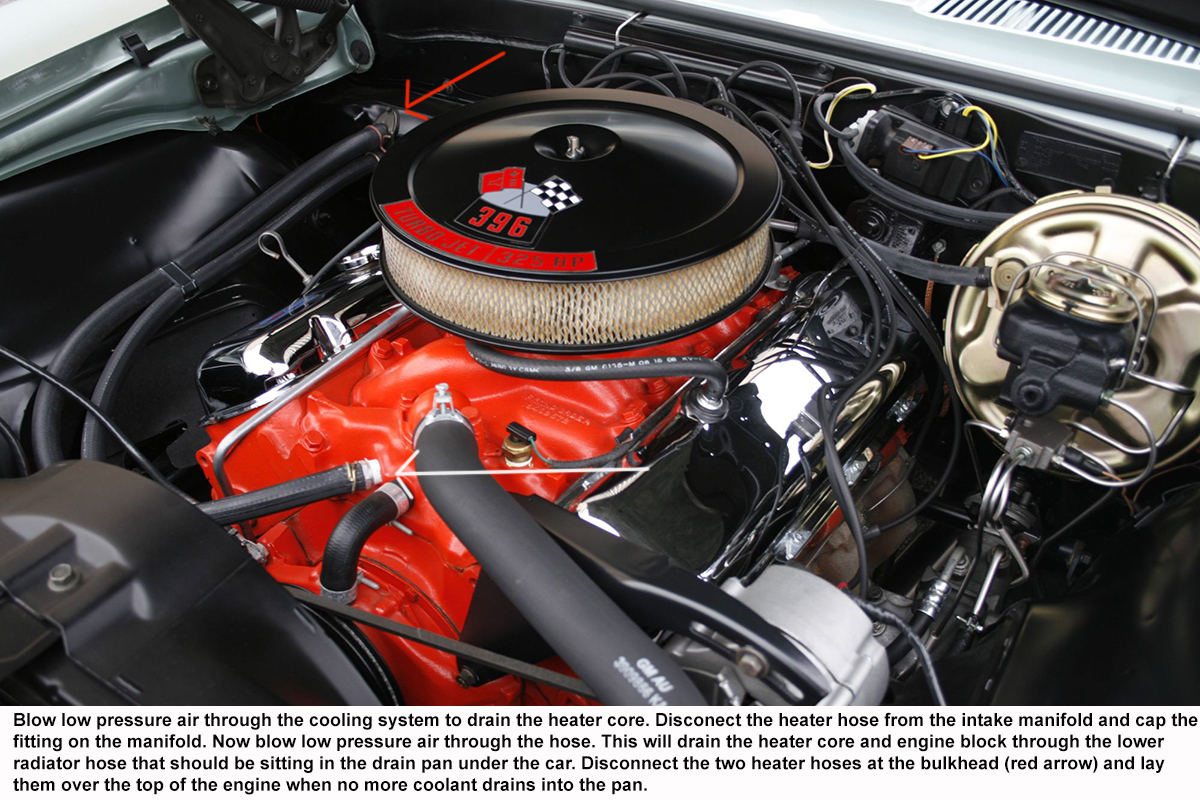
Loosen and remove one heater hose from the engine and blow low pressure compressed air through it to get the heater core to drain. Loosen and remove both heater hoses at the bulkhead and lay them over the top of the engine. If you have a mechanical temperature gauge, remove the wire now and carefully lay it aside.
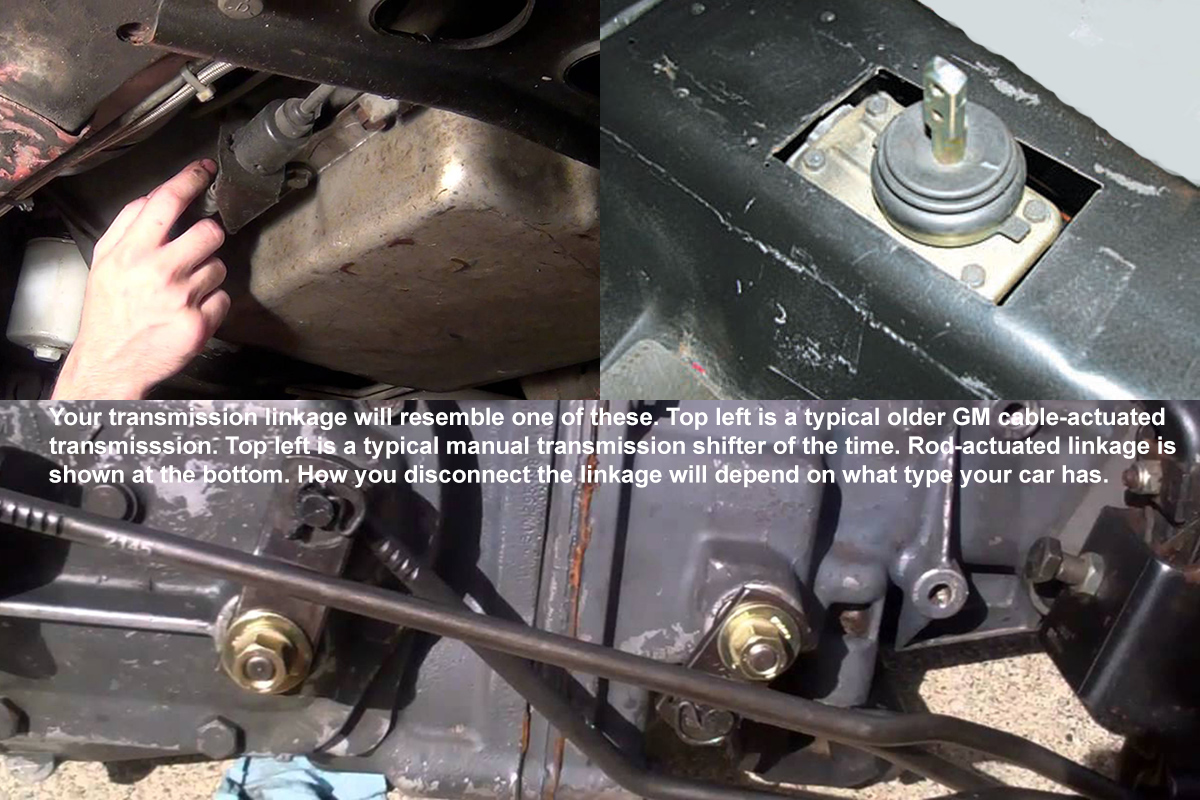
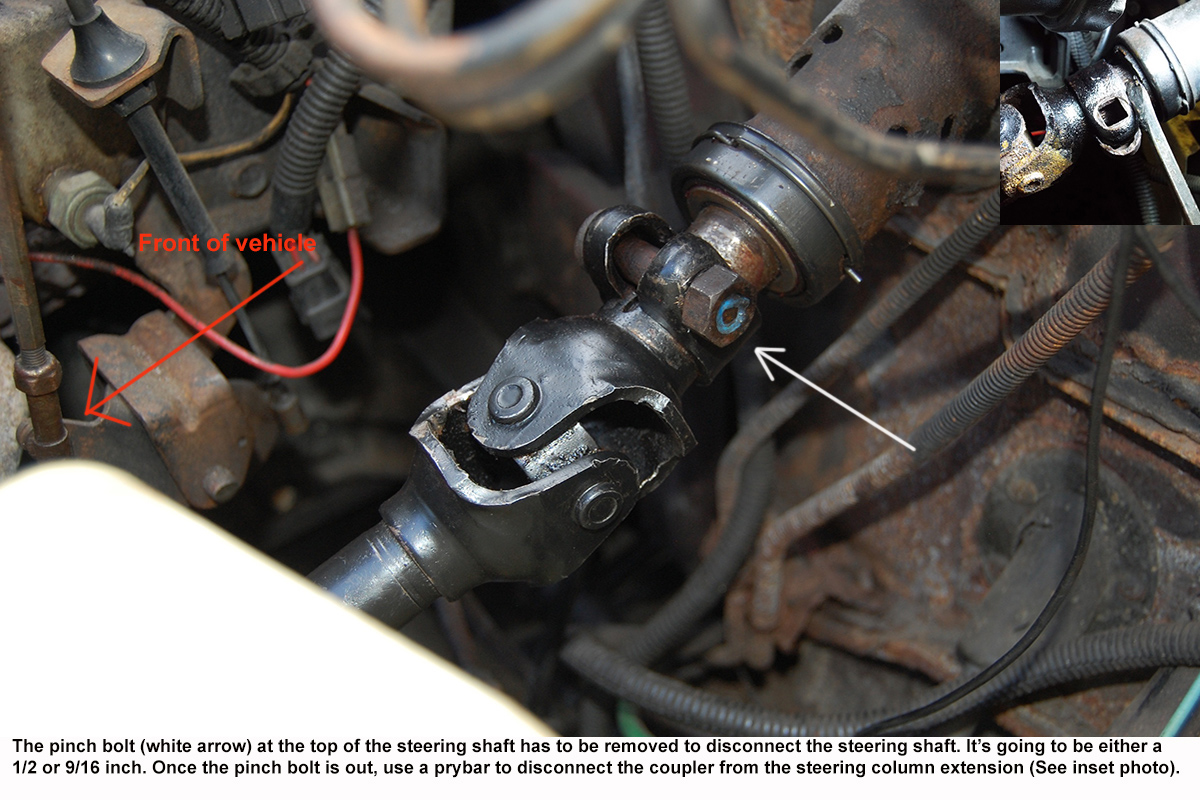
Although the steering column (the part the steering wheel attaches to inside the car) doesn’t have to come out, the steering coupler on the end of the shaft has to be popped loose of the steering column extension. After loosening the pinch bolt, you can use a pry bar to spread the coupler to help in loosening it.
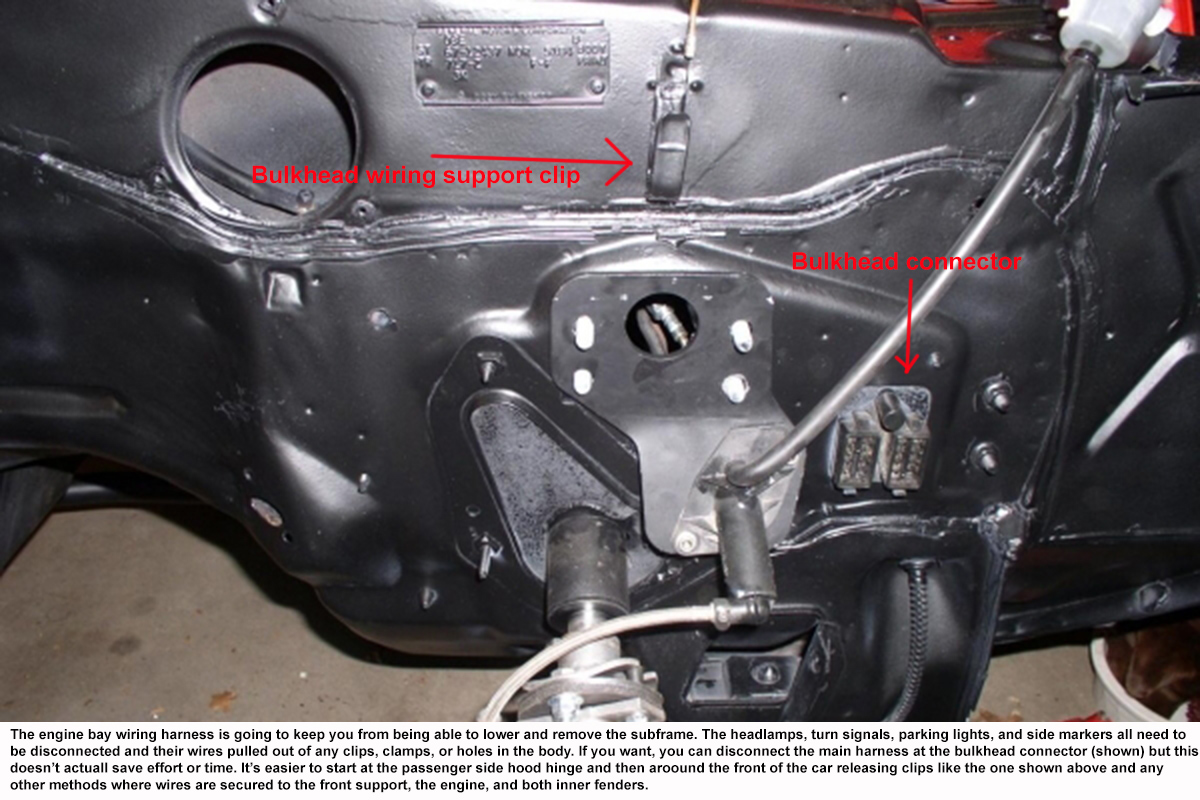
On the bulkhead near the steering coupler is the main power junction connector. Follow the cables coming from it down the driver side. Every place it or one of its branches is secured to the subframe, inner fenderwells or the engine/transmission, remove it. I would wrap the harness in a fender cover and lay it out of the way between the door and body. Next, remove any wires going to the engine to such components as fuel injectors, throttle position sensors, chokes, temp/pressure gauges etc.
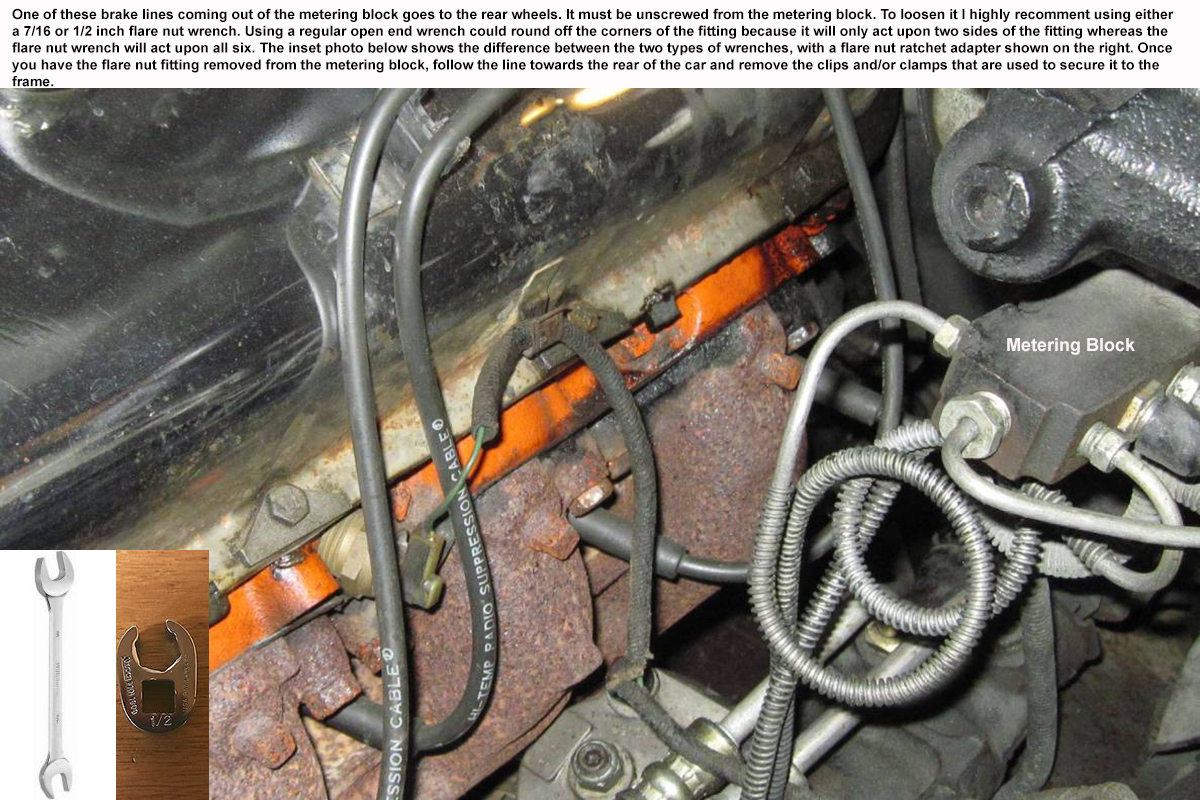
All brake lines will need to be removed from the master cylinder or metering block. Typically, you can unbolt the master cylinder from the bulkhead/power booster and support it somehow. This will allow you to only have to disconnect the rear brake line. If you can’t or don’t do this, you’ll need to fully disconnect the master and rear line from the metering block.
The radiator has to come out. My most important reason for this is because a big mess could result if it doesn’t.
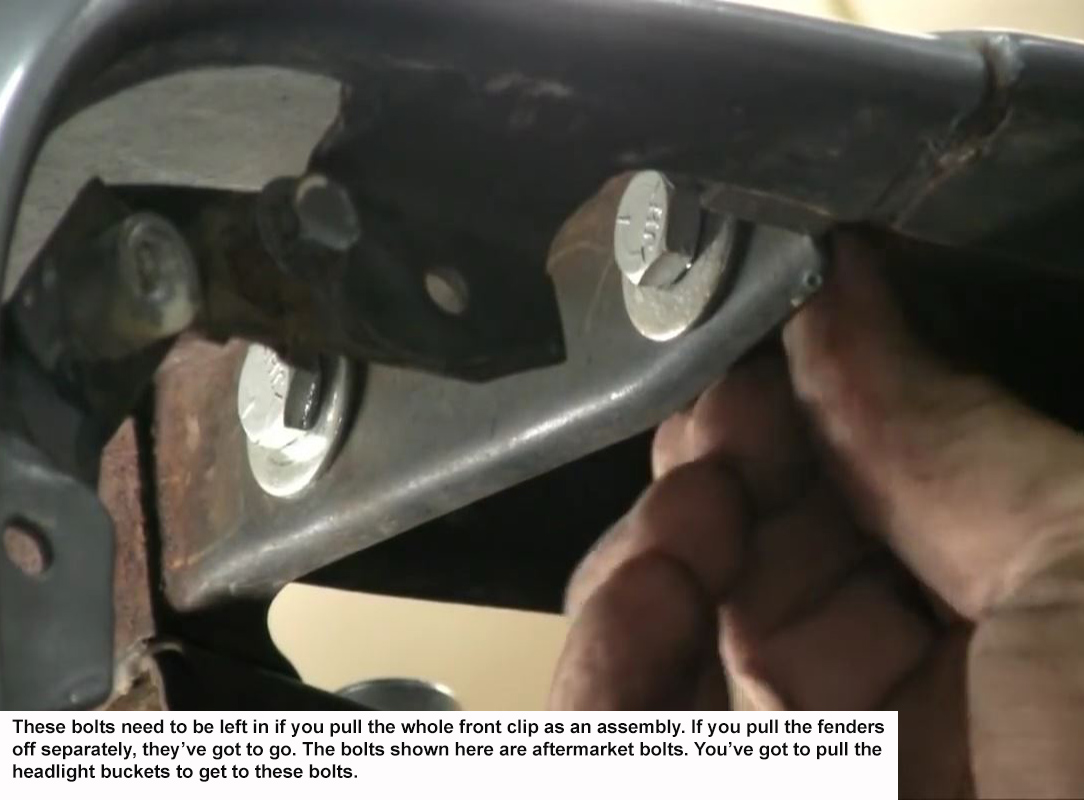
This helps whether you wish to take the front end apart piece by piece or pull the front clip as an assembly.
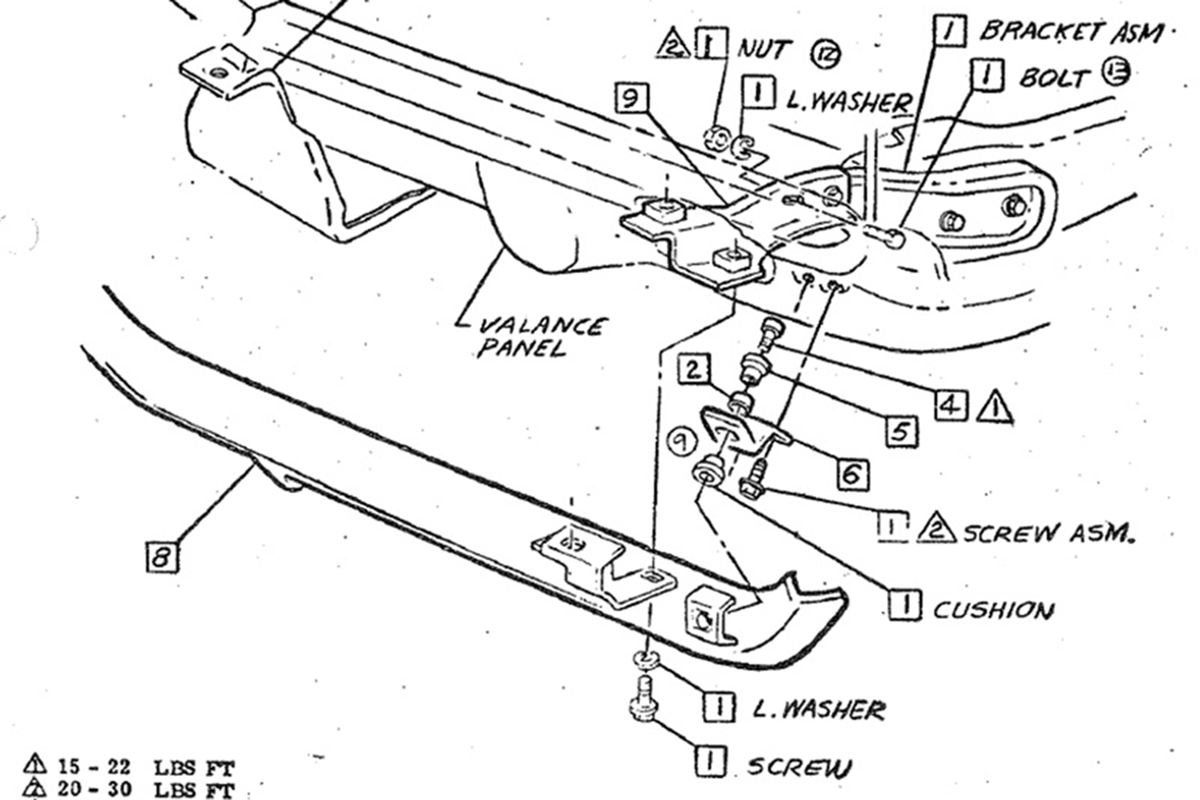
GM’s assembly sheets show how to remove the front bumper better than I can.
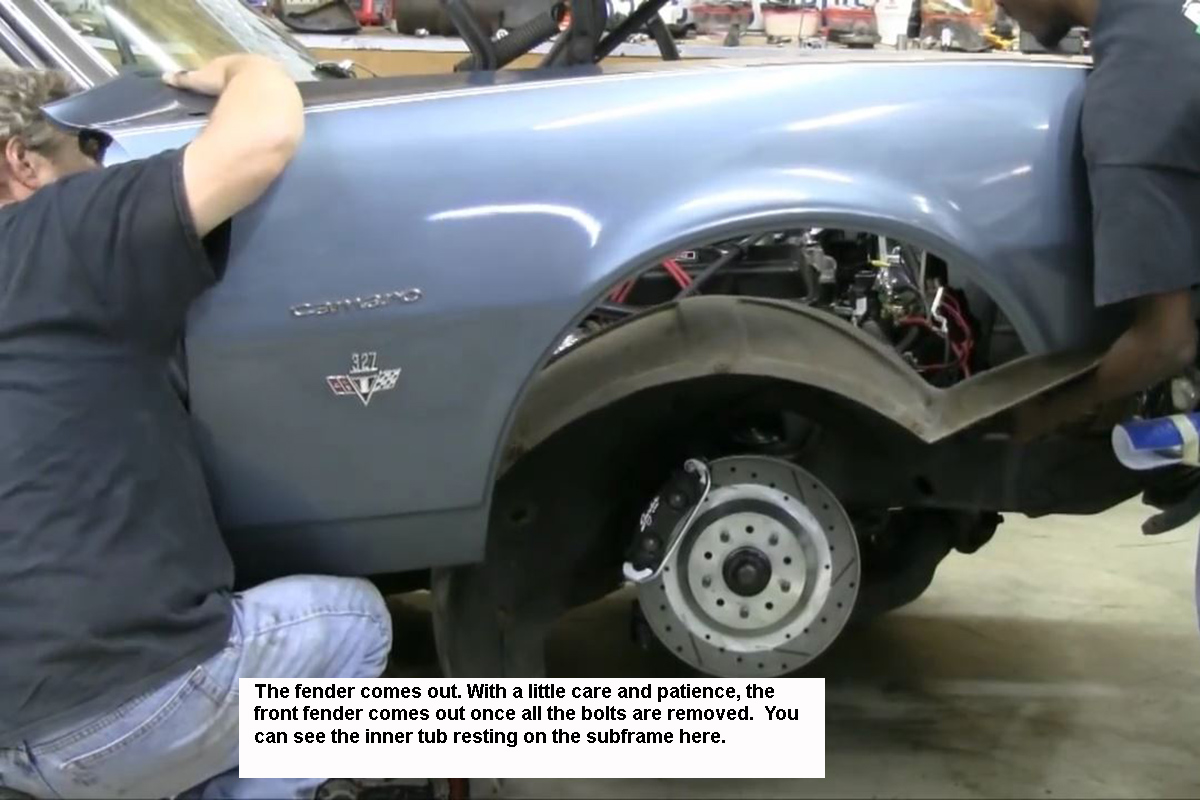
You can remove the nose piece and both fenders separately, but it’s actually easier (if you have help) to remove the whole front clip as a unit.
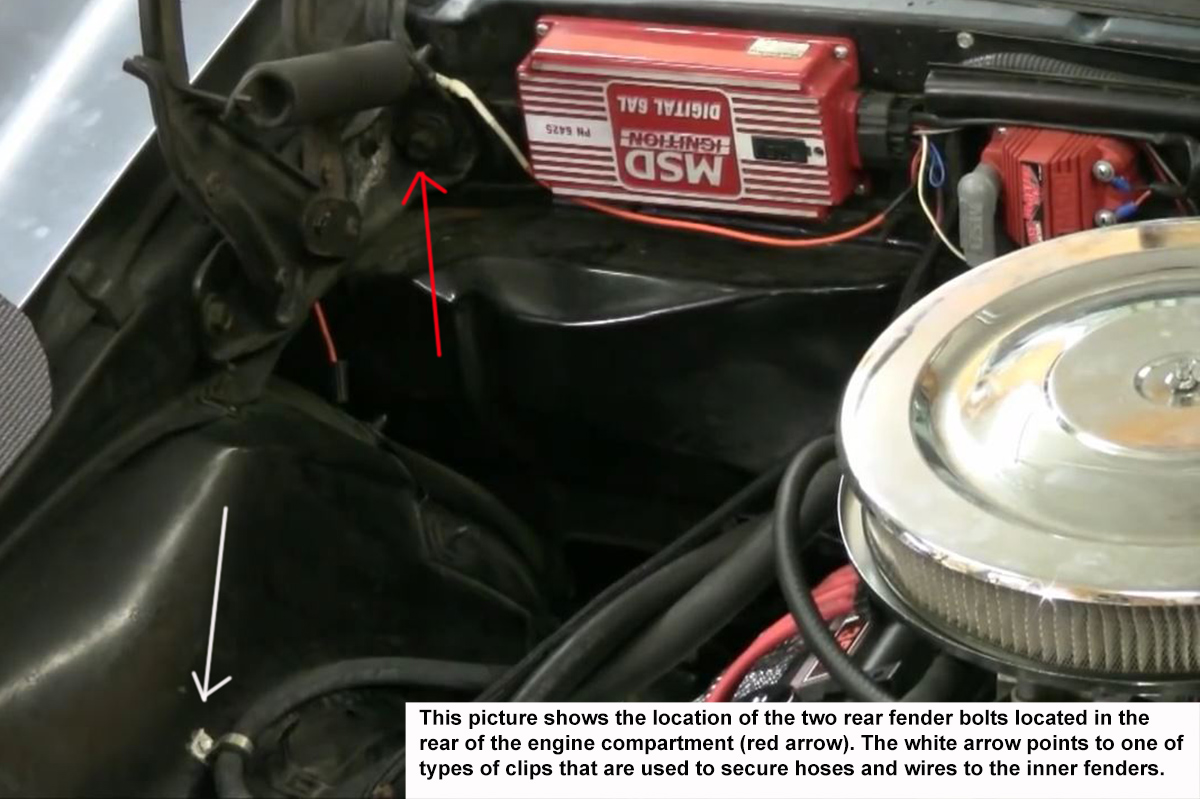
Go through the engine bay one last time to make sure that all hoses, tubes and wires are no longer secured or attached to the front radiator support and the left and right inner fender wells. Remove the bolts securing the lower radiator support to the front of the subframe.
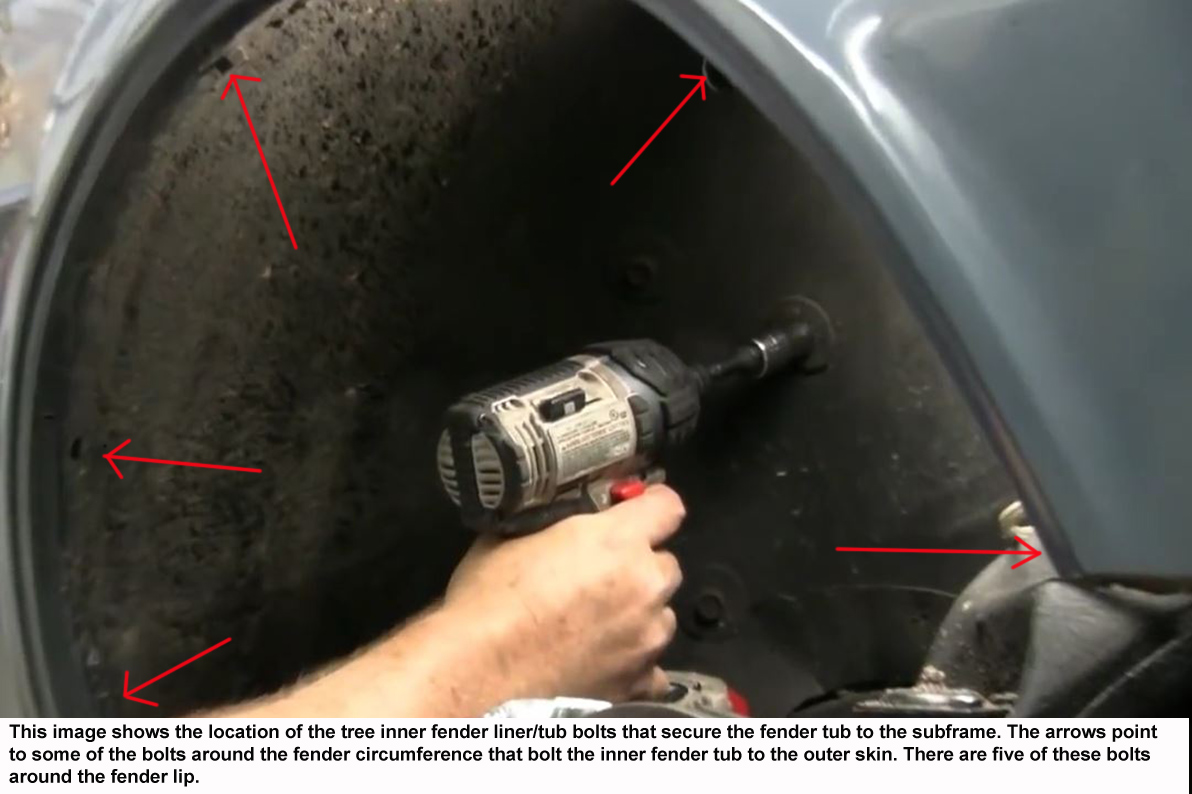
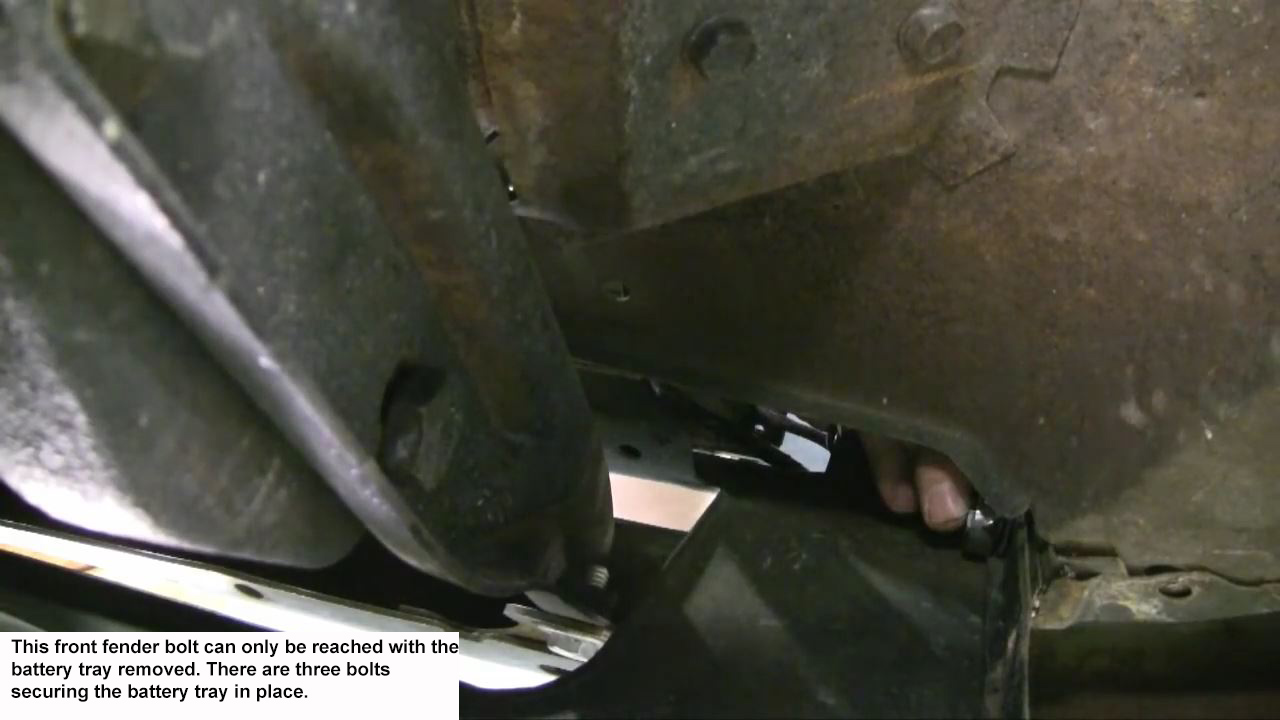
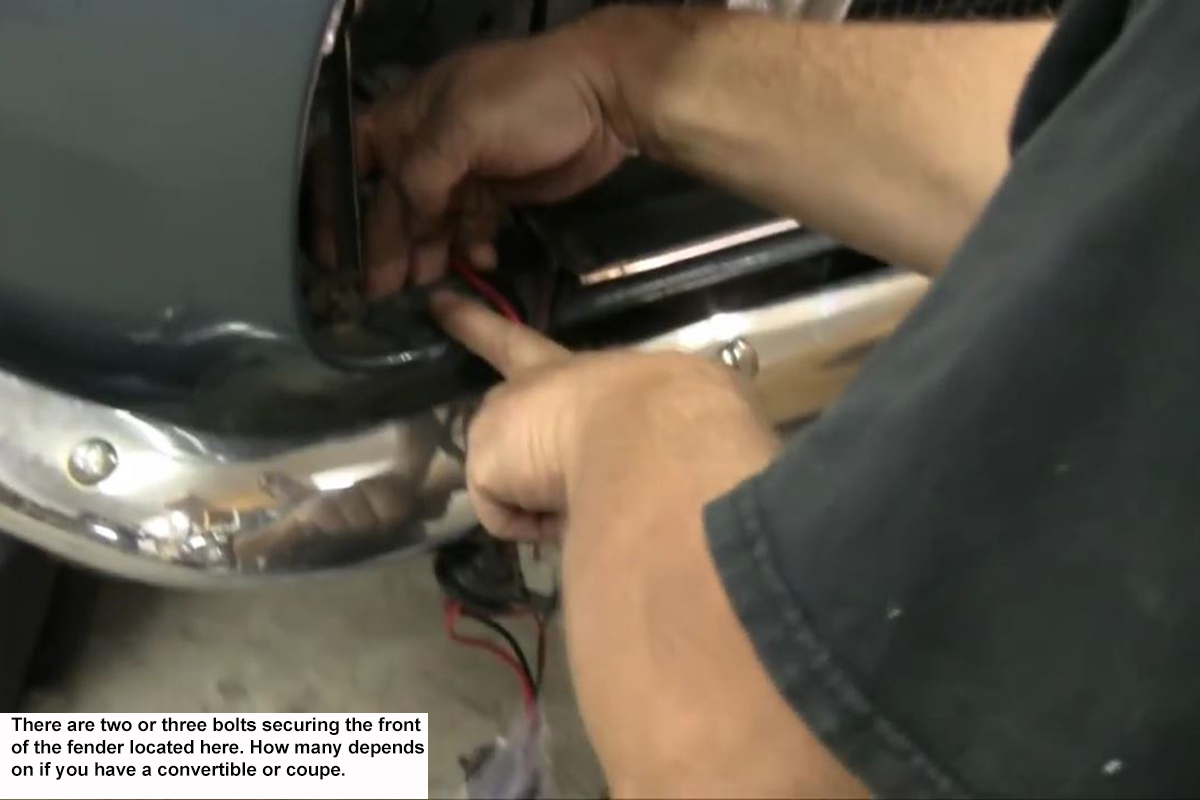
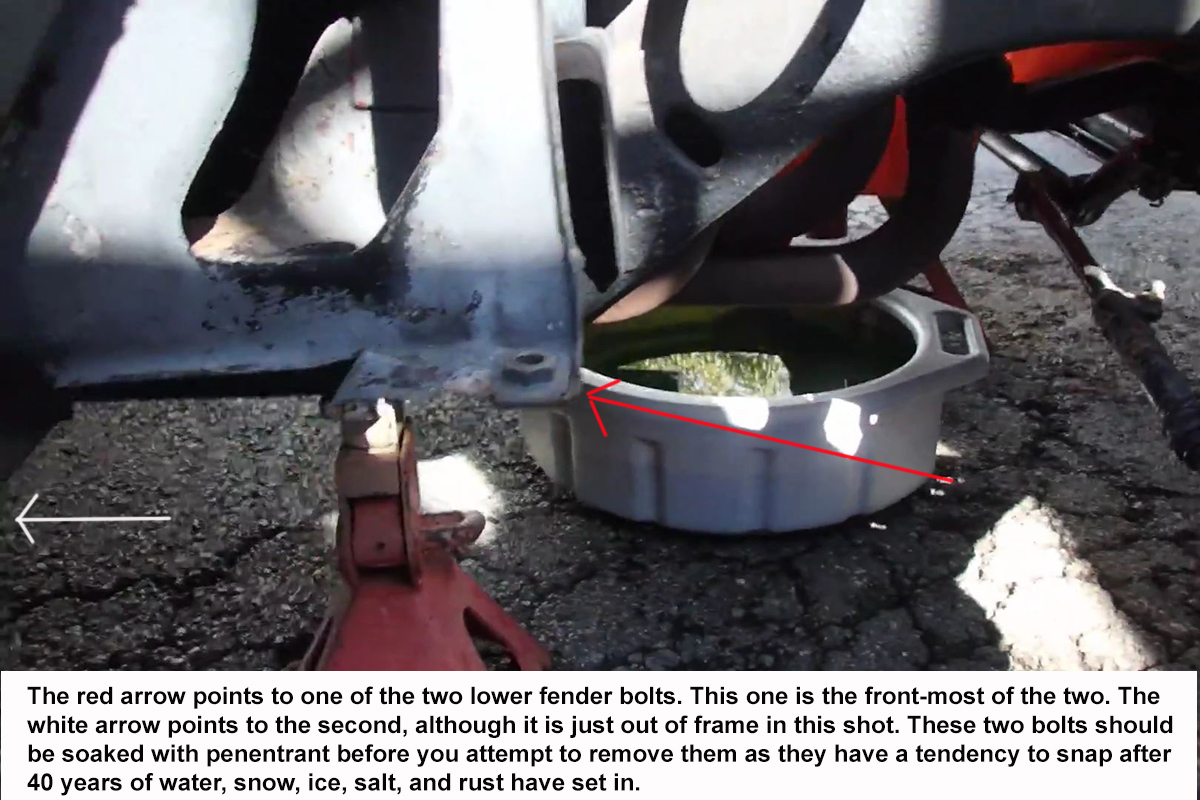
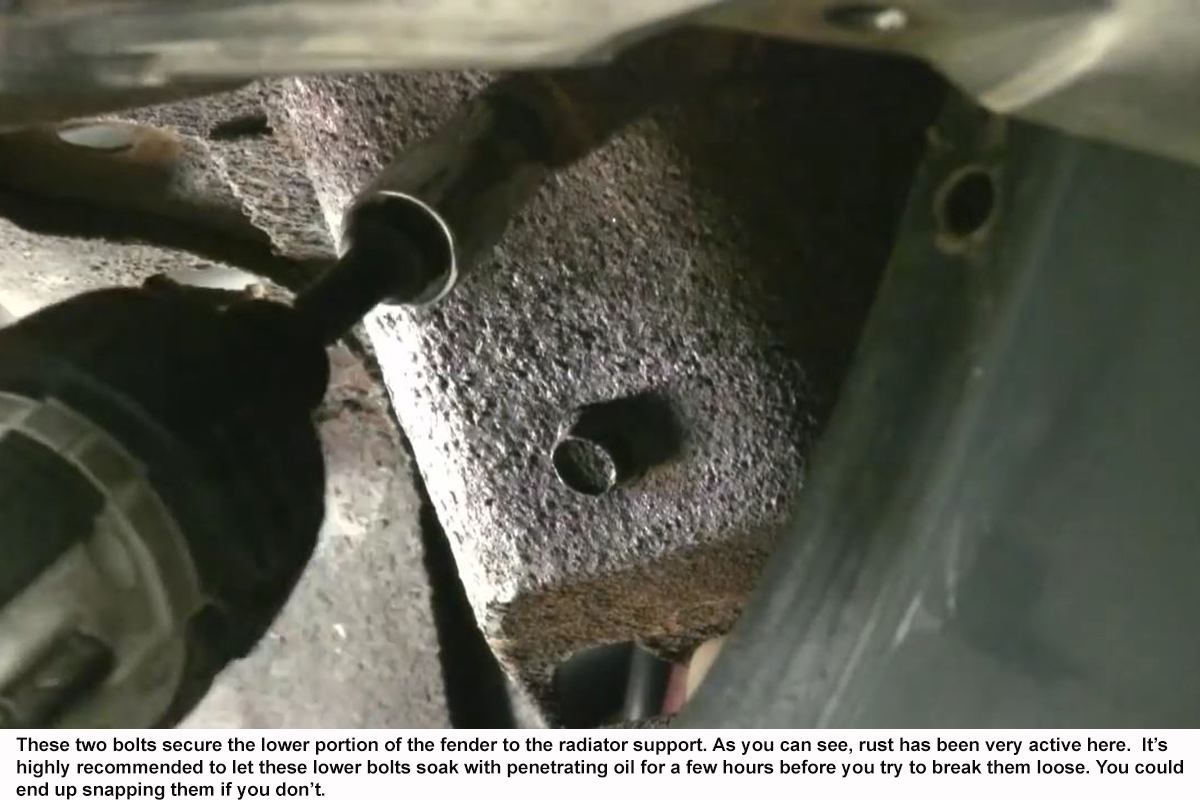
Inside both wheel wells there will be three 5/8 inch bolts with large washers securing the inner fender panels to the subframe. There are also two bolts in the pockets between the body and fenders, and a final one that can only be reached by opening the door.
The rear of the car has to be high enough that the rear wheels are off the ground and you can work comfortably and safely under it. You need jack stands under either the rear frame rails or the differential. Lift and support the front of the car with four more jack stands so that the car is level. Two of these will need to be under the body of the car with a board or block of wood to prevent damage.
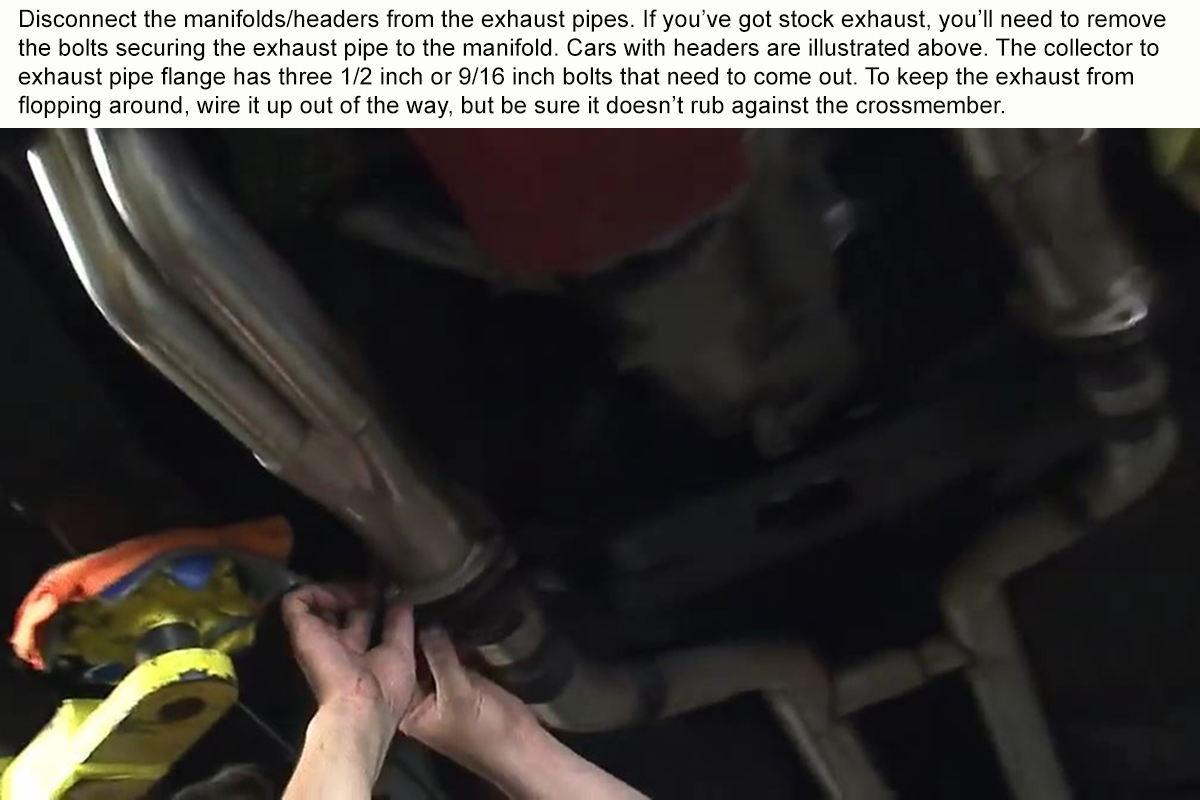
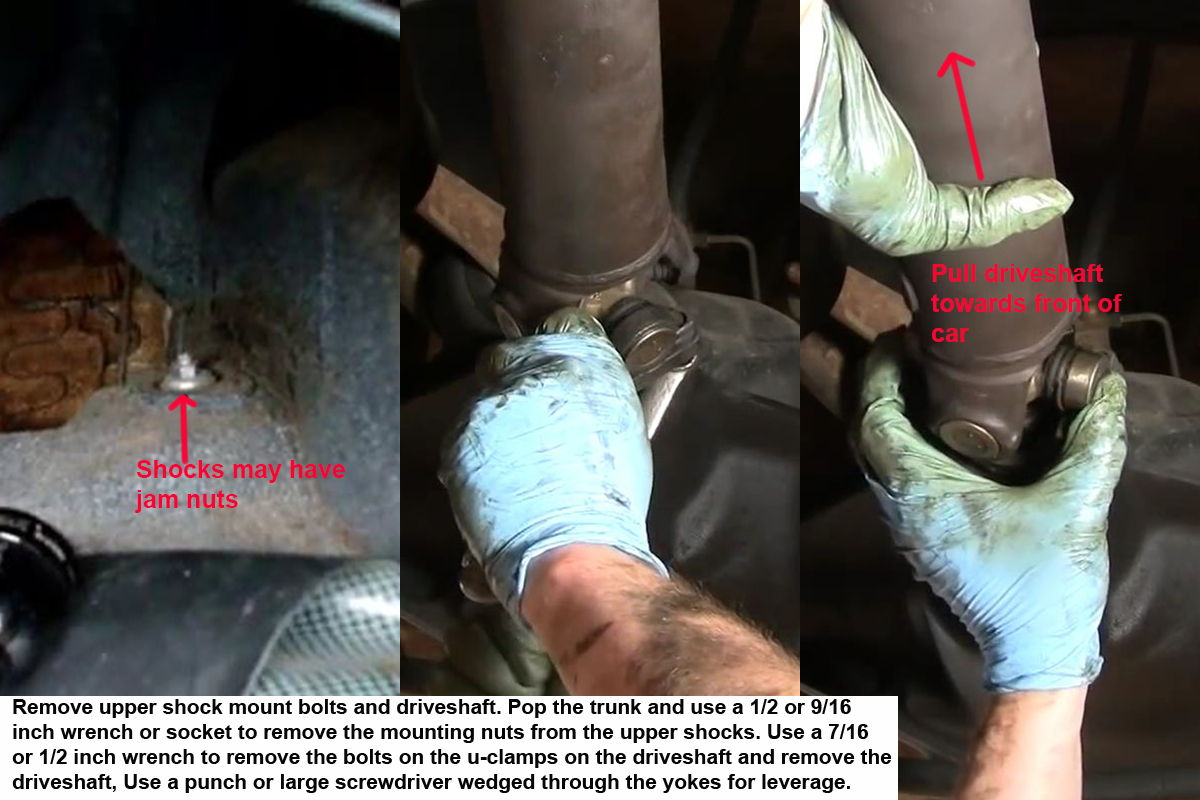
Next, disconnect and support the exhaust, then slide or crawl to the back and disconnect and remove the driveshaft. There are two U-bolts and four 7/16 or half inch nuts that secure it to the pinion yoke on the rear end. With these removed, push the driveshaft towards the front of the car to release it from the yoke, lower it a bit to clear the rear-end housing and pull it straight back to disconnect it from the transmission.
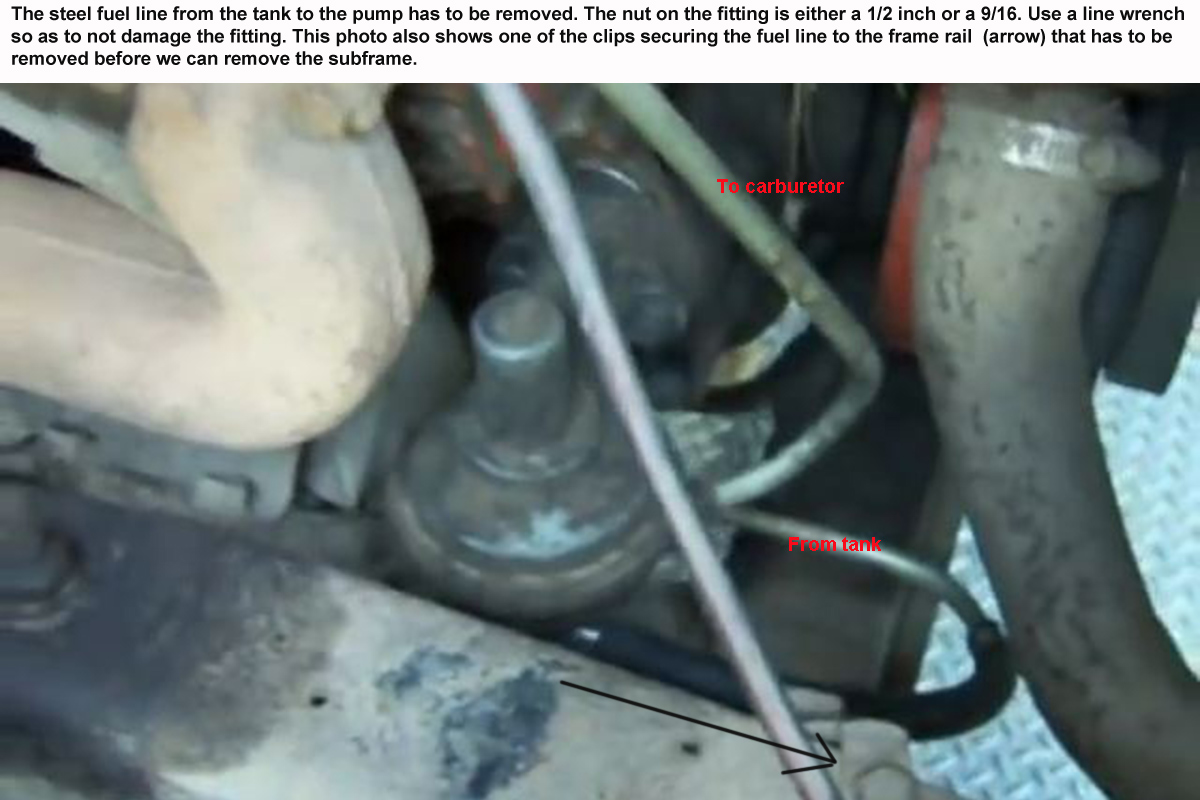
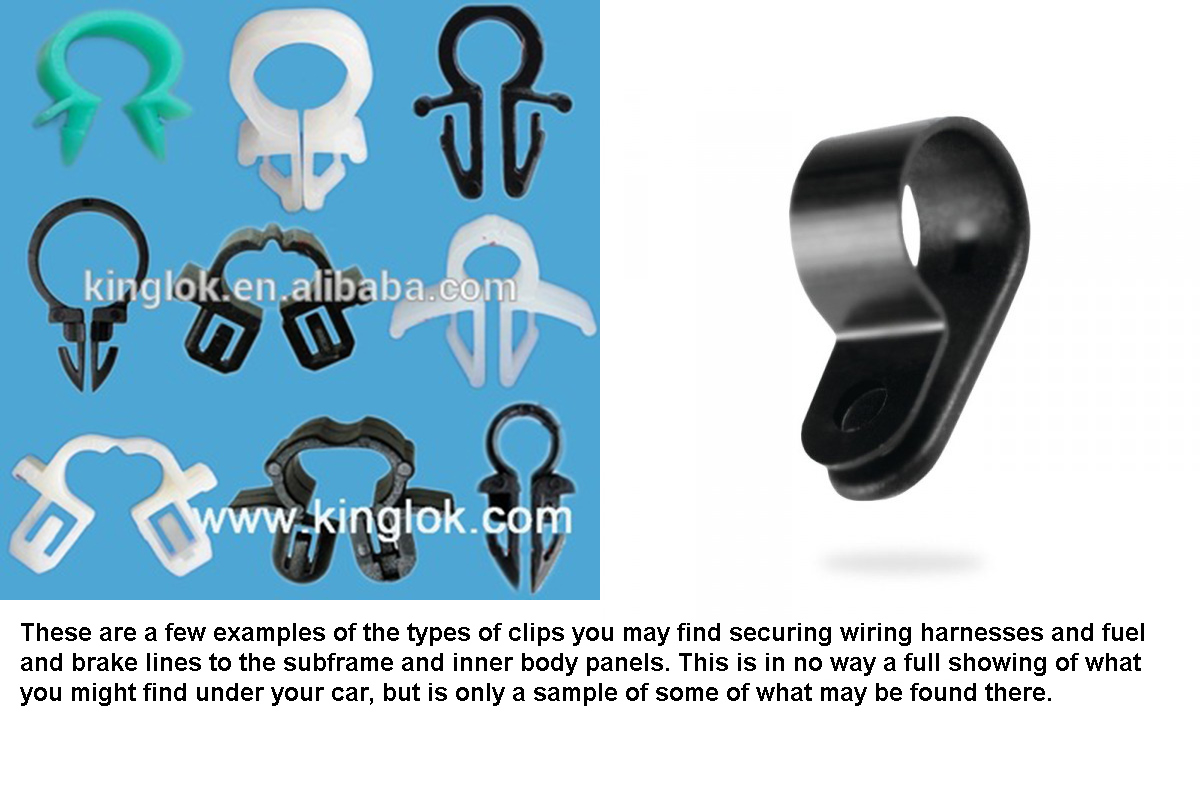
Your Camaro’s stock fuel line is a one-piece steel tube running from the fuel tank to the fuel pump. This line must be removed from the fuel pump. You also need to remove the support clips wherever they are attached to either the subframe or the inner fender tubs.
A few examples of what was used to secure or clip fuel and brake lines and wiring harnesses to the inner body panels and subframe.
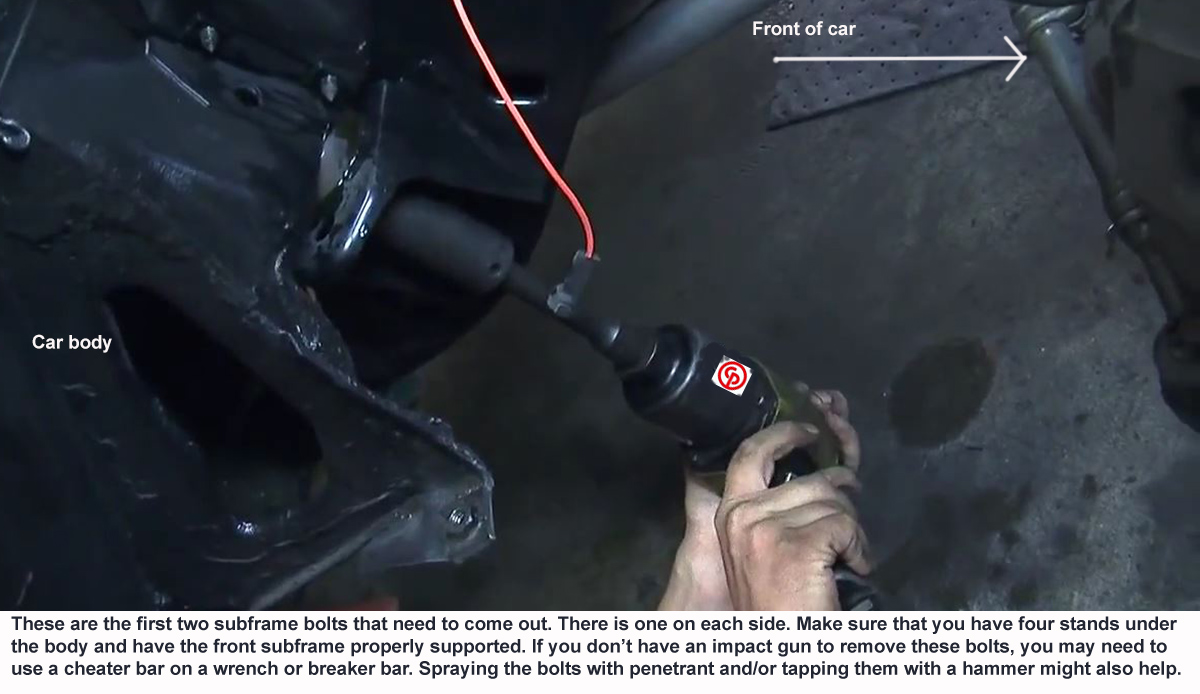
This image shows us removing one of the main subframe mounting bolts. There are two more bolted horizontally through the frame. These are used to assist in aligning the subframe during installation.
If you’re lucky and have access to a full lift, once the six subframe bolts are out you should be able to simply lift the body off the subframe. If you’re like me and only have jacks and stands, you’ll need to lower the front subframe assembly and then roll it out from under the body.
Keep an eye out for part 2 of this article, coming soon!


