

Drag Race 101: Proper rear-end gear set up
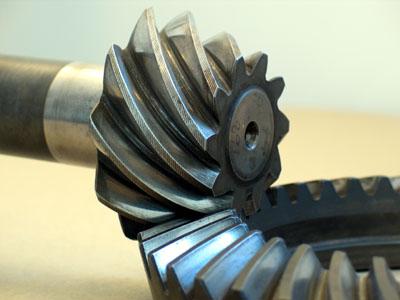
It’s not rocket science. Sure, setting up ring and pinion gears can seem challenging, but it really is simple enough that anyone can do it—If they’re willing to pay attention to proper procedures. When setting up the positioning of a ring and pinion in any rear end, there are only two settings that need to be done/measured correctly to ensure proper gear setup and long gear life. These settings are:
* Pinion depth (how close the pinion is to the ring gear)
* Backlash (how close the ring gear is to the pinion).
Bearing preloads are equally important, but we’ll address those particulars in a later article. All we will be focusing on at this time is the actual setting of the gears.
This isn’t about the install of ring and pinion gears. That process has been covered ad nauseam everywhere on the Internet. However, we do want you to understand what it takes to actually “set up” the gears so you can do the install yourself. Normally, the first step is to set the pinion depth using a proper pinion depth tool. Since we’re fairly certain that most DIYers don’t have a pinion-depth gauge, here’s how to set the pinion depth without using one.
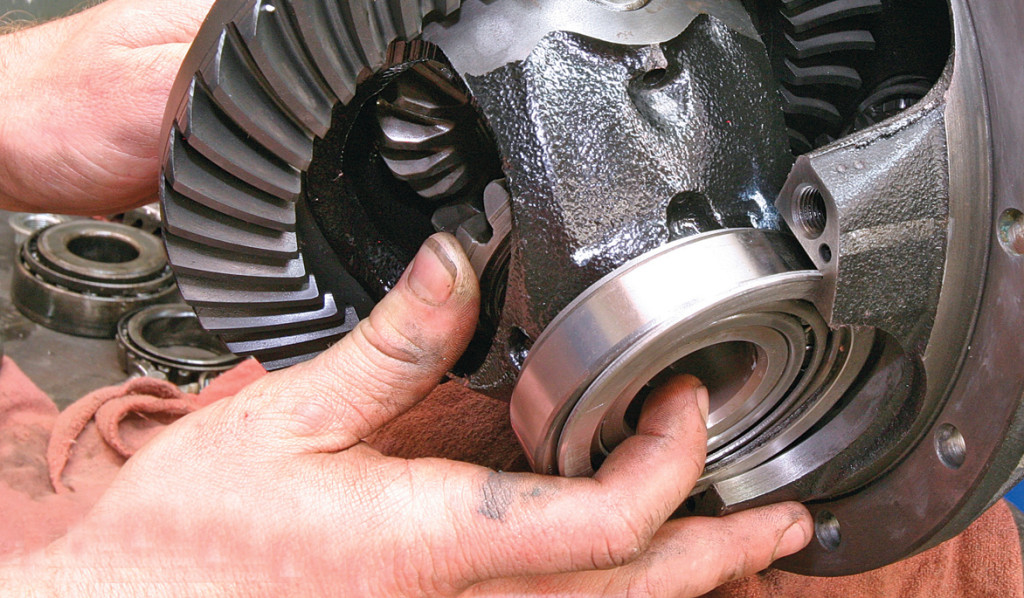
1. With the pinion gear and differential in place, rear-end marking compound in place, and with the bearings only “snug” (just tight enough to eliminate any “play”), check the pinion depth by way of the contact pattern that can be found by the rotation of the pinion against the ring gear.
Tech Tip: use only actual gear marking compound (available from Randy’s Ring and Pinion, and many auto parts stores). This is because other marking substances (like shoe polish), can be hard to read.
2. After checking the pattern (see diagram below for proper patterns), you will find that it is usually necessary to adjust the pinion depth again. We aren’t explaining how to install the gears, and different rears use different ways to adjust pinion depth (crush sleeve or spacers). Just know that after changing the pinion depth, the pattern should be rechecked using the method we just explained. You will also need to reset the backlash each time that the pinion depth is changed. This is because backlash needs to be close to spec in order to get a good pattern reading.
Backlash is the play—or how much play there is between your ring and pinion gears. This play becomes important when the loading and unloading of the gear occurs (acceleration/deceleration). Once the pinion depth is properly set, the backlash needs to be adjusted and set. Some rear ends use adjusters that are located next to the differential carrier bearings, and others are adjusted by adding/removing shims. Finding the proper backlash setting can be found in a service manual for the vehicle you are working on. This measurement is recorded in thousandths of an inch, using a dial indicator that is positioned to read from a tooth on the ring-gear. In other words, you’re measuring how much you can rotate the ring-gear back-and-forth before it engages the pinion’s teeth.
3. Once the correct pinion depth is established, the pinion bearing preload can be adjusted.
4. Once pinion depth has been set, a final backlash setting can be achieved by adjusting the location of the differential and ring gear.
If using shims: Adding shims on the ring-gear’s smooth side of the carrier moves the ring-gear closer to the pinion, causing the teeth to mesh tighter, decreasing the amount the backlash. Adding shims on the other side moves the ring-gear teeth away from the pinion, increasing backlash.
The purpose of backlash is to prevent the gears from binding. Lack of backlash may cause noise, overheating, or seizing and failure of the gears or bearings.
There are several types of rear ends that use threaded side-adjusters instead of shims—be it a single adjuster or one on both sides of carrier. The most commonly known rears with this type of carrier adjustment are the Chrysler 7.25, 8.25, 8.75, 9.25, Ford 9 inch, and GM’s 8.25 inch. The GM 9.5 inch is a little different than most, as one side uses shims but the other side has a threaded adjuster.
Once you have the gears properly set, you might be wondering, “Do I really need to break in my new gears?” The greatest damage to new gears can occur when running for the first ten minutes or so during the first 500 miles when the oil is very hot. Any heavy use or overloading while the oil is extremely hot will cause it to break down and allow irreversible damage to the ring and pinion. If the temperature of the oil and gears gets hot enough to change the molecular structure, it will soften the tooth surface instead of hardening it.
The following procedure is generally accepted for breaking in a new gear set. Drive below 60 m.p.h., approximately 15 to 20 miles, then stop and let the differential cool. Avoid abusive situations for the next 100 miles or so, and then have at it. If you take it easy on a new ring and pinion, and keep it full of high-quality oil, it will last a lot longer.
 Different backlash pattern markings—correct and incorrect.
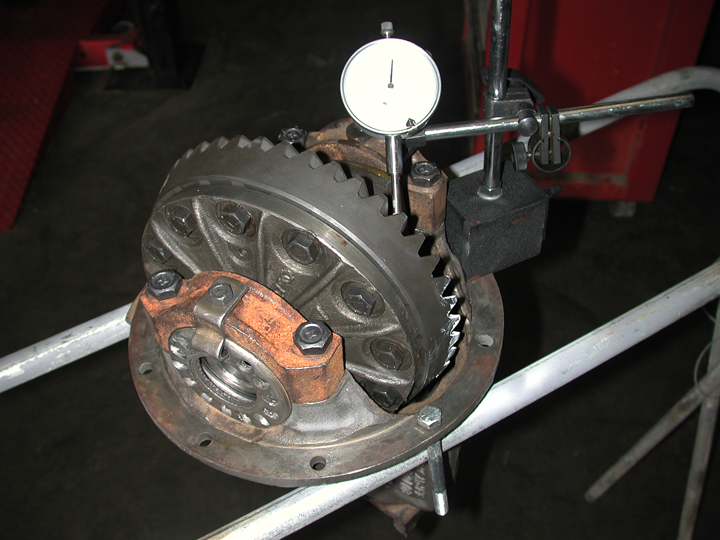 Setting backlash is done using a dial indicator to measure the free movement of the ring gear.
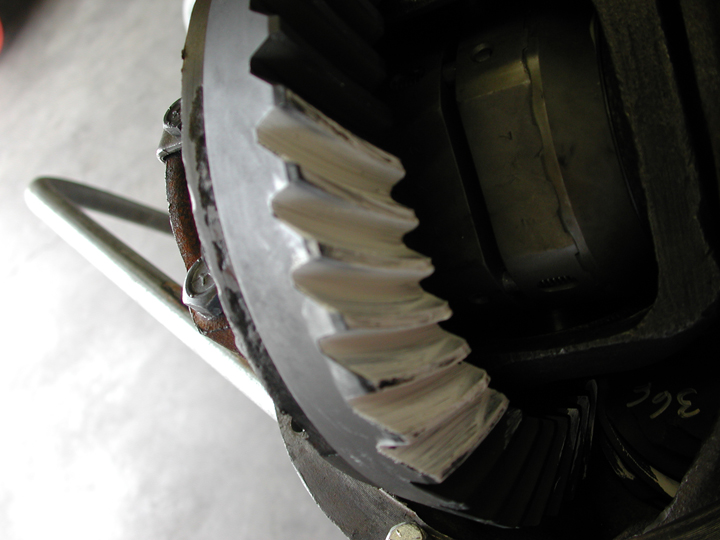 A typical set of gears comes with a marking compound. This compound is used to show what the pattern actually is on the ring gear while adjusting the backlash. In this image, the pinion depth is too deep (too far into the housing) and needs more shims. This is shown by the wear pattern on the inside of the teeth.
 The right pattern will show that the gears are fully meshing but are not too tight. Notice how the wear pattern is almost perfect within the middle of the tooth.
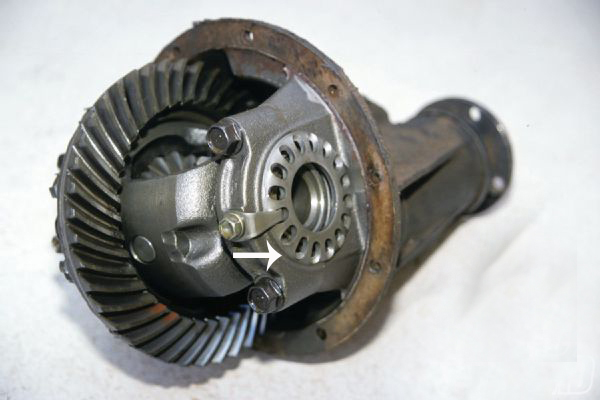
This rear end uses adjusters (arrow), to reposition the differential, and set backlash. They work by tightening one side and loosening the other side to move the differential sideways.
If your rear end does not use adjusters, then you need to adjust backlash by using shims. By placing various thickness shims on either side of the differential, you can adjust backlash.
This is the best how to I’v seen.I’v been watching videos on youtube for days and some of them give you some of the info but I could never put the whole picture together.Reading this just blew my mind.Everything came together.I really cant tell you the relief that came to me when it all made sense.I was close to taking it in.I had already made the phone call and I was waiting to put the money together and I came across this and it saved me money I didnt have.Thank you so much.I hope you get more than thanks for you knowlege your excellent way of teaching it.I really am greatful.Thank you
Hi Has anyone have this problem? We have a 9 in 31 spline ford in a race car. the problem is carrier adjusting nut lock straightened out and the nut backs off and wipes out ring gear. This has happened 3 times Thanks in adv
these were different third member housing