

![[Gallery] Show us Your Mustang! Celebrating 60 Years of Mustang](https://www.racingjunk.com/news/wp-content/uploads/2024/04/Al-Liebmann-376x206.webp)
![[Gallery] Okolona Street Rods Kentuckiana V Foundation Car Show](https://www.racingjunk.com/news/wp-content/uploads/2022/04/IMG_0774-e1650040587750-376x206.jpg)
![[Gallery] Road Rats Car Show](https://www.racingjunk.com/news/wp-content/uploads/2022/05/2A-e1651770667920-376x206.jpg)
How to Install a Jesel Belt Drive Part 4
Click Here to Begin Slideshow
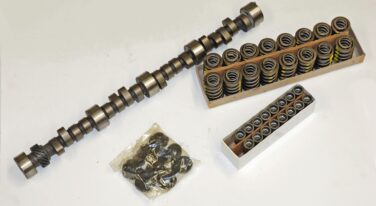
Over the past three segments of this series, we’ve taken a look at the installation of a Jesel belt drive system – our example is for a big block Chevy, but all of the belt drives from Jesel install in a similar manner. They’re very straight forward and you can install them with common racer hand tools. In our last issue, we reached a point where the camshaft thrust was established and the camshaft pulley adapter was installed. We also installed the crank pulley. In this segment, we’ll complete the installation with the fitting of the cam pulley and the drive belt. Check it out:
To complete the install on a conventional Chevy, the engine must be brought to number 6 Top Dead Center. The crank pulley should have the timing mark facing up. Then you can rotate the cam so the adapter is at 12:00.
At this point, the top pulley spider can be assembled into the pulley. Align the timing marks on the spider with the pulley and loosely assemble the flanged nuts. You can also loosely install the heavy cam pulley washer and the left hand thread bolt. You’re ready to install the belt. It fits easily if you tilt the top pulley downward.
Once the belt is installed, you can tighten the cam pulley bolt. As mentioned above, keep in mind it’s a left-hand thread fastener. The photos show you how it’s done. Finally, you’re ready to degree your camshaft. Once the cam is dialed in, you can tighten the four upper pulley flanged nuts. See the accompanying photos for a closer look.
By the way - once the cam is degreed, it’s easy to revise cam timing. Simply loosen the four nuts on the spider. Turn the crankshaft clockwise to retard the camshaft timing. Turn it counterclockwise to advance the camshaft timing. Jesel notes that each mark on the spider gear works out to two degrees at the crankshaft.
You’re done! It’s a very straightforward install. All of the components are of the highest quality and, just as importantly, everything fits as designed. It’s simply the ultimate cam drive available today.
Torque specifications for the various fasteners are as follows:
• Upper Pulley Nuts: 22-24 Ft/Lbs
• ¼-20-Inch Front Cover Bolts: 96 In/Lbs (8 Ft/Lbs)
• Cam Seal Thrust Plate Nut: 96 In/Lbs (8 Ft/Lbs)
• 7/16-20-Inch Left Hand Cam Bolt: 70 Ft/Lbs
• 5/16-Inch Cam Adapter Bolts: 26-28 Ft/Lbs
Leave a Reply