Click Here to Begin SlideshowIn a previous issue, we looked at the most common Dzus fasteners. But that’s not the end of it. There are numerous other configurations available when you’re shopping for quick release hardware. Some are pretty simple (such as latches). Others are more complex. By the way, if you do some digging on the world wide web (particularly in aviation sites and race car chassis fabrication sites) you’ll discover all sorts of different quick release fasteners, along with accessories and tools to help install them. We’ve only skimmed the surface with this series.
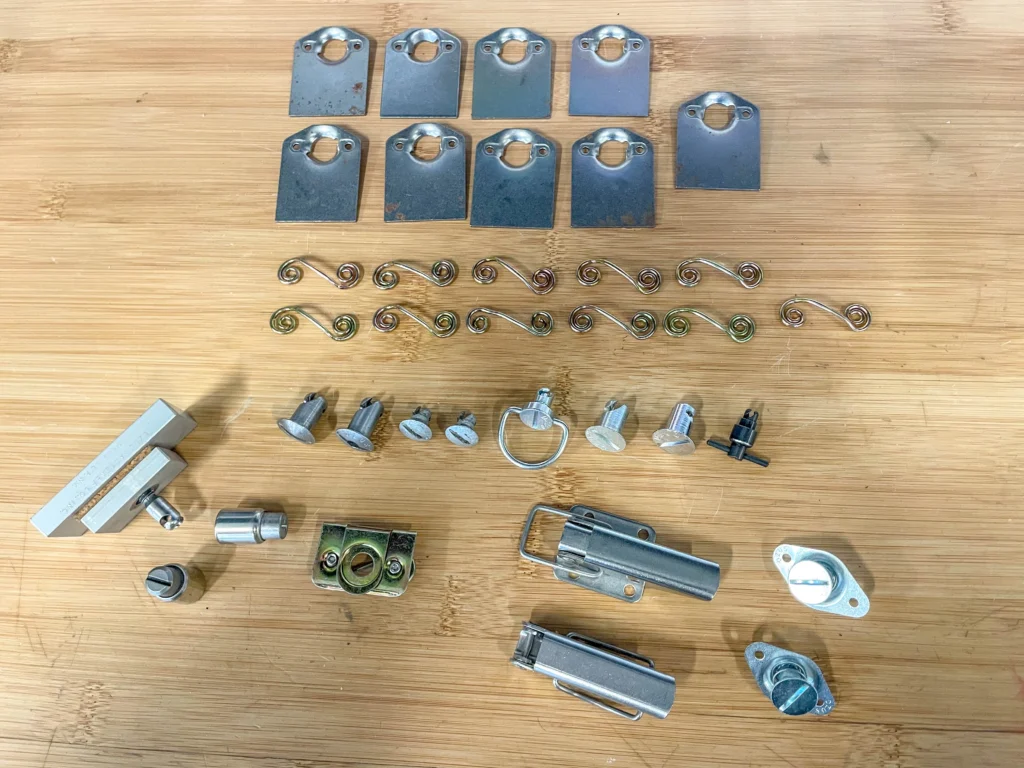
Guide Pin Fasteners…
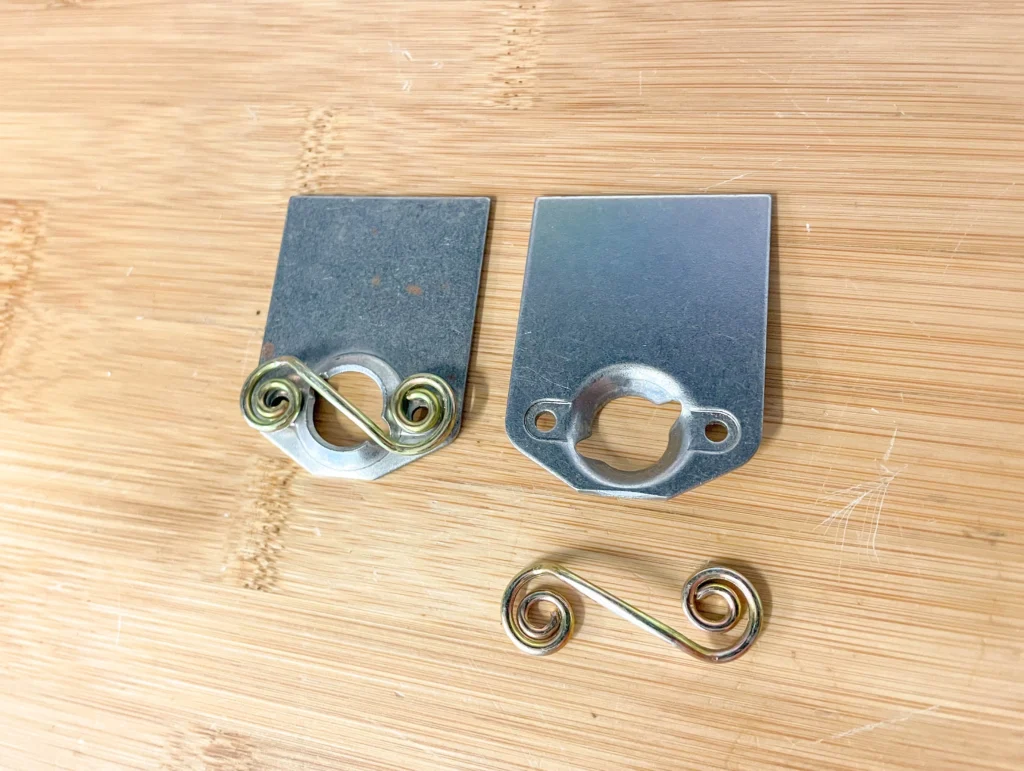
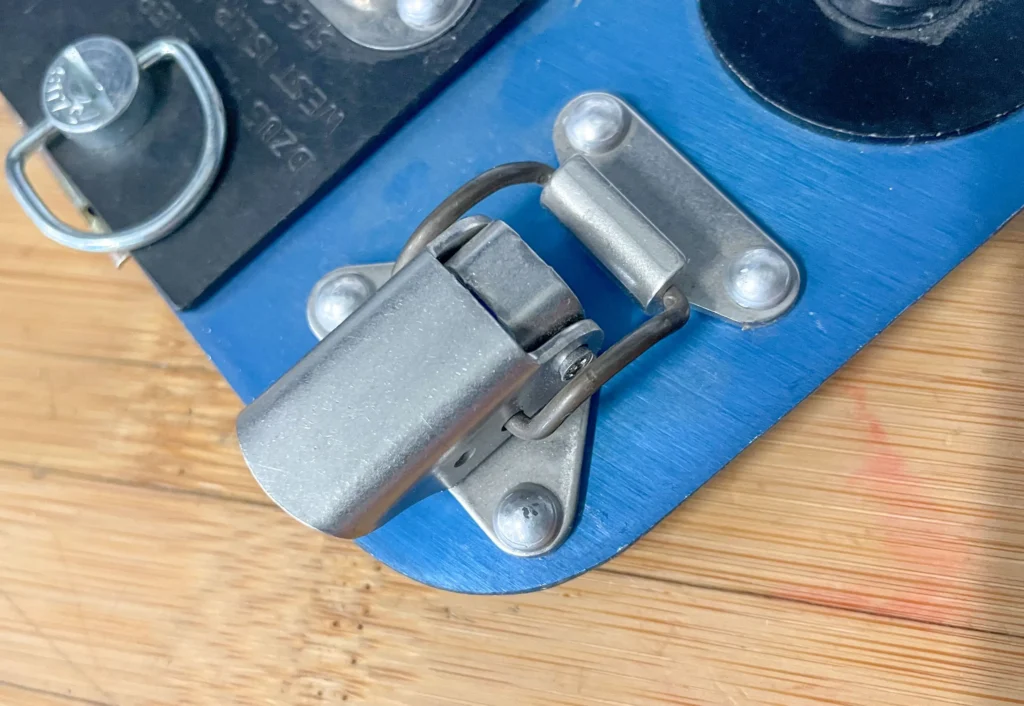
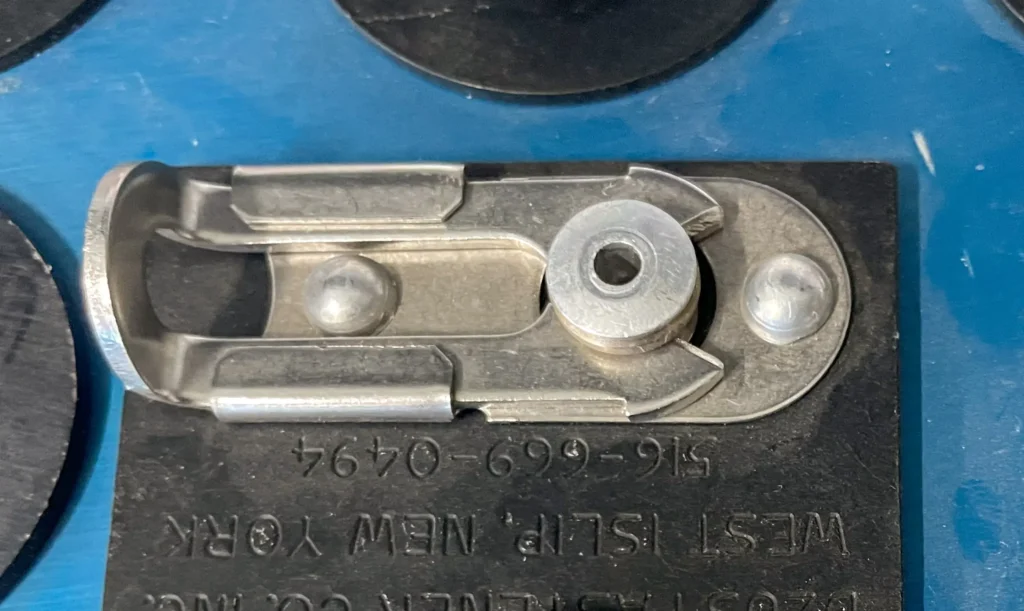
These tend to be a bit difficult to find today (the Dzus company changed hands a while back), but they definitely have some motorsports applications if you can find them. They are essentially stud-mounted fasteners that can be used in any number of applications. I’m really high on these fasteners. Here’s a good example of why: Valve cover gaskets and valve cover fasteners are a curse. You know the drill: Unfasten the bolts, grab the little load bearing washers or tabs, put the bolts and washers in a spot where they won’t fall into (a) the carburetor or (b) through the oil drain back holes in the cylinder heads, pull the covers, run around the valve lash, re-install the covers and then fight with the 1/4-inch hardware. Invariably, it takes longer to properly line up the valve cover bolts than it does to lash the valves on a solid-lifter cam. Worse yet, too much torque on the tiny bolts can either bend a steel or stamped aluminum cover into a pretzel shape, strip the threads or snap the bolt. In the end, oil leaks at the valve cover are common — especially if the valve covers are only equipped with four fasteners, such is the case with a Chevy small block.
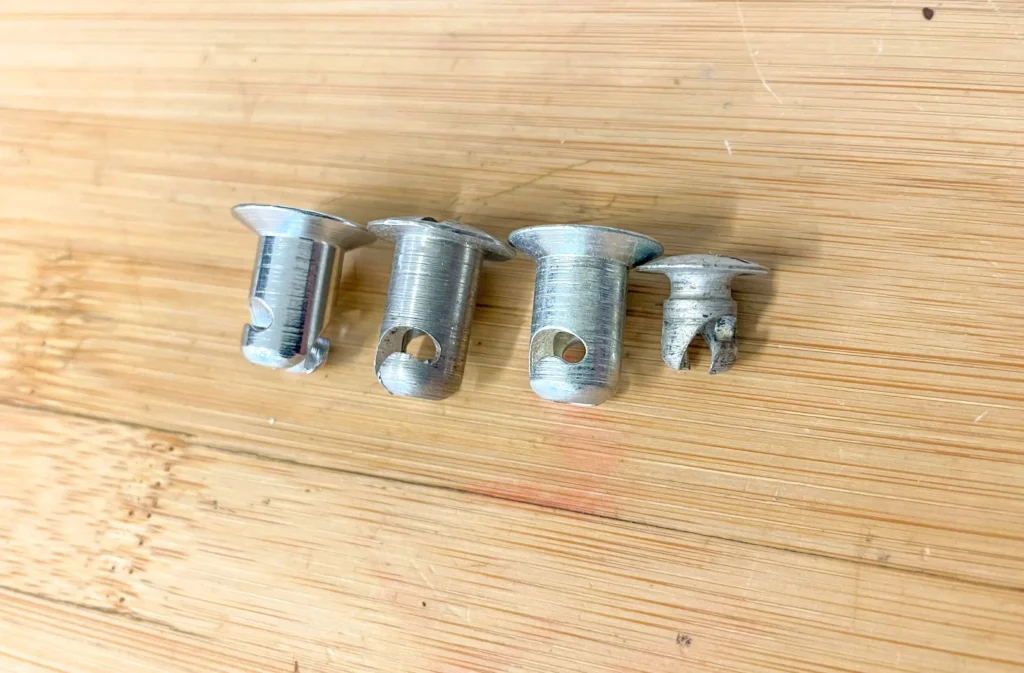
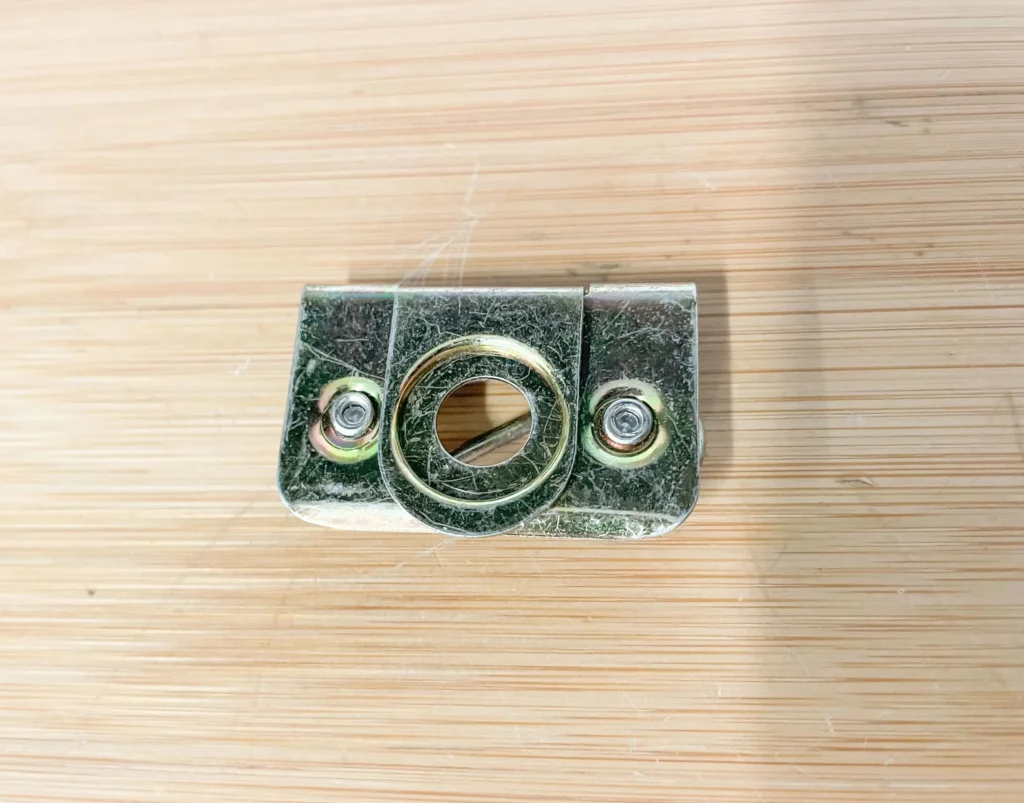
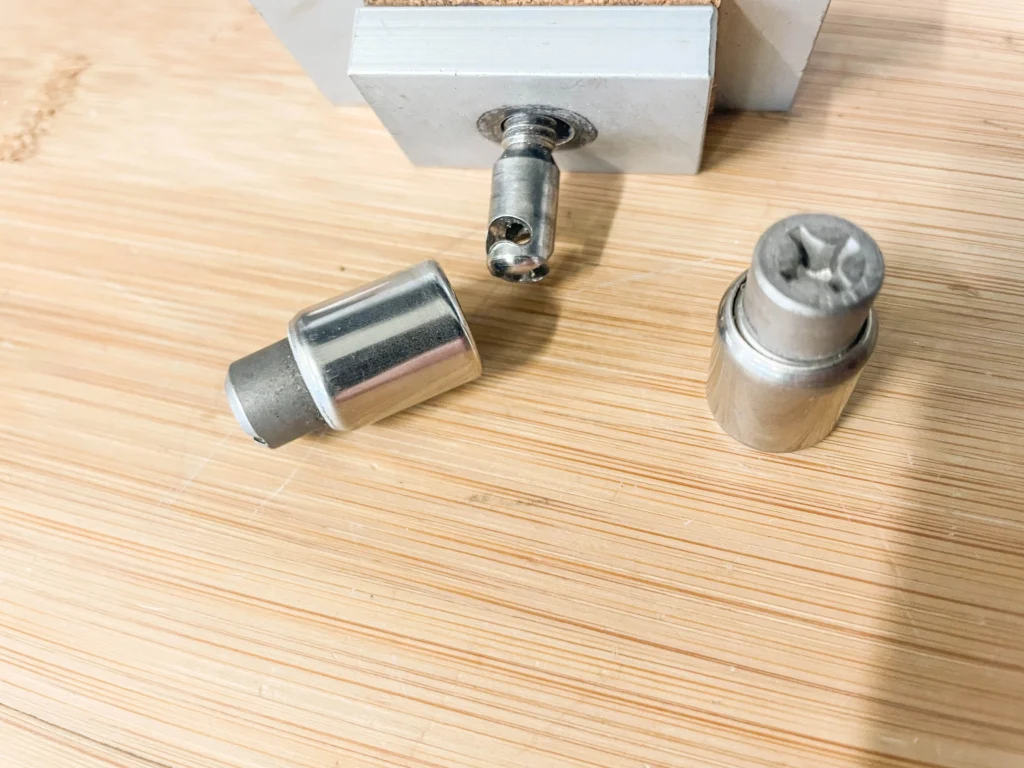
The solution is the old Dzus Guide Pin Fastener (which is available in a 1/4-20 thread or a 5/16-18 thread). These fasteners are, of course, universal in design. As a result, each fastener has to be custom fit to the application. The first thing you should do is to thread each of the fastener studs through a die. This cleans the threads and removes any excess material that has built up during the plating process. While you have your tap and die set out, run a tap down each valve cover bolt hole in the cylinder heads. This will remove all accumulated grit and grime from the threads. Next, remove your valve covers. You’ll note that the actual head of the Dzus fastener stud will not pass through the valve cover fastener hole. It’s a simple matter to enlarge the holes in the valve cover with a 21/64-inch drill bit (a 5/16″ or 11/32″ drill bit will work in a pinch). Clean any drilling burrs with a fine round file. Similarly, the corresponding holes in the gasket might have to be enlarged (this enlargement process varies from gasket set to gasket set).
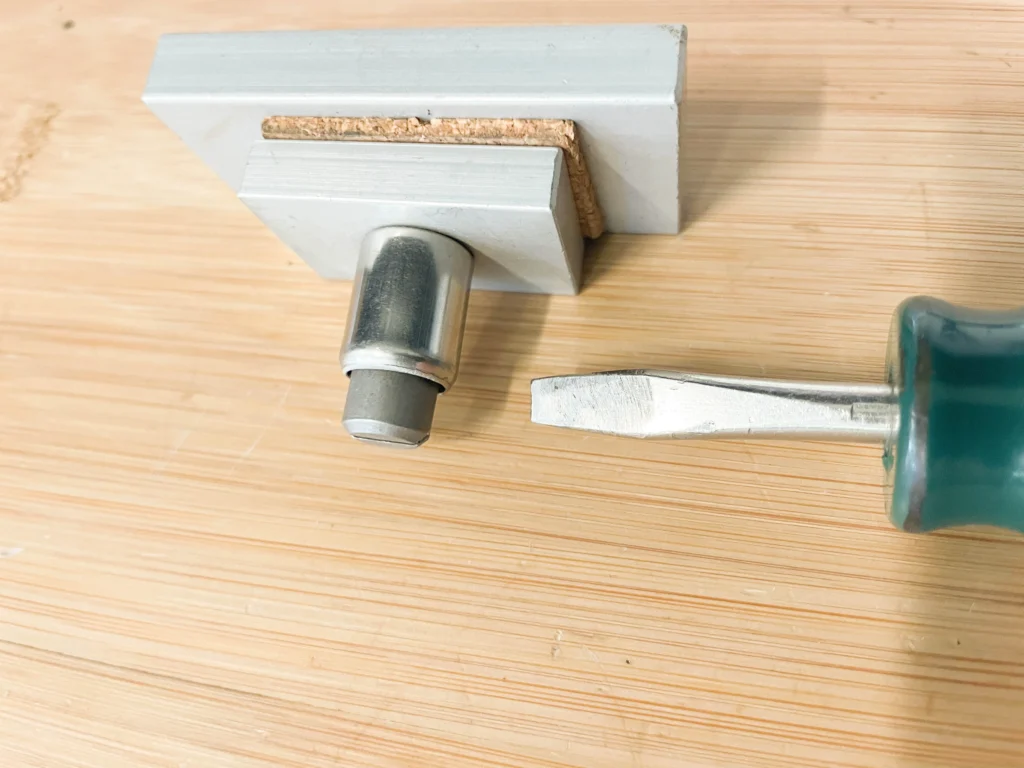
With the covers drilled, you can turn your attention to the actual Dzus studs. Fit the valve covers to the cylinder heads, complete with an appropriate gasket sandwiched in between. Gently turn in one of the Dzus studs. Add the quick release top section and turn down the fastener (just don’t get carried away). If the stud bottoms in the cylinder head, it will have to be shortened (not a problem with most cast covers, but almost mandatory with stamped steel or stamped aluminum valve covers). With the stud removed (to remove it, simply use the Dzus receptacle — the quick release top section), you can shorten the threaded portion of the stud by an appropriate amount. Although there are several methods of shortening the stud, the easiest is by way of a bench grinder. I normally thread a 1/4-20 die to the end of the stud (until it bottoms out against the special quick release body). Then the thread portion of the stud is shortened the required amount. Debur the end with a file, remove the die and the threads will be perfect.
This process has to be repeated for each valve cover bolt hole on the power plant. Given Detroit production tolerances, each stud should be set up for each valve cover bolt hole. Otherwise, you won’t be able to establish the correct height for the Dzus quick release.
Check the operation of the respective Dzus fasteners. A properly installed assembly will be tight enough to “snap” the valve cover into place, but not so tight that the valve cover tab surrounding the fastener bends. Conversely, if the stud is not installed deep enough, the fastener will not be tight. Once the exact location is established, remove each stud individually and apply a small amount of Loctite to the threaded section of the stud. Re-install the stud with the Dzus fastener top included and move to the next stud.
You’ll typically find with this setup that the valve cover gasket is perfectly “captured” on the cylinder head. A properly installed set of Dzus fasteners will preclude the use of a sealant on the gasket surfaces. I always install the gaskets dry when using this system and because of the fasteners, I’ve never experienced a gasket failure.
Other Neat Stuff…
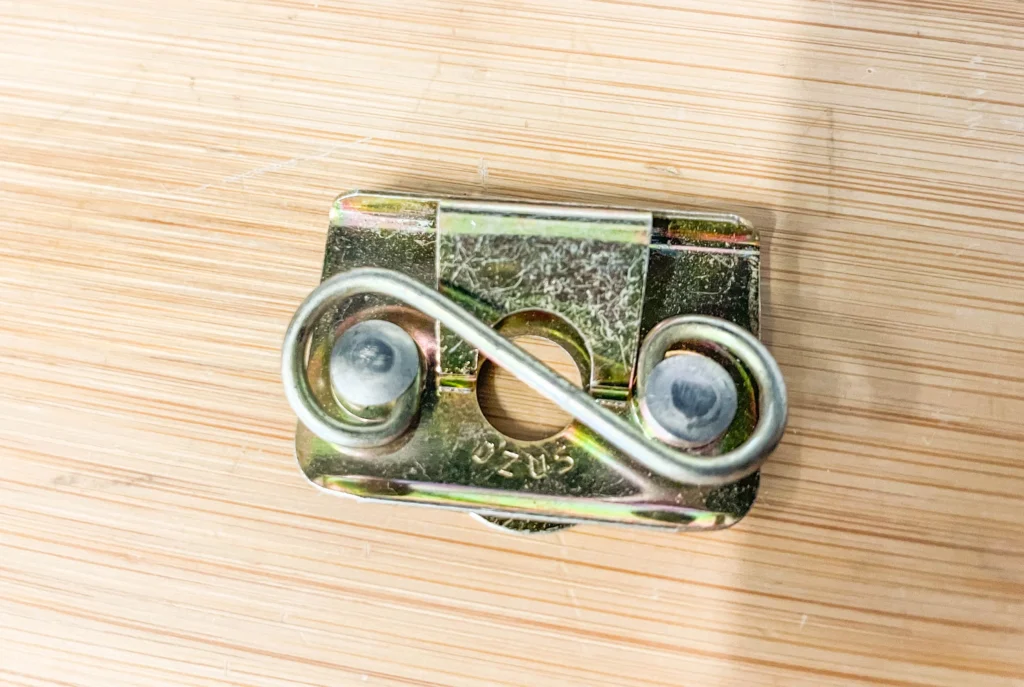
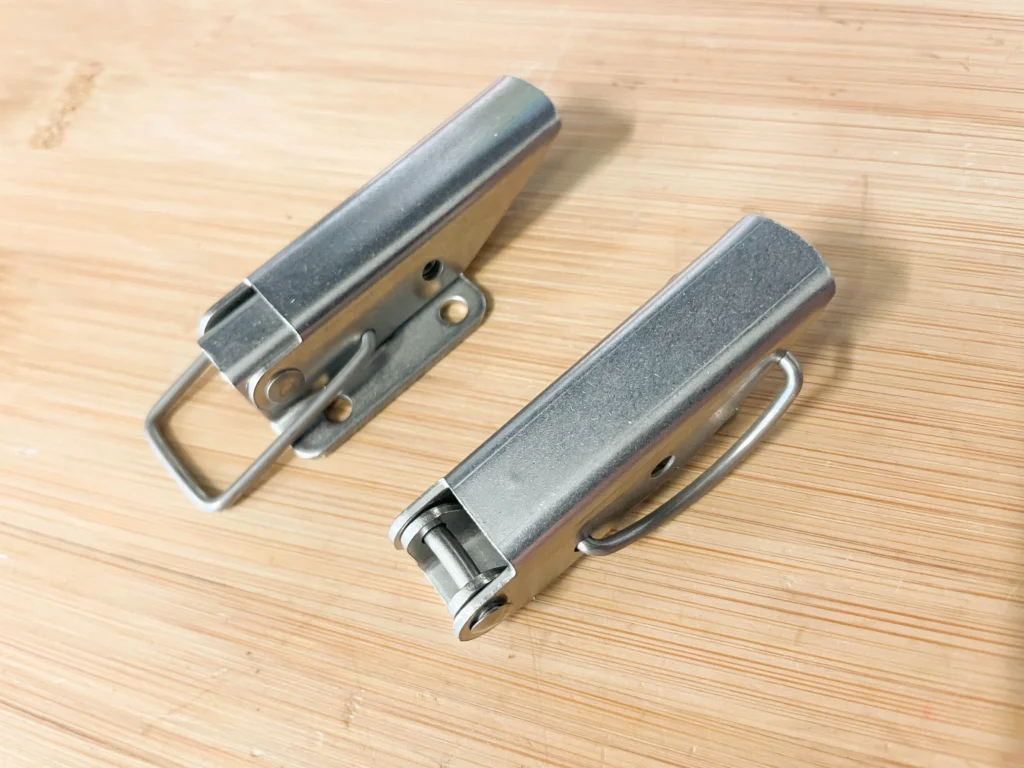
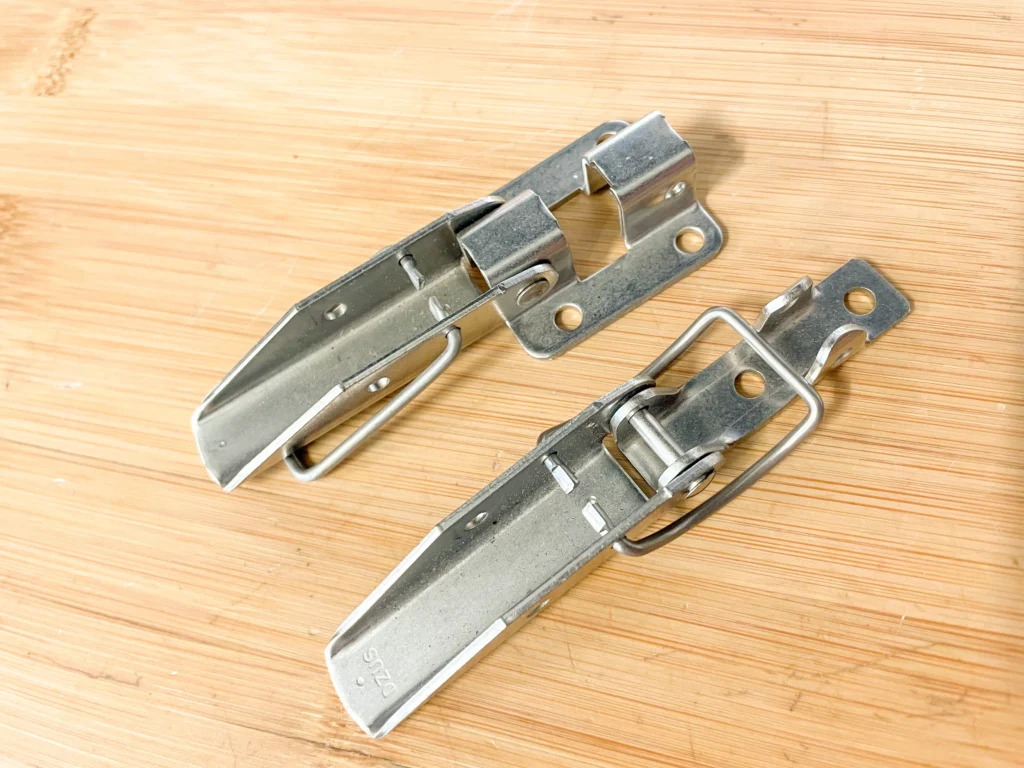
Another neat piece in the Dzus catalog include Slide Latches. This system is based upon a sliding bar assembly, a bushing as well as assorted spacers. The sliding bar assembly is attached to the removable panel and the bushing is mounted to the panel’s stationary support. When closed, the spring action of the bar resists opening under shock and vibration loads. Typically, these pieces can be used for replacements for items such as hood pins or any other spot where you can use a sideways motion to lock or unlock a given latch.
There are countless other fasteners available in the Dzus line. Things like plastic ¼-turn fasteners, pawl latches, toggle latches and of course, a myriad of extreme duty, quick release aviation fasteners included in the Dzus mix.
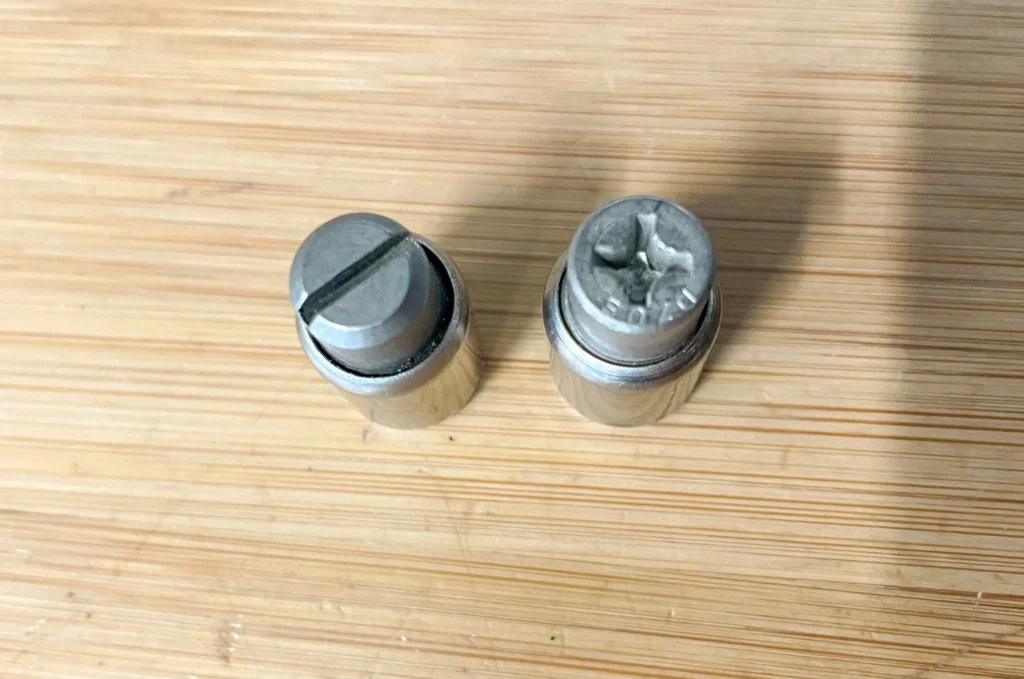
Button: The term “button” is used in some industries (such as drag racing) to refer to an oval head stud, which resembles a button.
Cam: The cam is the milled opening on the end of a stud. This opening is used to engage the receptacle and lock the stud in place by way of the detent in the cam.
Deflection: Deflection is the amount of movement of the receptacle spring when locked on to the stud. The stud is secured in place by the pressure of the spring in the cam. In order for the spring to ride over the cam to the locked position, the spring must be deflected (moved). The minimum / maximum / actual deflection is the amount of this movement. Minimum is the amount that must be moved in order for the lock to be secure. The maximum deflection is the amount that, if exceeded, would prevent the stud from locking on. The actual deflection is the amount of spring movement calculated based on the parameters provided.
Gap: The gap is a space between the panel and the support. This space may be occupied by a gasket or any interposing material, or it may be air space.
Panel: The panel is the surface on which the stud is located.
Retainer: The retainer is a part that is used to secure (retain) the stud in the panel to keep the stud from falling out of the hole.
Receptacle: The receptacle is a device to which the stud is locked to hold the panel closed.
Stud: The stud is the main item which engages the receptacle and secures the panel to the support.
Support: The support is the surface to which the receptacle is mounted.
Undercut: The undercut is a part of the stud which is smaller in diameter than the stud shank. The undercut is located directly under the head. This decreased diameter is where the retainer fits to prevent the stud from coming out of the mounting hole.