Tip 30 – CONTACT! The contact points on drum brake backing plates can become grooved with use. No problem - just get some new backing plates. Unfortunately, if you have a rare car (or if you’re working with vintage hardware, which is extremely popular today), finding replacement parts might be easier said than done. If your backing plates fall into that category, try this: Weld new metal into the grooves (a MIG welder works perfectly). Grind down the weld until it’s smooth, and you’re ready for action. You might be surprised at how much more effective those old brakes have become.
Tip 31 – PONY EXPRESS: Plenty of early Mustangs and other Ford products were equipped with 9-inch diameter rear brake drums. They’re small because the cars were light. To add a wee bit more stopping power, think about swapping in the drums, backing plates and other hardware from a Fairmont wagon. It’s an easy swap using stock OEM components.
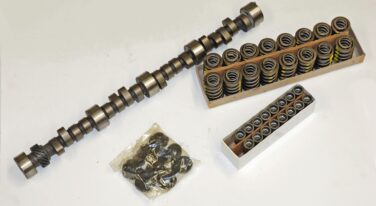
Tip 32 – WEIGHT WATCHERS: Big bad Buick finned aluminum brake drums are all the rage with street rodders today. Those brakes not only look good, they also offer impressive stopping power (for a drum system). There are some other inexpensive, easier to find aluminum drums out there, particularly if you have a GM vehicle with a rear axle that has common 5 lug on a 4-3/4-inch-diameter bolt circle along with back drums that measure 9.5-inches in diameter by 2-inches wide (that is just about every vintage GM compact or mid-size car). You can drop 10 pounds of unsprung weight by removing the existing 14-pound cast-iron drums and installing a pair of aluminum drums, which weigh 9 pounds each, including their iron liners. Where do you find these aluminum drums? Try looking under the following candidates in your local wrecking yard (FYI, not all of these vehicles came with aluminum drums – as near as we can tell, they were packaged according to option groups on a specific automobile or light pickup):
• Blazer/Jimmy, '83-84, S or T models
• Buick, '80-84 Le Sabre, '85 RWD, '78-81 Century, '78-87 Regal
• Riviera, '81-85
• Camaro, '82-92
• Chevy passenger, '86-89
• Cutlass, '78-82
• Firebird, '82-92
• Grand Prix, '78-85
• LeMans, '78-81
• Malibu, '78-81
• Monte Carlo, '78-81
• Olds Delta 88, '80-85
• Pontiac, '80-81, '83-85 Bonneville, '86 Parisienne
• S10/S15, '82-84
• GMC Sprint/ El Camino, '78-81


![[Gallery] Show us Your Mustang! Celebrating 60 Years of Mustang](https://www.racingjunk.com/news/wp-content/uploads/2024/04/Al-Liebmann-376x206.webp)
![[Gallery] Okolona Street Rods Kentuckiana V Foundation Car Show](https://www.racingjunk.com/news/wp-content/uploads/2022/04/IMG_0774-e1650040587750-376x206.jpg)
![[Gallery] Road Rats Car Show](https://www.racingjunk.com/news/wp-content/uploads/2022/05/2A-e1651770667920-376x206.jpg)
Brakes…. Everyone talks about “Big brakes”. However, most of the aluminum caliper’s pistons are reduced down to original GM specs. No gain in PRESSURE. PRESSURE is what applies the brakes. The stock, or lack of, a power brake unit, can not RAISE PRESSURE with a manual system. Manual systems can lock up a drum brake, but difficult with a high horsepower engine and disc brakes. I have built hundreds of handicapped modified brakes without ever taking the wheels off. The “sensitizing” of a stock booster for handicapped, assumes stock vacuum pull. In a modified engine, most times the vacuum is lost. I have been installing MY HYDROBOOST systems to raise PRESSURE, and eliminate the lack of stopping power using Hydroboost. They can deliver up to 1800psi to the calipers at idle pump speed. Contact [email protected] for more info. https://uploads.disquscdn.com/images/b5c66546c57f488a4efd92601ff17d23b6f0dca0e56c9e8f2670564dcf95d87a.jpg
Bob,
First off, I want to THANK YOU for working to allow enthusiasts with handicaps to be able to enjoy their cars, as well as have the ability to maintain their independence by driving themselves.
The reasons for installing “Big Brakes” are not to drastically shorten stopping distances, and especially not to make the pedal pressure less than stock.
The main reason is the larger rotors have a much higher THERMAL capacity, and also more area to dissipate that heat between braking events.
Calipers with more pad area also spread that heat over a larger area, again lowering peak pad temperatures, as well as having more material, which provides a lower wear rate.
HEAT is the enemy of brakes, and stock sized brakes often quickly fade after a few laps under track conditions.
Brakes fade for two reasons.
First is the pad temp rises above it’s operating range, which causes it’s coefficient of friction to drop. This is where you push harder on the pedal, but the brake force just continues to go away.
The other is the pad conducts so much heat into the pistons that the fluid boils. Once gas bubbles form in the calipers, it displaces fluid back to the reservoir, and when you mash the pedal it just goes to the floor, with little or no braking effect.
This problem is compounded by old brake fluid, which gradually absorbs moisture, lowering its boiling point.
A secondary benefit of larger diameter rotors is the pad has more leverage on the hub, which produces more brake torque for the same pad friction.
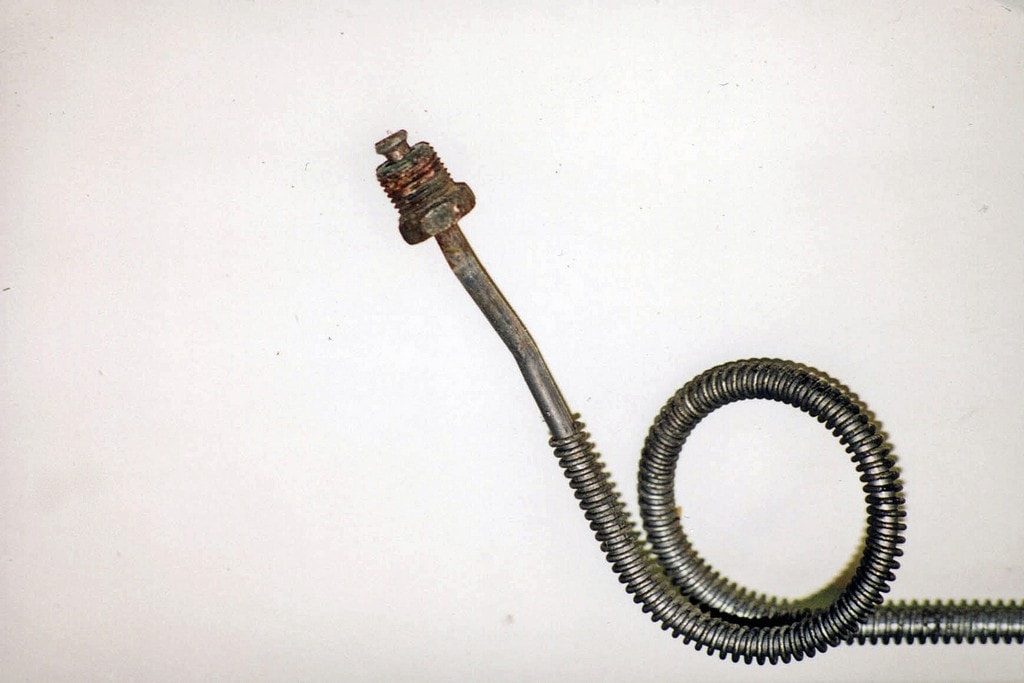
Look into Cupronickel brake lines.
I just plumbed the brakes on my race car with it. It’s awesome to work with, looks great and doesn’t rust.