

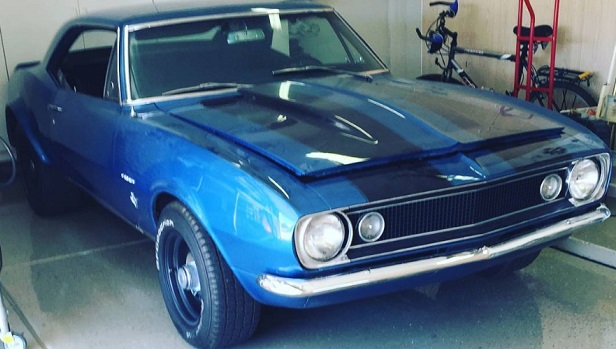
Scott Garven and his dad, Tom, are rebuilding this 1967 Chevy Camaro which has been living in Tom’s garage since the early 1990s. Scott has plenty of experience with mods and builds, most recently on a BMW-turbo engine rebuild which he documented on his blog. The Camaro project is a work in progress for Scott and Tom, and we will be sharing it as they go to help guide other hands-on modders with this project.
“This is our first generation Camaro. The car was purchased in the early 1990s and hasn’t been touched much since then,” explains Scott. “The car was mainly used as a cruiser and a street show car, and But the main purpose was to enjoy the sight, sound, and aroma of a 1967 Chevrolet Camaro on the road. It’s loud, fast and fun to drive. “
The initial upgrades upon purchase 12 years ago were new rims and tires, new shocks, some shift linkage repairs, and touching up the car to make it look more presentable. They also had to install a heater core since the Camaro didn’t have one. Since then, the car has been hanging in Scott’s dad’s garage in Wisconsin.
“The last drive and tune-up was in 2014 while I was completing my training at Universal Technical Institute,” Scott says. “With a few adjustments here and there, it produced nearly 300 horsepower and 300 foot pounds of torque at the wheels. I was impressed but wanted more.”
“The overall goal is to get the Camaro back on the road after over a decade of sitting, which involves restoring systems that have failed due to neglect over the years. The overall unibody is clean, without any serious rust issues, since the car was a “California” car for most of it’s life. So we will update and upgrade the brake system, fuel system, wiring harnesses, interior and engine components in due time to get it on the street again.”
Scott and his dad hope this series will help other Camaro owners plan their own re-build,.
Exhaust Headers Prep and Paint
Headers. To paint or not to paint?
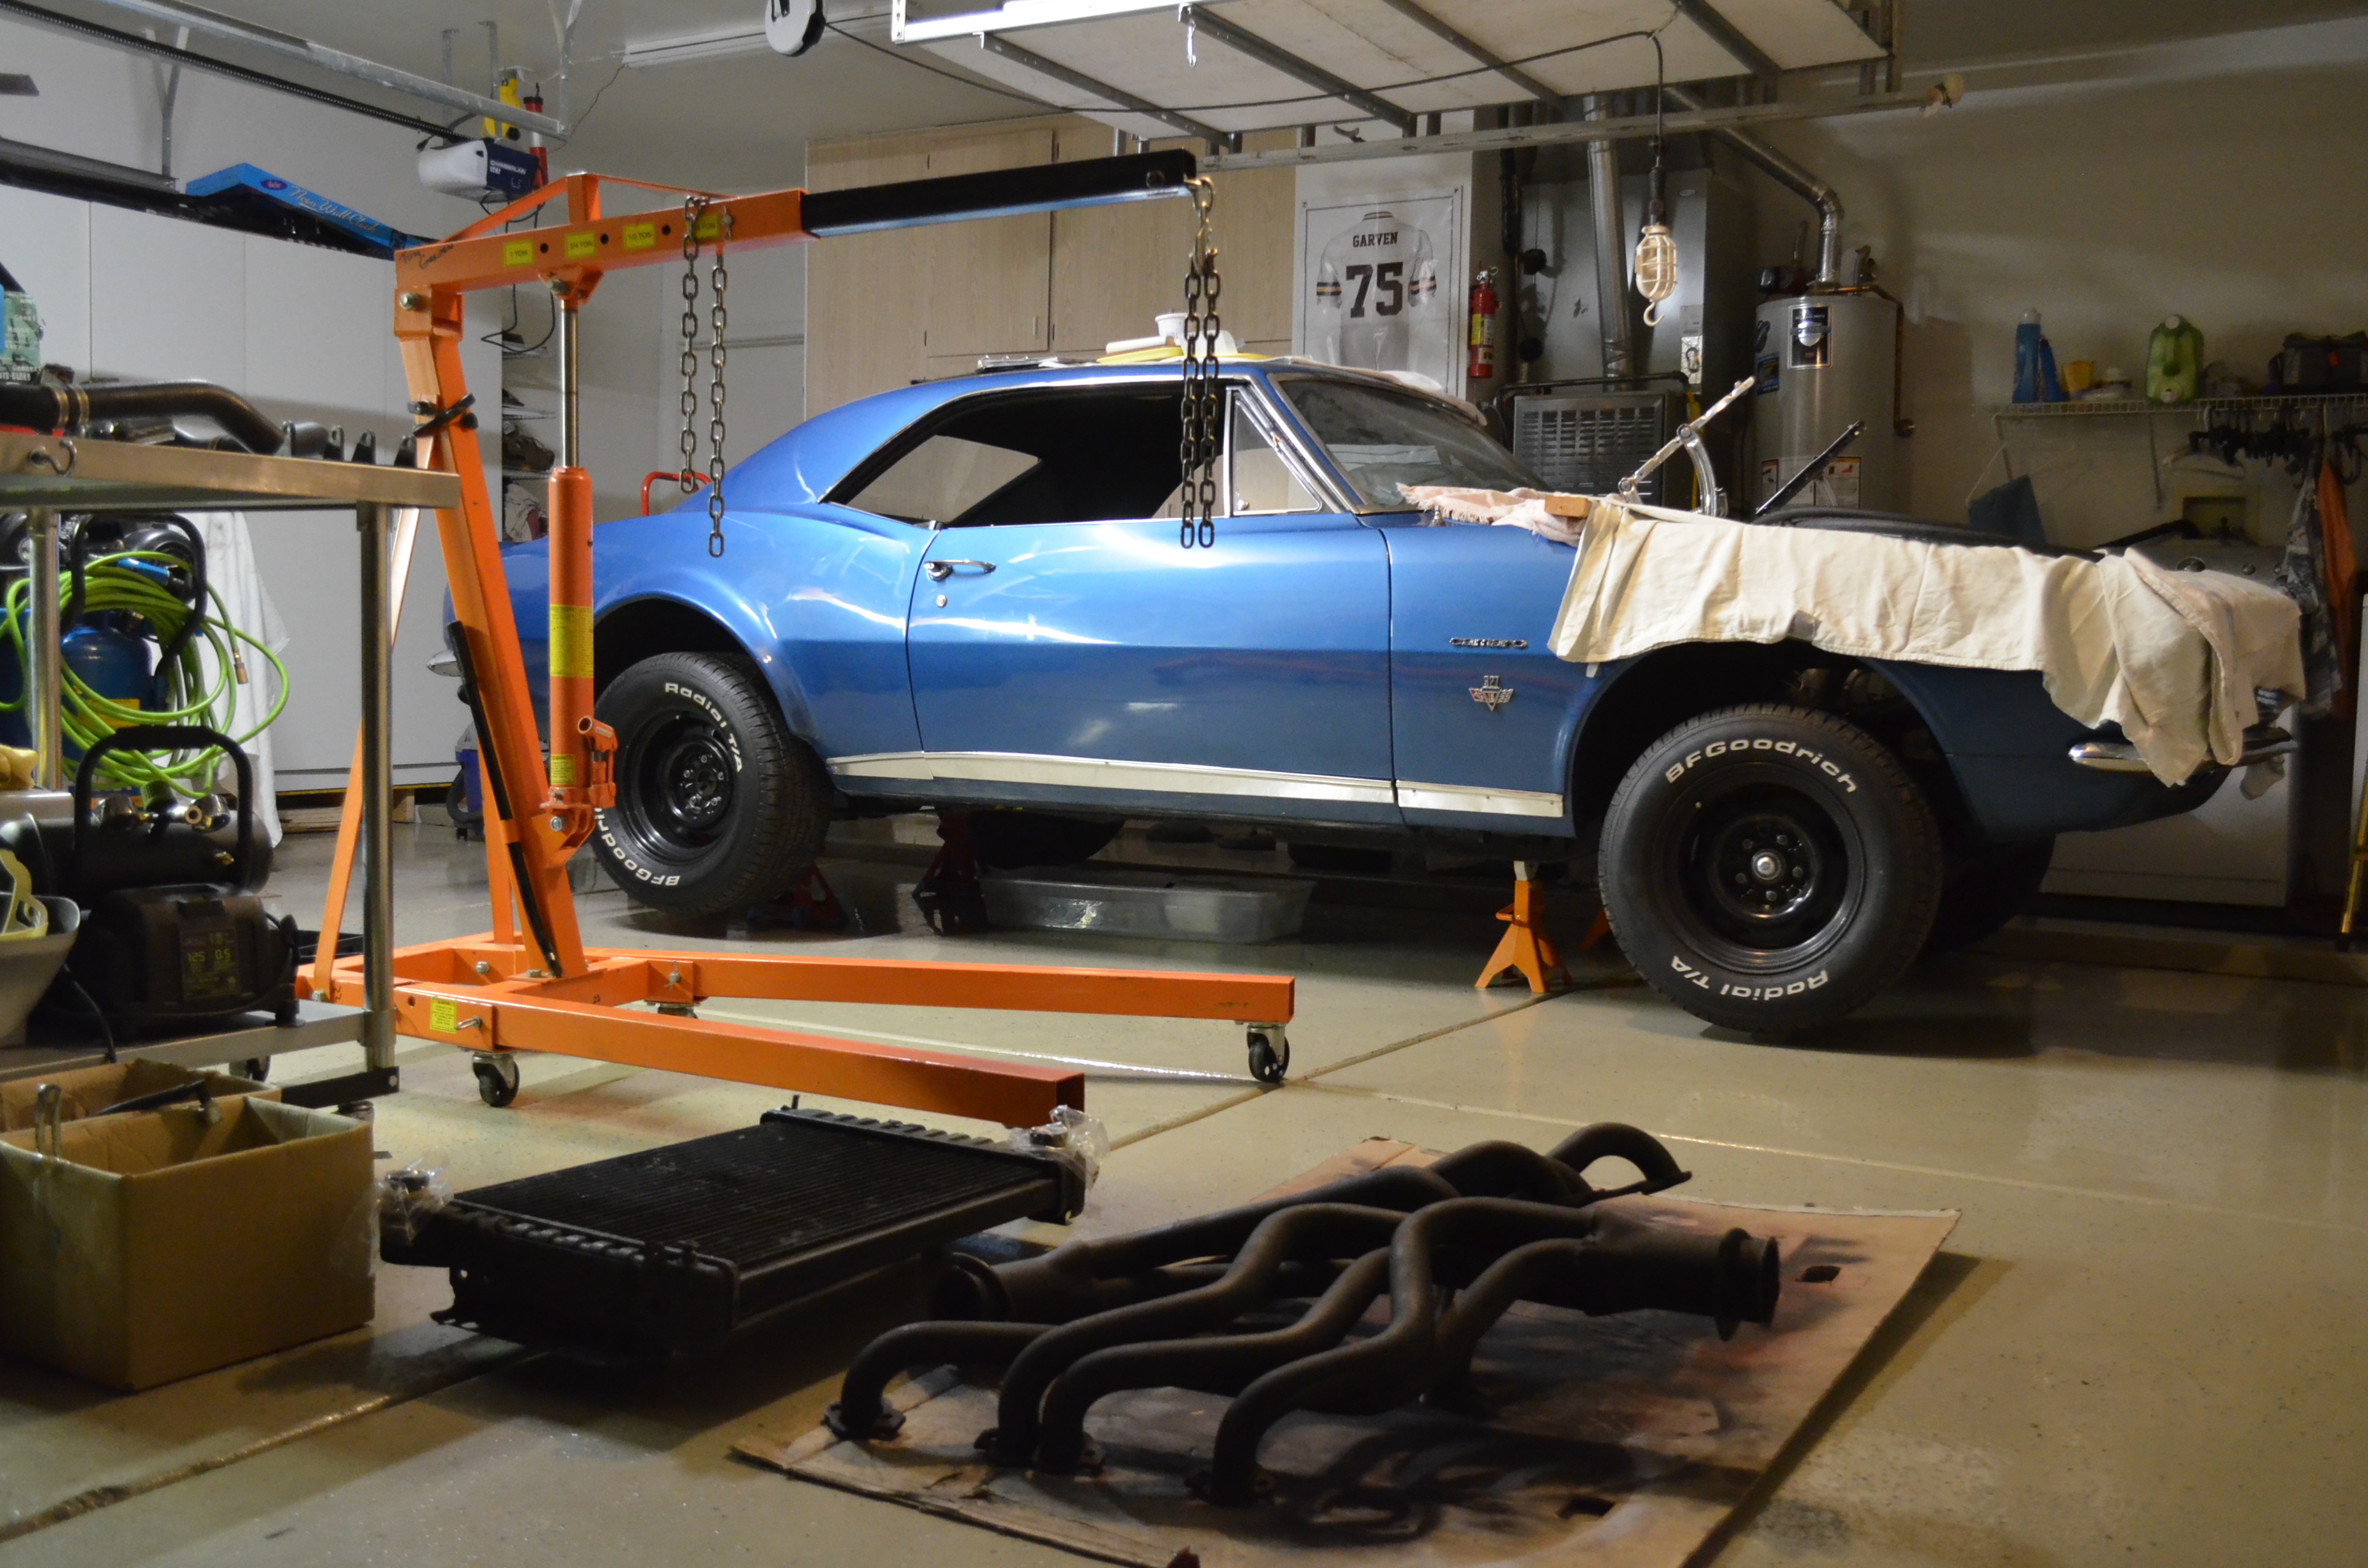
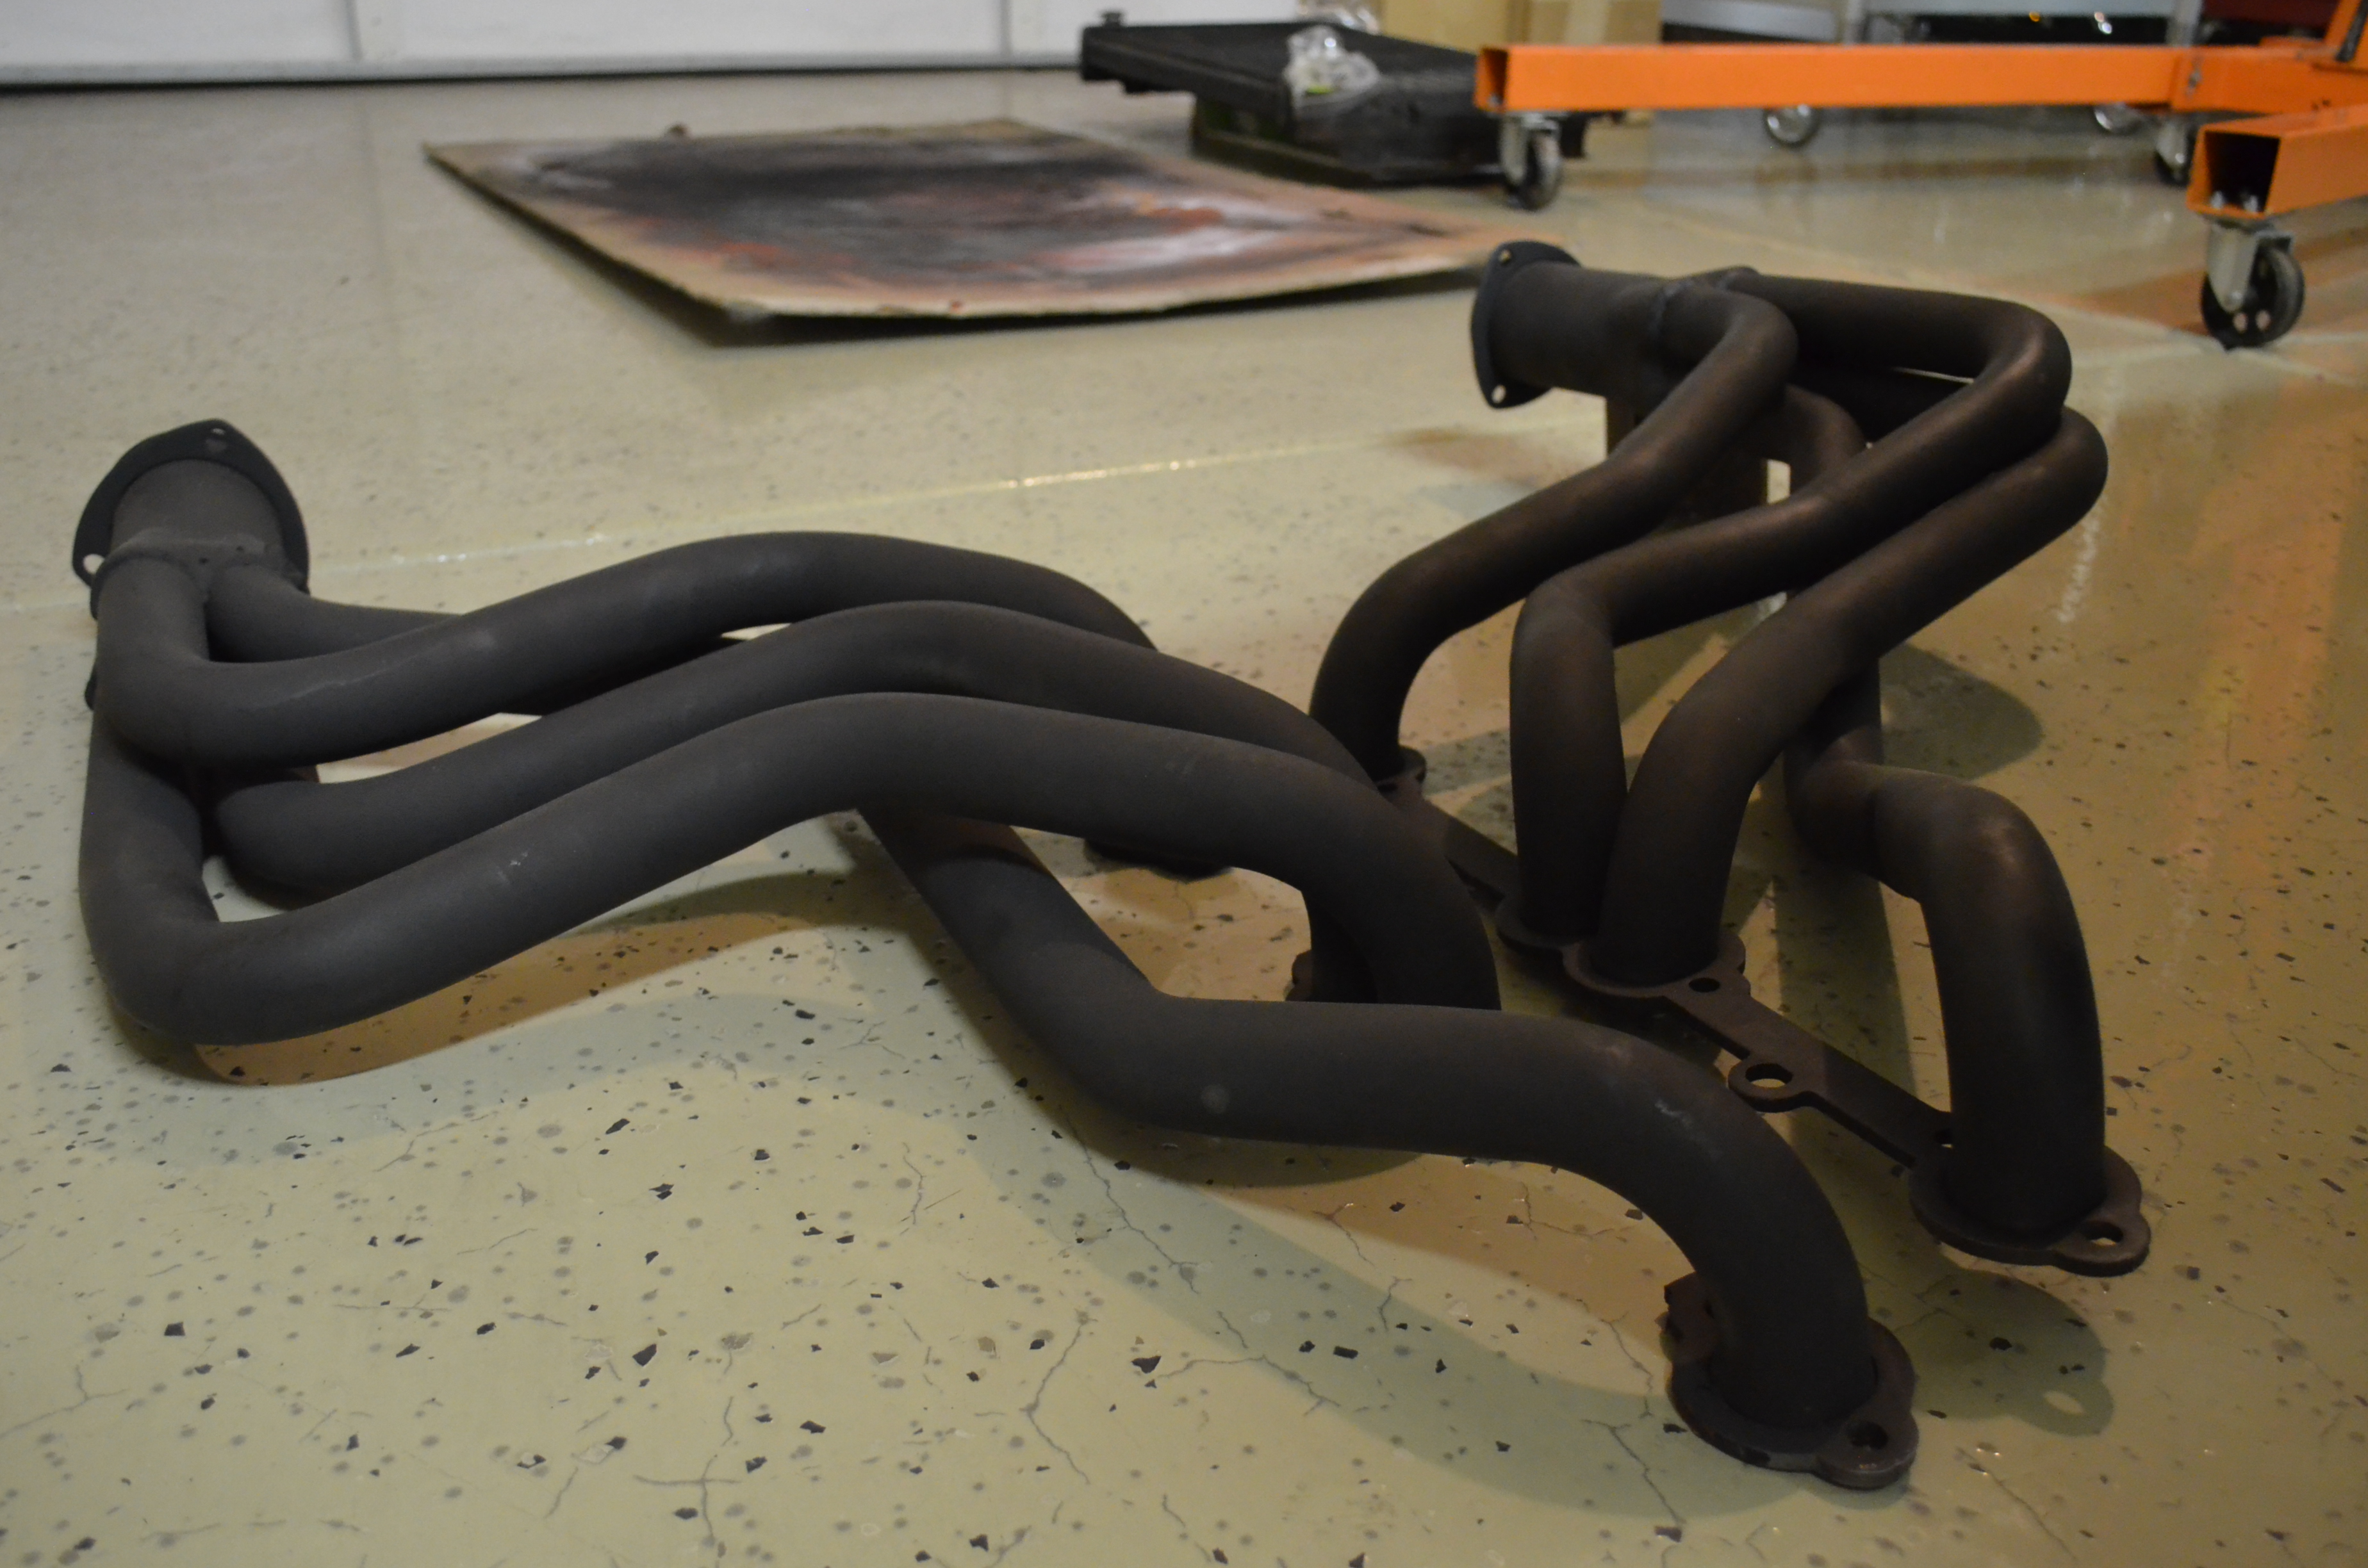
Aftermarket headers come in many shapes and materials. We have a classic setup of long tube steel, 4 to 1, headers. These were originally on the car since the 90s and we really like how they look and sound on the engine. Plus, we wanted to put the high temp paint challenge to the test. Besides keeping the headers rust free, paint on the headers will keep heat inside, which does improve engine efficiency, but let’s not get too technical on exhaust gas flow theories, we can talk about that in another write up. Our headers were covered in rust and needed a complete restoration. They haven’t tasted hydrocarbons in years, and we wanted to make sure they will sustain another 20 plus years.
Our budget was low to make these headers look brand new again, and for about $40 and lots of elbow grease, they turned out great!
Benefits of painting headers
Aside from a cosmetic appeal, protection from outside elements to prevent rust and deterioration of headers is the most significant reason to coat exhaust headers with high temperature paint.
Precaution
Always use good safety habits and wear safety glasses.
Tools Needed
- Basic SAE tools
- Sandblaster
- Sandpaper (120 grit)
- Wire Brush
- Eastwood Pre Painting Prep Aersoal Can
- VHT FLAMEPROOF Coating Aersoal Can
Step 1: Removal of Headers
With the headers removed we went over to our local auto shop and had the headers sandblasted. This is the most effective way to remove rust and check for pitting, holes or other damages from rust development. Our headers didn’t show any signs of severe damage after sandblasting, so we continued to prep them for paint.
Step 2: Cleaning and Prep
Once the headers were cleared from inspection, we then prepared them with 120 grit sand paper to improve the bonding of the metal and paint. After sanding, we cleaned off the excess debris from sanding. And just like any porous material, metal does in fact hold in moisture and other contaminants. To ensure there is no moisture in the headers, we used a heat gun to dry out the headers after cleaning.
At this point, the headers are ready for the first application of cleaner. We applied Eastwood Pre Painting Prep. This stuff is great and removes silicone, waxes, polish, grease and dirt from surfaces. Plus, it helps promote paint adhesion for a better bond of metal and paint.
Step 3: Coating and Painting
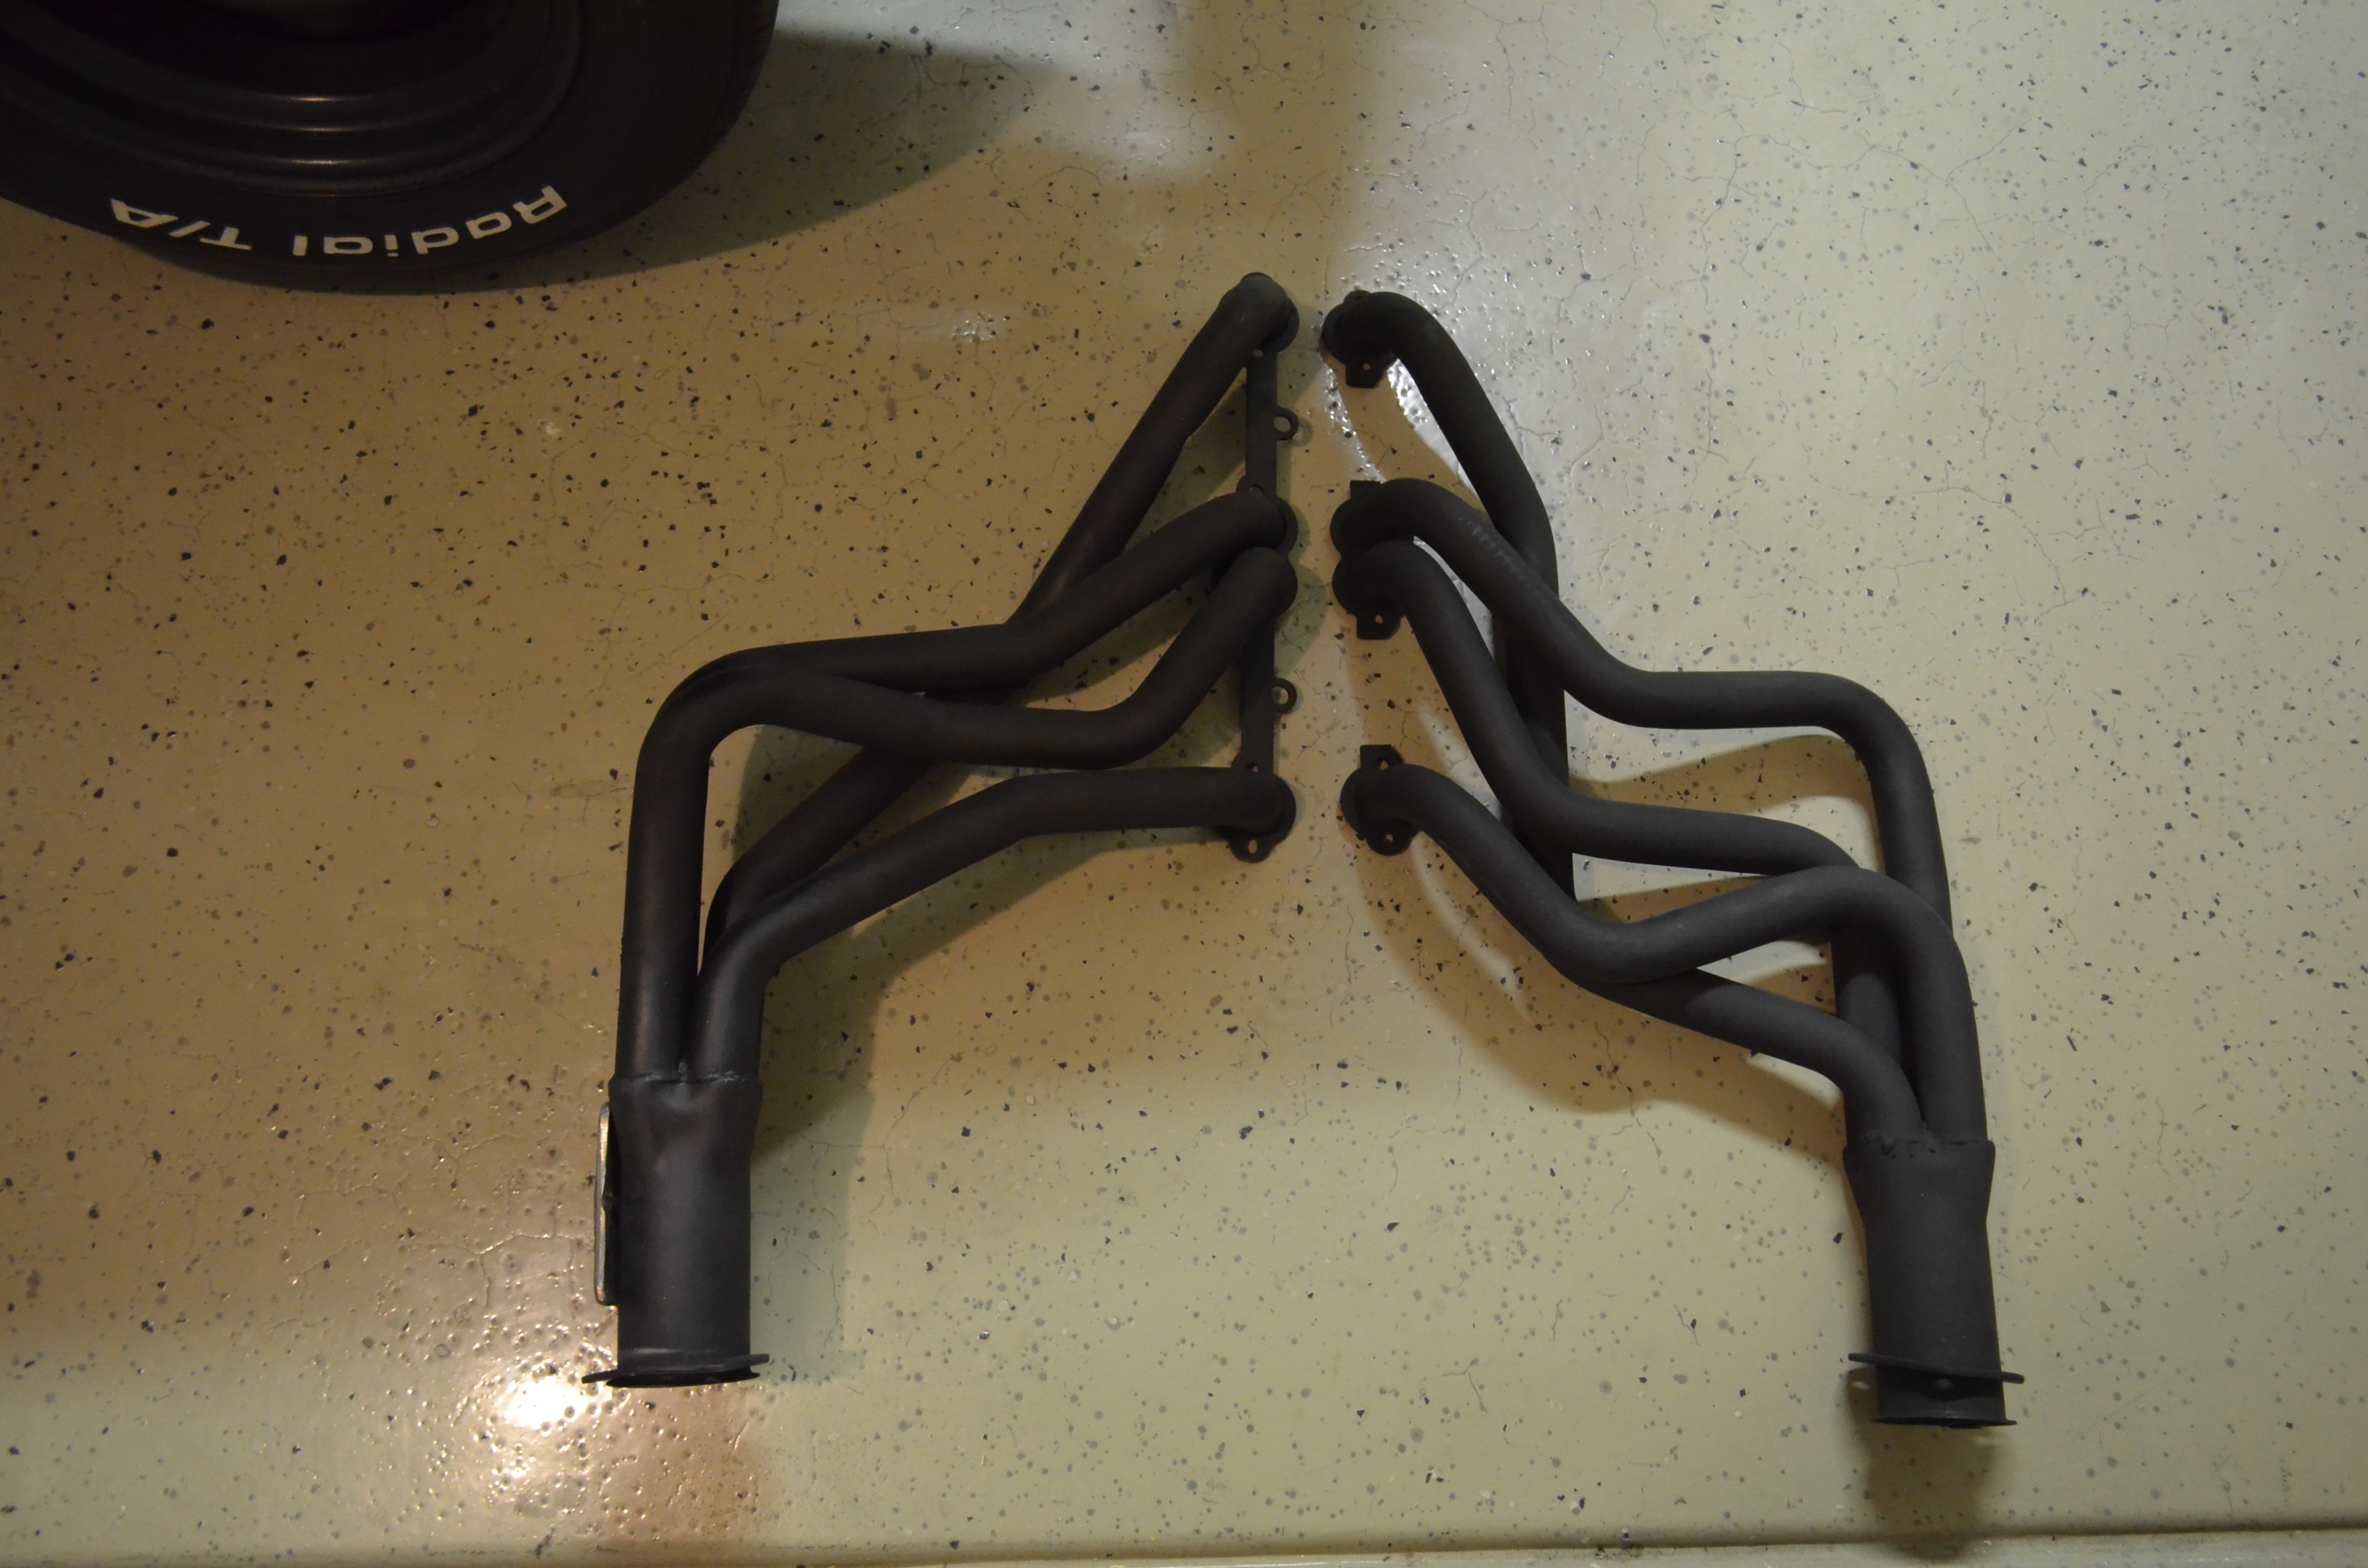
We then painted the exhaust headers with VHT FLAMEPROOF™ Coating. We applied three coats of paint which was more than enough. But we wanted to ensure that the paint would last for another 20+ years.
Step 4: Curing
Once the paint was dry, we then had to cure the paint to withstand the exhaust temperatures of the engine. Exhaust temperatures vary, but the ballpark for this engine is between 700 and 900 degrees fahrenheit.
Two options, either reinstall to engine and cure or cure the headers of the engine in a suitable oven. We decided to reinstall the headers onto the engine to cure the paint. These steps are very important to ensure the high temperature paint will hold up.
On Engine and In Car
Step 1: Run engine at idle for 10 – 15 minutes. Check for any signs of discoloration of paint.
Step 2: Let engine and headers cool for 20 minutes. Engine must be off.
Step 3: Start engine and run at idle for 20 minutes. Check for any signs of discoloration of paint.
Step 4: Let the engine and headers cool for 20 minutes. Engine must be off. Check headers for signs of discoloration or paint burn off. There should be none.
Step 5: The final step includes running the engine at normal operating conditions for a minimum of 30 minutes.
Off Engine and Out of Car
Step 1: Heat headers to 250 degrees F for 30 minutes.
Step 2: Let the headers cool for 30 minutes.
Step 3: Heat headers to 400 degrees F for 30 minutes.
Step 4: Let the headers cool for 30 minutes.
Step 5: The final step includes heating the headers up to 650 degrees F for 30 minutes. After this step, let cool for installation onto engine.
After the final step, you are all done coating your headers with high temp paint. Reinstallation requires new header gaskets and hardware (if applicable).
Leave a Reply