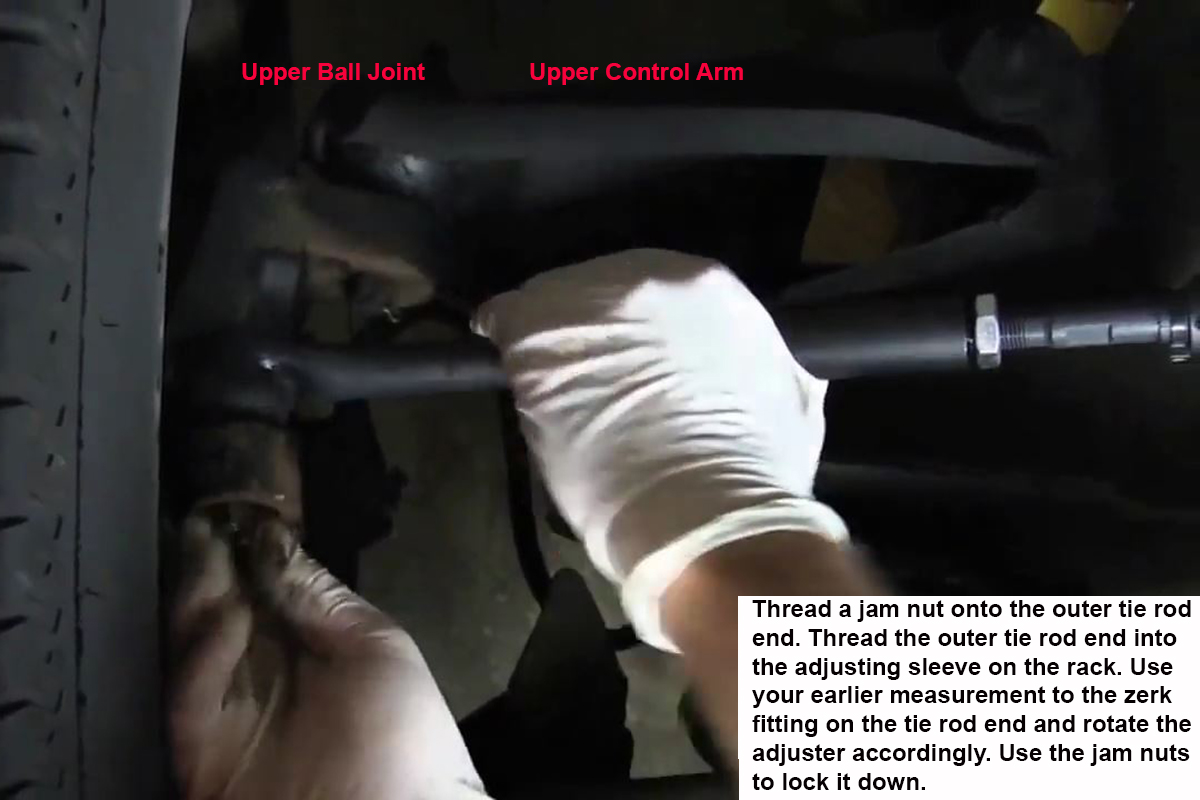
Grab whatever you wrote the zerk fitting to car centerline measurements on and adjust the tie rod ends to match those measurements. Slide the rod end shafts into the holes on the steering knuckles and thread the castellated nuts onto them. Torque these to about 50 lb-ft and run a cotter pin through the stud. If the pin won’t go because the hole is blocked, tighten the nut slightly until the pin will slide in. Lock the cotter pins in place by bending them either over the top of the studs or bending the around the two sides of the nut/stud.
Adjust Toe In/Out
Toe-in and toe-out describe the orientation of the tires in relation to the car’s front-to-rear centerline. For example, of a tire is described as toe-in, it means it points inward toward that centerline. Conversely, a tire that is toe-out points outward. With a rear drive car, we want a slight toe-in condition because as the car is being driven, the tires will be forced out a little at the front.
Toe HAS to be adjusted with the car completely on the ground, so take it off the stands before doing these measurements. Again, a friend’s help is very handy here, unless you happen to have an alignment rack you can walk or slide under.
Grab that piece of paper that you write your measurements from the preparatory steps in the previous article on and adjust the tie rod ends so that each side’s zerk fitting to centerline measurement is the same as what you wrote down. Now you can lock down the rod ends, either with a locknut or by tightening the two half inch nuts and bolts on each adjuster sleeve.
I like to set my toe from scratch whenever I replace suspension parts. Measure to and from the same spot on both the front and rear of both front tires to the car’s centerline and adjust accordingly. The toe spec for Camaros from 76-81 is ¼-1/2 inch toe-in. I like to split that to 3/8 (6/16 inch) inch toe-in.
With the car on the ground and the steering wheel centered and locked, measure from the centerline to one tire and set it to 3/16 inch toe-in. Lock that side down. Move to the other side and lock it down after setting it to 3/16 inch toe-in. Remember, you have to measure from front of the tire and then measure from the back of the tire and subtract.
Let’s take an example: The front width of a 1969 Camaro is shown to be 72.5 inches. That means the distance from our centerline to the edge of a front wheel is about 34 inches, give or take a bit. Now let’s say that your measurements you get are 34 inches in the front and 34 ½ inches at the rear. You could simply lock that side down and go to the other because the toe is set to ½ inch toe-in as the rear of the tire is ½ of an inch farther away from the centerline than the front of the tire.
However, as I said, I like to split the spec in half to 3/16 inch toe-in. Thus, I would crank the adjuster just a bit until my toe is set at that 3/16 inch toe-in I like and then lock it down. I would then move to the other side and measure and adjust until I get my 3/16 inch toe-in there as well.
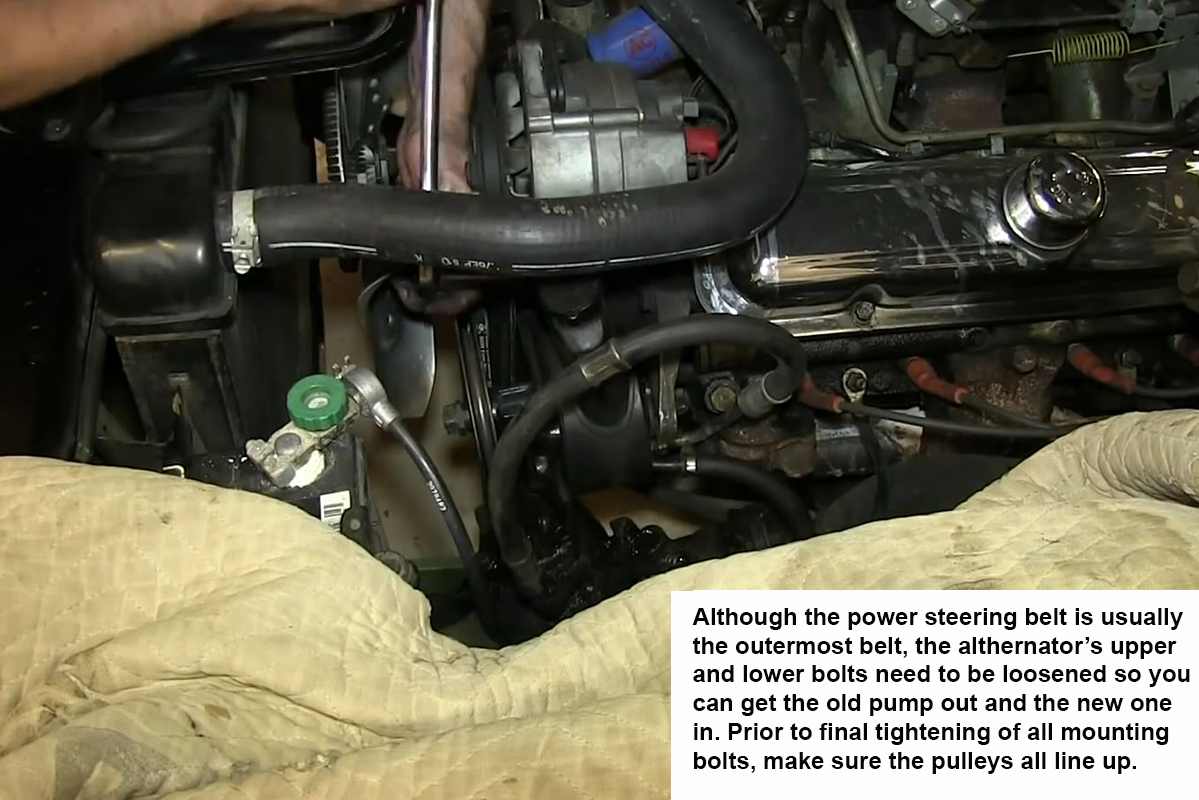
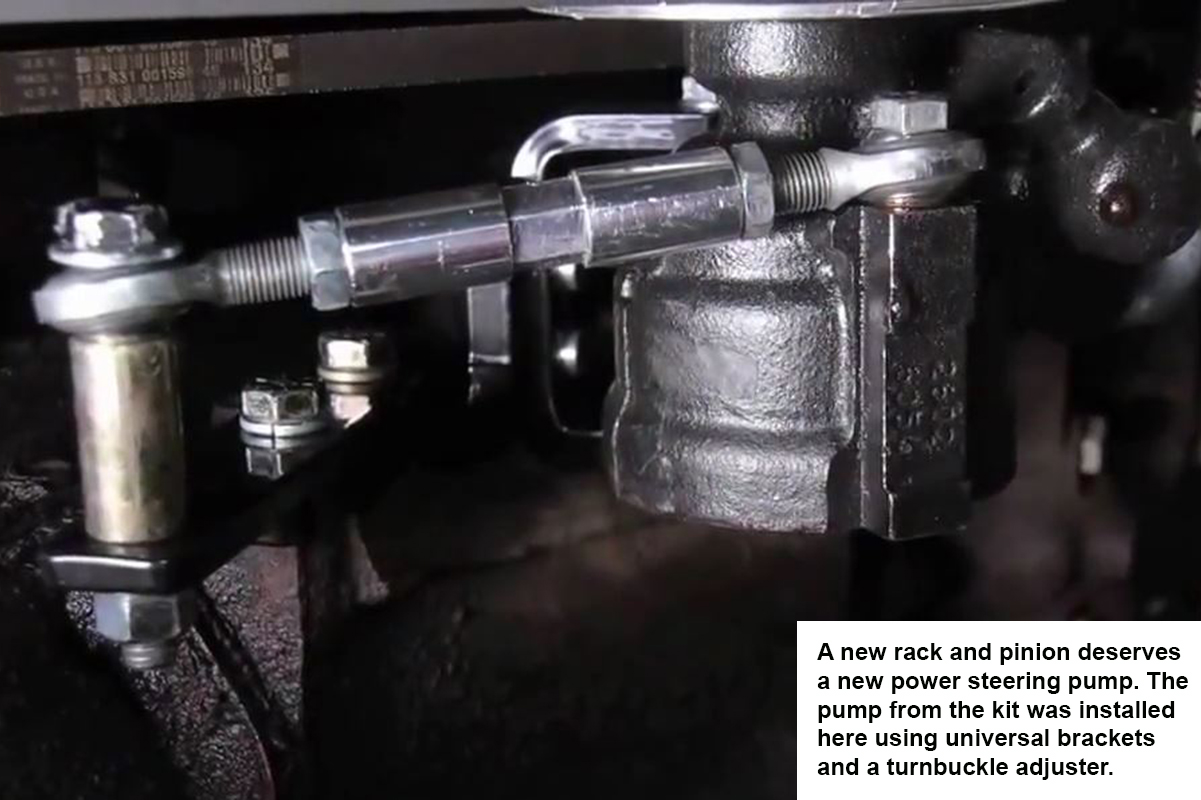
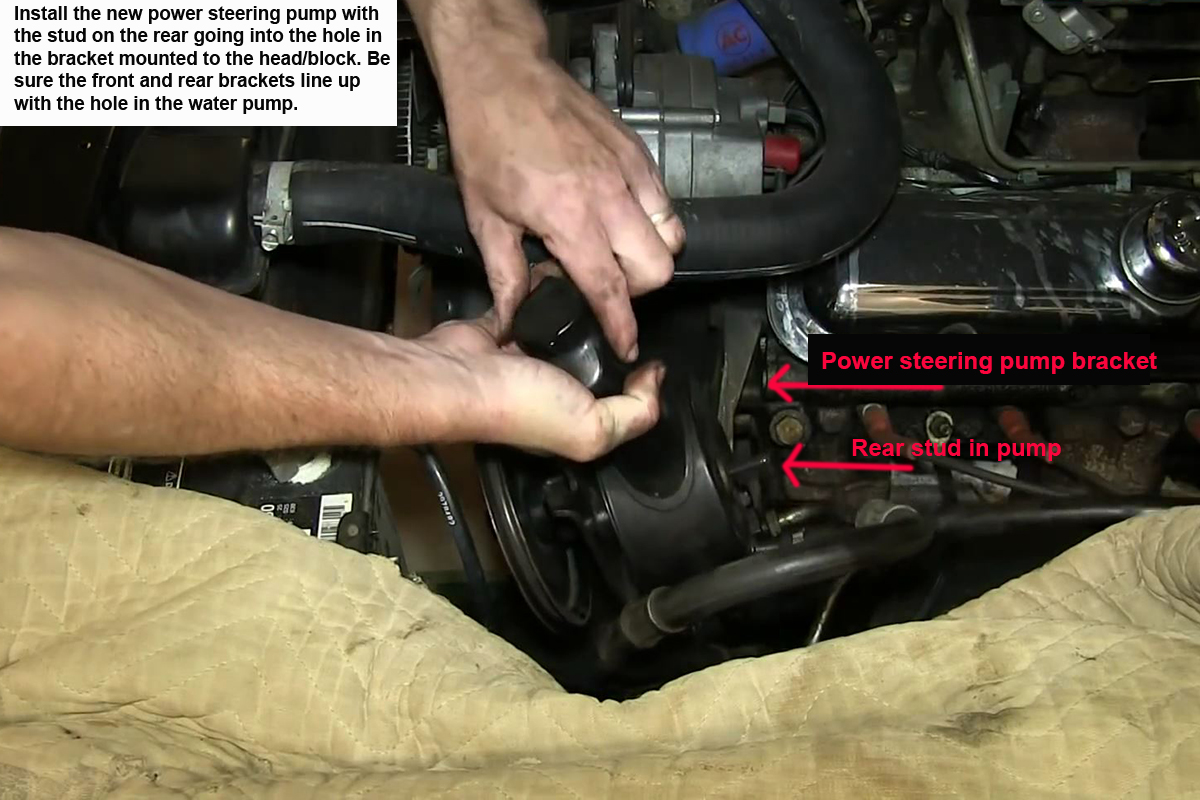
Installing the Power Steering Hoses
Jack the car back up and support it with the jack stands again. Slide the lo-side hose over the nipple on the pump (or reservoir) and tighten the clamp. Let the end of the hose hang into the catchpan. Attach the hi-side hose to the back of the pump, letting the other end hang in the catchpan. Remember, use a line wrench or crow’s foot on the hi-side hose so as to not ruin the fitting.
Now, pour a little more than a cup of power steering fluid into the reservoir and allow it to flow into the pan. This makes sure that no contaminants that got into the pump, reservoir, and hoses during storage and shipment will be allowed to contaminate and possibly damage your rack. They’ll be flushed into the pan.
Check the instructions with your kit to determine which port on the rack is hi-side/pressure and which is lo-side/return and attach the hoses accordingly. Remember to use a line wrench or crow’s foot adapter so you don’t ruin the fitting.
Fill and Bleed the System
Now, slowly fill the reservoir as much as possible. Give it a minute or so to allow the fluid to fill the lines and rack. Once the fluid level stops falling below where you can see it, start the engine and let it idle. Refill the reservoir again. You’re probably hearing the pump growling at you now. That’s to be expected.
SLOWLY turn the steering wheel from side-to-side, lock-to-lock five times in each direction. Check the fluid level in the reservoir and top it off to the “Full Cold” line. Repeat the turning of the wheel from one side to the other slowly until you no longer hear the pump growling at you. Now, check underneath to make sure there aren’t any leaks. Tighten the clamp or the fittings if you see any fluid leaking.
That’s it. Recap the reservoir, drop the hood and the car and take it for a test drive. Unless you’ve been doing alignments for a few years I do highly recommend taking your car to a reputable shop to have them at least check the alignment for you. I would also have them check for bump steer for you. I’ll describe how to check and adjust bump steer to a minimum in my next article.


![[Gallery] Okolona Street Rods Kentuckiana V Foundation Car Show](https://www.racingjunk.com/news/wp-content/uploads/2022/04/IMG_0774-e1650040587750-376x206.jpg)
![[Gallery] Road Rats Car Show](https://www.racingjunk.com/news/wp-content/uploads/2022/05/2A-e1651770667920-376x206.jpg)

Leave a Reply