


![[Gallery] Okolona Street Rods Kentuckiana V Foundation Car Show](https://www.racingjunk.com/news/wp-content/uploads/2022/04/IMG_0774-e1650040587750-376x206.jpg)
![[Gallery] Road Rats Car Show](https://www.racingjunk.com/news/wp-content/uploads/2022/05/2A-e1651770667920-376x206.jpg)


How to Replace a Fuel Filter
Click Here to Begin
The fuel filter plays a big role in keeping your engine clean and healthy. It works as a gate that filters the fuel going from the fuel tank to the engine, which ensures the fuel going into your engine is clean of debris or anything that will stay inside your engine. Sometimes you put a dirty batch of fuel in your tank, which can get your filter dirty or even clogged. Signs of lagging and hesitation can accompany a dirty fuel filter, which can even cause your car to not start at all.
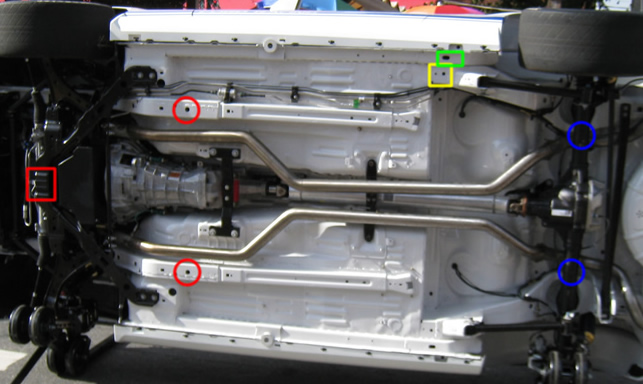
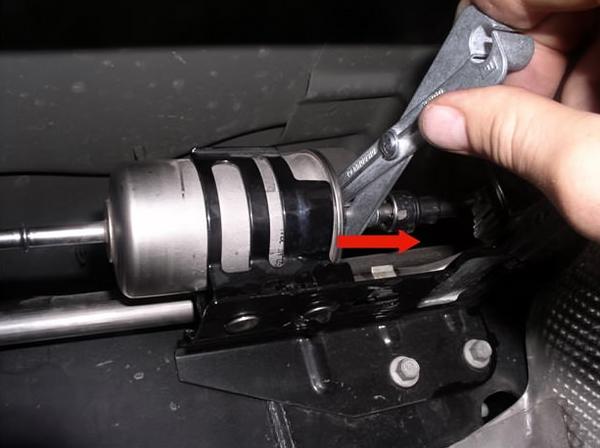
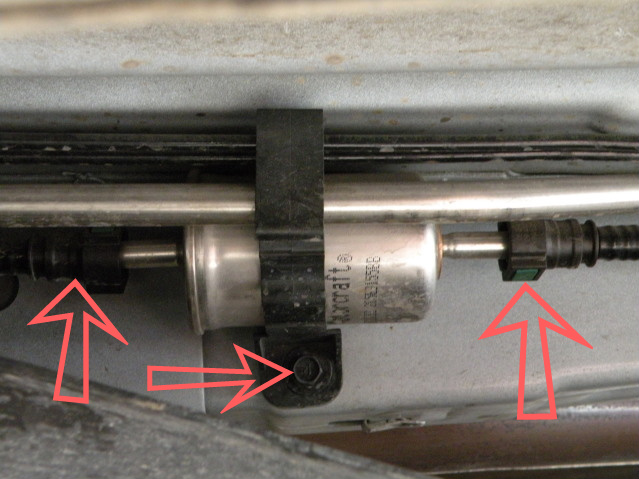
When your fuel filter is clogged, your engine doesn’t receive the proper amount of fuel to complete the combustion process, so the engine either doesn’t operate properly, or doesn’t receive enough fuel even to start. The location of the fuel filter varies from one vehicle to another; some cars don’t recommend changing the fuel filter for the life of the car, so they install it with the fuel pump inside the fuel tank. However, if the factory wants you to replace the fuel filter as a part of maintenance, then you can find it either along the frame lines or right by the fuel tank, facing the front of the car. If you’re having a hard time locating the filter, follow the fuel lines from the tank to the front of the engine. Most filters require a special tool to disconnect, so be sure to have one handy.
Tools Required:
Jack and jack stands
Rag
Fuel filter removal tool
Wrench
Fuel filter
The fuel filter plays a big role in keeping your engine clean and healthy. It works as a gate that filters the fuel going from the fuel tank to the engine, which ensures the fuel going into your engine is clean of debris or anything that will stay inside your engine. Sometimes you put a dirty batch of fuel in your tank, which can get your filter dirty or even clogged. Signs of lagging and hesitation can accompany a dirty fuel filter, which can even cause your car to not start at all.
When your fuel filter is clogged, your engine doesn’t receive the proper amount of fuel to complete the combustion process, so the engine either doesn’t operate properly, or doesn’t receive enough fuel even to start. The location of the fuel filter varies from one vehicle to another; some cars don’t recommend changing the fuel filter for the life of the car, so they install it with the fuel pump inside the fuel tank. However, if the factory wants you to replace the fuel filter as a part of maintenance, then you can find it either along the frame lines or right by the fuel tank, facing the front of the car. If you’re having a hard time locating the filter, follow the fuel lines from the tank to the front of the engine. Most filters require a special tool to disconnect, so be sure to have one handy.
Tools Required:
Jack and jack stands
Rag
Fuel filter removal tool
Wrench
Fuel filter
Leave a Reply