


The unibody construction of the Mustang makes for an inherently lighter car. It also makes it easier to swap out the front end in the event of a major front end collision that does normally irreparable damage. However, it also makes the chassis more prone to spring which makes the chassis and suspension work harder. How do we keep the weight down and still improve launch and launch recovery? We install subframe connectors. In this article we’re going to install the MMFL-5PC subframe connectors from Maximum Motorsports (MM) for Ford Fox Body vehicles.
What Are Subframe Connectors and What Do They Do?
A car that is built with subframe/unibody vehicle construction method has a number of plusses and minuses. However, if you ask car builders that prep cars for all forms of racing, most of them will tell you the minuses outweigh the benefits. Here’s why: The unibody construction uses the floorpan and rocker panels as strength members.

The problem with this is that age and racing can beat the hell out of them, causing significant but not readily apparent damage. There’s also the fact that repeated high torque launches and corning cause massive stresses that quickly cause metal fatigue. We correct this by using a pair of rails to connect the front and rear frame sections, thereby strengthening the car’s chassis quite a bit. When the car’s chassis doesn’t flex, the high performance suspension you spent so much time and money on can work to its fullest potential.
What You Need for This Installation
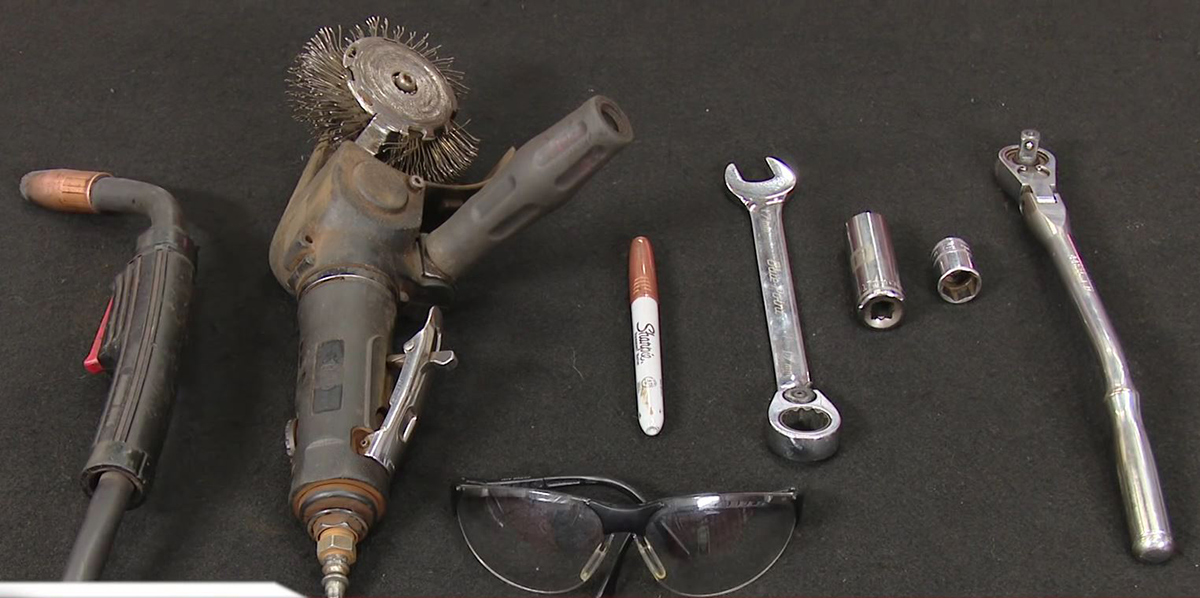
Most of what you need for this installation you’ve probably already got. This includes a set of wrenches and sockets, a hammer, and a marker. About the only thing you might not already have is a welder. If you don’t already have one of these, it’s something I highly recommend you get. Ebay has a number of great starter models starting fore under a hundred bucks. A good C-clamp will also make things easier for you, but isn’t absolutely necessary. You’ll also need a can of good primer and paint to protect against rust. There’s most likely going to be a piece of transmission crossmember that overlaps the frame rail, so you’ll need a die grinder to cut it.
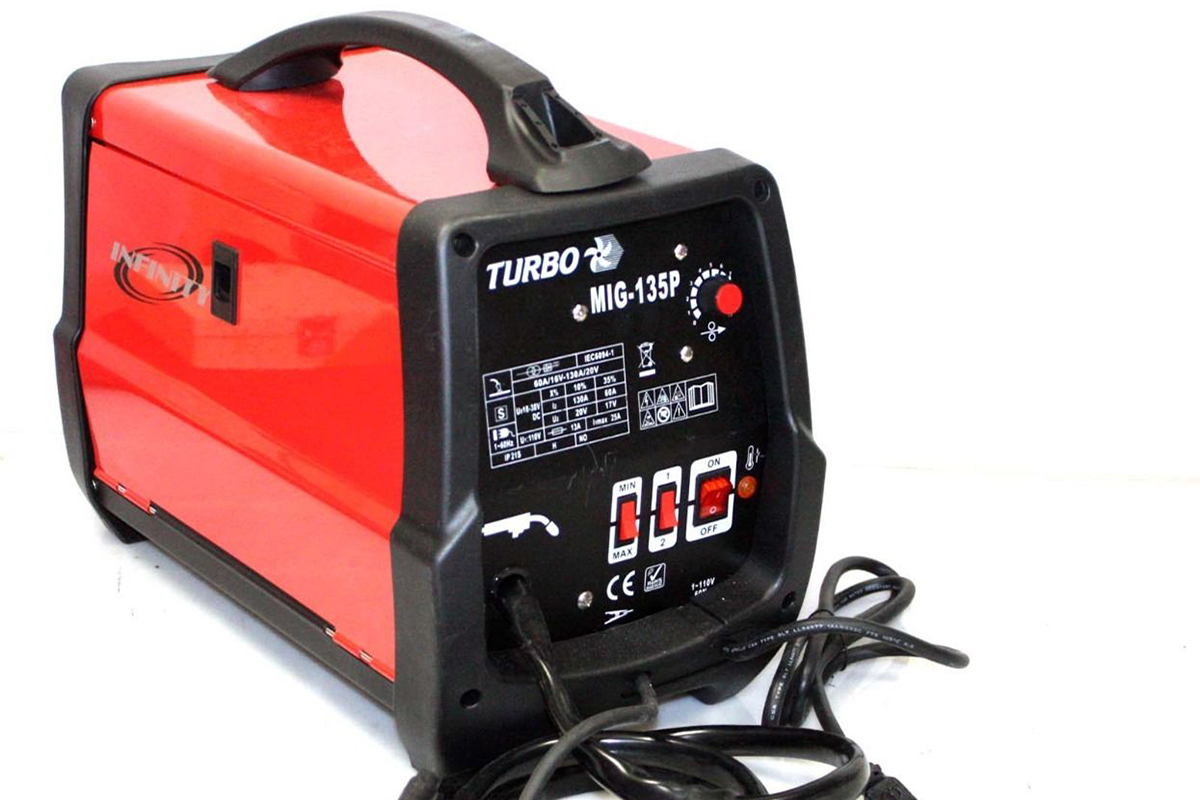
Most of the “experts” out there will tell you that if you don’t know how to weld like a pro, you should leave this installation to a pro. I’m here to tell you that’s hogwash. Get a welder, some pieces of scrap metal, and practice until you can tack and run a somewhat decent bead. Unless you’re planning on entering the car in shows you don’t have to have welds that look like a professional did them; they just have to be solid. To ensure you get good solid welds, you’ll need a grinder or wire wheel brush on a drill or die grinder. To protect your eyes, you’ll need safety glasses.
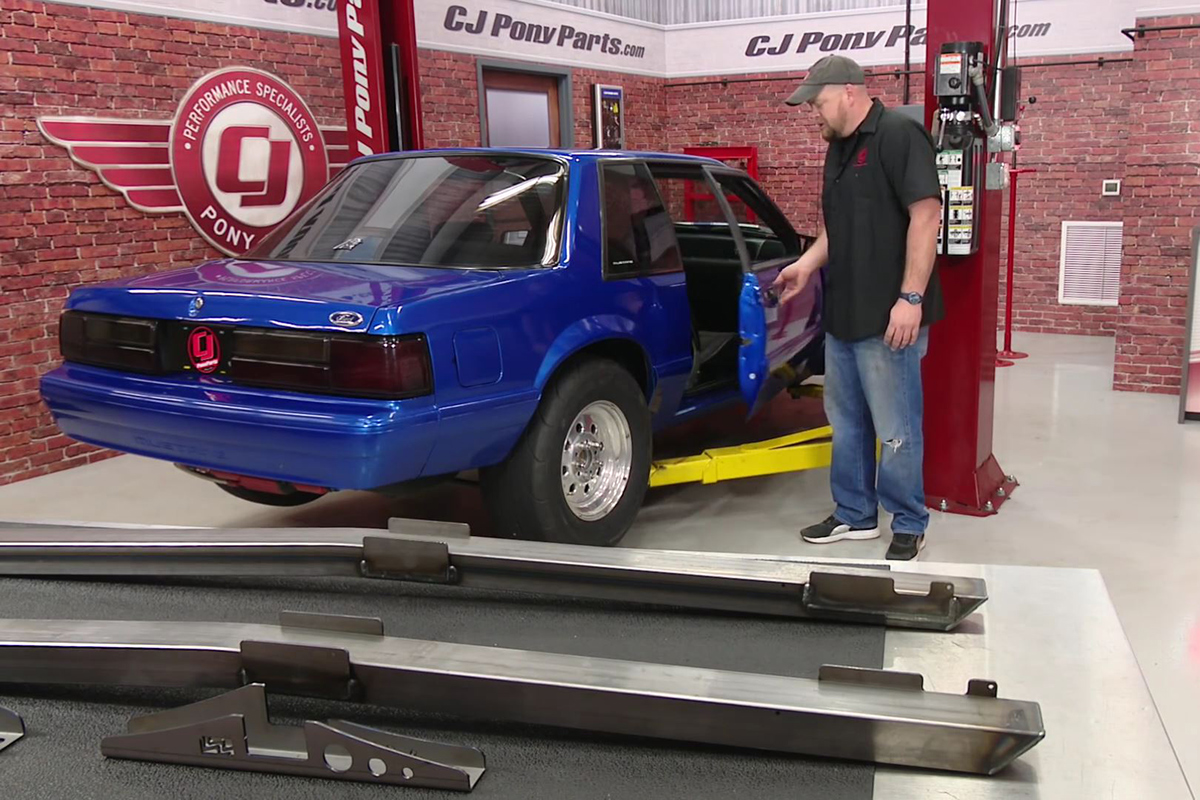
You are also going to need a jack and four jack stands. You have to get the car in the air with the suspension loaded. If you’ve got ramps, use them up front and jack stands at the rear corners. If you only have jack stands, you’ll need to put the front jack stands under the ball joints. Once you have the car in the air, open and close the doors to make sure the body hasn’t twisted or folder at all. Now, let’s get started.
Replace the Seat Bolts

Your MM subframe connector kit came with four bolts and locknuts and eight flat washers. Remove the bolts from the rear of the front seat brackets. Use a washer on each thread the included bolts in place of these. Make sure you tighten them down sufficiently.
Make Way for the Connectors

With the car in the air, crawl under the car with the connectors and eyeball what you’re going to need to move temporarily to install the connectors. This means moving the fuel and evap lines. Wrap them in something fireproof like an extra welding glove or piece of leather. If you’ve got the Home Depot/Lowe’s work gloves, those will work. Loosen the parking brake cable, disconnect the front and rear sections, and remove the front section from its bracket and tie it out of the way.

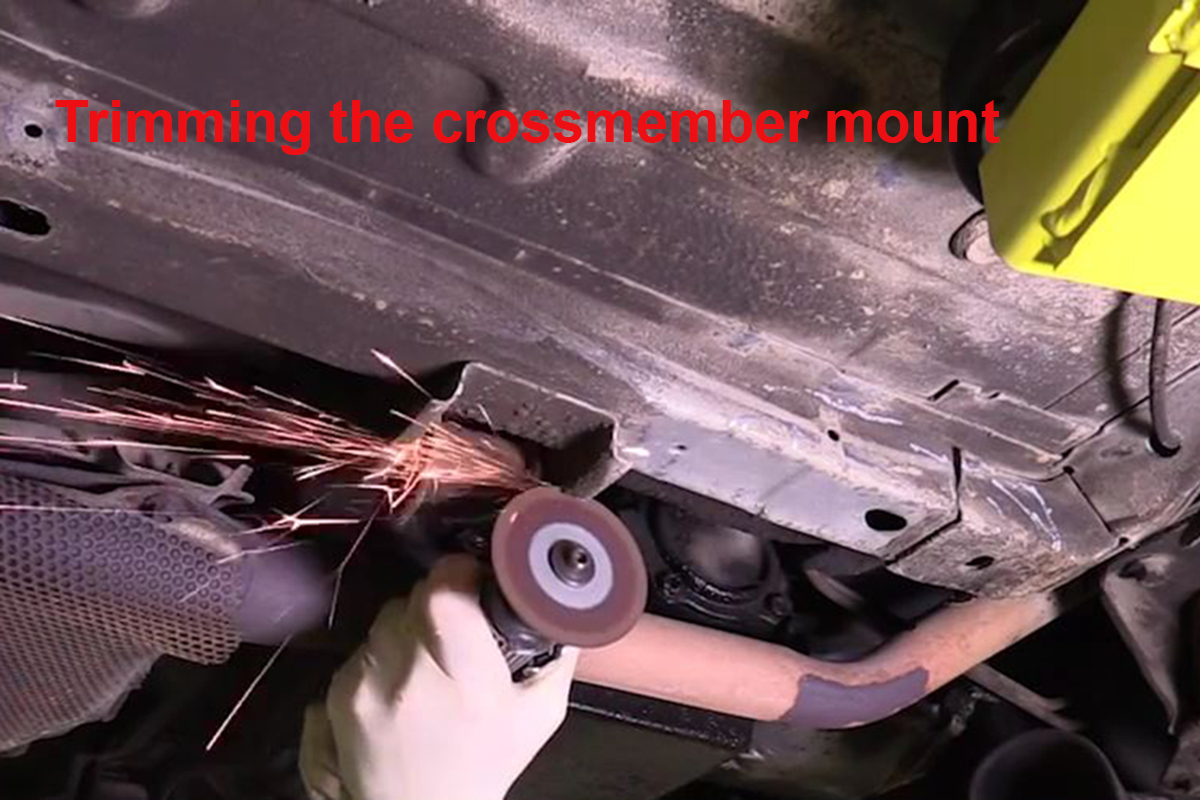
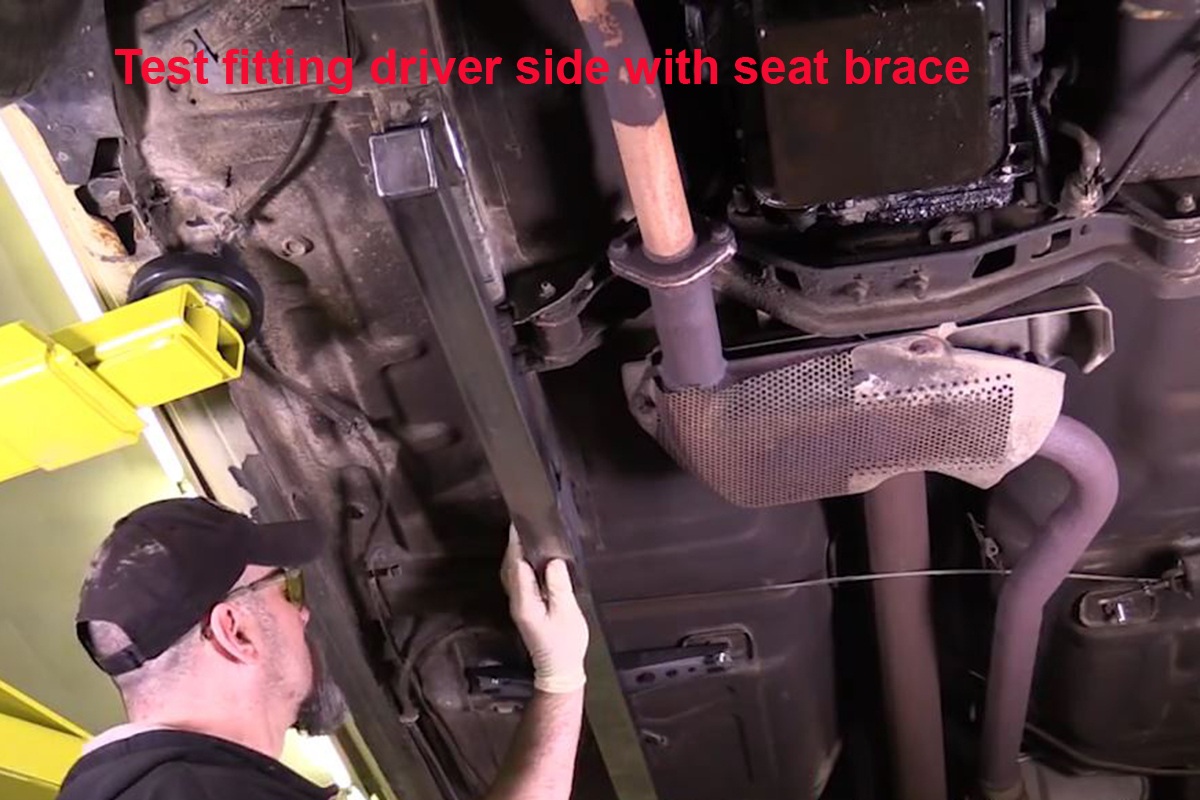
Lastly, on the driver side, eyeball and cut the tabs/wings on the transmission crossmember so the connector on that side will fit. Cut it close so you can weld it to them connector for added strength. On some year Mustangs, there’s a reinforcing plate at the front of the subframe that you’re going to need to notch or remove.
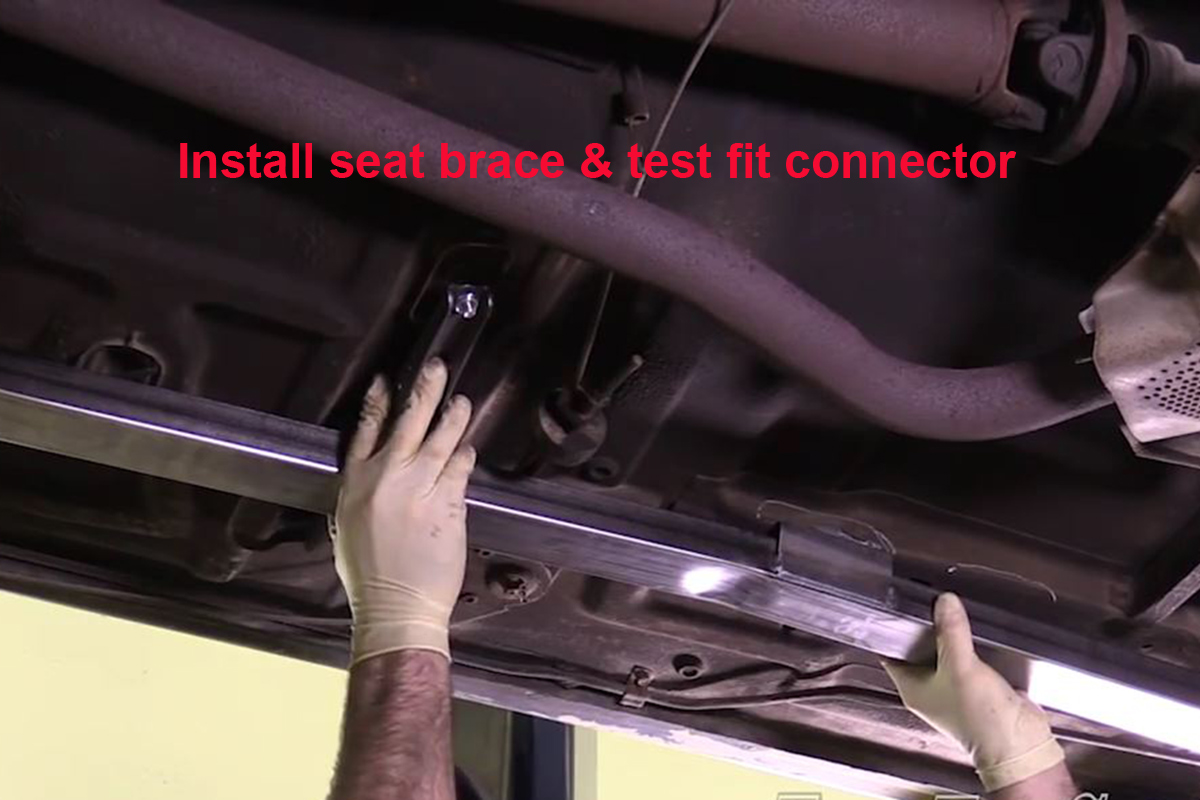
Test Fit, Mark, and Clean
Now it’s time to test fit the subframe connectors. The front portion of each connector has an ear on one side which goes to the outside of the car, while the rear is clean, no ears. You may need to use the hammer to smack the bottom side of the connectors to get them to seat fully against the subframe rails. There’s a good chance that the rear portion of the connectors won’t want to sit flat against the torque box. You can fix that during final installation and I’ll address that when the time comes.
Once you have them located, use a marker of some sort to mark where you need to clean and weld. You will want to clean the whole contact area of the ears/tabs. You will also want to weld along the side of the connector where it contacts the torque box at the back of the car. You can also weld one inch long beads every three inches to give a little more support. Clean the frame rails and torque box of all paint, road grime, and undercoating down to bare metal. Leave not a trace of anything but bare metal where you’ll be welding.
Spray paint the top side of the connectors because you’re not going to be able to do so once you have them installed. I prefer to scuff the metal surfaces up with some 80 grit sandpaper prior to painting to help the paint adhere. I use a paint that has the primer included in the formula. Spray a light coat first, give it a few minutes to set up, and then apply a thicker coat to cover. Don’t forget the seat braces.
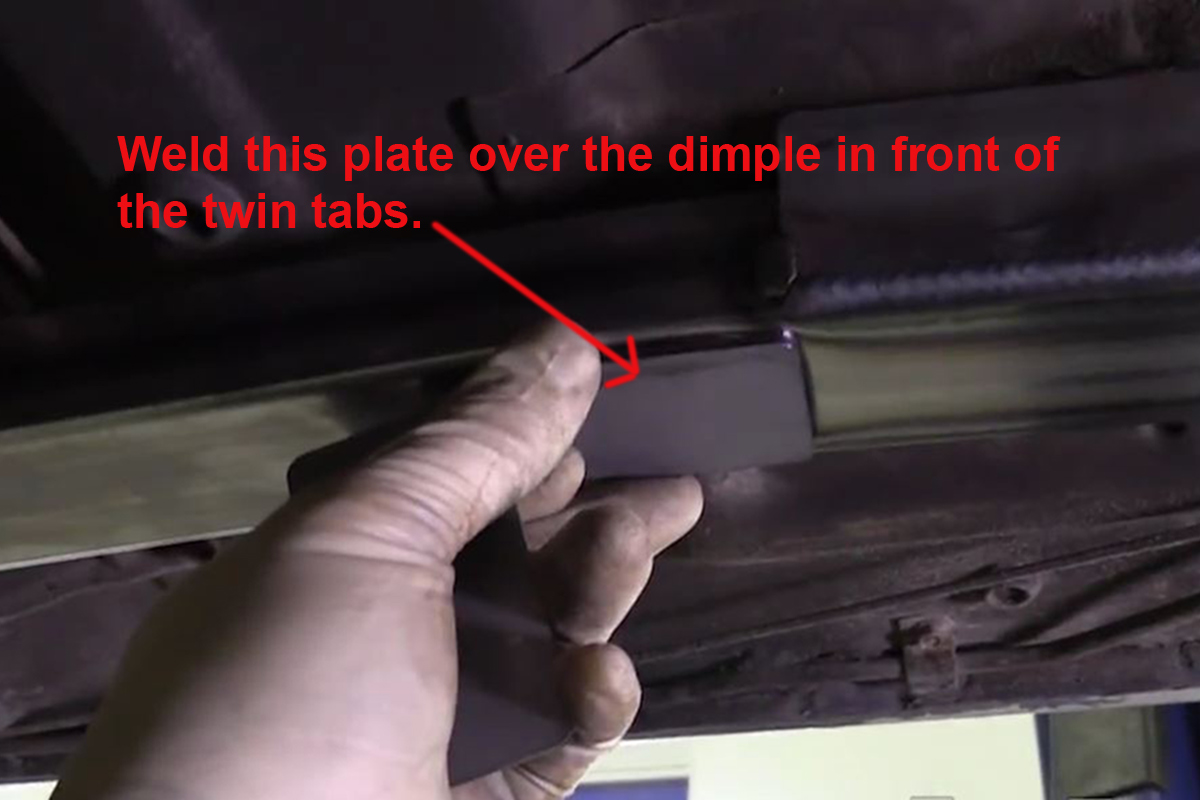
Now, clean the weld areas of the connectors. On the Maximum Motorsports models, there’s a dimple on the bottom about in the middle that will need to be covered with the included plate. Be sure to clean it up a bit as well as the dimpled area it will be welded to. Be sure to clean off any overspray from when you paint the top of the connectors.

Depending on the year and trim level, there may be minor adjustments you will need to make to get the connectors to sit flat against the car. This includes using a die grinder to remove lips and excess metal from brackets and such. Also, you may need to adjust the floorpan with a hammer or your feet to get it flat enough for the connectors to fit. Lastly, previous owners or “mechanics” may have improperly jacked the car up and bent the frame rails. You may need to do a little metal work to get a snug and proper fit of the connectors to the rails. Remember, on some models, such as the Cobras, the transmission crossmember extends across the frame rail and you’ll need to cut that section of the crossmember off. Carefully.
Install and Tack Weld
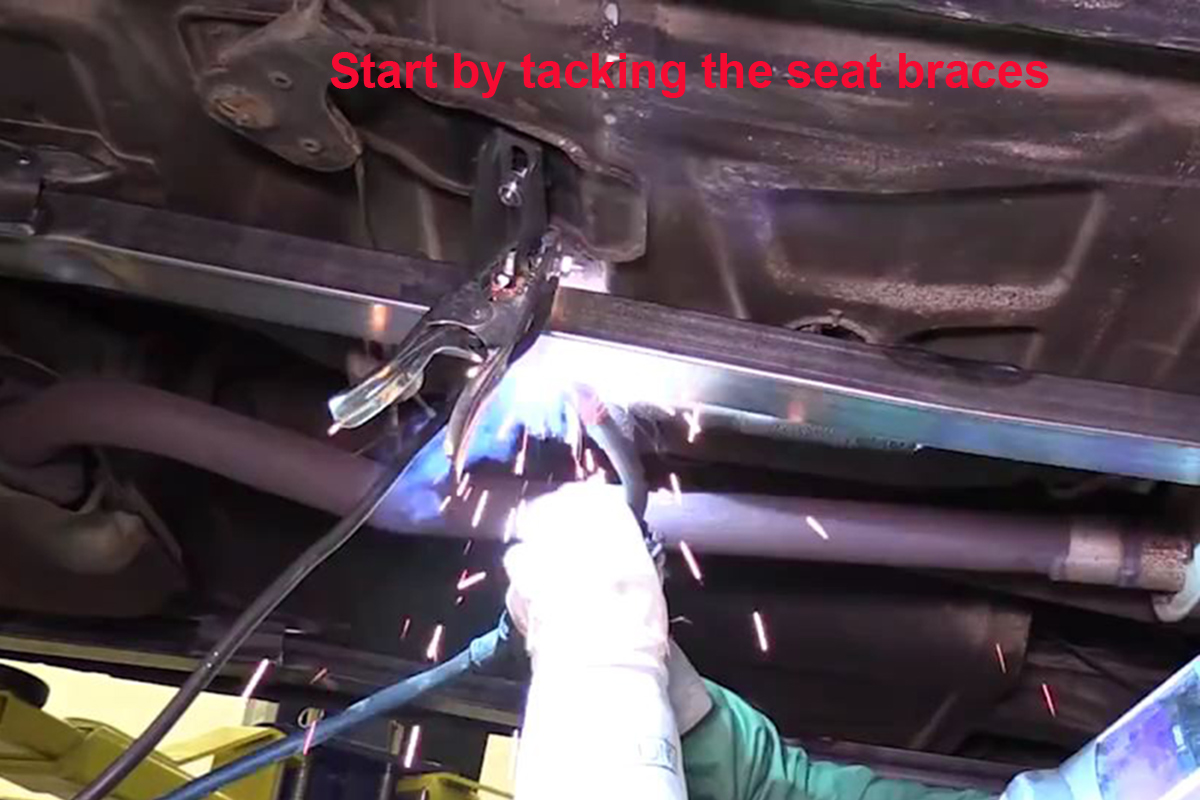
Slide the seat braces over the seat bracket bolts, slide a washer over the bolts, and loosely thread the locknuts onto the bolts. Leave these loose enough that the braces can slide back and forth to allow you to fit the connectors.
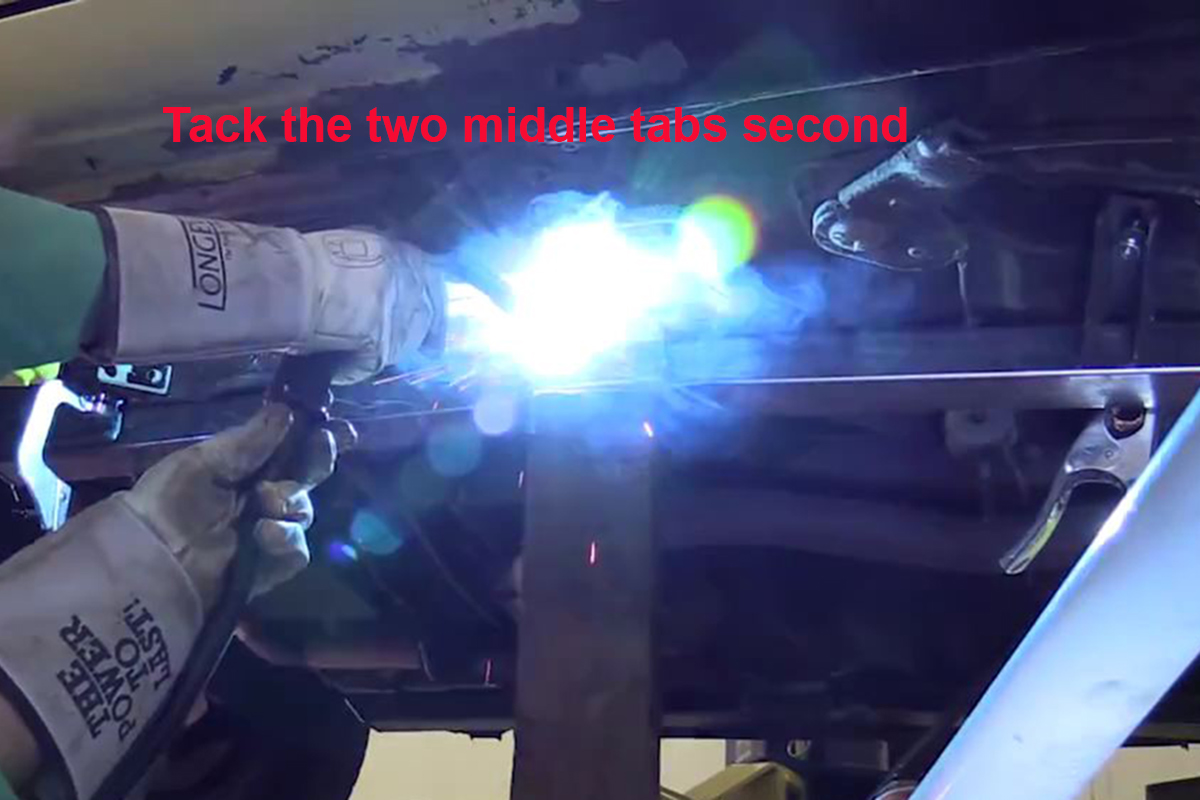
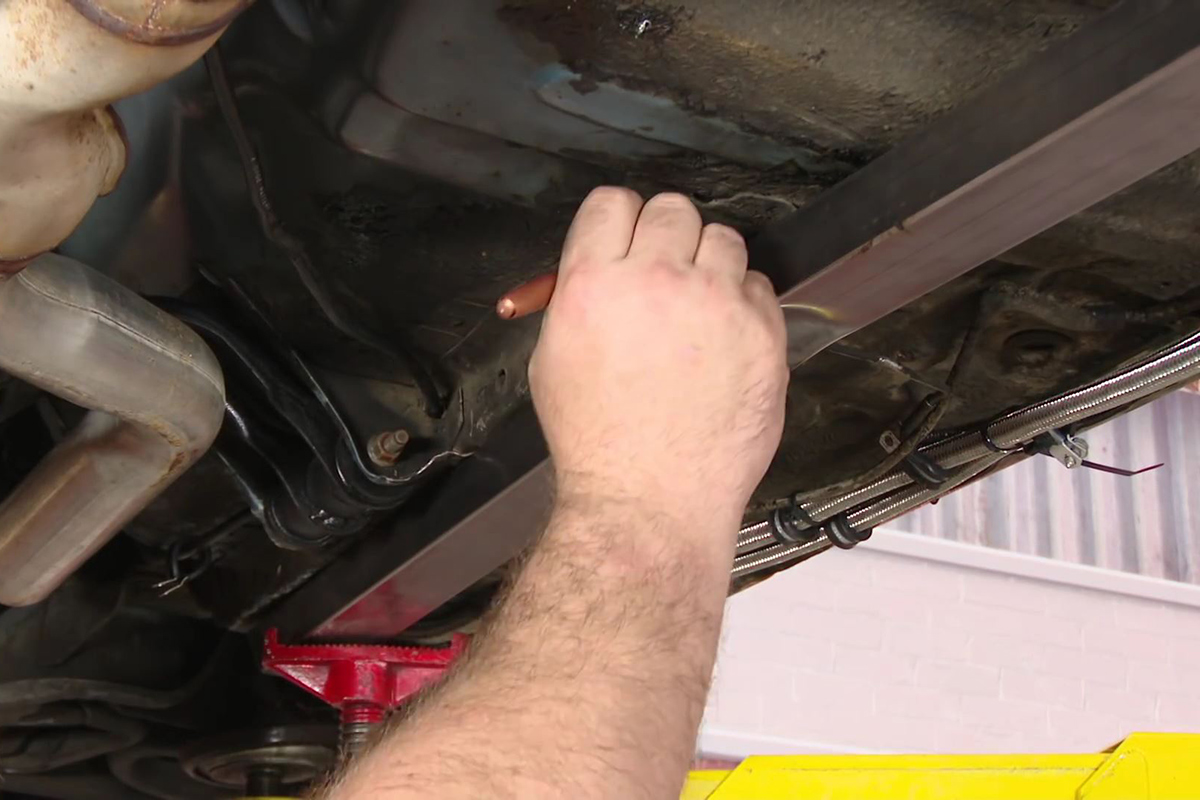
Get the connector in place and support it with the jack and a block of wood. Make sure the jack keeps the connector firmly against the frame rail, but not enough to lift the car off the stands. Place the jack and block near the middle of the connector, but not right under the wings. Tighten the seat brace bolts once the connector is in place and tack it to the connector.
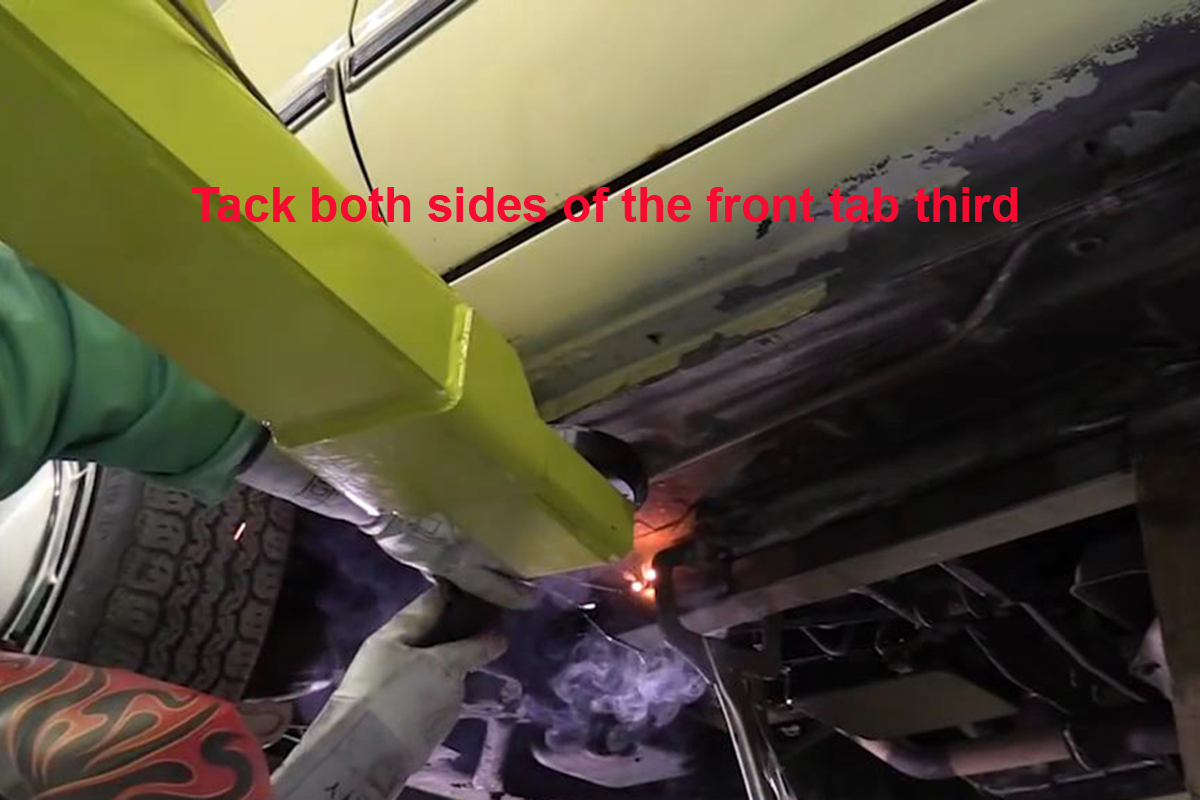
Tack the wings/tabs in the center of the connector to the frame rail using three or four tacks on both sides of the frame. Move to the front of the vehicle and tack the wing on the outside of the connector to the rail (You may need to use that C-clamp I mentioned to get the wing tab flat against the frame rail.) and add two or three solid tacks on the inside of the rail.
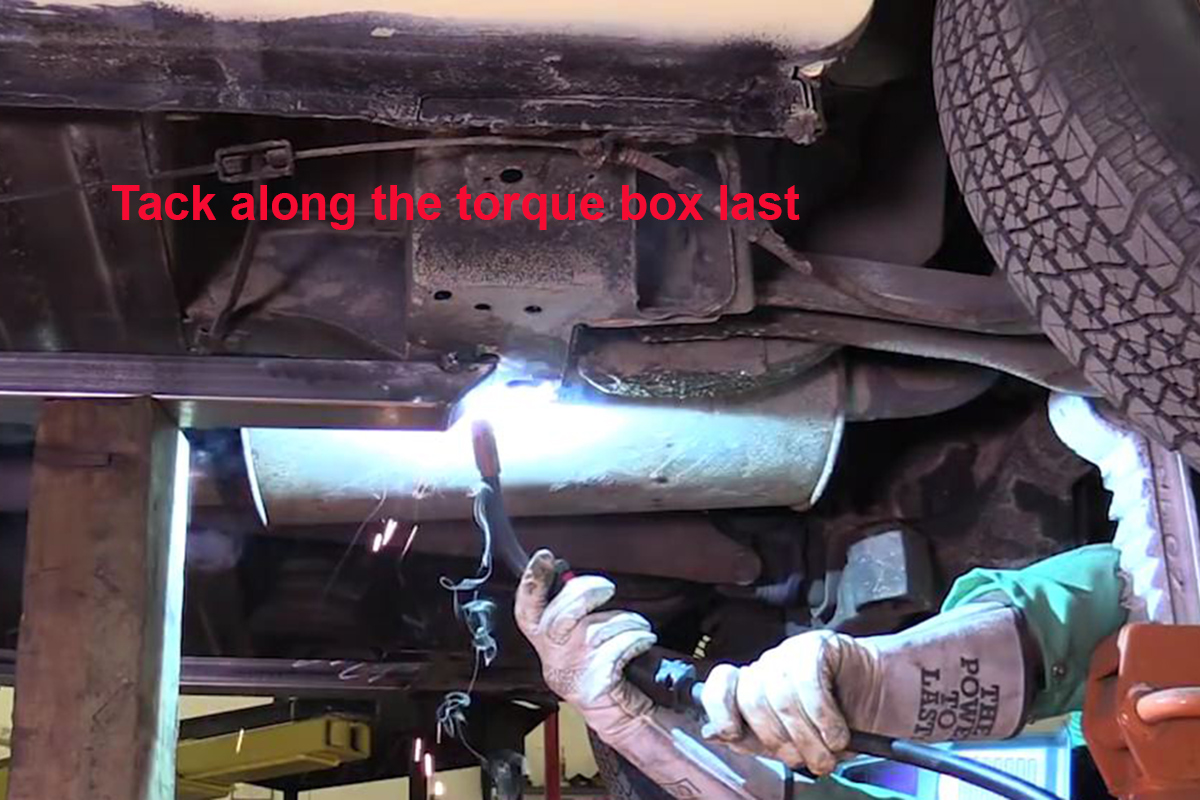
Lower the jack. You may notice that the rear of the connector doesn’t want to sit flat against the torque box. Use the jack and block to convince the connector to do so and tack both sides of the connector to the frame rail/torque box in three or four places. Remove the jack.
Final Welding
Starting in the middle of the car again, it’s time to do the final welds. Begin with the wings/tabs and weld completely around on both sides. Next, weld along the full joint between the seat brace and the connector. Now move to the front and, except for the very front of the connector (facing the front) weld along the whole joint between the connector and frame.

Now, move to the rear and weld along the whole joint on both sides again. Again, do not weld the tips of the connectors to the frame rails. Just weld the sides. For added strength, MM says you can weld between the wing tabs, making one inch long welds every three to four inches. Repeat on the passenger side of the car.
Finishing Up
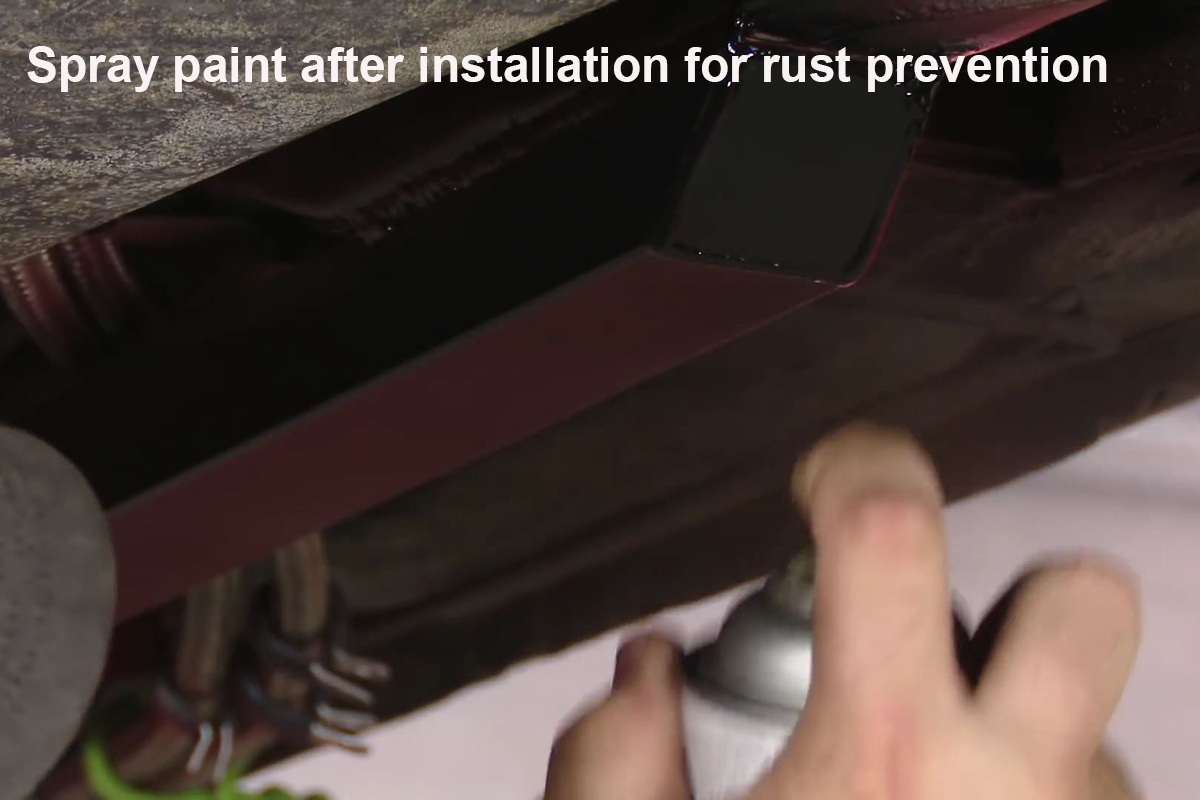
To protect your new subframe connectors and your frame from rust, you need to paint them now. Again, I use a paint that has the primer as part of the formula as it saves time and money. Spray a light coat on the whole length of the connectors as well as the seat braces. Allow it to tack up some and spray another coat. For added protection, once the second coat is tacky, give it another coat. Remove whatever you used to protect the fuel and evap lines and replace the parking brake hardware. Drop the car and enjoy.
Note: You can cut down on the amount of painting you need to do by buying connectors that come from the supplier powder-coated. You’ll need to grind or sand the powder-coating off before you weld, but these will be the only areas that will require painting.
While Maximum Motorsports is definitely not the only maker of good quality subframe connectors, they are my personal favorite. Some of my friends prefer BMR products. There are quite a few makers of subframe connectors for the Fox Body Mustang. Take your pick. Something else to be aware of: These subframe connectors should fit any Fox-bodied Ford, such as the ’79-’04 Mustang and Fairmonts.
Leave a Reply