

Ball joints and control arm bushings are integral parts of your strip burner’s suspension. As wear items, they are things that you will eventually have to remove and replace with new ones, if you plan on keeping your car in good running order. While the job of “R&R” (removal and replacement) of these parts is time-consuming and requires a few specialty tools, it isn’t difficult as long as you pay attention to safety.
What Are Ball Joints and Control Arm Bushings?
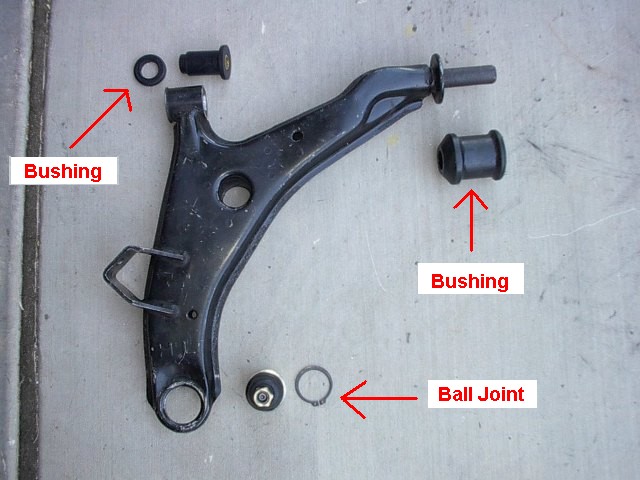
Before I can start explaining what ball joints and control arm bushings are, I have to tell you what control arms are. In a nutshell, control arms are what connect your car’s wheels to the frame. Older cars have to of them up front, upper and lower control arms. Sandwiched between these, you will find the steering knuckle/kingpin assembly. Connecting this assembly to the control arm are the ball joints. The kingpin/steering knuckle assembly is what supports the wheel and allows it to roll.
Every car has at least one ball joint. Most of our strip burners, as older cars with coil spring front suspensions, have two. The ball joints allow for suspension travel. The joint is able to pivot a full 360 degrees as your car goes down the road and you turn the wheels left and right. The control arm bushings allow the control arm to pivot up and down as you drive down the road. Cars with MacPherson struts only have lower control arms, so they only have one ball joint instead of two. On these cars, the strut acts as the upper connection point for the steering knuckle/kingpin assembly.

How Can You Tell When a Ball Joint Has Gone Bad?
Each of the Big Three American automakers has a different procedure for checking ball joints. No matter what kind of car you’ve got, you have to make sure the wheel bearings are in good condition and properly packed before you can even think of checking the ball joints. Chevys/GMs are usually easy:
- Jack the car up just enough to get the front wheels off the ground.
- Grasp the tire firmly at the top and bottom.
- Wiggle the tire up and down at the top.
- Watch and feel for movement in the ball joint between the knuckle and control arm.
Most older GM models that are still equipped with OEM lower ball joints also have wear indicator nipples. On these vehicles, the wear indicator will withdraw into the ball joint housing when the joint is worn and needs replacing. The wear indicator is where the grease nipple (Zerk fitting) threads into the joint.
Most Fords are similar yet different:
- Jack the car up until the wheels are approximately three to four inches off the ground.
- Place a pry bar or lever under the center of the tire.
- Lift up on the lever and tire while observing (looking and feeling) for movement in the ball joint.
- If you can see or feel movement other than the sidewall compressing, you’ve found a worn ball joint that needs to be replaced.
There is some confusion among many people about how to test ball joints on Mopar products. Goodyear and Moog taught me years ago to use a procedure similar to that used for Chevy products with the main difference being to lift the vehicle under the control arm. Most suspension parts and car manufacturers say that you need to use a dial indicator to check to see how much movement there is in the joint. Anything over .030 inches of travel indicates a worn joint. Experience has told me that any movement that you can detect by eye is enough to tell you to replace the joint.
Checking Control Arm Bushings
Control arm bushings are usually pretty easy to tell when they need replacement. The first sign they give you is that they start squeaking. I’m sure you’ve all heart at least one set of worn bushings in your life. They sound like a worn set of bed springs as the car rolls down the road.

However, not all worn control arm bushings squeak. These can be checked visually. If they look like they’re falling apart, replace them. Next, insert a small pry bar between the upper pivot arm and frame and pull up with your weak arm. There should be next to zero movement. A better way to test them is the two-man method:
- Jack the car up enough to be able to slide underneath and place a jack stand under the frame.
- Slide under the car and eyeball the bushings.
- Have your helper yank the wheel back and forth while you watch for movement of the control arm within the bushing and pocket. Any motion denotes a worn bushing.
- Slide out and repeat the process for the uppers.
You can also perform the sound test, but this will usually only work on very worn bushings. Coast forward or backwards slowly. Hit the brakes. Listen for a small clunk coming from the area of the control arms and bushings.
Tools and Equipment You Will Need for This Repair
Quite a few of the tools and equipment you’ll need for this job may be ones you already own. You’ll need a jack, wheel chocks/blocks of wood, jack stands, sockets, and wrenches. You’ll also need something to separate the ball joints from the knuckle – this cal be either a pickle fork or a ball joint separator tool. To remove the old ball joints from the control arms, you’ll either need a drill to drill out the rivets as on most older Chevy products and some Ford products, you’ll need a ball joint tool, like for Mopar products. Of course, this generalization only holds for OEM ball joints.
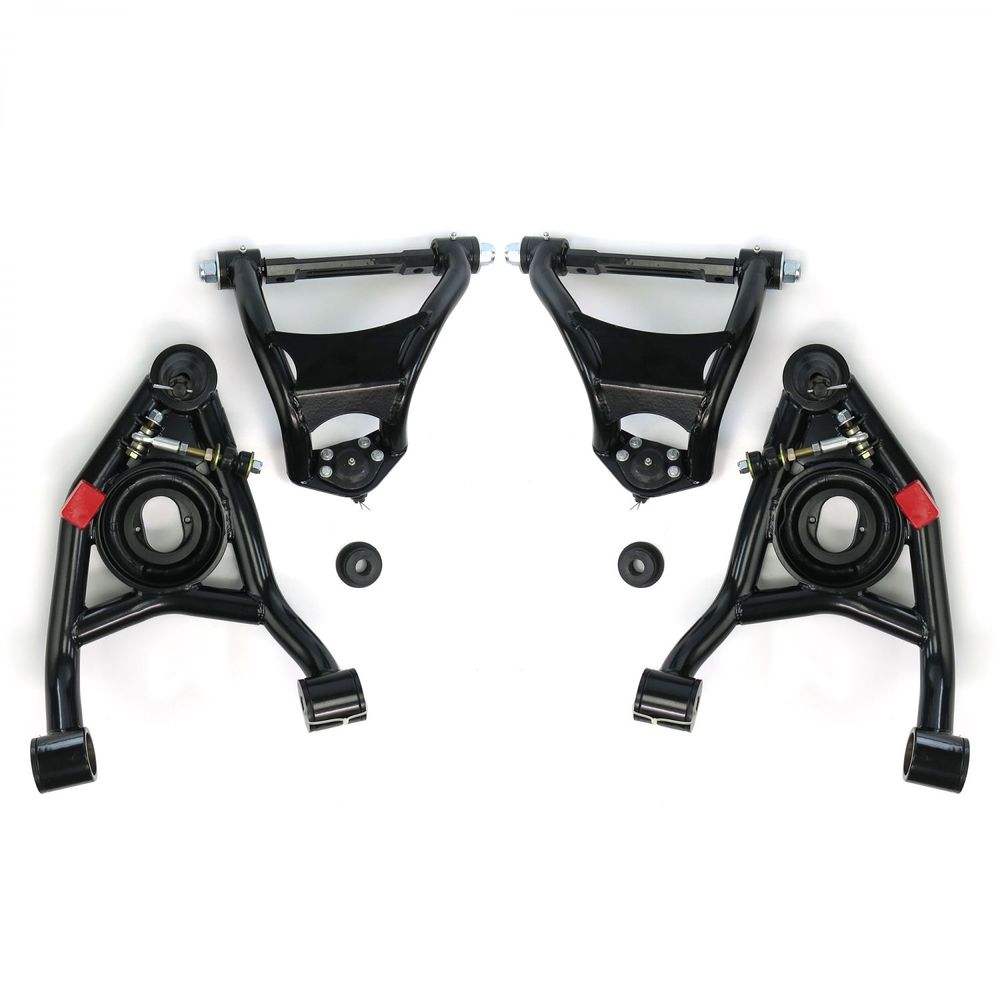
Replacing Ball Joints – Pre-81 GM Products/Ford Products
To replace the ball joints, you’ve got to separate the control arm(s) from the steering knuckle. The first step is to remove the coil springs. After separating the steering knuckle from the control arm(s), be sure to support the knuckle, spindle, rotor, and caliper/drum assembly, leaving slack in the brake hose. Removing the control arm assembly adds a little time to the process, but it does make the job quite a bit easier. This is accomplished by removing the two nuts and bolts where the control arm meets the frame. Don’t forget to remove the sway bar links first. In fact, now would probably be a great time to replace them. If you’ve got the money, while you’re at that, go with a larger sway bar to add more stability in corners.
OEM ball joints in older GM products are riveted to the control arm. If you’ve got an air hammer and chisel, or a good ball peen hammer and chisel, use them to chop the rivet out. If not, I feel for you, you’re going to have to drill the rivets out without damaging the control arm. Take it easy and don’t rush yourself.
If you look at the new ball joints and the control arm(s), you’ll notice that there’s only one way the new ball joints will fit properly, meaning all three mounting holes line up properly. Instead of rivets, the new ball joints are bolted to the control arms. Torque these to about 30 ft-lbs. After reassembling everything, torque the upper ball joint stud to 60 ft-lbs and the lower to 90 (Pontiacs are 75 and 75, while Camaros are 83). If you’ve pulled the control arms, torque them to the following (in ft-lbs):
- Buick- Upper 70, Lower 100
- Chevy-75 and 100
- Pontiac-80 and 70 (Bonnys and Cattys are 80)
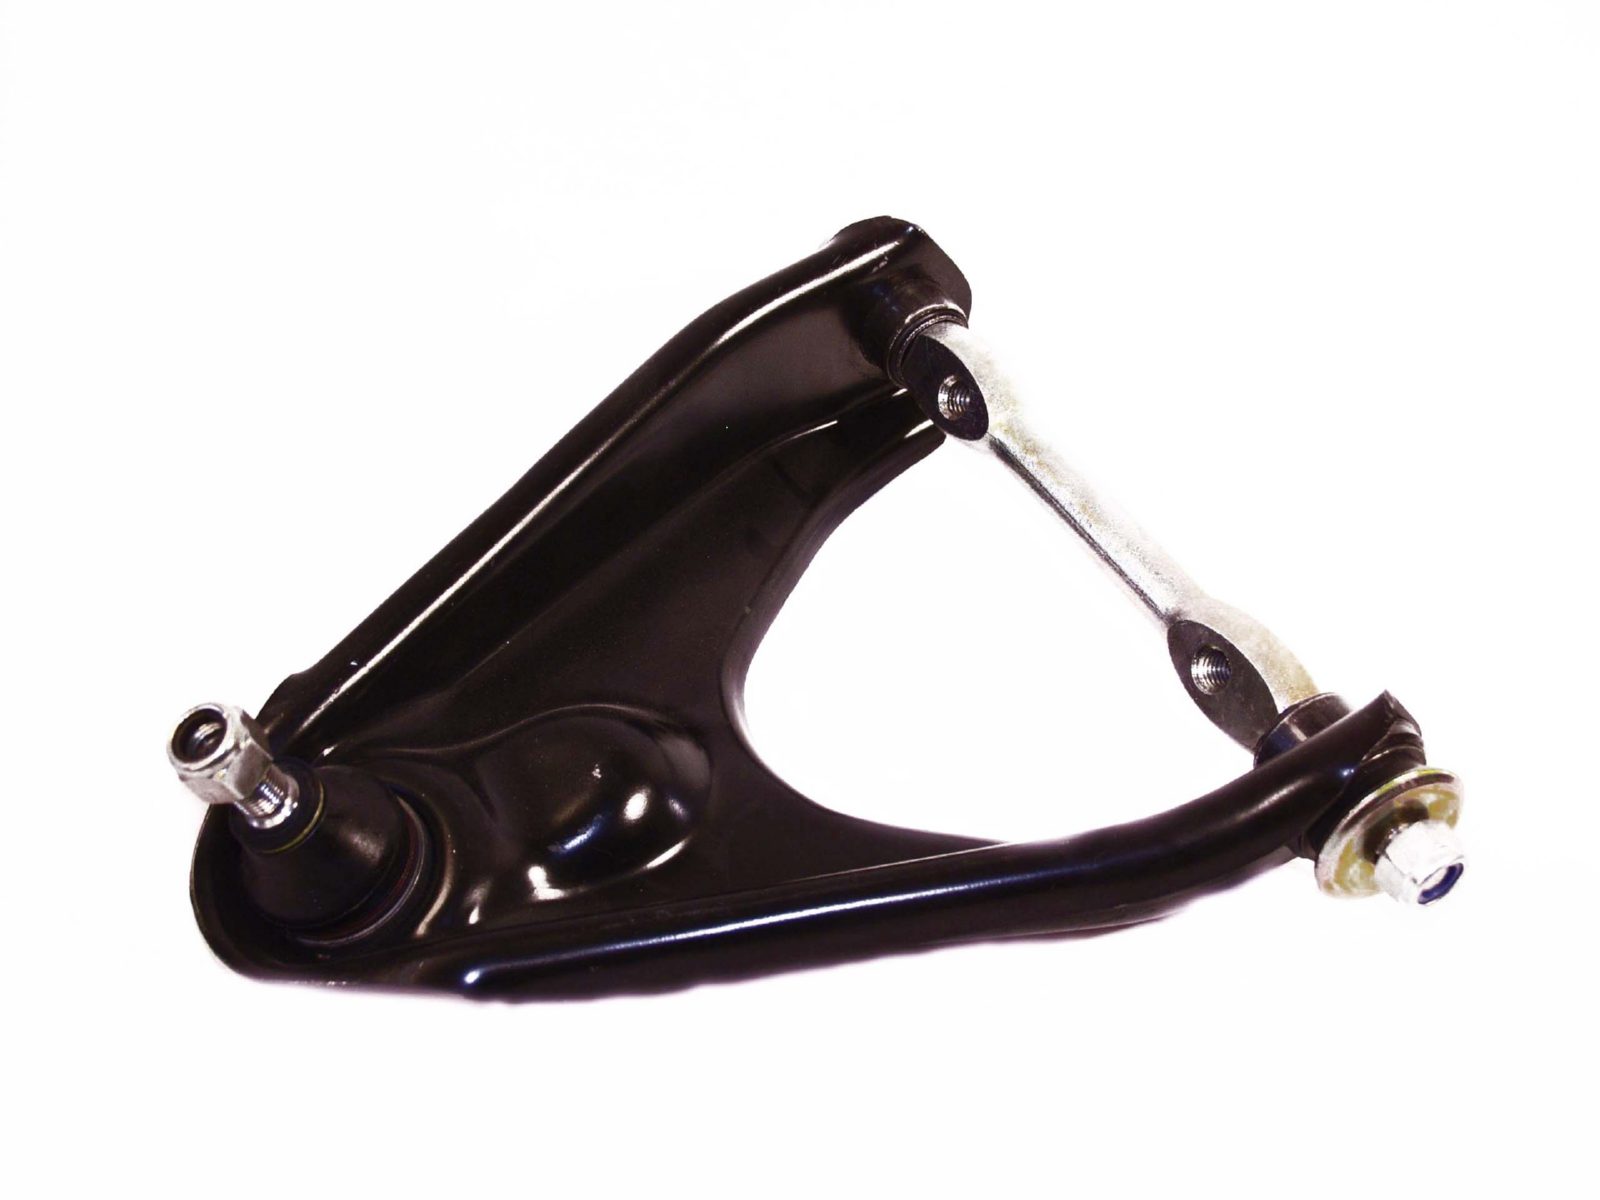
Replacing Ball Joints on Mopar Products

Once you’ve got the steering knuckle separated from the control arms, replacing the lower ball joints on Mopar products is a matter of using a ball joint press tool and pressing it out from the bottom. Installing the new joint is a matter of turning the tool over and pressing it in.
Upper ball joints on Mopar products are threaded into the control arm. Most references say you need a special socket to remove the old ones and install the new ones. Check around at the Autozone and similar stores near you to see if they loan out a suspension repair tool kit similar to the one linked above or the image above.

Replacing Lower Control Arm Bushings on Mopars
Most older Mopar products have torsion bar suspensions. Although not impossible with the right tools and equipment, pulling the lower control arm is not easy. I don’t recommend this for someone that doesn’t have quite a bit of experience working on suspensions.
For those willing to attempt it, remove the strut bar attaching bolts, and the sway bar retaining bolts. Next, measure the depth of penetration of the torsion bar anchor bolt into the lower control arm and remove the torsion bar. Next, remove the lower control arm shaft nit from the control arm shaft and push the shaft out from the crossmember and remove the lower control arm and shaft as a unit.

With the control arm in a vise or suitable clamp, remove the torsion bar adjusting bolt and pivot. Orient the control arm so the torsion bar hex opening faces up and use a brass drift punch, through the hex opening, and press the shaft out of the control arm, leaving the bushing inner shell on the shaft. Cut the old bushing off the shaft or control arm. Use a chisel to cut the bushing outer shell, being careful to not cut into the control arm.
To install the new bushing, place the bushing on the shaft with the flange end first. Use the suspension repair tool to press the bushing in until it sits flush on the shaft shoulder. Now press the shaft and bushing assembly into the lower control arm. Reverse the control arm removal procedure to reinstall. Torque the bolts to between 70 and 80 ft-lbs.
Mopar Upper Control Arm Bushings
Separate the ball joint from the steering knuckle. Remove the pivot shaft nuts and bolts and lift the control arm out of the car. Put the arm into a vise or suitable device and use the puller tool to press the bushing out. Installation of the new bushing is a matter of reversing the tool and pressing the bushing in. Reverse the control arm removal procedure to reinstall.

Servicing Control Arm Bushings on GM Products
Follow the procedure for removing the coil springs. Remove the lower control arm to frame bolts and remove the control arm from the car. For the upper control arm, note the number and location of any shims and unbolt the upper control arm and remove the control arm and shaft assembly.
Once you’ve got the lower control arm out, removal and replacement of the bushing is with the aforementioned suspension repair tool. Press out, press in the new one. Reassembly is the reverse: Hold the control arm in position and reinstall the bolts and nuts.
Upper control arms take an added step. Clamp the arm in a vise or something similar. Remove the nit and retainer from both ends of the control arm shaft. Use the suspension press tool to press the old bushings out. Reverse the tool and press the new bushings in. Reverse the removal process to reinstall, ensuring that you replace the shims as they were when you removed the arm.
Ford Mustang Lower Control Arm Servicing
With the car in the air and the tire off, remove the stabilizer links and disconnect the sway bar from the link and the link from the arm. Remove the strut bar to lower attaching nuts and bolts. Separate the ball joint from the steering knuckle using the previously mentioned method. Remove the nut from the arm and lower arm and the lower arm to underbody cam attaching components. Finally, remove the arm. Press the old bushing out, reverse the tool and press the new bushing in. Reverse the removal process to reinstall the control arm.
Mustang Upper Control Arm Bushings
Follow the procedure for removing the coil spring. Remove the upper control arm bolts (engine compartment) and then remove the upper control arm. Worn bushings are pressed out with that famous tool and the new bushings are pressed in after the tool is reversed. Reinstallation is accomplished by reversing the process.
Note: I can’t fully describe the whole process for every car out there. Procedures change from model to model. Torque specifications change from model to model and year to year. I highly recommend springing for the 20 bucks and buying the motor manual for your specific car. The procedures described above are generalizations, to allow you to decide if you think you can accomplish the repair. These manuals will also have pictures illustrating the process on your particular car.
Leave a Reply