Last issue, we took a sort of look at timing lights. But what’s the big deal if your timing light is off a degree or two at 2,500 RPM? While it might sound like a marginal amount, keep in mind that whatever error exists in the light at low engine speed levels will be multiplied as the engine speed increases. If the light is off by two degrees at 2,500 RPM, it might be off by eight or ten degrees at 8,500 RPM – and, as you can imagine, that happens to be a significant amount of error.
To determine the accuracy of your particular timing light, it should be checked against a digital engine analyzer at speeds below 2,500 RPM. Be certain that your light is installed properly (see below) Unfortunately, you can’t trust all digital analysis equipment over the 2,500 RPM ceiling.
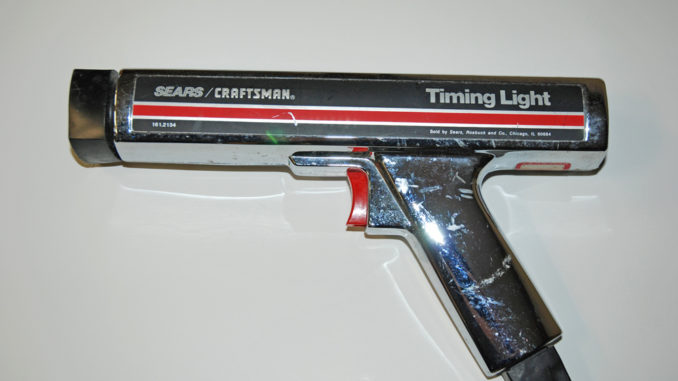
Autotronic Controls Corporation (makers of the MSD ignition systems) recognized this problem and began to test a rather large number of available timing lights. Through this testing, they decided to develop their own timing light. Additionally, this testing also revealed that an older model Sears Craftsman Timing Light (P/N A-2134 – still available used on that big auction site) was considered very reliable and accurate. Both lights are stable and accurate from zero to 8,000 RPM and because of this, they are well-suited to a modified (as in “drag race”) application. I’ve had the opportunity to test these lamps against several well known “professional” models, and I found that a few of the other lights were showing much different timing at engine speeds slightly over 1,200 RPM. At the same time, the MSD light and the Sears light were virtually identical in performance. And yes, these two lamps compared favorably with a digital engine analyzer below 2,500 RPM.
There’s more to timing lights, too. In truth, many enthusiasts (and believe it or not, that includes many of us in the drag racing community) hook up timing lights incorrectly. It sounds bizarre, but it isn’t. Often, a convoluted header configuration coupled with a tight engine compartment will only allow one easy light installation. Trouble is, that installation might not be correct. If the timing light is set up incorrectly, the timing marks you are watching could be a mile (and more than a few degrees) off. According to MSD, when setting up your timing light, there are several things to consider:
- Be absolutely certain that the positive and negative clips are correctly attached to the battery or power source. Never use the coil as a source of power! Be certain that the pair of timing light power cables are not in contact or close to any of the spark plug wires.
- When connecting the trigger clamp to the number one cylinder, be absolutely positive that the clamp does not come in contact with any other spark plug wires. If contact is made or if the trigger is close to any other wires, there is a good chance that a false triggering will occur. Additionally, it is always a good idea to further separate the number one cylinder wire lead from any other cylinder wires. Stray signals or spark crossover will not influence the timing light if this practice is always followed.
- Some timing lights require the trigger clamp to be mounted in a specific direction on the spark plug wire. Be absolutely positive that your clamp is mounted with the jaws pointing in the proper direction. In the event that the clamp is installed upside down (and it’s very easy to do), the timing will appear retarded.
As you can easily see, there’s much more timing lights than simply hooking up the power cables and clamping the inductive pickup over the number one cylinder. Who knows, there’s a chance you could find some serious power lurking in your engine? And only because you were fooled by a faulty timing light.


Wow lucky me I happen to have that exact model Sears light that I have been using on my race car for years. My question is: Does that Sears light have a specific orientation for the clamp. My clamp doesn’t show any markings and I got the light for free from a co-worker years ago without an manual.
My pickup has an arrow on it. So which direction should it face? I’m assuming toward the spark plug.