

Imagine you’re driving down the road and the light changes. You step on the brakes and . . . you start slowing down and your foot slowly sinks to the floor. Then, nothing, you’ve got no brakes. But wait, when you check, the master cylinder is full! You could take your car to a shop and (sometimes) pay to have it inspected/diagnosed, but this can be a time-consuming process that often requires an appointment. What if I told you that finding and fixing most brake problems that originate under the hood is actually pretty simple and you can normally do it in less than an afternoon? Well, it is, and I can. Keep reading.
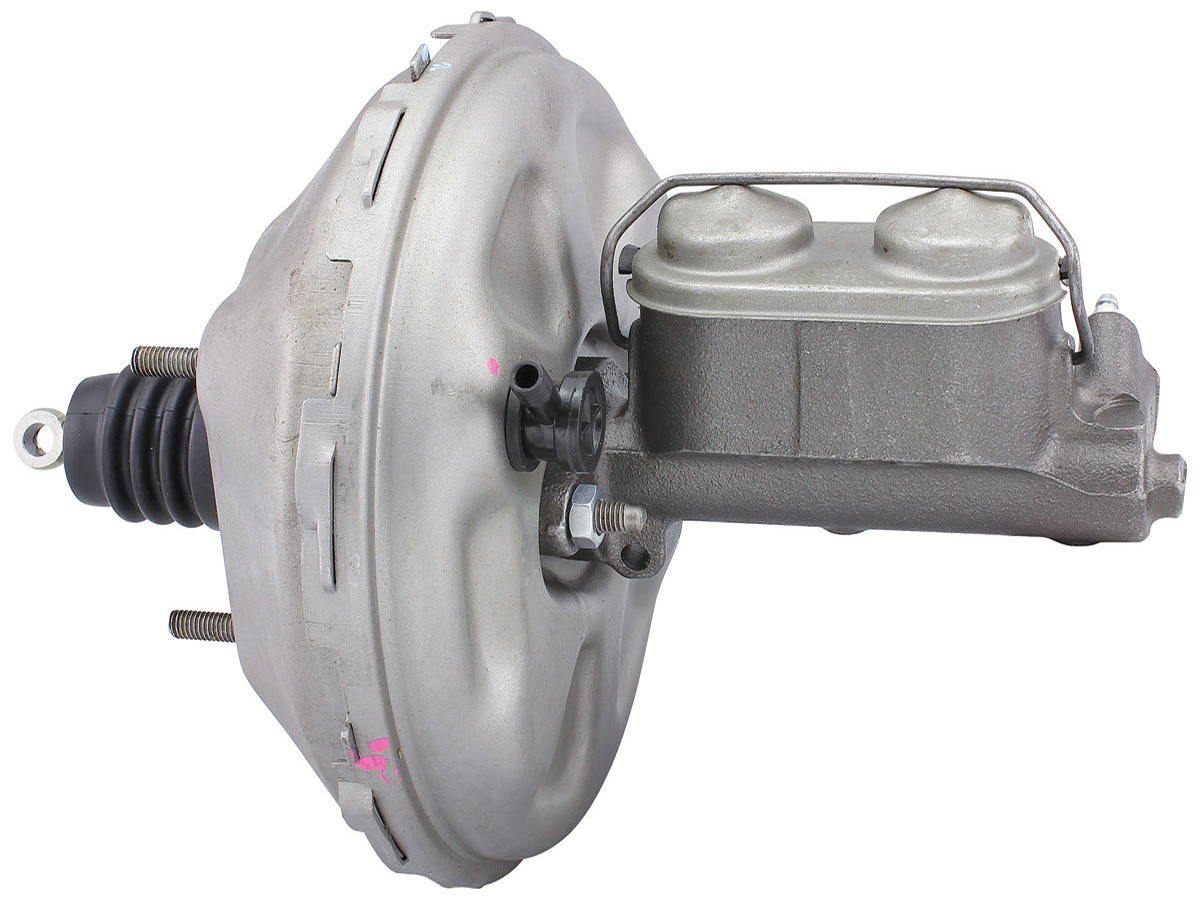
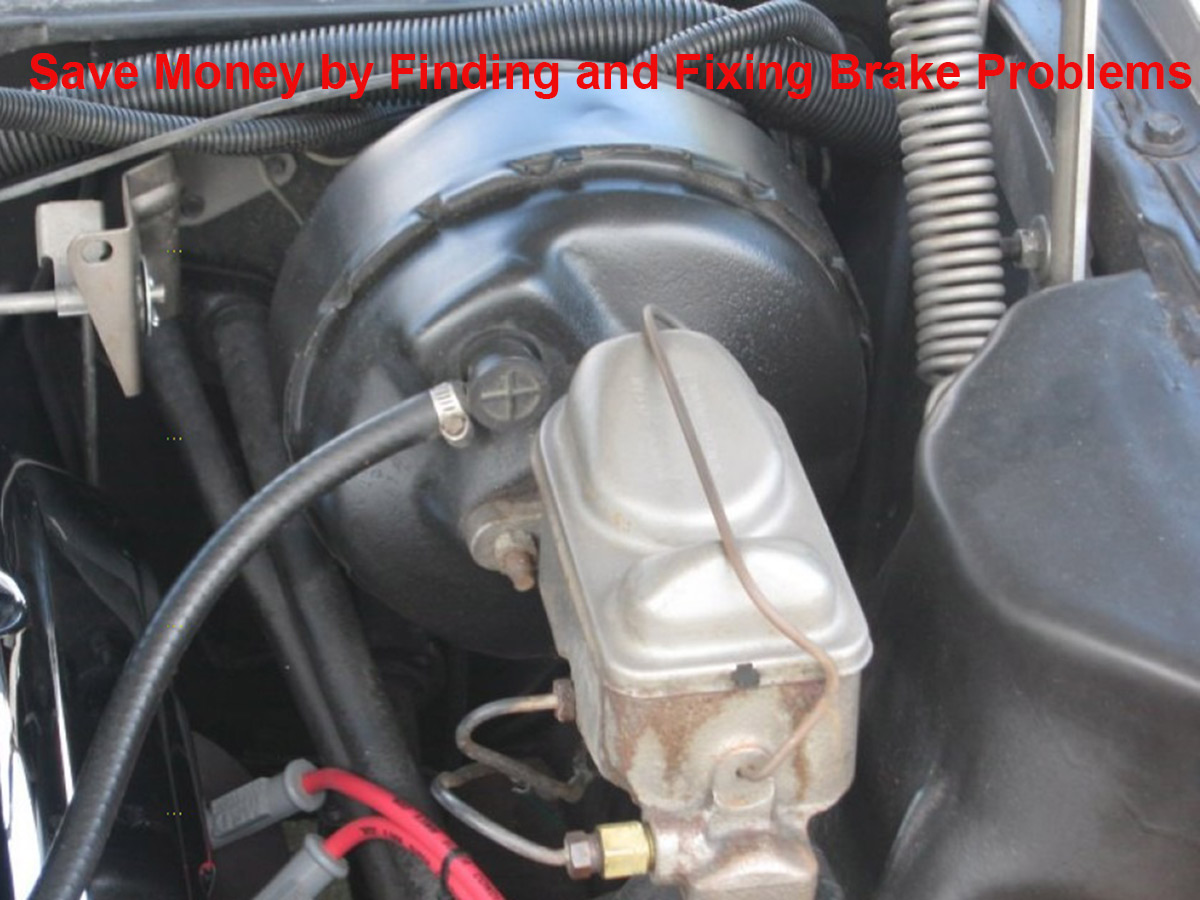
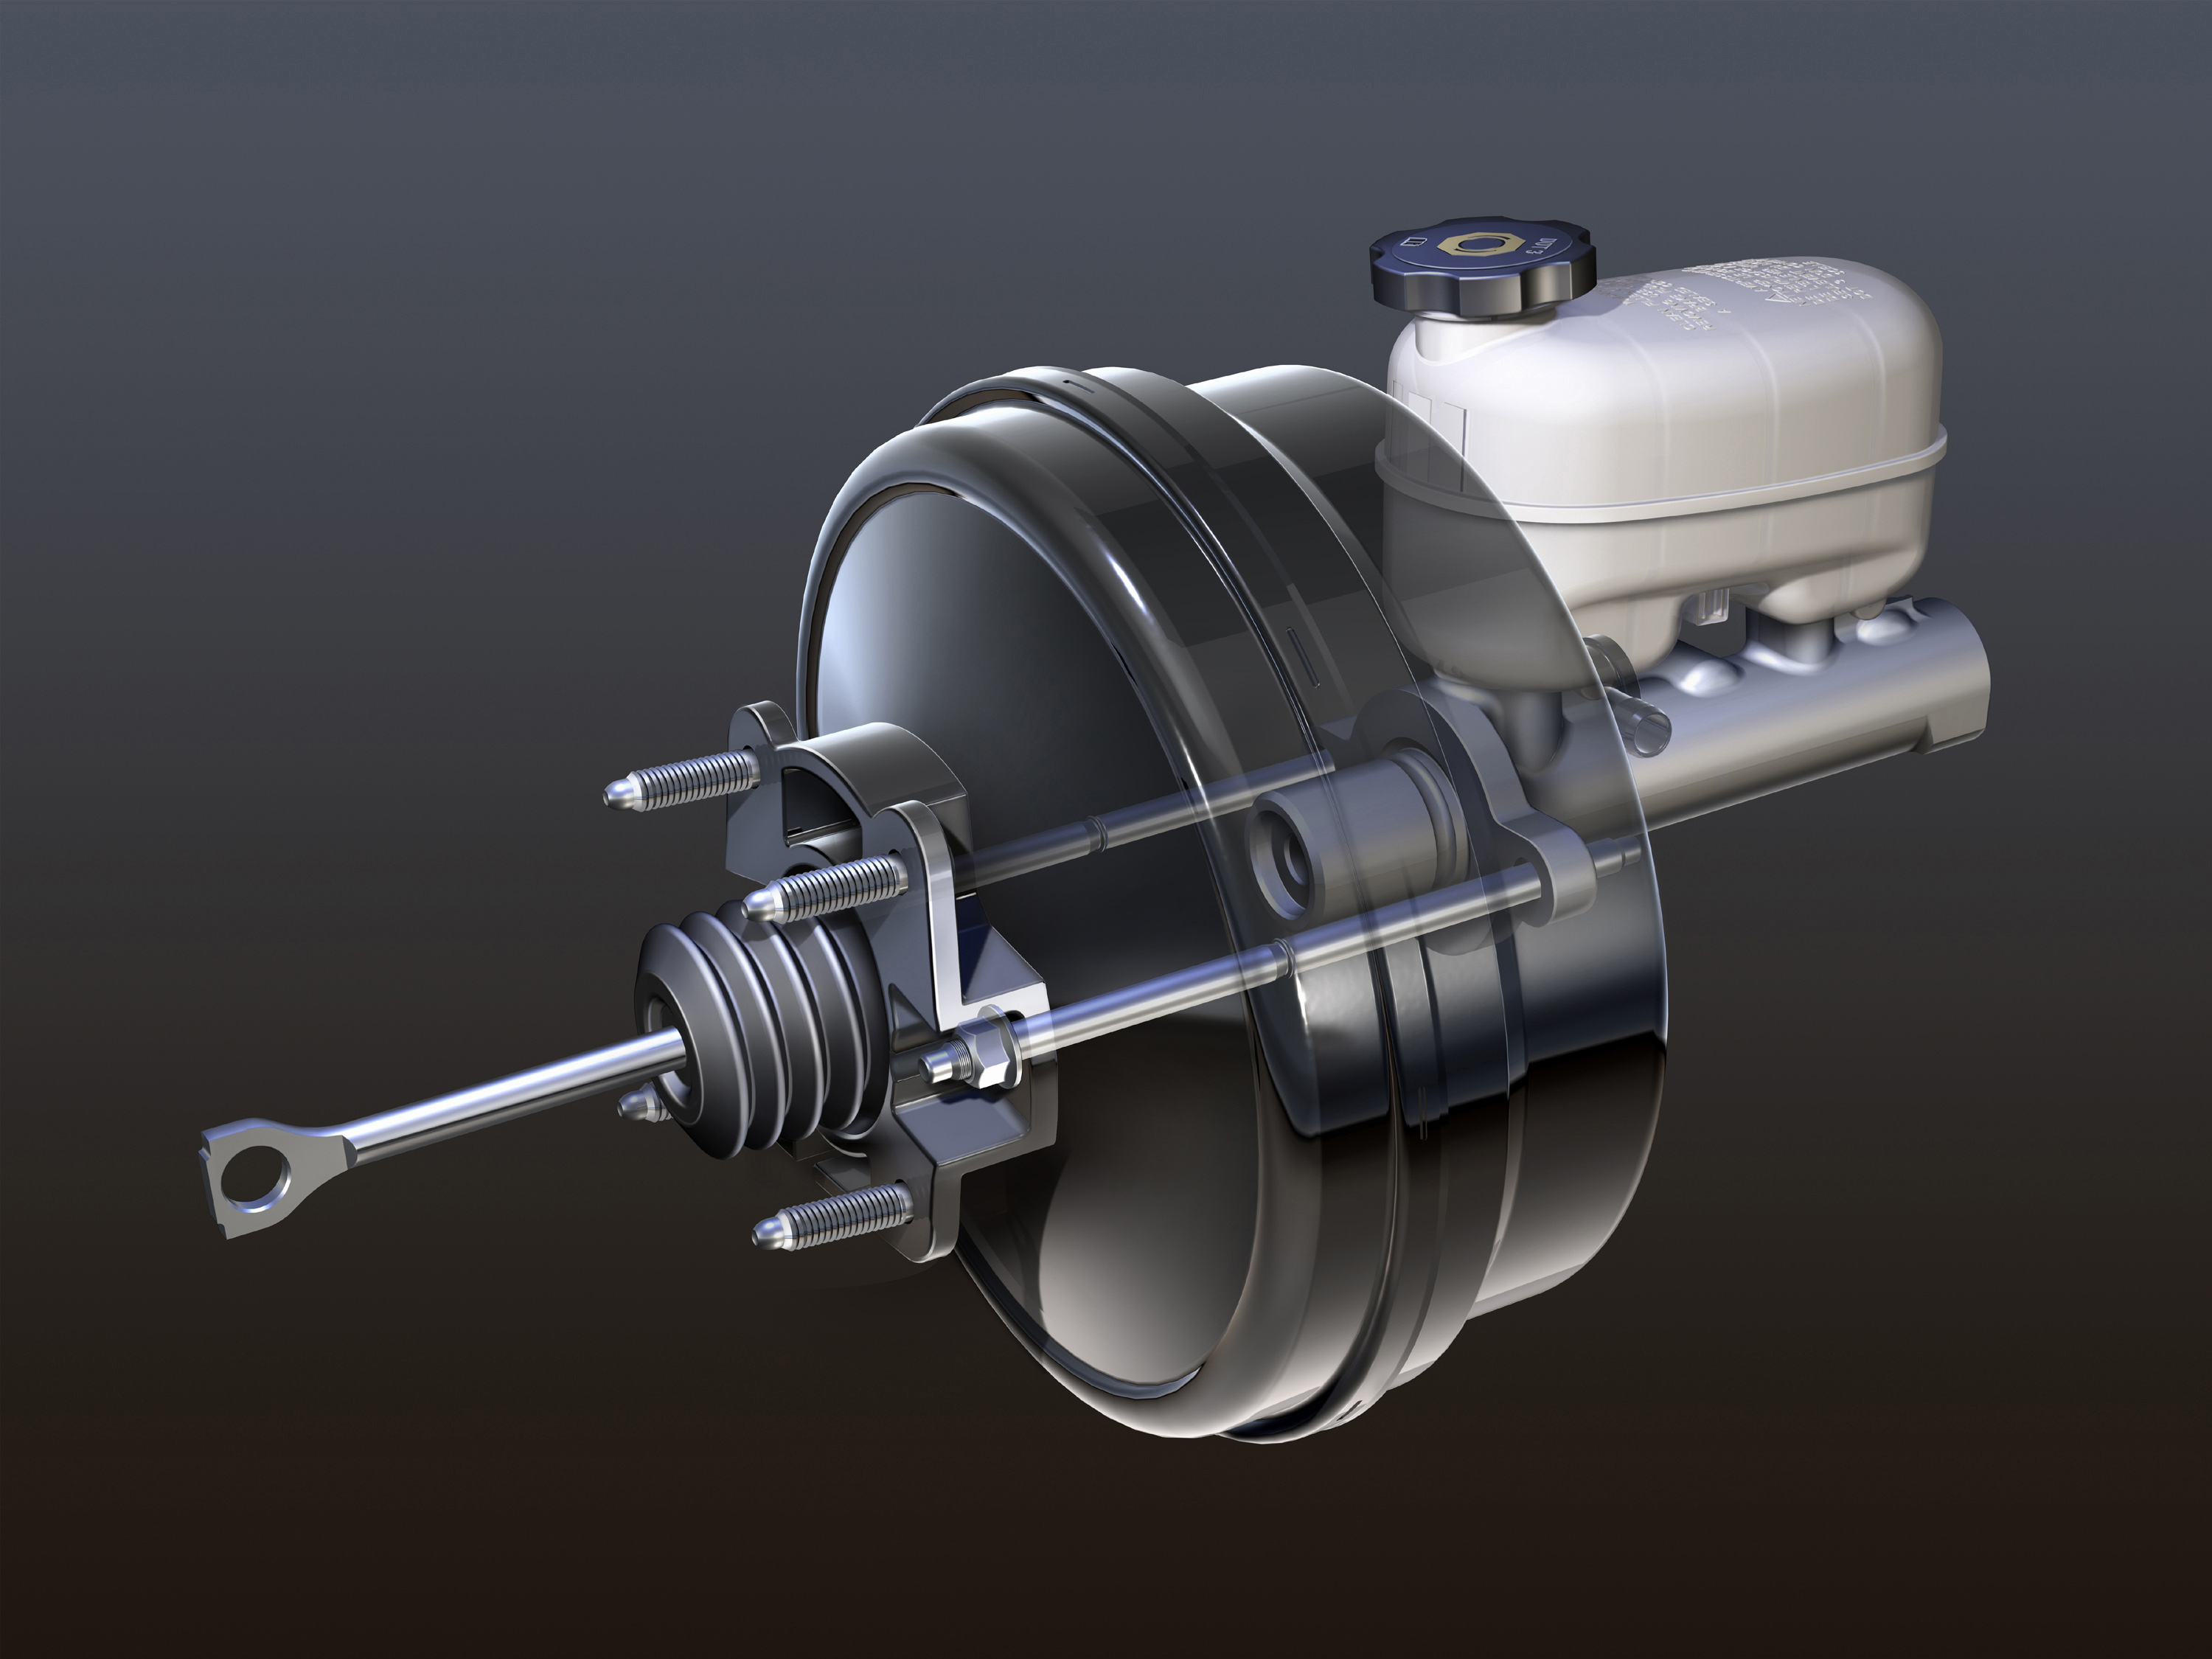
First let’s talk about what I mean when I say master cylinder and brake booster, as not all of us know yet. The master cylinder is the brake system component under the hood that sits against the firewall/bulkhead between the engine and passenger compartment fright in front of the steering wheel. On older cars, it’s metal and has a flat metal (cast steels) cover held on by a banjo that snaps over and into grooves on top of the cover. On newer cars this is an aluminum body with a plastic fluid reservoir and a cam-lock cap. The brake booster is mounted between the master cylinder and the wall on newer or converted/upgraded cars. See the images above and below.
The Brake Pedal That Slowly Sinks to the Floor
I first have to mention that I don’t mean that the pedal sinks to the floor when you apply your whole to it. I’m talking about the pedal sinks to the floor with nothing more than normal braking pressure applied. You know that a pedal that sinks to the floor is a sign of a leak in the system and a slowly sinking pedal means a slow leak. However, you’ve spent an hour or more under the car looking, you’ve even used a leak detector kit. What’s really got you scratching your head is the fact that the reservoir is full.

What I’ve just described is a brake master cylinder that is bypassing. One or more of the inner seals on the piston inside have failed and fluid pressure is bypassing that/those seal(s) and returning to the reservoir. The fix for this is either replacing the master cylinder or rebuilding it. Neither is really difficult. Replacing is in and out with a slight detour, while rebuilding isn’t much different than rebuilding calipers once you’ve got it off and apart in that both require you to ensure the seal mating surfaces are blemish-free. I’ll describe the R&R process below.
The Brake Pedal That Feels Like a Weak Spring
This is the brake pedal that goes farther than normal and then feels like it wants to bounce back a little. Braking force applied to the wheels is lower and you have to step on the pedal harder to stop the car. This is air in the brake lines. Air is compressible, while fluid isn’t. This property of brake fluid is what makes it ideal for use in automotive brake systems, while air is pretty bad. The fix for this is to bleed the air out of the hydraulic system, bleeding the brakes. I describe bleeding the brakes at the end of this article.
The Brake Pedal That Stays Hard but Doesn’t Stop the Car

Your car has power brakes but it feels like you have to stand on the brake pedal to get your car to stop, even at city street speeds. It’s worse than the days before power disc brakes if you’re old enough to remember them. The technical diagnosis for this condition is “gunk in the lines and orifices”. You see, brake fluid is hygroscopic, which means it absorbs water (even in a sealed system) which causes rust and sludge buildup. The combination of “gunk” can clog up the small orifices in the brake system as well as the small brake lines, reducing system efficiency.
You can verify this by scraping the tip across the bottom of the fluid reservoir and seeing if anything sticks to it. The fix for this is to suction the old fluid out of the master and flush the system, preferably with denatured alcohol and then fresh fluid. This process is described in Step 7. If you have drum brakes I would highly recommend cleaning out the wheel cylinders also, which I’ll describe in a later article. Also, use only denatured alcohol as anything else will deteriorate the rubber seals in the system.
You Hear a Hiss When You Step on the Brakes
There you are coming to a stop light or sign. You apply the brakes and as you’re coming to a stop, you hear a hiss that sounds like air escaping from a tire or balloon or the sound a snake makes. Chances are you’re also thinking to yourself that the pressure you’re applying is more than normal for power disc brakes.
What you’re describing is a power brake booster that is suffering a leaking seal, either inner or outer. A brake booster outer seal that’s leaking is likely to be accompanied by signs of wetness between the master cylinder and power booster because it will cause the piston seal on the master cylinder to fail due to being put under a vacuum. Your only repair option here is to replace the power booster. If you’re seeing signs of leakage from the master, you’ll also either have to rebuild or replace it.
Removing the Brake Power Booster and Master Cylinder

You’ve got to remove the master cylinder in order to get at the brake booster. If you only need to replace the booster, you don’t need to pop open the brake lines on the master, so all you’ll need is a wrench to remove the master (usually 5/8″ or 9/16″) and a socket (same size) and extension(s) and maybe a swivel universal. If you’re not taking the master out of the car to work on or replace, skip to step two below:
- Loosen and remove the brake lines at the master cylinder. These are usually either 3/8″ or 7/16″. It is best if you use line wrenches, especially if the fittings look rusty as they’re designed to not round the corners of the fitting. A little WD-40 can make this easier.
- Use a wrench to remove the two nuts that secure the master cylinder flange to the brake booster by turning them counter clockwise. WD-40 again.
- Once you’ve got the nuts off, if you’re going to work on the master, remove it from the car and put it on your work bench or the ground for the moment. If not, simply move it forward enough to slide off the booster studs.
- Inside the car and under the dash you will find either two or four (usually four) nuts or bolts securing the brake booster to the firewall/bulkhead. This is easier with the socket and swivel.
- Disconnect the brake booster piston from the brake pedal. This might be a nut and bolt connection or a pin through an eyebolt secured with a cotter pin or locking pin.
- Remove the booster from the car from the engine compartment.
Installing the New Brake Booster and Master
Installing the new power brake booster is just removing it in reverse, unless you’ve either worked on the master cylinder or replaced it.
- Slide the booster piston through the large hole in the bulkhead. Align the bolt holes and push until the booster is flush to the bulkhead.
- Install and tighten the nuts/bolts securing the booster to the bulkhead and connect the piston to the brake pedal.
- If you’ve disconnected the master cylinder, you need to bleed it. New masters come with bleeder kits which are nothing more than rubber tubes attached to plastic fittings. If you’ve only rebuilt it, you can buy a bleeder kit for cheap at places like Autozone. I’ll describe this later.
- Slide the master cylinder over the studs on the brake booster. Install and tighten the nuts.
- If you’ve removed the brake lines, reinstall them and tighten them using a line wrench.
- Bleed the brakes following the directions in Step 10 of the linked article.
Bleeding the Master Cylinder
After attaching the new or rebuilt master cylinder to the brake booster, thread the plastic fittings of the bleeder kit into the cylinder ports and route the hose(s) into the reservoir(s). BY HAND, slowly depress the brake pedal. have someone watch and let you know when no more air bubbles come out of the hoses. Remove the bleeder kit and reattach the brake lines to the master cylinder. Bleed the brake lines completely, rears first then fronts. If you have a vise mounted on a solid workbench and a large Philips screwdriver, you can mount the master on the vise to bleed it. This is easier.
Leave a Reply