

![[Gallery] Okolona Street Rods Kentuckiana V Foundation Car Show](https://www.racingjunk.com/news/wp-content/uploads/2022/04/IMG_0774-e1650040587750-376x206.jpg)
![[Gallery] Road Rats Car Show](https://www.racingjunk.com/news/wp-content/uploads/2022/05/2A-e1651770667920-376x206.jpg)

Plumbing 101: Part 7
Click Here to Begin Slideshow
Last time around in our comprehensive plumbing series, we detailed exactly how to assemble and test top-of-the-line Earl’s Perform-O-Flex hose and Swivel Seal fittings. In this issue, we’ll begin the process of assembling Earl’s latest UltraPro series hose and matching fittings.
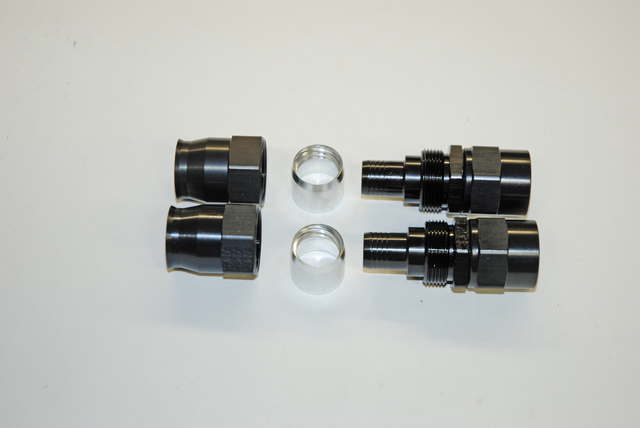
Let’s start at the top and rewind a little bit: Earl’s UltraPro series hose is constructed with an inner liner made of polytetrafluoroethylene (PTFE) – a lightweight and rugged material ideally suited for transferring fluids in high performance automotive applications, including the most extreme forms of racing. Earl’s notes: “The inner liner is carbon-infused and features a double-helix ribbed structure that supports robust flow even in applications requiring tight bends. The double helix ribbed structure also promotes superior sealing through positive engagement and retention of hose-ends. Structural integrity is enhanced even further by a glass-fiber wrap applied to the inner liner before the final application of either polyester or stainless steel braid.”
The matching UltraPro Series hose ends from Earl’s are manufactured from premium high-strength 2024-T8 aluminum and fitted with fluoroelastomer internal seals which are chemically resistant to all known fuels, oils and coolants. They feature brazed bent tubes for increased strength, and all unnecessary weight has been eliminated from UltraPro components. The result is a very lightweight hose and fitting package (the stainless braided UltraPro is up to 37% lighter than comparable stainless braided hose, and the Polyester Braided hose shown here is a whopping 67% lighter than comparable rubber lined stainless braided hose). The bottom line here is that the weight reduction alone makes it perfect for modern racecars.
One very important thing to keep in mind with the new PTFE lined hose from Earl’s is the fact it is impervious to modern gasolines. The chemical mix used in many of today’s fuels (including some pump gas blends) can attack rubber hose or braided hose with rubber liners.
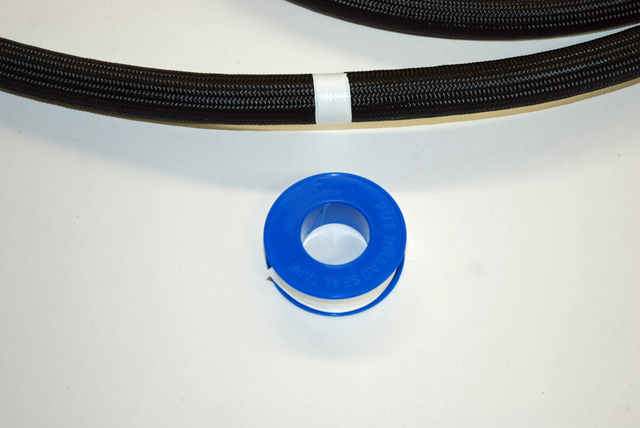
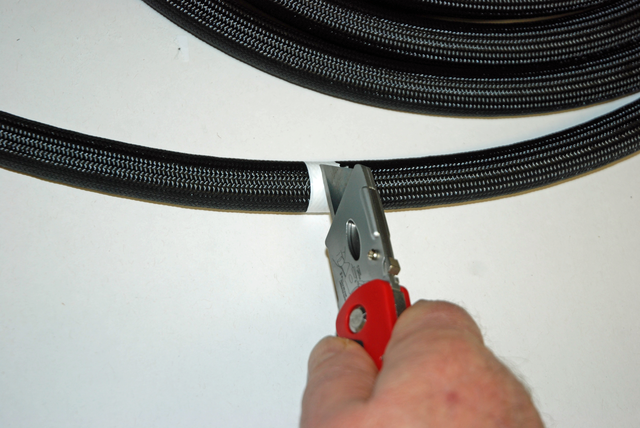
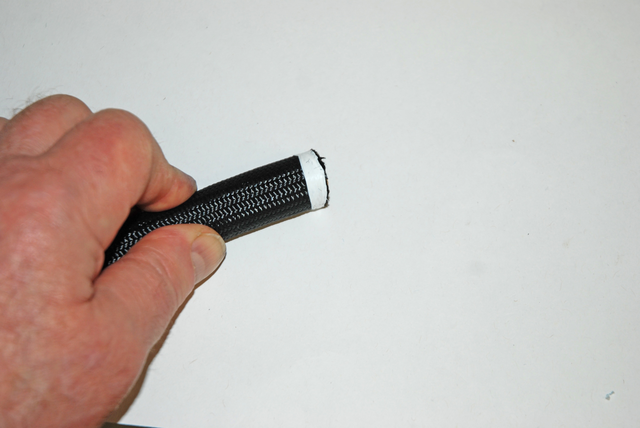
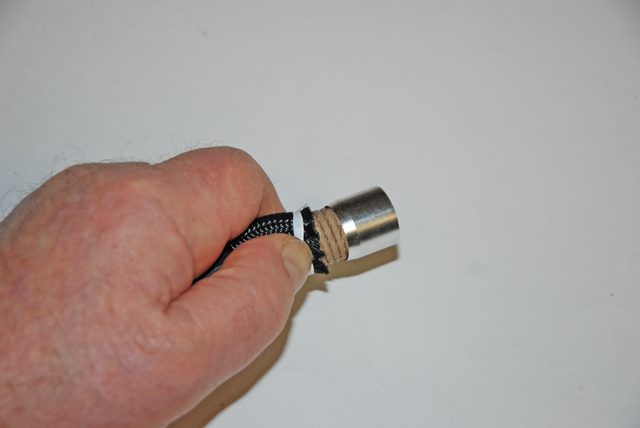
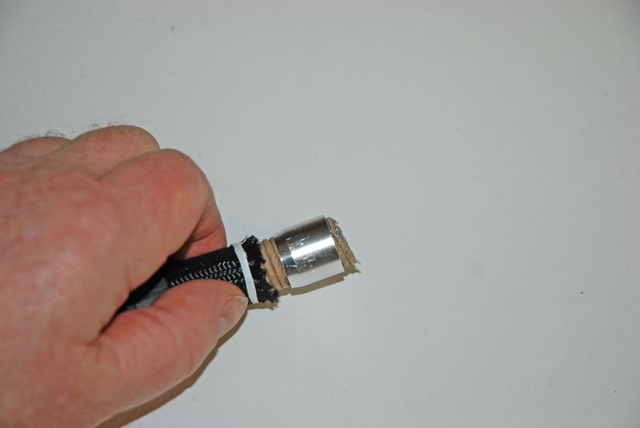
Fair enough. But how does it go together? There are a couple of ways to assemble this type of hose – by hand and by machine. For our purposes here, we’re using the lightest fabric braided UltraPro hose coupled with Earl’s matching UltraPro hose ends. This type of hose can be assembled at home with common tools. Here’s how it goes together (we’ll finish up with the hose next issue):
Last time around in our comprehensive plumbing series, we detailed exactly how to assemble and test top-of-the-line Earl’s Perform-O-Flex hose and Swivel Seal fittings. In this issue, we’ll begin the process of assembling Earl’s latest UltraPro series hose and matching fittings.
Let’s start at the top and rewind a little bit: Earl’s UltraPro series hose is constructed with an inner liner made of polytetrafluoroethylene (PTFE) – a lightweight and rugged material ideally suited for transferring fluids in high performance automotive applications, including the most extreme forms of racing. Earl’s notes: “The inner liner is carbon-infused and features a double-helix ribbed structure that supports robust flow even in applications requiring tight bends. The double helix ribbed structure also promotes superior sealing through positive engagement and retention of hose-ends. Structural integrity is enhanced even further by a glass-fiber wrap applied to the inner liner before the final application of either polyester or stainless steel braid.”
The matching UltraPro Series hose ends from Earl’s are manufactured from premium high-strength 2024-T8 aluminum and fitted with fluoroelastomer internal seals which are chemically resistant to all known fuels, oils and coolants. They feature brazed bent tubes for increased strength, and all unnecessary weight has been eliminated from UltraPro components. The result is a very lightweight hose and fitting package (the stainless braided UltraPro is up to 37% lighter than comparable stainless braided hose, and the Polyester Braided hose shown here is a whopping 67% lighter than comparable rubber lined stainless braided hose). The bottom line here is that the weight reduction alone makes it perfect for modern racecars.
One very important thing to keep in mind with the new PTFE lined hose from Earl’s is the fact it is impervious to modern gasolines. The chemical mix used in many of today’s fuels (including some pump gas blends) can attack rubber hose or braided hose with rubber liners.
Fair enough. But how does it go together? There are a couple of ways to assemble this type of hose – by hand and by machine. For our purposes here, we’re using the lightest fabric braided UltraPro hose coupled with Earl’s matching UltraPro hose ends. This type of hose can be assembled at home with common tools. Here’s how it goes together (we’ll finish up with the hose next issue):
Leave a Reply