

Prepping Automotive Parts for Paint
Prepping a new or repaired part for paint can be done several different ways. Each painter handles the tasks of scuffing, masking and cleaning each panel differently. Today we’ll discuss one of the many ways a person can make sure they’re doing this job correctly. The prepping of a panel that’s ready for the paint booth is a critical part of ensuring that all the work that’s been done, and will be done, lasts the lifetime of the vehicle. This article will focus primarily on an easy method for anyone to be able to prep and paint their own new or repaired auto body panel for the paint booth.
1.) Painting Edges/Jams
Each time a new part is received, it’ll need paint sprayed on its interior edges. These are the areas of your new part that won’t be visible from your vehicle’s exterior. The easiest way to understand this terminology is to open up your car door, hood or deck lid, and notice that there’s paint sprayed on the inside and underside, just like the exterior. If the panel you’re painting has been repaired, you can disregard this step because the factory has already done this for you. A red Scotch-Brite pad creates a scratch coarse enough for your new paint to bond to its new part. Don’t forget to clean the entire panel thoroughly before applying the sealer. There’ll be dust, contaminants, and grease that will need to be removed for your paint to stick.
Tech Tip
It’s easiest to prep your entire panel and seal it all before painting the edges on any new part. Once you’ve returned with your base coat, spray your edges/jams. Spraying the entire part prevents wasted time removing over spray when prepping that part again for paint. When the entire panel is sealed in the beginning, only a light scuff with a gray Scotch-Brite is needed to scratch that part again before masking starts for the paint booth.

2.) Sanding-Scuffing
Sanding any packaged defects and scuffing your new panel is essential to how your paint will look and how long it will last. How coarse the grit of sandpaper or scuff pad you use will determine if the primer/sealer, base coat, and clear coat will bond correctly. Using too light of a grit of sandpaper/Scotch-Brite won’t provide a deep enough scratch for your material to stick. This type of paint failure is called delamination, or otherwise known as peeling paint. Using too coarse of a grit of sandpaper/Scotch-Brite will show through your new paint. These deep sanding blemishes are often referred to as “sand scratch swelling” and will only get worse as your paint cures. The proper grit of sandpaper to use on a new part is 400 with a red Scotch-Brite.

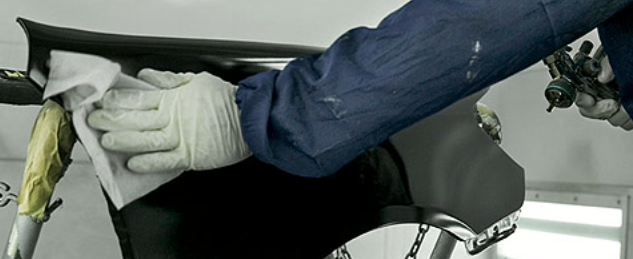
3.) Cleaner
Cleaning panels for paint is a big step to achieve success and clean paint work. If there’s a contaminant such as dirt, dust, grease or over spray on a new part, that flaw will show up in the final results. Any dirt or dust that finds its way into your paint will need to be sanded and buffed once the clear coat has cured. In an auto body shop, “denibbing” paintwork is a nightmare for any painter. Simply put, this process takes a lot of time, and time is one thing all auto body painters don’t have. To get the best result, make sure the panel you’re painting is properly cleaned with wax and grease remover.
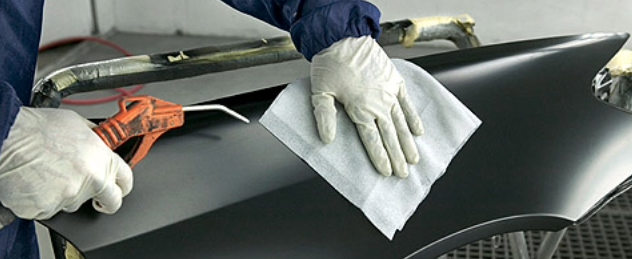
Tech Tip
When cleaning a panel for paint, wipe away dirt, grease and grime in one direction only. Wipe from one end of the panel to the opposite end. Do not “wax on, wax off,” as Mr. Miyagi said to Daniel in the Karate Kid. A quality tack cloth is also needed to remove any remaining dust after the panel’s cleaned and the part has dried. Once again, it’s wise to wipe in one direction only and use a pocket-sized air blower.
4.) Primer/Sealer
Finally, it’s time to start painting. The first material sprayed on a new part is primer/sealer. Primer/sealer promotes adhesion and provides color hiding, so a painter doesn’t over-apply their base coat. I’ve always been an advocate of using a primer/sealer as close to the paint color as possible. Other technicians may use only gray. Gray’s a neutral color and works well when applying any color based coat over the top. Whatever works for you and your pocketbook is usually best.
Tech Tip
Always allow adequate material flash time before and after each coat sprayed. If you’re using a solvent-based paint, trapping unevaporated solvent under a new layer of material will cause die back problems, paint failures, and mismatched color issues.

5.) Base coat
Once the sealer is ready for a base coat application, the fun begins. The base coat is always reduced in one way or another, be it water-based paints or solvent-based paints. The reducer selection is important because it’s what dries the paint and determines how long that process will take. On a hot day, a painter is most likely to use a slow reducer. Congruently, on a cold day they’re most likely to use a fast reducer. If you happen to be spraying base coat with metallic in it, then you will want to error towards a slower reducer based on the current temperature in the paint booth. Using a reducer that works too quickly for the environment will prevent the metallic flakes in the base coat from flowing out and facing the correct direction. When this error occurs, it’s called modeling and looks like dark clusters or spotting in the base coat. I like to have the booth set at 80 degrees and use a combination of slow and medium when spraying metallic colors, but that varies widely from technician to technician and the space in which they’re painting.
Tech Tip
Turning the booth lights off and using a 3M Light Kit is a great way to make sure you have enough base coat coverage. There’s nothing worse than under applying your base coat and not knowing until you pull the car out of the paint booth. Using a tack cloth between each coat of material helps accomplish a clean paint finish.

6.) Clear Coat
Applying clear coat to base coat is a really fun experience. Having the opportunity to see the color, and the fruits of your labor shine like the sun is a thrill. Red and black are my favorite colors to paint because they pop to life once the clear coat is applied. Most all clear coats have an activator, hardener and reducer. The reducer selection that’s chosen, much like the reducer selection for base coat, is selected based on the environmental conditions. Clear coat is what most painters and shop owners refer to as the “money coat.” It’s usually the most expensive material used in any paint job and no painter wants to mess up this coat. It’s vitally important that each panel is tack clothed before this application and it’s very wise to take your time. Spraying clear coat is where good painters get separated from great ones. It takes many hours of practicing this coat to make an auto body painter and it’s best to be applied by a professional when seeking optimal results.
Tech Tip
Clear coat is not where a person should try and save themselves a little coin. How much money you spend on clear is often directly related to the results you will get when spraying. Cheap clear is just that, cheap and a pain to use.
Leave a Reply